That expensive sable brush you just ruined could have lasted decades with proper care. Learning how to clean paintbrushes correctly saves money while improving your art quality.
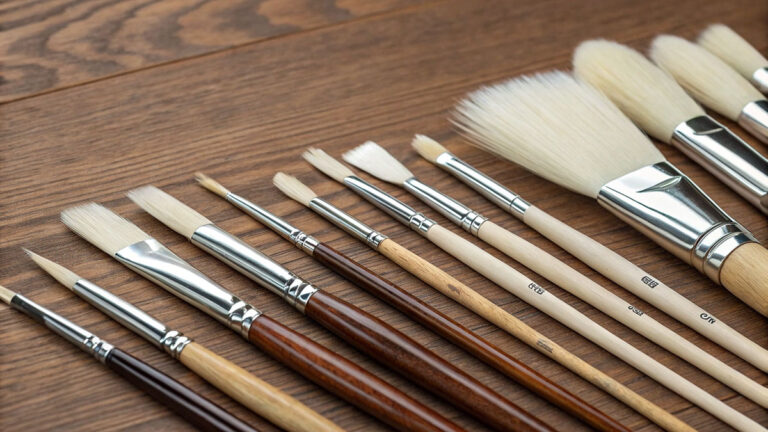
Proper brush care separates amateur painters from professionals. Whether you work with acrylic painting, oil painting, or watercolor painting, your brushes determine paint application quality.
Professional artists treat brush maintenance as seriously as their painting technique. A well-maintained natural bristle brush performs consistently for years, while neglected tools fail within months.
This guide covers everything from immediate paint removal to long-term storage solutions.
You’ll master solvent selection, conditioning treatments, and troubleshooting common problems that damage expensive art supplies.
By following these proven methods, you’ll extend brush longevity, maintain consistent paint application, and protect your investment in quality painting tools.
Pre-Cleaning Preparation

Immediate Paint Removal
Speed matters when paint clings to your bristles. Fresh paint comes off easily, but wait too long and you’ll face a restoration nightmare.
Grab paper towels first. Wipe excess paint from the brush starting at the ferrule and working toward the bristle tips. Don’t push paint deeper into the bristles.
Wiping Technique for Different Paint Types
Acrylic painting requires quick action. These water-based paints dry fast and bond aggressively to natural bristles. Blot gently rather than rubbing hard.
Oil painting gives you more time. The paint stays workable longer, making removal easier. Still, don’t let it sit.
For watercolor painting, immediate wiping prevents staining. The transparent nature means even small residue shows up later.
Scraping Thick Paint Buildup
Palette knives work better than your fingers for removing thick paint. Scrape gently along the bristle direction, never against it.
Start near the ferrule where paint accumulates most. Work systematically toward the brush tip. Professional artists keep dedicated scrapers just for brush cleaning.
Workspace Setup Essentials
Ventilation Requirements
Open windows when using solvents. Even odorless mineral spirits need airflow. Your lungs and your art deserve protection.
Position your cleaning station near ventilation but away from direct drafts. Moving air helps solvents evaporate but can blow particles around.
Container Organization
Three-container system works best. First container for initial rinse, second for deeper cleaning, third for final rinse. Label each clearly.
Wide-mouth jars prevent bristle damage. Narrow containers force bristles into unnatural positions. Mason jars or old paint containers work perfectly.
Safety Equipment Selection
Nitrile gloves protect your skin from solvents and prevent oil absorption. Latex breaks down with some paint thinners.
Keep paper towels, rags, and a dedicated apron nearby. Spills happen fast when you’re focused on saving an expensive brush.
Time-Sensitive Considerations
Critical Cleaning Windows
Acrylic paint becomes permanent after 20-30 minutes depending on temperature and humidity. Check your brush every 15 minutes during painting sessions.
Oil-based paints give you hours but still require attention. Left overnight, even oils can damage natural hair brushes permanently.
Emergency Cleaning Protocols
Found a forgotten brush with dried paint? Don’t panic yet.
Soak synthetic brushes in appropriate solvent for 30 minutes. Natural bristles need gentler treatment with specialized brush restorers.
Test bristle flexibility before aggressive cleaning. Sometimes it’s better to replace than destroy a brush trying to save it.
Water-Based Paint Cleaning Methods

Basic Soap and Water Technique
Temperature Selection
Lukewarm water works best for most cleaning situations. Hot water can damage natural bristles and loosen ferrules. Cold water doesn’t dissolve paint effectively.
Test water temperature on your wrist. It should feel comfortable, not hot. Professional brush soaps work better in slightly warm water.
Gentle Agitation Methods
Roll the brush gently in your palm. Never scrub bristles against surfaces – this splits and damages them irreversibly.
Create lather by working the brush in circular motions. Let the soap do the work rather than forcing mechanical action.
For stubborn areas, use your fingertips to work soap into bristles. Apply pressure gradually and watch for any bristle separation.
Proper Rinsing Procedures
Rinse from ferrule to tip, following natural bristle direction. Water flowing against bristles forces paint deeper into the brush.
Continue rinsing until water runs completely clear. Soap residue attracts dirt and can affect paint application later.
Check the ferrule area carefully. Paint hiding there will work loose during your next painting session.
Stubborn Paint Removal

Soaking Techniques and Duration Limits
Synthetic brushes handle longer soaking than natural hair. Soak stubborn synthetic brushes up to 2 hours in appropriate cleaner.
Natural bristles from sable or hog need careful timing. Limit soaking to 30 minutes maximum to prevent damage.
Use dedicated brush cleaning soaps rather than dish detergent. Purpose-made cleaners contain conditioning agents that protect bristles.
Specialized Cleaning Products
Masters Brush Cleaner removes dried acrylic paint without harsh scrubbing. Work the soap into wet bristles and let chemistry do the heavy lifting.
Windsor & Newton Brush Cleaner dissolves multiple paint types safely. These products cost more but save expensive brushes.
General’s Hand Soap cleans and conditions simultaneously. Professional artists swear by products designed specifically for art materials.
Mechanical Cleaning Without Damage
Use a brush cleaning tank with coil springs at the bottom. Gentle agitation against the coil removes paint without bristle damage.
Palm-rolling technique works for most situations. Roll the soapy brush in your cupped palm using light pressure.
Avoid brush cleaning pads with aggressive textures. They remove paint but destroy bristle tips permanently.
Conditioning and Reshaping
Hair Conditioner Applications
Regular hair conditioner restores natural bristle softness. Apply small amounts after thorough cleaning and rinsing.
Work conditioner through bristles with your fingers. Leave for 2-3 minutes before final rinse. This step matters most for expensive natural hair brushes.
Rinse conditioner completely. Residue interferes with paint application and can cause strange color mixing effects.
Reshaping Wet Bristles
Shape brushes while damp, never when soaking wet or completely dry. Wet bristles are too soft; dry bristles can snap.
Reform the original brush shape by gently squeezing and twisting bristles. Most brushes have natural memory and want to return to their manufactured form.
Work from the ferrule outward, encouraging bristles into their intended configuration. Be patient – forcing creates permanent damage.
Removing Soap Residue Completely
Final rinse requires more water than most people use. Soap film invisible to your eye will show up in your next painting.
Test for residue by checking if water beads on the bristles. Clean bristles allow water to flow smoothly without forming droplets.
Shake excess water gently. Violent shaking loosens ferrules and can damage the brush handle connection.
Oil-Based Paint Cleaning Methods

Solvent Selection and Safety
Understanding Solvent Types
Turpentine cuts through oil paint fastest but produces strong fumes. Use only in well-ventilated areas with proper respiratory protection.
Mineral spirits work almost as well with less odor. They’re gentler on natural bristles and safer for extended use.
Odorless mineral spirits like Gamsol cost more but protect your health. Professional studios often mandate these for daily cleaning.
Proper Handling Protocols
Never pour solvents down drains. They contaminate water systems and violate environmental regulations in most areas.
Store used solvents in sealed metal containers. Glass jars can shatter; plastic containers may dissolve with certain chemicals.
Keep solvents away from heat sources including direct sunlight. Even “safe” solvents are flammable under the right conditions.
Fire Safety Essentials
Solvent-soaked rags spontaneously combust in enclosed spaces. Spread used rags flat to dry or store them in water-filled metal containers.
Keep a Class B fire extinguisher nearby when using large amounts of solvents. Water makes solvent fires worse.
Never smoke or use open flames in solvent cleaning areas. Static electricity can ignite vapors you can’t see.
Multi-Stage Cleaning Process
Initial Solvent Wash
Pour small amounts of solvent into a wide container. Deep containers waste solvent and make brush handling difficult.
Swish the brush gently to dissolve paint. Don’t grind bristles against the container bottom – this damages brush tips permanently.
Work from the ferrule toward the brush tip. Paint flows out more easily when you follow the natural bristle direction.
Progressive Cleaning Stages
- First wash removes bulk paint – expect cloudy, heavily colored solvent
- Second wash gets embedded paint – solvent should be clearer
- Third wash ensures complete removal – nearly clear solvent indicates success
Replace solvent between stages for best results. Dirty solvent redeposits paint onto cleaned bristles.
Soap and Water Follow-up
Oil paint solvents don’t remove everything. Soap and water eliminate solvent residue and remaining paint particles.
Use dish soap or specialized brush soaps after solvent cleaning. Work up a good lather to lift any remaining contaminants.
Rinse thoroughly until water runs completely clear. Solvent residue interferes with future paint application.
Solvent Conservation Techniques
Reusing Dirty Solvents
Let used solvents settle overnight in covered containers. Paint particles sink to the bottom, leaving cleaner solvent on top.
Pour off the clear top layer for reuse. This technique cuts solvent costs by 60-70% without compromising cleaning effectiveness.
Filter settled solvents through coffee filters for extended reuse. Multiple filtrations can restore solvents to near-original clarity.
Container System Setup
Three-jar system maximizes efficiency. First jar for initial cleaning, second for intermediate wash, third for final rinse.
Graduate dirty solvents through the system. When jar three gets dirty, it becomes jar two, jar two becomes jar one, and jar one gets fresh solvent.
Label containers clearly to avoid confusion during painting sessions. Muscle memory prevents mistakes when you’re focused on artwork.
Waste Minimization
Use minimal solvent amounts – just enough to cover bristles. Excess solvent doesn’t clean better but increases costs and waste.
Wipe brushes thoroughly before solvent cleaning. Removing excess paint first means less contaminated solvent.
Consider brush cleaning tanks with built-in agitation coils. These systems use less solvent while providing better cleaning action.
Specialty Cleaning Situations

Dried Paint Recovery
Assessment Before Treatment
Check bristle flexibility first. Completely rigid bristles rarely recover to original condition regardless of treatment method.
Test a few bristles by gentle bending. If they snap immediately, the brush is likely beyond salvation.
Examine the ferrule area closely. Paint that has hardened around the metal band often indicates permanent damage.
Soaking Methods for Different Paint Types
Acrylic paint responds to specific acrylic brush cleaners or ammonia-based solutions. Never use harsh solvents on water-based paints.
Oil paint requires solvent soaking followed by mechanical agitation. Start with the gentlest effective solvent.
Mixed media situations need sequential treatment. Remove water-based paints first, then tackle oil-based layers.
Mechanical Removal Techniques
Gently work paint loose with your fingernails or a soft brush. Never use metal tools that can cut bristles.
Patience saves more brushes than force. Multiple gentle treatments work better than aggressive single attempts.
Consider professional brush restoration services for expensive brushes. Some specialists can save brushes that seem hopeless.
Multiple Paint Layer Removal
Sequential Cleaning Approach
Remove the most recent paint layer first. Fresh paint comes off easier and doesn’t interfere with older paint removal.
Document your paint sequence if working with complex mixed media. This helps determine the best cleaning order.
Take photos before starting if the brush has historical or sentimental value. Failed restoration attempts can’t be undone.
Preventing Cross-Contamination
Use separate containers for different paint types. Oil paint solvents contaminate water-based paint cleaning solutions.
Clean tools between paint types. Even small amounts of the wrong solvent can set paint permanently.
Work in good lighting to spot contamination early. Paint residue often appears as subtle color changes in cleaning solutions.
Color Bleeding Prevention
Rinse thoroughly between different colored paints. Red and yellow pigments are particularly prone to staining.
Some pigments permanently stain natural bristles even with proper cleaning. Factor this into brush selection for different color theory applications.
Professional artists often dedicate specific brushes to problem colors rather than risk contaminating their entire brush collection.
Vintage and Delicate Brush Care

Extra Gentle Techniques
Vintage brushes require museum-quality care. Their bristles may be irreplaceable and extremely fragile.
Use only the mildest cleaning agents. Test any cleaner on a few bristles before treating the entire brush.
Never soak vintage brushes for extended periods. The adhesives holding bristles may be water-soluble.
Preserving Natural Hair Integrity
Kolinsky sable and other fine natural hairs need conditioning treatments after cleaning. These bristles cost more than gold by weight.
Use hair conditioner or specialized brush preservatives after each cleaning session. Natural oils keep bristles flexible.
Store valuable brushes in protective cases with moth deterrents. Natural bristles attract insects that can destroy them overnight.
Professional Restoration Considerations
Document brush condition with detailed photos before attempting restoration. Insurance claims may require before-and-after evidence.
Research brush makers and manufacturing dates. Some vintage brushes are worth more as collectibles than functional tools.
Professional conservators handle museum pieces but charge accordingly. Weigh restoration costs against brush replacement value.
Proper Drying and Storage
Drying Techniques
Horizontal vs Vertical Positioning
Lay brushes flat when possible. Water pools in ferrules when brushes dry vertically, loosening the metal band over time.
Horizontal drying prevents water from running into handles. Wooden handles crack when moisture penetrates the finish repeatedly.
Use towel-lined trays for horizontal drying. The absorbent surface pulls moisture away from brushes faster than hard surfaces.
Air Circulation Requirements
Position brushes where air moves freely around them. Stagnant air allows mold growth, especially in humid climates.
Avoid direct sunlight and heat sources that crack handles and dry bristles too quickly. Natural air circulation works best.
Point a small fan toward drying brushes if humidity exceeds 60%. Moving air prevents fungal problems common in studios.
Speed vs Safety Balance
Fast drying seems appealing but damages expensive brushes. Natural drying preserves bristle integrity and ferrule stability.
Hair dryers and heat guns cause brittle bristles that snap during use. Professional conservators never use forced heat on fine brushes.
Plan cleaning time to allow overnight drying. Rushed cleaning leads to damaged tools and poor painting results.
Shape Maintenance During Drying
Brush Guards and Protective Covers
Plastic brush guards maintain tip sharpness during drying and storage. Size them properly – too tight damages bristles, too loose allows spreading.
Mesh guards work for round brushes but not flats. The wrong guard type creates permanent bristle distortion.
Remove guards once brushes dry completely. Trapped moisture under guards creates mold problems in storage.
Natural Reshaping Methods
Reform brush shapes while bristles remain damp. Completely wet or dry bristles resist reshaping efforts.
Gently squeeze and twist bristles back to their original configuration. Most quality brushes remember their manufactured shape with minimal encouragement.
Use your fingers to coax stubborn bristles into place. Tools can cut or bend individual hairs permanently.
Avoiding Permanent Deformation
Never store brushes bristle-down in containers. Constant pressure bends tips and destroys fine detail capabilities.
Elastic bands around bristles create permanent creases. Professional brush cases use individual slots instead.
Check stored brushes monthly for signs of deformation. Early intervention saves brushes that might otherwise need replacement.
Long-Term Storage Solutions
Moth Protection for Natural Hair
Cedar blocks repel moths that devour natural bristles overnight. Replace cedar annually as oils dissipate.
Lavender sachets provide pleasant-smelling protection while keeping insects away from expensive sable brushes.
Vacuum storage areas regularly. Moth eggs hide in dust and debris around brush storage locations.
Climate Control Considerations
Maintain 30-50% relative humidity in storage areas. Higher humidity promotes mold; lower humidity makes bristles brittle.
Temperature fluctuations crack wooden handles and loosen ferrules. Basement storage often provides ideal stable conditions.
Avoid attics and garages where temperature swings damage art supplies. Climate-controlled spaces protect investments better.
Organization Systems That Prevent Damage
Individual brush slots prevent bristles from touching and transferring contaminants. Rolled brush cases work well for travel.
Label storage areas by brush type and size. Quick identification prevents handling damage during selection.
Store brushes by frequency of use. Daily brushes deserve premium storage while occasional brushes can use simpler systems.
Maintenance and Longevity Tips

Regular Brush Inspection
Early Damage Detection Signs
Check ferrules for looseness monthly. Slight movement indicates deteriorating adhesive that will worsen quickly.
Split bristles appear gradually then accelerate rapidly. Early trimming saves brush functionality longer than ignoring the problem.
Look for bent or kinked individual hairs. These catch paint and create streaks in finished work.
Preventive Maintenance Schedules
Professional artists inspect brushes weekly during active use. Monthly checks suffice for occasional painting.
Deep cleaning every 20-30 uses removes embedded pigments that cause stiffness. Mark calendars or set phone reminders.
Rotate brush usage to prevent overworking favorites. Even quality brushes need rest periods between intensive sessions.
When to Retire vs Repair
Ferrules loose enough to twist by hand need professional repair or replacement. Home fixes rarely last.
Bristles missing more than 25% of their original density should retire from fine detail work. They’re still useful for texturing.
Severely bent tips sometimes recover with patient reshaping. Try restoration before discarding expensive brushes.
Quality Preservation Techniques
Rotation Strategies
Own multiple brushes in frequently used sizes. Rotation prevents overuse while maintaining workflow continuity.
Alternate between synthetic and natural bristles for different techniques. Each brush type excels in specific applications.
Keep backup brushes for critical painting sessions. Equipment failure during important work creates unnecessary stress.
Proper Loading and Application Methods
Load paint gradually rather than jamming brushes into paint blobs. Excessive paint in ferrules causes permanent stiffening.
Work paint out of bristles before loading more. Multiple thin coats work better than single heavy applications anyway.
Avoid grinding brushes against palettes to mix colors. This technique destroys brush tips while producing inferior paint consistency.
Avoiding Common Handling Mistakes
Never leave brushes standing in water or solvent. Even brief soaking loosens ferrules and damages handles.
Don’t use brushes to stir paint in containers. Stirring sticks are cheaper than replacement brushes.
Keep brushes away from painting areas when not actively using them. Accidental damage happens when brushes sit in work zones.
Professional Care Products

Specialized Brush Cleaners
Masters Brush Cleaner removes dried paint while conditioning bristles simultaneously. Professional studios stock this exclusively.
Winsor & Newton Artisan products specifically target different paint types without harsh chemicals that damage natural hairs.
Art Spectrum brush cleaners cost more but extend brush life significantly. Calculate replacement costs versus cleaner expenses.
Conditioning Treatments
Hair conditioner works for emergency situations but specialized products perform better long-term. They’re formulated for paint residue.
Apply conditioning treatments after every fifth cleaning session. Natural bristles need regular moisturizing to maintain flexibility.
Work conditioners through bristles thoroughly then rinse completely. Residue attracts dirt and affects paint application.
Cost-Effective vs Premium Product Comparison
Cheap cleaners often contain harsh detergents that strip natural oils from bristles. Initial savings become expensive when brushes need early replacement.
Premium products cost 3-4 times more but extend brush life proportionally. Professional artists calculate cost-per-use rather than upfront price.
Buy small quantities initially to test product compatibility with your specific brushes and painting mediums. Not every product works for every situation.
Troubleshooting Common Problems
Bristle Issues
Fixing Splayed or Fanned Bristles
Wet bristles before reshaping – never work with completely dry brushes. Dampness makes bristles pliable without causing damage.
Gently squeeze bristles together while rolling between your fingers. Work from ferrule to tip, encouraging natural grouping.
For stubborn splaying, wrap damp bristles in tissue paper and secure with rubber band. Leave overnight to reform shape.
Dealing with Bent or Kinked Hairs
Individual bent bristles often respond to gentle straightening when wet. Use fingernails to carefully coax them back into position.
Steam treatment works for minor kinks. Hold brush over hot water steam for 30 seconds, then reshape immediately.
Severely kinked bristles should be trimmed rather than forced straight. One bent hair can ruin an entire brushstroke.
Restoring Lost Points and Edges
Sharp points deteriorate gradually, then rapidly. Early intervention saves more bristles than waiting for complete point loss.
Trim damaged tips with sharp scissors at a slight angle to mimic natural bristle taper. Cut conservatively – you can always trim more.
For flat brushes, maintain straight edges by trimming only the longest damaged bristles. Uneven cutting ruins the brush permanently.
Recovery Techniques for Natural vs Synthetic
Natural bristles respond better to conditioning treatments after reshaping. Their organic structure accepts moisture and oils readily.
Synthetic bristles hold shapes more permanently once set. They resist reformation but maintain crisp edges longer than natural hair.
Kolinsky sable requires the gentlest handling. These expensive bristles justify professional restoration rather than home attempts.
Ferrule Problems
Tightening Loose Ferrules Safely
Never use pliers directly on ferrules – they dent the metal and damage the brush permanently. Wrap ferrules in cloth first.
Gentle pressure applied evenly around the circumference works better than squeezing from two sides. Rotate while applying pressure.
Some ferrules loosen due to wood swelling. Let handles dry completely before attempting tightening procedures.
Preventing Rust and Corrosion
Dry ferrules thoroughly after each cleaning session. Water trapped in joints causes rapid corrosion in humid environments.
Apply thin coats of paste wax to ferrule exteriors. This prevents moisture penetration while maintaining the original appearance.
Store brushes in low-humidity areas when possible. Dehumidifiers protect entire brush collections from moisture damage.
Handle Reattachment Methods
Epoxy adhesives work best for permanent ferrule reattachment. Clean all old adhesive before applying new material.
Clamp repaired brushes for 24 hours minimum. Rushed repairs fail during the first painting session when stress loads increase.
Mark repaired brushes clearly. They’re suitable for rough work but shouldn’t be trusted for detailed painting projects.
When Professional Repair Makes Sense
Expensive brushes justify professional restoration costs. A $200 sable brush merits a $50 repair investment.
Vintage or collectible brushes need expert handling. Amateur repairs destroy historical and monetary value permanently.
Multiple brush repairs often cost less per unit when bundled. Save damaged brushes until you have several needing attention.
Persistent Odors and Stains
Removing Solvent Smells
Activated charcoal absorbs residual solvent odors from brush bristles. Place brushes and charcoal in sealed containers overnight.
Baking soda paste applied to bristles neutralizes many chemical smells. Rinse thoroughly after treatment to remove residue.
Time eliminates most solvent odors naturally. Store affected brushes in ventilated areas until smells dissipate completely.
Cleaning Color Stains from Ferrules
Brass cleaner removes stubborn paint stains from metal ferrules without damaging the underlying material. Test on hidden areas first.
Toothpaste works as mild abrasive for light staining. The gentle scrubbing action removes surface discoloration effectively.
Chrome polish restores shine to stainless steel ferrules. Apply with soft cloth and buff to original luster.
Restoring Original Brush Appearance
Acetone removes dried paint splatters from handles without damaging most finishes. Test inconspicuous areas before treating visible surfaces.
Fine steel wool (0000 grade) removes stubborn stains from wooden handles. Work with the grain, not against it.
Professional brush restoration services handle museum-quality pieces. Their techniques preserve value while improving function.
Dealing with Permanent Discoloration
Some pigments stain natural bristles permanently regardless of cleaning method. Accept cosmetic changes that don’t affect brush performance.
Document stained brushes for insurance purposes if they have significant value. Photographs prove pre-existing conditions for claims.
Consider dedicating permanently stained brushes to specific colors. Red-stained brushes work perfectly for red paint applications.
Emergency Cleaning Solutions
Household ammonia cuts through dried acrylic paint when commercial cleaners aren’t available. Use minimal amounts with good ventilation.
Rubbing alcohol dissolves many paint types safely. It’s less effective than specialized solvents but widely available.
Dish soap works for emergency watercolor painting cleanup. Rinse thoroughly to remove all residue before storage.
Prevention Strategies
Clean brushes immediately after use. Fresh paint removes 90% easier than paint that’s had time to cure.
Keep emergency cleaning supplies readily available. Quick access prevents minor problems from becoming major restoration projects.
Rotate brush usage to prevent excessive wear on favorites. Multiple brushes in common sizes extend overall collection lifespan significantly.
FAQ on How To Clean Paintbrushes
How often should I clean my paintbrushes during painting sessions?
Clean brushes immediately when switching between colors or paint types. Never let paint dry in bristles during active painting.
For acrylic painting, clean every 15-20 minutes to prevent permanent damage from fast-drying paint.
What’s the best way to clean acrylic paint from brushes?
Use lukewarm water and gentle soap immediately after use. Work soap through bristles from ferrule to tip.
For stubborn residue, soak synthetic brushes briefly in specialized brush cleaner, then rinse thoroughly until water runs clear.
Can I use dish soap to clean my paintbrushes?
Dish soap works for emergency cleaning but lacks conditioning agents. Professional brush soaps perform better for regular maintenance.
They clean effectively while protecting natural bristles from drying out and splitting over time.
How do I remove dried paint from brushes?
Soak brushes in appropriate solvent or brush restorer. For dried acrylic painting residue, use ammonia-based cleaners.
Oil paint requires mineral spirits followed by soap washing. Patience works better than force for recovery.
Should I store brushes bristle-up or bristle-down?
Store brushes horizontally when possible to prevent water pooling in ferrules. If vertical storage is necessary, store bristle-up with protective guards.
Never store bristle-down as this permanently bends tips and ruins detail capabilities.
What solvents are safe for cleaning oil paint brushes?
Odorless mineral spirits like Gamsol offer the safest option for regular use. Turpentine works faster but produces harmful fumes.
Always use adequate ventilation regardless of solvent choice and follow up with soap washing.
How do I prevent my brush bristles from splaying?
Reshape brushes while damp, never when soaking wet or completely dry. Use brush guards during drying and storage.
Avoid pressing bristles against surfaces while painting, and clean thoroughly to prevent paint buildup that forces bristles apart.
Can I save a brush with a loose ferrule?
Loose ferrules sometimes tighten with gentle, even pressure applied around the circumference.
Wrap ferrule in cloth before using pliers. Severely loose ferrules need professional repair or epoxy reattachment for permanent fixes.
What’s the difference between cleaning natural and synthetic brushes?
Natural bristles need conditioning treatments and gentler handling. Synthetic brushes tolerate longer soaking and more aggressive cleaning.
Both require thorough rinsing, but natural hair benefits from occasional hair conditioner applications to maintain flexibility.
How long should quality brushes last with proper care?
Professional-grade brushes can last decades with proper maintenance. Kolinsky sable brushes often outlive their owners when cared for correctly.
Synthetic brushes typically last 2-5 years depending on usage frequency and cleaning consistency.
Conclusion
Mastering how to clean paintbrushes transforms your painting experience while protecting expensive art supplies. These proven techniques work across all painting mediums and brush types.
Consistent brush care routines separate professional artists from hobbyists. Quality tools deserve quality maintenance – your Kolinsky sable brushes will outlast cheaper alternatives when properly maintained.
Remember the fundamentals: immediate paint removal, appropriate solvent selection, and proper drying techniques.
Whether working with synthetic bristles or natural hair, these principles remain constant across different studio practices.
Invest in professional cleaning supplies rather than improvising with household products.
Masters Brush Cleaner and specialized solvents cost more initially but extend brush longevity significantly.
Your painting tools reflect your artistic commitment. Well-maintained brushes produce consistent results, preserve paint consistency, and reduce frustration during creative sessions.
Start implementing these brush maintenance techniques today – your future artwork depends on it.