A painting that looks dull, cracked, or damaged isn’t necessarily lost.
Knowing how to restore an oil painting, whether it’s a family heirloom or an antique canvas picked up at auction, can mean the difference between preserving something irreplaceable and watching it deteriorate beyond repair.
Oil paint deterioration is more common than most people realize. Yellowed varnish, flaking paint, canvas tears, and accumulated grime affect even well-kept works over time.
This guide covers the full oil painting restoration process: condition assessment, surface cleaning, structural canvas repair, inpainting losses, revarnishing, and long-term art preservation. It also covers when DIY work ends and a professional conservator takes over.
What Is Oil Painting Restoration
Oil painting restoration is the process of repairing physical and chemical damage to a painting while preserving as much of the original artist’s work as possible. It’s not the same as cleaning, and it’s not the same as conservation.
People mix these up constantly. Here’s the actual difference:
- Cleaning: Removing dirt, grime, and yellowed varnish from the surface
- Conservation: Stabilizing the painting to stop further deterioration
- Restoration: Active repair work, including filling paint losses, inpainting, structural repairs, and revarnishing
In practice, a full oil painting restoration treatment usually involves all three. You clean first, then stabilize, then restore.
The goal is always the same: make the painting readable again without hiding the artist’s hand. Professional conservators work by a core principle borrowed from the field, which is that every treatment should be reversible. Future conservators need to be able to undo what you did.
That principle matters a lot. Pre-20th century restoration was often brutal. Restorers painted over large areas, used irreversible adhesives, and lined canvases with wax-resin mixes that are nearly impossible to remove cleanly. Many of those old treatments are now the damage that modern conservators have to fix.
A 2025 study published in Nature described a digital restoration technique for a heavily damaged oil painting that filled over 5,600 individual paint losses using a reversible printed pigment mask. The researchers noted that 70% of paintings in institutional collections are locked away from public view, partly because treatment costs are too high. That figure alone shows how large the unmet need for painting conservation actually is.
One more thing worth knowing: oil painting restoration is a field with real credentialing. The American Institute for Conservation (AIC) maintains a directory of professional conservators. Anyone can call themselves a restorer. Not everyone has the training to back it up.
Restoration vs. Conservation: Where DIY Ends
Some surface cleaning is genuinely DIY-friendly. Removing dust with a soft brush or cleaning above the varnish with careful technique falls within what a careful non-professional can do.
Everything else, specifically varnish removal, structural repairs, inpainting, and relining, should be handled by a conservator. The margin for error is extremely small, and mistakes can be permanent.
How to Assess the Condition of an Oil Painting Before Starting
Never touch a painting before you’ve examined it carefully. A proper condition assessment determines what work is actually needed, and skipping it is how people cause irreversible damage.
Start with photography under normal light. Document everything before you do anything.
How to Read the Surface
Good lighting reveals a lot. Raking light (angled from the side) shows surface texture, raised paint edges, old repairs, and areas of paint loss that are nearly invisible under direct lighting.
What to look for under raking light:
- Flaking or raised paint edges (active paint loss)
- Canvas distortion or bulging
- Previous repairs or retouching
- Texture inconsistencies that suggest overpaint
UV light is the other key tool. Under UV examination, old varnish fluoresces a characteristic greenish-yellow. Areas that don’t fluoresce are either recent additions or spots where the varnish has been removed. Previous inpainting shows up as dark patches under UV, making it easy to map exactly where earlier restorers worked.
The Louvre’s 2024 restoration of Arcimboldo’s “Four Seasons” used UV examination to assess varnish layers before any cleaning began. The restorers found the cloudy varnish was obscuring the original colors significantly, which informed how aggressively they cleaned.
Checking the Canvas or Panel Support
Flip the painting over and look at the back. Press gently on the canvas from the back and feel for soft spots, tears, or areas of separation. A healthy canvas has consistent tension.
Canvas paintings are particularly vulnerable to humidity fluctuations. Research from the Canadian Conservation Institute shows that drops in relative humidity below 35% cause cracks to form and expand rapidly in oil paintings on canvas. The paint film, not the canvas itself, generates most of the mechanical stress as it dries and contracts.
On wood panels, look for:
- Warping or cupping across the panel
- Splits along the grain
- Loose or broken cradle members (if the panel has been cradled)
Signs That Require a Professional Conservator
Some damage is beyond DIY. Recognizing the threshold matters.
| Condition | Risk Level | Action |
|---|---|---|
| Active Paint Flaking | High | Do not touch. Store flat and seek a professional conservator immediately. |
| Canvas Tears or Punctures | High | Professional structural repair (patching or lining) is required. |
| Mold or Biological Growth | High | Isolate the painting and seek professional chemical treatment. |
| Water Damage (Tide Lines) | Medium-High | Professional assessment is needed to check for canvas shrinkage or rot. |
| Yellowed Varnish Only | Low-Medium | A light surface cleaning may be appropriate before professional stripping. |
Tools and Materials Needed for Oil Painting Restoration

Using the wrong materials causes more damage than the original problem. Conservation-grade supplies exist for a reason. Substituting hardware store products for professional-grade materials is almost always a mistake.
Essential Tools
Brushes and application tools:
- Soft natural-hair brushes in various sizes (for consolidation and inpainting)
- Cotton swabs (for surface cleaning and solvent testing)
- Wooden spatulas or bone folders (for lifting flaking paint edges)
- Scalpels with fine blades (for localized work)
Lighting and examination:
- UV lamp (Burton lamp or equivalent)
- Adjustable raking light source
- 10x loupe or magnifying glass
Conservation-Grade Materials
This is where most DIY attempts go wrong. The products below are what professional conservators actually use.
| Material | Purpose | Primary Source |
|---|---|---|
| Paraloid B-72 | A stable, non-yellowing acrylic resin used as a consolidant for flaking paint or as an adhesive for broken fragments. | Talas, Conservation Resources. |
| Beva 371 | An ethylene vinyl acetate heat-seal adhesive used specifically for lining canvases or consolidating structural layers. | Conservation-grade suppliers. |
| Gamblin Conservation Colors | Stable, reversible pigments used for “inpainting” (filling in color losses) that remain soluble in mild solvents. | Gamblin Artists Colors. |
| Gamvar / Regalrez 1094 | A modern, synthetic final varnish that is easily removable and does not yellow like traditional dammar. | Gamblin Artists Colors. |
| Modostuc / Conservation Filler | A fine-grained filler used to level out “losses” or holes in the paint layer before inpainting begins. | Talas, specialty suppliers. |
Gamblin Conservation Colors are specifically designed for inpainting because they remain soluble in mild solvents even after drying. Standard artist oil paints polymerize over time and become permanent. That’s the opposite of what restoration requires.
Solvents to have on hand: mineral spirits, isopropyl alcohol, and acetone. Always test solvents on an inconspicuous area before using them on the main surface. Solvent sensitivity varies considerably between paintings, even ones from the same period.
How to Clean an Oil Painting Safely
Cleaning is the most common restoration task and the easiest to do wrong. The basic rule: start with the least invasive method and only escalate if needed.
Basic professional cleaning starts around $200. More intensive work can exceed $1,000 (MoMAA). That cost range should give you some sense of how much careful work is involved, even for relatively minor cleaning.
Dry Cleaning First

Always start dry. A soft natural-hair brush or a Wishab sponge removes loose dust and surface debris without introducing any moisture or solvents.
Work in one direction, from top to bottom. Don’t scrub. If the Wishab sponge picks up color, stop immediately. That’s a sign the paint layer is unstable or the varnish is extremely thin.
Surface Cleaning with Saliva or Mild Solvents
Saliva cleaning sounds unusual but it’s a real conservation technique. Human saliva contains amylase enzymes that break down certain surface grime without affecting the varnish below. Use a cotton swab, apply gently, and roll it (never rub).
For solvent cleaning, the swab-rolling technique is standard: load the swab lightly, roll across the surface in a single pass, inspect it, and repeat with a fresh swab. Never re-use a dirty swab on a clean area.
The 3-step escalation for surface cleaning:
- Dry brush or Wishab sponge for loose dirt
- Saliva or diluted saliva (1:1 with distilled water) for grime above the varnish
- Mild solvent (mineral spirits or isopropyl alcohol) for stubborn deposits
Know when to stop. The painting doesn’t need to look brand new. Over-cleaning is a real risk, and removing too much surface grime can strip glaze layers that are part of the original paint film.
Removing Old Varnish
Old dammar and mastic varnishes yellow significantly over decades. Removing them is one of the most dramatic steps in oil painting restoration. It’s also one of the most technically tricky.
The varnish type determines your solvent. Dammar varnish responds to mineral spirits and mild aromatic solvents. Mastic varnish is similar. Synthetic varnishes are more resistant and may need acetone or more targeted solvent blends.
Critical rule: always do a patch test in an inconspicuous corner before working across the full surface. Apply solvent on a swab, wait 10 seconds, and see what comes off. If the swab picks up color, the solvent is too strong, or there’s no isolating varnish layer between the varnish and the paint.
Work in small areas. Varnish removal is slow, layer-by-layer work. The 2024 Louvre restoration of Arcimboldo’s “Seasons” series involved careful varnish lightening that revealed an original bright blue background hidden under decades of yellowed buildup. That kind of reveal only happens when you work carefully and patiently.
How to Repair Canvas Tears and Punctures
Canvas damage falls into two categories: small tears that can be addressed locally, and significant structural damage that requires more involved treatment. The approach is completely different for each.
A torn canvas is stressful to look at. But it’s fixable in most cases, even large tears, if handled correctly and without rushing.
Repairing Small Tears
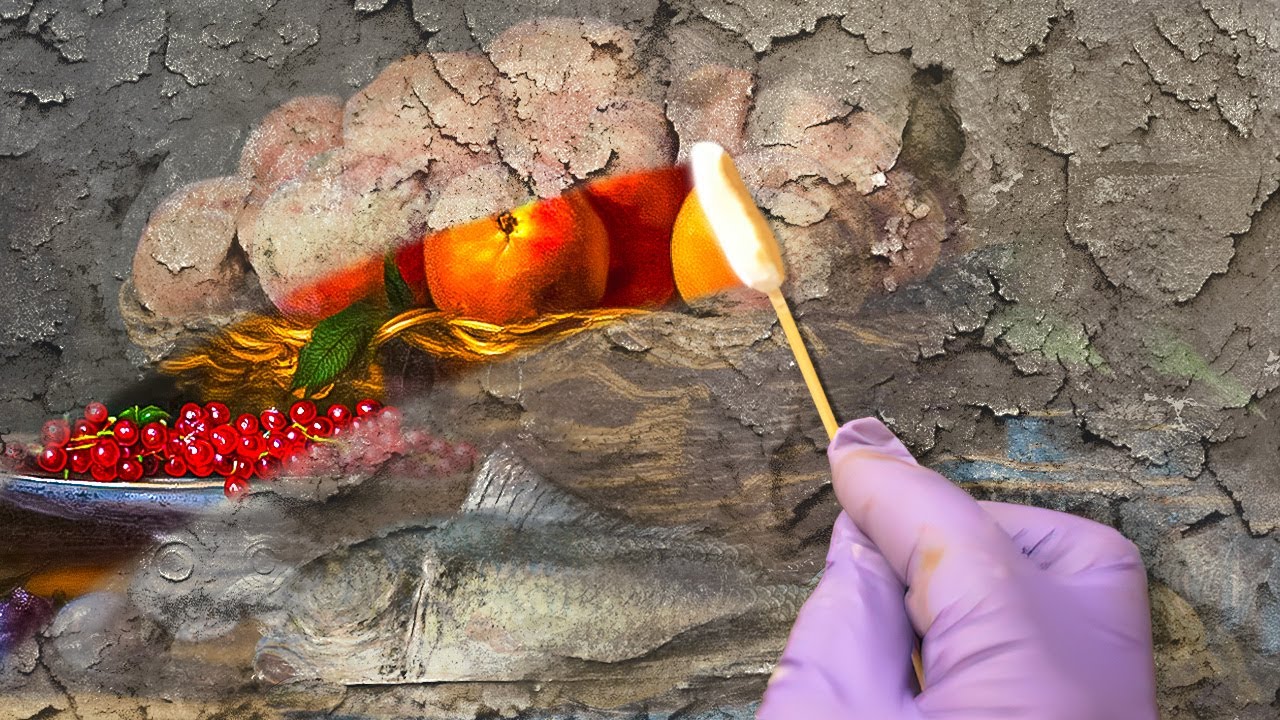
For tears under roughly 2 inches, local consolidation from the back is usually sufficient.
Basic local tear repair process:
- Relax the canvas by humidifying it slightly from the back (use a damp sponge held near, not touching, the canvas)
- Align the tear edges carefully from the front
- Apply Paraloid B-72 (5% solution in acetone) along the tear from the back using a fine brush
- Bridge the tear with a small patch of Japanese tissue paper, adhered with Paraloid B-72
- Allow to dry under light pressure
The stretcher bar tension should be checked before any repair work. A canvas that’s sagging or over-tightened puts uneven stress on the tear and makes alignment harder. Adjust the stretcher key slots first.
Canvas Lining
Lining attaches a second canvas to the back of the original for structural support. It’s used for severely deteriorated canvases, large tears, or paintings where the original fabric has become brittle.
Lining is a contested technique in conservation. Wax-resin lining (the older method) is largely out of favor now because the wax is extremely difficult to remove and can affect paint appearance. Beva 371 lining is the current standard, though even that is done more selectively than it was 30 years ago.
The current thinking in the field is that lining should be a last resort. Local repairs and backing consolidation are preferred when they’re sufficient.
When lining is appropriate:
- Large tears covering more than a few inches
- Canvas fabric that has become brittle and friable
- Extensive cleavage across the paint layer that local treatment can’t address
Filling Paint Losses
After structural repairs come fills. Paint losses leave depressions in the surface that need to be built up to the level of the surrounding paint before inpainting.
Modostuc or a similar conservation filler is applied in thin layers, building up gradually. Each layer must dry before the next is applied. Overfill slightly, then sand back carefully with fine-grit sandpaper to match the surrounding texture.
The fill should be slightly lower than the surrounding paint surface, not raised above it. A raised fill catches the light differently and will be visible even after inpainting.
How to Inpaint Losses and Damaged Areas
Inpainting is the most visible part of oil painting restoration, and the most skill-intensive. Done well, it’s invisible. Done poorly, it’s the first thing people notice.
There’s one rule that absolutely cannot be bent: inpaint only on filled losses, never over original paint. Every brushstroke of inpainting should touch only the fill material, not the original paint layer around it. A UV lamp confirms this after the fact.
Materials and Approach
Gamblin Conservation Colors are the standard choice for inpainting. They stay soluble in mild solvents indefinitely, so future conservators can remove retouching without affecting the original paint. Watercolors applied under a varnish layer are another option, useful when very thin, transparent color is needed.
Never use standard artist oil paints for inpainting. They cure and become inseparable from the original paint layer, making future restoration treatment much harder.
Color matching process:
- Mix on a glass palette, not directly on the fill
- Build color in thin layers rather than trying to match in one pass
- Test the match while the paint is wet (colors shift on drying)
- Examine under raking light at each stage to check for surface texture differences
The Tratteggio Method
For large areas of paint loss, especially in historically significant works, many conservators use tratteggio (also called rigatino): fine parallel hatched lines of color applied in alternating directions, building up optical color mixtures rather than flat fills.
Up close, the fill is clearly identifiable as restoration work. From normal viewing distance, the eye reads it as matching color. This approach satisfies the conservation principle of distinguishability. A viewer with knowledge can see where the restoration is. A casual viewer sees a complete painting.
The tratteggio approach was developed at the Istituto Centrale del Restauro in Rome and remains the preferred method for large-scale loss compensation in museum-level conservation.
Final Check Under UV
After inpainting, always examine the work under UV light. Gamblin Conservation Colors and watercolors fluoresce differently from the original paint and varnish layers, so the UV inspection confirms that inpainting is confined to the fills.
Any inpainting that extends over original paint shows up immediately. That’s fixable now. It’s much harder to fix after varnishing.
How to Revarnish an Oil Painting After Restoration

Varnishing is the last step in the oil painting restoration process. Skip it and the work is unfinished. Rush it and you can trap moisture under the varnish layer, causing long-term damage that’s hard to reverse.
The right varnish does three things at once: it protects the paint surface, unifies the sheen across areas that were cleaned or inpainted, and gives future conservators a removable layer to work through.
Applying an Isolation Coat First
Why isolation matters: An isolation coat separates the paint layer from the final varnish. Without it, solvent-based varnishes can disturb freshly applied inpainting or interact with the original paint below.
Apply a thin, diluted coat of Gamvar or a conservation-grade resin varnish as the isolation layer. Let it cure fully before the final varnish goes on.
For paintings with heavily textured surfaces or thick impasto areas, use a dry brush immediately after varnish application to wick out any pooling in the recesses. Pooled varnish dries unevenly and creates visible patches.
Choosing the Right Varnish

Gamblin’s Gamvar and Winsor & Newton’s varnish range are both commonly used conservation-grade options. The choice of finish affects the final appearance significantly.
| Varnish Type | Finish | Best For |
|---|---|---|
| Gamvar Gloss | High sheen, strong color saturation. | Old Masters & Portraits: Deepens shadows and brings out the “glow” in dark pigments. |
| Gamvar Satin | Moderate, sophisticated sheen. | General Restoration: Provides a balanced finish that doesn’t distract from the image. |
| Regalrez 1094 | Low yellowing; adjustable (Matte to Satin). | Conservation: Light-sensitive pigments and high-value museum pieces. |
| Soluvar Matte | Flat, zero-glare finish. | Textured Works: Modern paintings with heavy impasto where glare would obscure the surface. |
Dammar varnish is still available but largely avoided in conservation contexts now. It yellows noticeably within a decade and requires turpentine for removal, which is more aggressive than the mineral spirits needed for synthetic varnishes.
Application Method and Timing
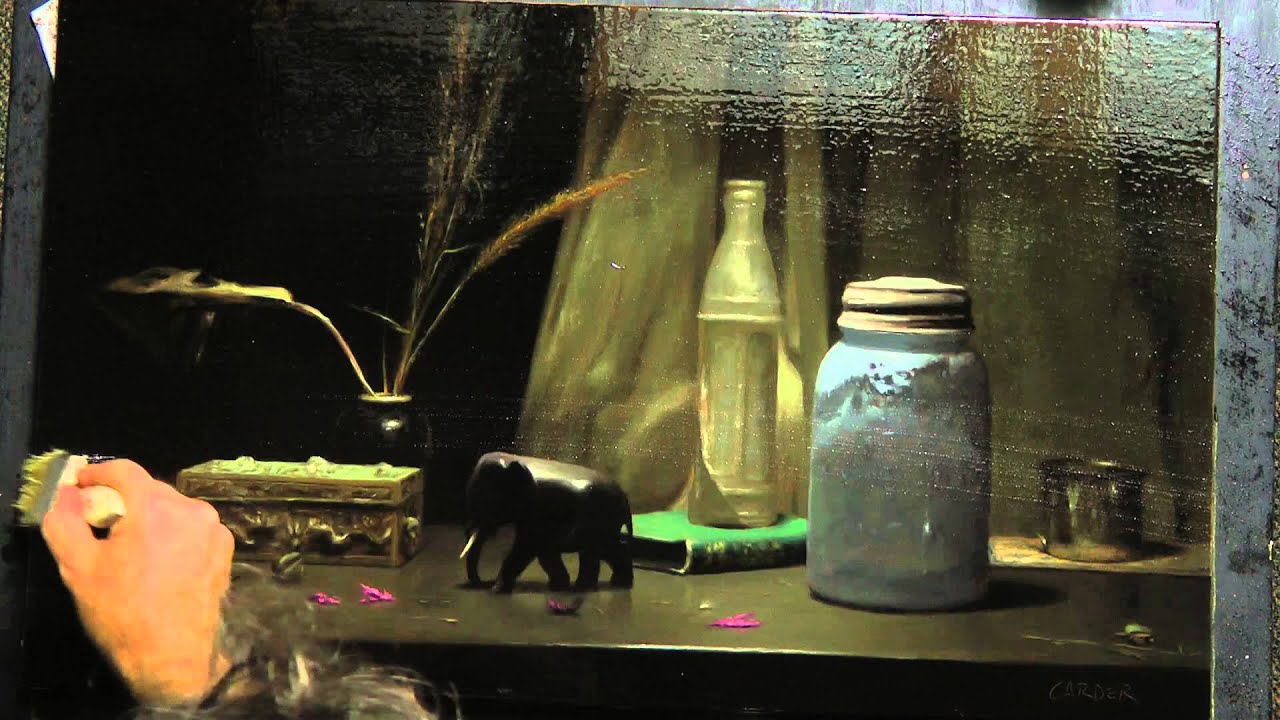
Brush or spray. Both work, but they behave differently on textured surfaces.
Brush application: long, overlapping strokes in one direction, then rotate 90 degrees for a second pass. Work on a flat horizontal surface only. Never varnish a painting standing upright.
Spray application: hold the can 12-16 inches away, start each pass off the canvas edge, do horizontal passes first, then vertical, then diagonal. This gives the most even coverage.
Wait at least 6 to 12 months after completing any inpainting before final varnishing, according to Natural Pigments. The paint layer needs time to fully cure. Varnishing too early traps moisture and can cause discoloration or cracking over time.
Always work in a dust-free environment. Close windows, wear a hat, tuck in loose clothing. Even a single hair or dust particle landing in wet varnish is annoying to deal with after the fact.
How to Store and Handle Oil Paintings to Prevent Future Damage
Most oil painting deterioration is preventable. The Canadian Conservation Institute and the British Association of Paintings Conservator-Restorers (BAPCR) both document the same core finding: environmental instability causes more cumulative damage than any single event.
A painting stored in a stable environment at 60 degrees F and 50% RH will outlast one that fluctuates between acceptable ranges, according to UOVO’s conservation research. Consistency matters more than hitting ideal numbers.
Ideal Storage Conditions

The University of Delaware sets the ideal humidity for art storage at 40-55% RH. Below 35% causes cracking and desiccation. Above 65% creates mold risk.
Temperature range: 65-72 degrees F (18-22 degrees C), with no more than a 4-degree swing in any 24-hour period (per conservation guidelines from the Western Australian Museum).
The BAPCR guidelines specify humidity fluctuations should stay within 10% in any 24-hour period. That’s the threshold where physical stress begins to build up in the paint layer and canvas support.
Places to avoid:
- Above fireplaces (heat, soot, and low humidity cycles)
- Basements (humidity spikes and flooding risk)
- Attics (extreme temperature swings)
- Exterior walls (temperature differential causes micro-climate instability)
- Near HVAC vents
Framing and Backing
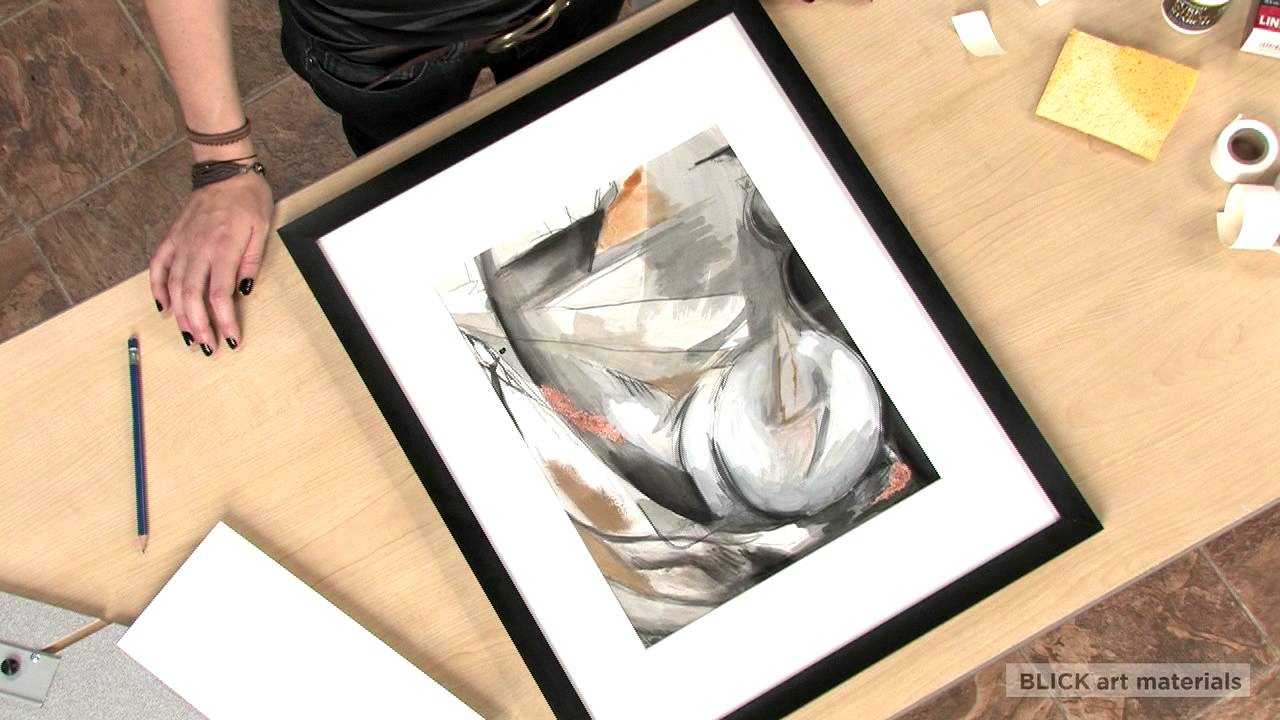
A backing board on the reverse of the canvas buffers against humidity changes and protects the canvas from physical impact. It’s one of the simplest and cheapest preventive conservation measures available.
UV-filtering glazing is strongly recommended for displayed paintings. UV light degrades pigments, yellows oil mediums, and accelerates varnish breakdown. Acrylic glazing (Perspex or equivalent) is preferred over glass for its lower weight and shatter resistance.
Frames should be checked periodically for loose joints, as a shifting frame puts uneven mechanical stress on the canvas.
Safe Handling Practices

Wear powder-free nitrile or cotton gloves when handling paintings. Natural oils from hands attract dust and can leave residue on varnish surfaces.
Always support a canvas painting with two hands, one on each side of the frame. Never carry a painting by just the top edge of the frame. Never press on the canvas surface from the back.
When storing oil paintings long-term, keep them upright (never flat-stacked face down), separated by padding, and away from any direct contact with other surfaces. Face-to-face storage without padding is one of the most common causes of surface damage in private collections.
When to Hire a Professional Painting Conservator Instead
This is where a lot of people either spend money unnecessarily or make a mistake they can’t undo. Knowing the line between DIY and professional work is actually the most useful skill in oil painting restoration.
Professional conservation basic cleaning starts around $200. Full treatment for significant damage can run into several thousand dollars (MoMAA). That’s a wide range, and the cost scales directly with the complexity of the damage.
Damage That Requires Professional Treatment

Active paint flaking is the single most urgent situation. Every hour you delay risks permanent paint loss. Do not attempt to consolidate active flaking yourself without specific training.
Send it to a conservator immediately if you see:
- Paint lifting or flaking away from the surface
- Tears, punctures, or large distortions in the canvas
- Mold, biological growth, or dark staining
- Water tide lines or flood damage
- Unknown previous repairs that are failing
The 2024 Notre-Dame restoration project involved 50 professional restorers working over 24 months to treat paintings that had been exposed to heat and soot from the fire. Even paintings that appeared undamaged required condition assessment before any cleaning began.
How to Find a Qualified Conservator
The American Institute for Conservation (AIC) has grown to over 3,500 members across more than 20 countries since its founding in 1972 (AIC / Wikipedia). Their “Find a Professional” tool at culturalheritage.org lets you search by specialty and location.
AIC Professional Associates have been peer-reviewed. Their work has been observed and their credentials verified. That status matters. Anyone can call themselves a restorer without it.
What to ask before hiring:
- What is your formal training in paintings conservation?
- Can I see a portfolio of similar restoration work?
- Will you provide a written condition report before treatment begins?
- What materials will you use, and are they reversible?
A good conservator will always examine the painting before proposing treatment. Be cautious of anyone who quotes a price without seeing the work first.
What a Professional Condition Report Covers
Before any treatment begins, a proper condition report documents the current state of the painting in detail. This protects you and the conservator.
Condition report contents:
- Photographic documentation under normal, raking, and UV light
- Description of all visible damage and its likely causes
- Proposed treatment steps and materials
- Estimated cost and timeline
- Any risks associated with the treatment
The oil painting process involves multiple distinct layers that each require different treatment approaches. A conservator who understands the material history of the painting, including what is gesso, ground preparation, and paint layer structure, will give you a more accurate assessment than one who treats the surface as a single entity.
Ask whether the treatment record will be kept on file. Good conservation studios maintain documentation that travels with the painting, so future conservators know exactly what was done and when.
FAQ on How To Restore An Oil Painting
Can I restore an oil painting myself at home?
Basic surface cleaning above the varnish layer is DIY-friendly. Anything involving paint consolidation, varnish removal, or canvas repair carries real risk of permanent damage. When in doubt, consult a professional conservator first.
How do I know if my painting needs restoration?
Look for yellowed or cloudy varnish, flaking paint edges, canvas distortion, or visible dirt buildup. Examine it under raking light. If you spot active paint loss, stop handling it and contact a conservator immediately.
What is the difference between cleaning and restoring an oil painting?
Cleaning removes surface dirt and old varnish. Restoration goes further, covering structural repairs, filling paint losses, inpainting, and revarnishing. Most full oil painting restoration treatments involve all three stages in sequence.
How do you remove yellowed varnish from an oil painting?
Test a small area with mineral spirits or a mild solvent on a cotton swab. Roll, never rub. Dammar varnish responds to mineral spirits. Always patch-test first. If color lifts with the varnish, stop and seek professional help.
What materials do professional conservators use for inpainting?
Gamblin Conservation Colors are the standard choice. They stay soluble in mild solvents after drying, making them fully reversible. Standard artist oil paints cure permanently and should never be used for inpainting losses.
How long does oil painting restoration take?
A basic cleaning takes hours. Full treatment involving canvas repair, inpainting, and revarnishing can take weeks or months. Each layer must dry fully before the next step. Rushing the process causes more damage than the original problem.
Is it safe to clean an oil painting with saliva?
Yes, and it’s a real conservation technique. Saliva contains amylase enzymes that break down surface grime without harming the varnish below. Use a cotton swab, roll gently, and work in small sections. It works best for light surface dirt.
How much does professional oil painting restoration cost?
Basic cleaning starts around $200. Intensive treatment involving structural repairs and full paint layer stabilization can exceed several thousand dollars. Cost depends on painting size, damage extent, and conservator rates. Always get a written condition report before agreeing to any treatment.
What varnish should I use after restoring an oil painting?
Gamvar from Gamblin is the most widely recommended conservation-grade option. It’s removable, non-yellowing, and available in gloss, satin, and matte finishes. Apply only after inpainting has fully cured, ideally 6 to 12 months after treatment.
How do I find a qualified painting conservator?
Use the American Institute for Conservation (AIC) “Find a Professional” tool at culturalheritage.org. Look for AIC Professional Associates, who are peer-reviewed. Ask for a portfolio, written treatment proposal, and references before handing over any painting.
Conclusion
This conclusion is for an article presenting the full process of oil painting restoration, from the first condition assessment to the final varnish application.
Paint consolidation, canvas relining, inpainting losses, and solvent-based cleaning are all manageable when approached with the right materials and realistic expectations about what belongs in DIY territory.
The biggest mistake people make is waiting too long. Surface dirt becomes embedded. Flaking paint becomes permanent loss. Small canvas tears become structural failures.
Preventive care, stable storage conditions, and periodic condition checks do more for long-term artwork preservation than any single restoration treatment.
And when the damage is beyond your skills, the American Institute for Conservation directory exists for exactly that reason. Use it.