Most muddy, lifeless paintings come down to one thing: poor mixing habits, not poor talent.
Learning how to mix oil paints correctly changes everything. Color temperature, pigment transparency, paint consistency, the fat-over-lean rule. These are not abstract concepts. They are practical decisions that affect every mix you make.
This guide covers what oil paint mixing actually means, how to set up your palette, the physical mechanics of mixing, color theory as it applies to real pigments, and how to store mixed paint between sessions.
By the end, you will mix cleaner colors, avoid muddy results, and work with more control across every technique you use.
What Oil Paint Mixing Actually Means

Mixing oil paints is not the same as mixing acrylics or watercolors. The binder changes everything.
Oil paint is pigment suspended in a drying oil, most often linseed oil. That oil doesn’t dry by evaporation. It cures through oxidation, a chemical reaction with oxygen in the air. This means your mixed colors stay workable for hours, sometimes longer, depending on pigment and medium.
That slow cure is the whole point. It gives you time to adjust, blend, and rework. Acrylics don’t give you that. Watercolors definitely don’t.
Two distinct mixing approaches exist in oil painting:
- Pre-mixing on a palette before touching the canvas
- Wet-into-wet mixing directly on the painting surface
Most painters use both in the same session. Neither is better. They just serve different purposes.
The binder also matters for mixing behavior. Linseed oil produces a slightly yellower, stronger film. Safflower oil stays clearer, making it common in whites and light colors. Walnut oil falls somewhere in between. If you’re mixing a clean, cool white, check the tube. Safflower-bound whites will behave differently than linseed-bound ones in your mixes.
Artist-grade vs. student-grade paint matters here too. Student paints use lower pigment loads and more filler, which affects how colors behave when mixed. You get muddier results faster. Professional ranges from Gamblin, Winsor & Newton, or Williamsburg Handmade Oil Colors carry higher pigment concentration, so mixes stay cleaner and more predictable.
The fine art oil paints market was valued at USD 4.41 billion in 2025, according to Business Research Insights, with the artist-level segment accounting for 44% of global consumption. This reflects serious painter demand, not casual hobbyist use.
Understanding what mixing means in oils, specifically how the binder and pigment load interact, is what separates clean mixes from muddy ones before you even pick up a palette knife.
Oil Paint Consistency and Why It Matters Before Mixing

Paint consistency is probably the most overlooked variable in mixing. Get it wrong and even a technically correct color mix will behave badly on the canvas.
How Consistency Affects Mixing Results
Stiff paint straight from the tube gives you more control and holds texture. Buttery paint blends easily but can get slippery fast. Fluid paint, once you add medium, spreads far but loses body.
The problem most beginners run into: mixing a stiff cadmium red with a fluid phthalo blue. The two don’t play well together until you adjust one of them.
Different brands have noticeably different tube consistency. Williamsburg paints tend to be stiffer and very pigment-dense. Gamblin runs buttery and smooth. Winsor & Newton Artist’s sits in the middle. Old Holland is dense and rich, almost paste-like.
This isn’t a quality difference. It’s a formulation difference. But it does mean that switching brands mid-session can throw off your mixing entirely if you’re not paying attention.
When to Modify Consistency Before Mixing
Two scenarios where you’ll want to adjust before mixing, not after:
- Very stiff paint that resists blending on the palette (add a drop of linseed or walnut oil)
- Paint that’s too fluid for textured applications (leave it exposed on the palette briefly to let the oil absorb, or mix with a stiffer color)
Adding medium to one paint before mixing it with another changes the fat-lean ratio of your final mix. More on that in the mediums section, but it’s worth knowing now.
Testing mixes on a piece of scrap canvas or paper before applying them is a habit worth building. Color looks different on a white palette than on a toned canvas surface. Paint that seems too fluid on glass can settle fine once applied.
According to the International Artists Association, 35% of professional oil painters cite inconsistent paint consistency as a top mixing challenge, particularly when working across different brand lines in the same session.
Palette Setup for Mixing
Your palette layout is not just about preference. It directly affects how clean and accurate your mixes stay throughout a session.
Choosing the Right Palette Surface
Four main options, each with real trade-offs:
| Palette Type | Best For | Main Drawback |
|---|---|---|
| Glass palette | Color accuracy, easy cleaning | Heavy, fragile |
| Stay-wet palette | Extended sessions, keeping paint fresh | Not ideal for alla prima work |
| Tear-off paper | Quick cleanup, portability | Surface absorbency affects mixes |
| Wood palette | Traditional feel, lightweight | Requires sealing; absorbs oil over time |
For color accuracy in mixing, a white or gray-toned surface gives the most reliable read. A warm wood surface can shift your perception of cool colors like blues and violets, making them look warmer than they actually are.
Color Layout and Mixing Zones
Lay colors out in a consistent order every session. Most painters arrange warm to cool, or follow the color wheel. What matters more than which system you choose is that you stick to it. Muscle memory matters when you’re mid-session and focused on the canvas.
Leave a dedicated mixing zone in the center or lower portion of your palette. Keeping squeezed colors and mixed colors spatially separate prevents accidental contamination.
Palette size affects mixing freedom directly. A small palette forces you to compromise. A larger one lets you keep multiple mixes active simultaneously, which is useful when working on shadows, mid-tones, and highlights all at once.
Bob Ross’s wet-on-wet method famously relied on large mixing areas and heavy paint loads. His setup wasn’t aesthetic preference. It was functional necessity for the technique.
Keeping the Palette Clean During Work
Wipe the mixing zone between distinct color groups. A contaminated mixing zone with traces of previous mixes is one of the main causes of muddy colors, even when the individual pigments are well-chosen.
Palette knives clean more thoroughly than brushes. If you’re brushing off old mixes rather than scraping them, you’re leaving residue behind.
How to Mix Colors in Oil Paint
The actual mechanics of mixing matter as much as color theory. A correctly identified color mix can still fail if the physical mixing process is sloppy.
Mixing with a Palette Knife

Palette knife mixing is the cleaner option for large quantities of a single color. It gives full contact between pigments and produces a uniform blend without brush-hair contamination.
The correct motion is a folding and smearing action, not stirring. Stirring incorporates air and creates uneven distribution of pigments with different densities.
When mixing a light color into a dark one, always start with the lighter pigment and add the darker one in small amounts. Going the other direction, adding light to dark, wastes a large amount of paint trying to overpower a dense pigment. A little phthalo blue goes a very long way in a white mix. Most painters learn this the hard way.
- Mix enough paint to finish the area you’re working on. Running out mid-section and trying to remix an exact match is genuinely difficult.
- Test the mix on scrap material before applying it to the painting.
- Let the test swatch dry partially before judging the color. Wet oil paint looks more saturated than dry oil paint.
Mixing Directly on Canvas
Wet-into-wet mixing on the canvas surface is central to alla prima painting, where the entire composition is completed in a single session while paint remains workable.
This approach requires pre-planning. You can’t fully correct a color on the canvas the way you can on a palette. What you can do is work adjacent colors together, letting them blend at the edges while keeping the cores of each area relatively pure.
The risk: overworking. More than three or four passes with a brush over a wet oil mix breaks down the pigment structure and produces the gray-brown haze most people call “mud.” Less is genuinely more here.
Some pigments resist wet blending more than others. Earth tones like raw umber and burnt sienna blend smoothly. High-tinting-strength pigments like phthalo green and prussian blue have a tendency to overpower adjacent wet colors aggressively. Knowing your pigments helps you plan how much blending room to leave on the canvas.
Oil painting techniques vary significantly depending on whether you’re mixing on the palette or the canvas, and most painters develop a hybrid approach over time.
Color Mixing Basics for Oil Painters
Color theory exists on paper. Oil pigments behave differently. Both are true, and both matter.
Why Pigments Don’t Behave Like the Color Wheel Says
Standard color theory assumes idealized primaries. Real pigments are not ideal. This is where a lot of beginners get frustrated.
Mixing a “pure” secondary green from a generic yellow and blue gives you an olive or khaki, not a clean green. To get a clear, vibrant green, you need a cool blue (phthalo blue) and a cool yellow (hansa yellow or lemon yellow). The color temperature of your primary pigments determines the purity of your secondary mixes.
A few things that actually matter when mixing pigments in oils:
- Tinting strength: Phthalo blue can dominate an entire palette mix with a brushstroke. Burnt sienna will barely register in the same situation. Use high-tinting-strength pigments in tiny amounts.
- Transparency vs. opacity: Mixing a transparent pigment with an opaque one produces a semi-opaque result that behaves differently under glazes than either pigment would alone.
- Temperature: Every pigment leans warm or cool within its hue. Ultramarine blue leans warm (toward violet). Phthalo blue leans cool (toward green). This shift matters in every mix.
According to the U.S. Bureau of Labor Statistics, 38% of professional painters preferred oil paints over acrylics for gallery and exhibition work in 2023, largely because of oil’s superior blending behavior and color depth when mixing layered works.
Understanding Transparent vs. Opaque Pigments in Mixes
Transparent pigments (alizarin crimson, phthalo blue, viridian, yellow ochre) allow light to pass through and reflect back from the surface underneath. They produce depth and luminosity in mixes and glazes.
Opaque pigments (titanium white, cadmium red, cadmium yellow, cerulean blue) block light. They cover, and they dominate mixes more physically than transparent pigments do.
Mixing two transparents gives you a clean, luminous result. Mixing two opaques gives you a solid, covering result. Mixing a transparent with an opaque gives you something in between. Knowing which category your pigments fall into before mixing prevents surprises.
Understanding color in painting is foundational to making smart mixing decisions, and it goes well beyond memorizing the color wheel. The more you understand hue, tint, and color saturation, the more intentional your mixes become.
How to Mix Common Colors
These are the mixes painters return to constantly. Getting them right, reliably, saves more time than any other skill.
How to Mix Skin Tones

Skin tone mixing is where most portrait painters spend 80% of their color mixing energy. There is no single skin tone formula. There are starting points.
A basic light skin tone foundation: titanium white + yellow ochre + a small amount of cadmium red light. Adjust warmth with more red or raw sienna. Adjust coolness by shifting toward a yellow-green. For deeper skin tones, reduce the white and introduce burnt sienna, raw umber, or transparent oxide red.
Avoid using black to darken skin. It kills the warmth and produces a flat, unnatural shadow. Shadows in skin lean warm, not gray. Raw umber or a mix of complementary colors (a cool green into the warm mid-tone) produces far more convincing dark values.
Learning how to mix skin tones that hold up across different light conditions is one of the hardest practical skills in portrait work. The Zorn palette (titanium white, yellow ochre, cadmium red, ivory black) has been a reliable framework for this for decades.
How to Mix Greens
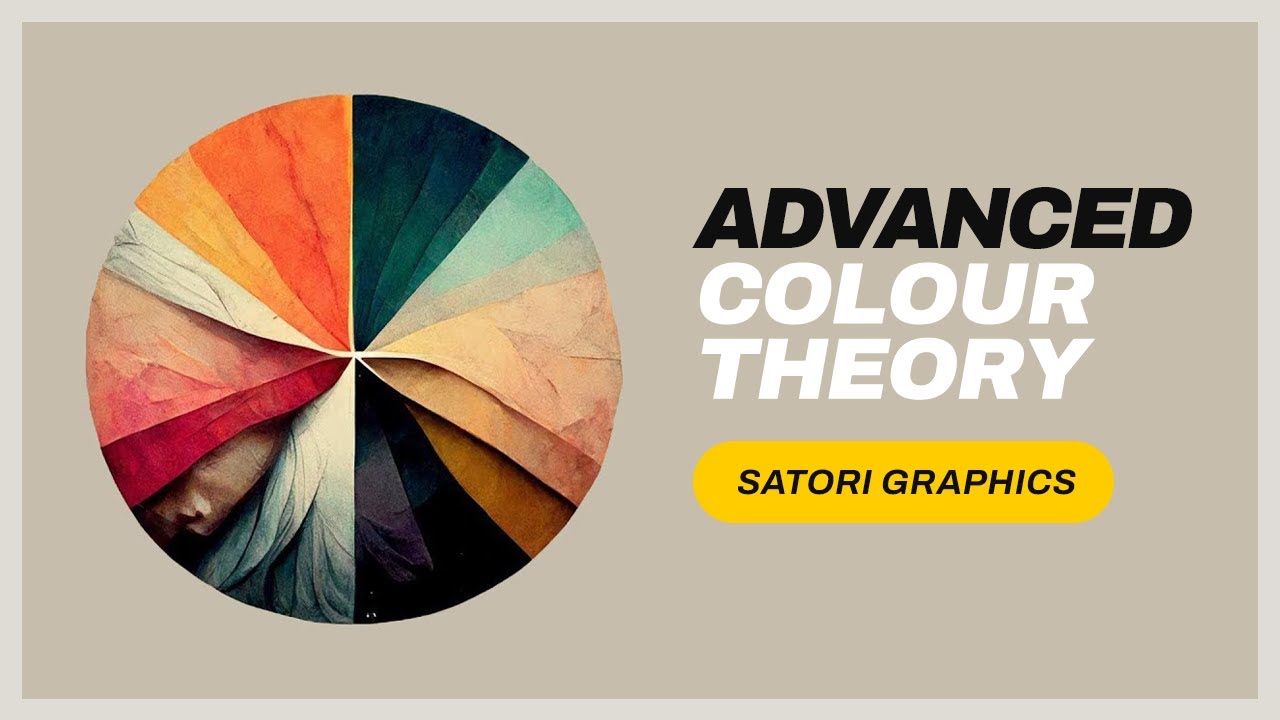
Pre-made greens from the tube are almost never the right green for a landscape. Mixing greens for landscape painting from scratch gives far more flexibility and keeps color harmony across the whole piece.
Starting points by green temperature:
- Cool, saturated green: Phthalo blue (green shade) + hansa yellow medium
- Warm, muted green: Ultramarine blue + yellow ochre
- Natural foliage green: Viridian + raw sienna or yellow ochre
- Dark shadow green: Phthalo green + burnt umber or alizarin crimson
Claude Monet mixed his greens optically, placing warm and cool greens adjacent to each other rather than always premixing a single value. The result is vibrance that a single mixed green can’t achieve.
How to Mix Neutral Grays

Mixing grays from complementary colors rather than black and white gives you warm or cool neutrals with far more character than a black-white mix ever does.
A neutral gray from complements: ultramarine blue + burnt sienna, adjusted with white. Shift the ratio toward blue for a cool neutral. Shift toward sienna for a warm one. The resulting grays harmonize naturally with the rest of the painting because they’re built from colors already on your palette.
This approach connects directly to broader color theory principles around complementary colors and how opposing hues neutralize each other to produce cleaner, more nuanced neutrals than any black can.
Mixing Mediums and Their Effect on Color
The medium you add to oil paint changes more than just consistency. It changes how the color reads, how long you can work it, and whether the paint film will last.
Over 60% of painters cite mixing oil painting mediums as their biggest challenge, according to a YouTalent survey. That tracks. There’s a lot of conflicting advice and a lot of products with overlapping claims.
Drying Oils vs. Alkyd Mediums

These serve fundamentally different purposes in the mixing process.
| Medium | Drying Time | Best Use in Mixing |
|---|---|---|
| Linseed Oil | 3–5 days (thin film). | General mixing, mid-layers, and upper-layers; the standard binder. |
| Safflower Oil | 5–7+ days. | Whites and light colors; resists yellowing over time. |
| Stand Oil | Varies; behaves “fatter” than linseed. | Glazing mixes and fine detail work; creates a smooth, enamel-like finish. |
| Liquin (Alkyd) | 8–24 hours. | Fast layering, plein air, and alla prima work. |
Linseed oil stays the standard for good reason. It cures to a strong, stable film and keeps paint workable for a full session without making it too fluid to control.
Safflower oil produces a cleaner, less yellowed result for pale mixes, but it dries slower and creates a weaker film than linseed. Fine for final layers. Risky for early ones.
Gamsol, Solvents, and What They Actually Do

Solvents thin paint. They don’t add body. Gamblin’s Gamsol (odorless mineral spirits) dissolves oil paint to make it more fluid for lean early layers. It evaporates rather than curing, leaving a weaker film than a medium-extended paint would.
This is the core of the fat-over-lean rule: solvent-thinned paint goes down first (lean), oil-extended paint goes last (fat). Reversing the order causes cracking as the painting ages.
Gamblin’s own two-approach method for fat-over-lean: either increase the oil content of your medium between layers while keeping the medium-to-paint ratio the same, or start with minimal medium and add progressively more with each successive layer.
When to Add Medium to a Mix vs. When Not To
Avoid adding medium if:
- You’re already in the upper layers and the paint flows well from the tube
- You’re mixing impasto textures (medium breaks down body)
- You’re using a high-oil paint like Williamsburg or Old Holland, which is already fat
Alkyd mediums like Liquin Original from Winsor & Newton or Gamblin’s Galkyd cut drying time to 8-24 hours, which is genuinely useful for multi-session layered work. They also increase flow and level brushstrokes, which affects how mixed color looks on the surface. Not everyone likes that enamel-like quality.
Walnut oil from M. Graham remains popular for painters who work wet-into-wet over extended periods. It dries the slowest of the main options but produces a flexible, clear film that doesn’t yellow.
Avoiding Muddy Colors When Mixing
Mud is the most common mixing complaint and also the most misunderstood one. Most of the time it’s not bad color choices. It’s process.
Why Mud Actually Happens
According to Realism Today’s 2023 faculty notes from Richard Schmid’s methodology, muddy color is almost always a color that is the wrong temperature for its context, not a color that is inherently wrong.
The main causes:
- Mixing more than three pigments into one pile (each addition lowers saturation through subtractive mixing)
- Contaminated brushes or palette knife carrying residue from a previous mix
- Overworking wet paint on the canvas, breaking down pigment structure
- Wrong color temperature for the light condition
Student-grade paint makes this worse. Lower pigment loads mean more filler, which dulls mixes faster than professional-grade equivalents.
The Three-Color Rule in Practice

Limit any single mix to three pigments maximum. This is the single most effective muddy-color prevention habit.
ZenART Supplies puts it directly: mixing too many different colors together produces a muddied, dull, and lifeless hue. That’s subtractive mixing working against you. Every additional pigment absorbs more wavelengths of light and reduces overall saturation.
Two exceptions worth knowing:
- White doesn’t count toward the three-pigment limit. It adjusts value, not hue.
- Earth tones (raw umber, burnt sienna) count fully. They’re pre-mixed pigment compounds that carry hidden primaries.
When Mud Is Actually Useful
Not all desaturated color is wrong. Sometimes it’s exactly right.
Neutralized mixes, grays built from complements, and muted mid-tones are tools. Rembrandt’s shadows and Velazquez’s backgrounds relied on desaturated color to make the saturated areas read more intensely by contrast.
Understanding value in painting is what separates useful neutrals from actual mud. A color can be low in saturation and still be exactly right if its value and temperature are correct for where it sits in the composition. The goal is contrast in painting, not uniform vibrancy.
Mixing Oil Paints for Specific Techniques

How you mix changes depending on the technique. There’s no universal approach.
Alla Prima: Mixing for a Single Session
Every value needs to be pre-mixed before you start painting. This is the part most beginners skip.
In alla prima work, you’re placing wet paint next to and into wet paint. You don’t have time to remix mid-composition without losing freshness. The common approach: mix a complete range of values for each color group before starting.
Plein air painters favor alkyd mediums for this reason. Liquin or Galkyd gives enough working time for a two-hour session while keeping layers dry enough to handle afterward.
Glazing: Mixing Transparent Layers

A glaze is a transparent film of oil color applied over a dried layer. The mixing ratio matters.
Standard glazing medium: stand oil mixed with a small amount of odorless mineral spirits at roughly 1:1. Add a small amount of paint. The goal is a translucent wash, not a tinted medium.
Transparent pigments work best for glazing: alizarin crimson, phthalo blue, viridian, Indian yellow, raw sienna. Opaque pigments like titanium white or cadmium red mixed into a glaze produce a semi-opaque film that obscures the layer below rather than enriching it.
Venetian artists in the 1500s used gum turpentine in their glazes to build luminous color depth across multiple sessions. The principle hasn’t changed much. The oil painting glazing techniques used today are direct descendants of that approach.
Impasto: Mixing for Texture
Impasto mixing is the opposite of glazing in almost every way.
| Technique | Paint Consistency | Medium Added? | Key Concern |
|---|---|---|---|
| Glazing | Very fluid and transparent. | Yes; usually a mix of Stand Oil + Solvent. | The bottom layer must be bone-dry to prevent smearing. |
| Impasto | Stiff, heavy, and full-bodied. | Minimal or none (sometimes “Impasto Paste”). | Cracking risk if the exterior dries too fast while the interior is wet. |
| Alla Prima | Buttery and workable. | Small amount; often Alkyd to speed setting. | Overworking the surface into “mud” by mixing wet layers too much. |
For impasto mixing, work straight from the tube or with a very small amount of stand oil. Adding fluid medium breaks down the body and you lose the textural ridges that impasto technique depends on.
Van Gogh’s impasto work in 1889 used paste-like consistency with virtually no medium. The ridges in his brushwork were structural, not incidental. Velazquez Medium, which adds body while allowing some blending, is a modern parallel for this approach.
Underpainting: Mixing Neutrals for Value Mapping
The underpainting stage is where most painters over-complicate their mixes.
Keep it simple. One or two pigments maximum: raw umber or burnt umber thinned with Gamsol. The goal is to map values, not colors. Transparent earth tones work best because they don’t fight the color layers that come on top.
Grisaille underpaintings use a neutral gray mix. Burnt umber plus ultramarine blue, thinned to a washable consistency, gives a full value range from near-white to near-black. The grisaille technique is built around this kind of lean, transparent underpainting before color layers are added.
Storing Mixed Oil Paint
Mixed paint doesn’t have to be wasted after a session. The right storage method extends it by days, sometimes weeks.
Short-Term Storage: Overnight to Three Days
The freezer is the most reliable option. Placing a glass palette in the freezer (not a wooden one, which warps) cuts off the oxidation process that dries oil paint. The freezing point of linseed oil is approximately -20C (-4F), lower than most home freezers, so the paint doesn’t actually freeze solid. It just slows dramatically.
According to Virtual Art Academy, slow-drying pigments like titanium white and cadmiums can remain usable for over a week using this method with daily sessions. Fast-drying pigments like burnt umber are good for only a day or two regardless.
Two other short-term options:
- Submerging a glass palette in water (cuts off oxygen completely; works for several days but can grow mold in warm weather)
- A drop or two of clove oil per paint pile inside a sealed container (eugenol in clove oil retards oxidation without altering paint chemistry)
Longer Storage: Weeks to Months
Transferring mixes to empty paint tubes is the cleanest solution for long-term storage of custom colors. Dick Blick and other suppliers sell aluminum tubes with open backs designed for this purpose. Fill with a palette knife, fold and crimp the end, and the mix stays usable for weeks.
Small airtight containers work for mixes you’ll return to within a few days. The key is minimizing air contact, since oil paint cures by oxidation, not evaporation.
Worth knowing before discarding a mix: dried surface skin on a paint pile usually hides wet paint underneath. Peeling the skin back with a palette knife often recovers a usable amount, especially with larger paint mixes.
If you plan to mix large, repeatable quantities (matching a portrait background across multiple sessions, for instance), mixing a full batch and storing it in a sealed tube is far more reliable than trying to remix from scratch. Color memory is not as accurate as people think it is. The oil painting process goes more smoothly when you’re not chasing a color match you made three sessions ago.
For a broader look at caring for finished work after mixing and painting, see the guides on how to store oil paintings and how to varnish an oil painting, which cover the steps that follow the mixing process.
FAQ on How To Mix Oil Paints
How do you mix oil paints without getting muddy colors?
Limit each mix to three pigments maximum. Clean your palette knife between mixes. Avoid overworking paint on the canvas. Wrong color temperature causes mud more often than wrong color choice.
Do you need a medium to mix oil paints?
No. Paint straight from the tube is the most stable mix. Add a small amount of linseed oil or odorless mineral spirits only when you need more flow. Less medium means fewer problems.
What is the fat-over-lean rule in oil painting?
Each paint layer must contain more oil than the one below it. Lean layers go first, fat layers last. Ignoring this causes cracking as the painting ages and dries unevenly over time.
How do you mix oil paints to get the right consistency?
Start with paint straight from the tube. If it feels too stiff, add a single drop of linseed oil. For early layers, a small amount of Gamsol thins paint without adding fat-over-lean problems.
What is the best way to mix skin tones in oil paint?
Start with titanium white, yellow ochre, and a small amount of cadmium red light. Avoid black for shadows. Raw umber or a warm-cool complement mix produces far more convincing, natural-looking dark values.
Can you mix oil paints directly on the canvas?
Yes. Wet-into-wet mixing on the canvas is central to alla prima painting. Keep passes to a minimum. More than three or four brushstrokes over the same wet area risks breaking down the paint into mud.
How do you mix a specific color in oil paint?
Identify the hue, value, and temperature you need before mixing. Always add dark pigments into light ones, not the reverse. Test the mix on scrap material first. Wet oil paint reads more saturated than dry paint.
How do you mix greens in oil painting?
Skip the tube green. A cool blue like phthalo plus a cool yellow like hansa produces a clean, vibrant green. For muted landscape greens, ultramarine blue mixed with yellow ochre gives a more natural result.
How do you keep mixed oil paint from drying out between sessions?
Store your glass palette in the freezer. This slows oxidation without freezing the paint solid. Alternatively, a drop of clove oil in a sealed container preserves most mixes overnight or for several days.
What is the difference between mixing with a palette knife vs. a brush?
A palette knife gives a cleaner, more uniform mix with no bristle contamination. It’s better for large quantities. Brushes are fine for small adjustments but leave residue. Use a knife for any mix you need to repeat precisely.
Conclusion
This conclusion is for an article on how to mix oil paints, and the core takeaway is simple: clean color comes from process, not luck.
Understand your pigments. Know whether they are transparent or opaque, high or low in tinting strength, warm or cool in temperature.
Follow the fat-over-lean rule when layering. Keep your palette organized. Limit mixes to three pigments.
Whether you work in layers or finish a painting in a single session, the same principles apply. Color mixing in oils rewards patience and consistency over speed.
Practice your color mixing ratios, test mixes on scrap material, and store leftover paint properly. Small habits compound fast.