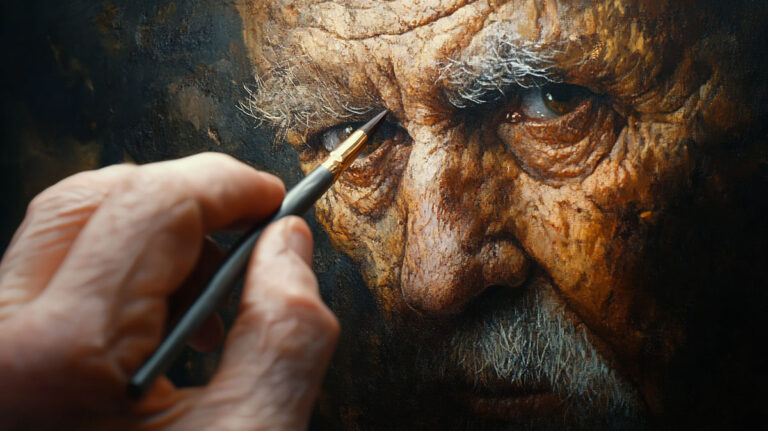
Most oil paintings fail before the first brushstroke of color ever lands on canvas.
The oil painting process is a sequence of stages, each one chemically dependent on the last. Skip the order, and you get cracking, dull patches, or layers that won’t hold.
This guide covers the full workflow, from surface preparation and priming through underpainting, color layering, and final varnish. You’ll learn the fat over lean rule, how drying times actually work, and which steps beginners can simplify without damaging their results.
Whether you’re picking up a brush for the first time or trying to understand why your paint film keeps failing, the process is the same. Get the sequence right, and everything else follows.
What is the Oil Painting Process
The oil painting process is an ordered workflow that starts with surface preparation and ends with a final protective varnish. It is not simply choosing a medium. It is a sequence of decisions that directly affect how long your painting lasts and how it looks 50 years from now.
Skip a step, or do them out of order, and you risk cracking paint, dull patches, or layers that won’t adhere properly. The sequence exists for chemical reasons, not tradition.
The global oil painting materials market was valued at approximately USD 2.8 billion in 2023, projected to reach USD 4.9 billion by 2032 at a 6.1% CAGR (Dataintelo). That kind of growth tells you one thing: more people are painting in oil, and most of them are trying to figure out where to start.
The core stages, in order, are surface prep, priming, underpainting, color layering, and varnishing. Each stage has its own drying requirements before the next begins. Rushing this is where most beginners damage their work.
| Stage | Purpose | Typical Timing |
|---|---|---|
| Surface prep | Protect fibers, control absorption | Before any paint |
| Priming / Ground | Create a stable painting surface | After sizing, 24h dry |
| Underpainting | Establish values and composition | Lean, fast-drying layer |
| Color layers | Build color, texture, and detail | Fat over lean, session by session |
| Varnishing | Protect and unify the surface | Minimum 6-12 months after completion |
Professional artists drive roughly 50% of demand in the oil painting materials segment, according to 24marketreports. But the process they follow is the same one a beginner should learn first.
Materials You Need Before You Start

Getting your materials right before you pick up a brush saves a lot of frustration. The wrong paint consistency, the wrong medium, the wrong surface choice… each one compounds into a harder painting experience.
Artist-level oil paints account for roughly 44% of global consumption compared to student and beginner grades (International Artists Association, 2024). That gap in quality is real. Cheaper paints have lower pigment loads and inconsistent oil content, which makes color mixing harder and drying times less predictable.
Paints and Mediums
Brands worth knowing: Winsor & Newton, Gamblin, and Old Holland are the benchmarks at artist grade. For beginners, Winsor & Newton Winton or Gamblin 1980 offer better consistency than generic brands.
- Linseed oil: slow drying, good for glazing, slightly yellows over time
- Stand oil: very slow, produces enamel-like finish, resists yellowing better than raw linseed
- Gamsol (odorless mineral spirits): the standard solvent for thinning and brush cleaning
- Liquin: alkyd-based medium, speeds drying significantly, useful for multi-session work
Pick one solvent and one medium to start. Adding too many variables early on makes it hard to understand what’s affecting your results.
Surfaces and Brushes
Cotton canvas is affordable and good for learning. Linen canvas is more stable long-term and preferred by professionals. The difference between cotton and linen comes down to texture, tension, and longevity.
Wood panels are rigid, which some painters prefer. They eliminate canvas texture entirely and hold paint differently. Worth trying once you have the basics down.
For brushes, start with a few hog bristle flats and filberts for body work, and a round synthetic for detail. Hog bristle moves thick paint well. Soft synthetics are better for smoother blending.
| Brush Type | Best For |
|---|---|
| Hog bristle flat | Large areas, scrubbing paint in |
| Filbert (hog or synthetic) | General painting, soft edges |
| Round synthetic | Detail work, fine lines |
| Fan brush | Blending, texture effects |
A palette knife is not optional. You’ll use it for mixing on the palette, scraping paint off the canvas, and building texture with impasto.
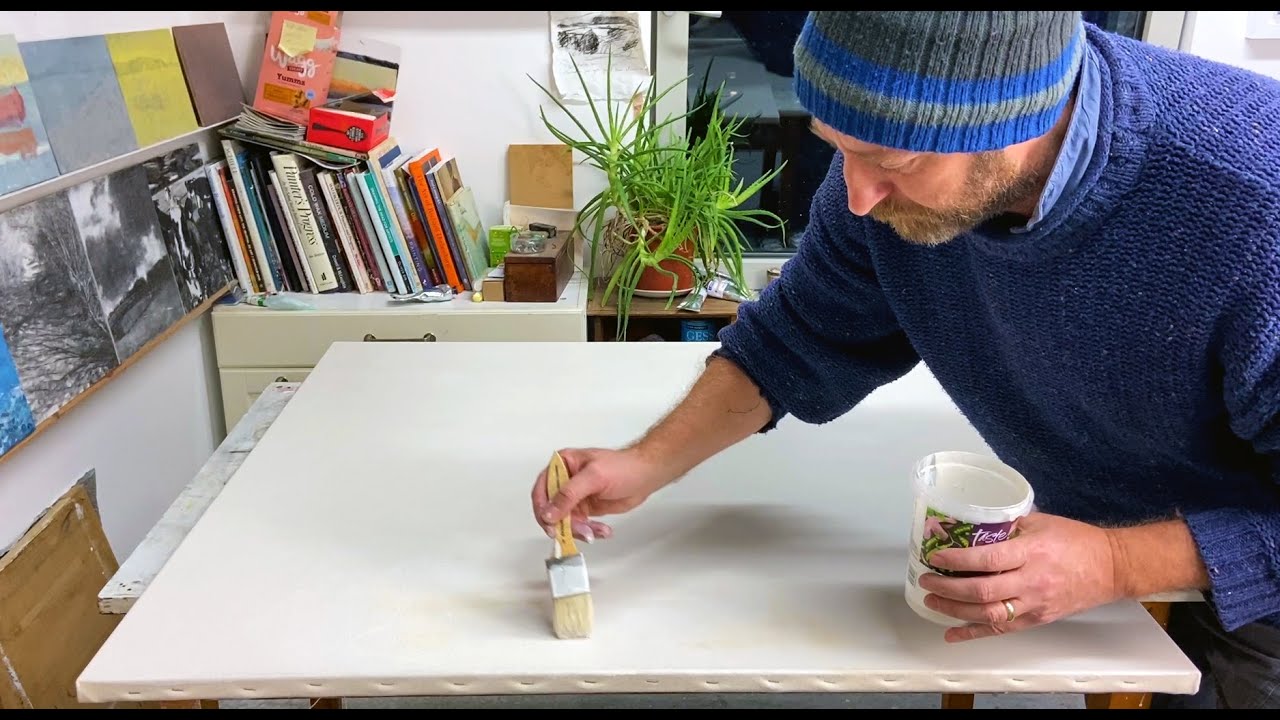
How to Prepare Your Surface
Surface preparation is the least exciting part of the oil painting process. It’s also the part most beginners skip, and it’s why their paintings look dull or start cracking within a few years.
Raw canvas fibers will absorb the oil from your paint directly. That leaves the pigment under-bound, which looks chalky and deteriorates the canvas over time. A properly prepared surface stops that.
Sizing the Canvas
Sizing seals the canvas before any primer goes on. Traditional sizing uses rabbit skin glue (RSG). Modern alternatives use acrylic polymer like Golden GAC 100, which is less fussy and doesn’t require warming.
Key point: if you’re using oil primer rather than acrylic gesso, sizing is not optional. Oil primer applied directly to unsized canvas will eventually rot the fibers.
Two coats of GAC 100 reduce linseed oil penetration significantly, according to Golden Artist Colors technical data. Most painters using acrylic gesso can skip separate sizing since the gesso itself acts as a barrier, but checking your specific product is worth it.
Priming with Gesso or Oil Ground
A survey by ASTM subcommittee researchers found the vast majority of painters prime with acrylic gesso, with only about 7% still using lead-based primer. Acrylic gesso dominates because it works with both oil and acrylic, dries fast, and is non-toxic.
Surface absorption study data (2024) shows that correctly primed surfaces reduce binder absorption by over 65% compared to raw canvas, maintaining color saturation and intended gloss levels (Canvas ETC).
Acrylic gesso gives more tooth and works on cotton, linen, and panel. Oil ground (like Gamblin Oil Painting Ground) gives a smoother, less absorbent surface preferred for reductive techniques and realism work. You can’t use acrylic over oil ground, only oil over oil.
Apply two to four thin coats for oil painting, letting each coat dry fully. Sand lightly between coats with fine sandpaper if you want a smoother surface. Winsor & Newton recommends waiting a minimum of 24 hours before painting on the final coat.
Toning the Ground
An imprimatura is a thin, transparent color wash applied over the dried primer. It eliminates the stark white of the gesso and gives you a mid-tone to work from, making value judgment much easier from the first brushstroke.
Raw umber, burnt sienna, and yellow ochre are the most common choices. Thin the paint heavily with Gamsol so it dries fast and lean before any color work begins.
This is different from a colored ground. A toned ground is thin and transparent. A colored ground is opaque and changes the overall temperature of the painting.
The Underpainting Stage
Underpainting is the structural first layer of the painting. It is where composition, tonal values, and the placement of light and shadow are locked in before any color decisions happen.
Leonardo da Vinci, Rembrandt, Titian, and Jan van Eyck all used underpainting as part of their process. This is not a beginner shortcut. It is how technically rigorous painters have worked for centuries.
Grisaille vs. Monochromatic Underpainting
Grisaille uses shades of gray to build a full tonal study of the painting. It’s the most controlled approach, common in portrait and figurative work.
Monochromatic underpainting (single earth color, not gray) is faster. Raw umber is the standard choice. It dries quickly due to its iron content, sits matte, and is lean enough to follow the fat over lean rule with room to spare. Burnt sienna is popular for warmer paintings. Gamblin recommends raw umber, transparent earth red, and yellow ochre as well-suited underpainting colors.
Ivory black has a high oil content and should be avoided as an underpainting color. Burnt umber is also richer in oil than raw umber, making it a riskier first layer.
Application and Dry Time
Thin the paint to a near-wash consistency using a 50/50 mix of Gamsol and a small amount of linseed oil, or use Gamblin’s recommended 50/50 Galkyd and Gamsol mix. The underpainting should be transparent enough that the toned ground beneath still shows through in lighter areas.
- Block in shadow shapes first, leave lighter areas thin or bare
- Work from dark to light to establish the value structure
- Keep edges loose at this stage. Detail comes later
Let the underpainting dry fully before adding any color layers. With raw umber thinned with Gamsol only, this can be as fast as 24 hours in warm, dry conditions. Add a medium and that extends significantly.
You can also use an acrylic underpainting beneath oil layers. The rule is: oil over acrylic is fine, acrylic over oil is not.
The Fat Over Lean Rule
Fat over lean is the single most important structural rule in oil painting. Break it and your painting will crack. Not immediately, maybe not in five years, but eventually.
“Fat” means more oil content. “Lean” means less. Each layer you add needs to be slightly fatter than the one beneath it. Fatter layers are more flexible when they dry. If a rigid lean layer sits on top of a flexible fat layer, the top layer cracks as the paint film moves over time.
Why It Causes Cracking
Oil paint dries through oxidation, not evaporation. It actually expands slightly, then contracts as the film hardens. A lean layer under a fat layer is fine because the fat layer remains more flexible.
The reverse creates a rigid shell over a more elastic layer. As temperature and humidity change, the layers move at different rates. Eventually the top layer fractures.
Practical breakdown by layer:
- Underpainting: paint thinned with solvent only (leanest)
- First color layer: small amount of medium added, mostly paint
- Middle layers: slightly more medium, less solvent
- Final layers: richer medium, no extra solvent
- Glazes: high medium-to-paint ratio (fattest)
Common Mistakes

Adding Liquin or stand oil to every layer from the start is a common mistake. That makes the first layers fat immediately, leaving nowhere to go in later sessions.
Another one: thinning paint with solvent only in a middle or late layer to make it easier to brush out. Solvent alone removes oil from the paint and makes it too lean. Always extend with a mix of solvent and a binder medium, not solvent alone.
Gamblin specifically flags this: “Extend oil colors with a mixture of solvent and binder, rather than solvent alone. Thinning with only solvent will make oil colors too lean which may prevent proper adhesion and permanence of paint layers.”
Building Color Layers

This is where the painting actually takes shape. Color layers build on the value structure of the underpainting, progressively adding hue, saturation, and detail in each session.
38% of professional painters preferred oil paints over acrylics for gallery and exhibition work in 2023, according to the U.S. Bureau of Labor Statistics. The reason is usually the flexibility of the layering process and the depth of color that builds over multiple sessions.
Alla Prima vs. Indirect Layering
Alla prima (wet-on-wet) means completing the painting in a single session before anything dries. This is how most plein air painters work, and how artists like Sargent approached portraits. Direct, fast, confident. The colors mix on the canvas itself.
Indirect layering means building the painting across multiple dry sessions. Each layer modifies the one beneath it. Glazes, scumbling, and detailed work happen across sessions separated by days or weeks.
Most studio painters use a hybrid. A few direct sessions to establish color and form, then selective glazing and scumbling to adjust and finish.
Glazing

Glazing is applying a thin, transparent layer of paint mixed heavily with a medium over a fully dry layer. It shifts color temperature, deepens shadows, and adds luminosity without covering the work beneath.
Transparent pigments work best for glazing:
- Phthalo blue and green
- Alizarin crimson (though it has lightfastness concerns)
- Burnt sienna, transparent earth red
- Quinacridone magenta and red
Opaque pigments like titanium white or cadmium yellow make poor glazes. They will cloud the layer instead of letting light pass through it. For a deeper look at this technique, oil painting glazing techniques covers the process in full.
Scumbling
Scumbling is the opposite approach. You drag a dry, stiff-bristled brush loaded with opaque or semi-opaque paint lightly over a dry surface, leaving the layer beneath partially visible through the broken coverage.
It’s useful for softening edges, suggesting texture, and creating the kind of atmospheric diffusion you see in fog, skin, or cloth. Rembrandt used scumbling extensively in his later work to create the warm, broken light effects in his portraits.
More on how this interacts with layering: layering and scumbling in oil painting breaks down both approaches side by side.
Wet-into-Wet Blending
Wet-into-wet mixing works well within a single session where the paint is still open. The alla prima method depends on this entirely.
Keep a palette knife handy to mix clean passages on the palette rather than over-working color on the canvas. Over-mixing on canvas is one of the most common causes of muddy, low-chroma color. Mix on the palette, apply with purpose, and leave the stroke alone.
Drying Times and Painting Sessions

Oil paint dries through oxidation, not evaporation. Oxygen reacts with the oil binder and slowly converts it from liquid to solid film, starting at the surface and working inward. Touching-dry is not the same as cured.
Paint that feels dry on the surface can still be soft underneath. Painting over it too soon causes muddy color, wrinkling, or cracking as the lower layer moves while the upper layer locks.
Touch-Dry vs. Fully Cured
Touch-dry means the surface no longer transfers paint to your finger. Fully cured means the paint film has hardened through the full depth of the layer and is chemically stable.
A thin wash or glaze can be touch-dry in 24 to 48 hours. Thick impasto passages can take weeks. The fingernail test is reliable: press gently into the edge of the layer. If it feels firm with no indentation (like hard cheese), it’s ready for the next layer (Art Pembrokeshire, 2024).
Oil paints dry best between 18°C and 24°C. Below 15°C, oxidation slows significantly. A dehumidifier in a humid studio can reduce drying time by up to 40%, according to Art Pembrokeshire.
Pigment Drying Rates
Not all colors dry at the same pace. This matters for session planning and for following the fat over lean rule.
| Drying Speed | Pigments |
|---|---|
| Fast (days) | Raw umber, burnt sienna, cobalt blue, titanium white |
| Medium (1-2 weeks) | Ultramarine blue, yellow ochre, phthalo colors |
| Slow (weeks) | Ivory black, cadmium yellows, alizarin crimson |
Ivory black is notorious for staying soft underneath for weeks while looking dry on the surface. Avoid using it in thick early layers.
Using Alkyd Mediums to Speed Up Sessions
Liquin and Galkyd are alkyd-based mediums that cut drying time to roughly 12-24 hours for medium-thickness layers.
Worth knowing: alkyds change the paint’s handling properties. The paint becomes slightly more fluid and transparent. Use them consistently through the painting, not just in one layer, because mixing alkyd-accelerated layers with non-alkyd layers creates uneven drying rates across the paint film.
Water-mixable oil paints adoption grew by 41% in 2024, offering reduced solvent use as another way to change working time, according to the Art Materials Association. That category is growing fast among painters who want to avoid Gamsol entirely.
Finishing and Varnishing
Varnishing is the final step in the oil painting process. It protects the surface, unifies the sheen across areas that dried to different levels of gloss, and gives the colors their full depth back after drying.
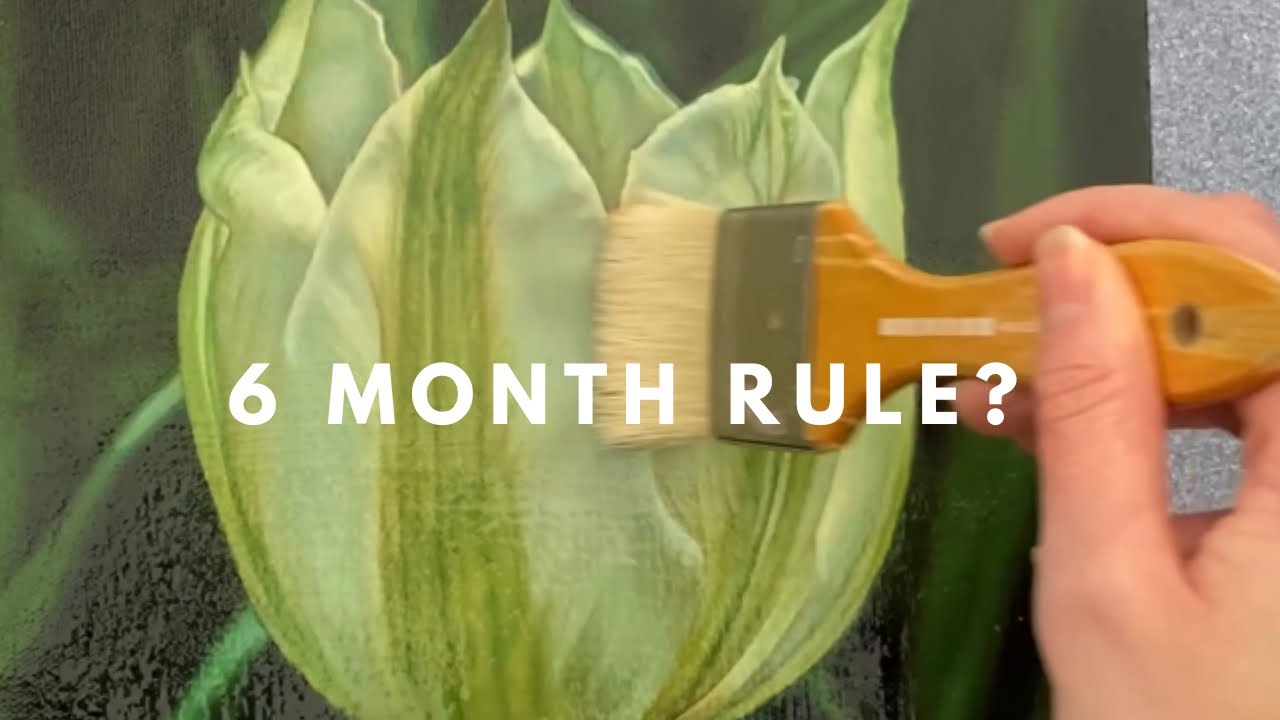
Most painters wrestle with the timing. The traditional rule is 6 to 12 months for full cure before applying final varnish, particularly with damar resin dissolved in turpentine. Applied too soon, damar can bond permanently to the paint film, making future conservation extremely difficult.
Retouch Varnish vs. Final Varnish
Retouch varnish is a very diluted varnish (usually damar or ketone resin) applied while the painting is still in progress or just finished. It temporarily restores color saturation and unifies the surface, allowing the painter to accurately judge values before resuming work.
Final varnish is the protective coat applied once the painting is sufficiently cured. Two main options dominate:
- Damar varnish: traditional, high gloss, tends to yellow over decades, requires strong solvents (turpentine) to remove
- Gamvar (Gamblin): synthetic, water-clear, developed in collaboration with the National Gallery of Art, removable with Gamsol
Gamvar does not chemically crosslink with a freshly dried paint film the way damar can, which is the key conservation advantage. According to Gamblin, a thinly painted work may be ready for Gamvar in as little as 2-3 weeks once the thickest areas are firm to the touch. For guidance on the full process of varnishing an oil painting, timing, brush selection, and application technique all matter.
Application Method
Brush application gives better control than spray for most paintings. Use a wide, soft natural-bristle brush, 2 to 3 inches wide. Apply in very thin coats in one direction.
Work in a dust-free room at room temperature. Prop the painting vertically after varnishing to let it dry without collecting airborne dust.
Gamvar dries in 18 to 24 hours. Damar varnish takes several days. If you’re varnishing for a gallery show before the painting has fully cured, a thin diluted coat of Gamvar (1 part Gamvar to 3-5 parts Gamsol) is a safer bridge than applying it full strength.
Common Problems in the Oil Painting Process
Most technical failures in oil painting are predictable and avoidable. A few of them are not fixable once they’ve set in.
The oil painting material market reached USD 2.34 billion in 2024, with professional artists driving 50% of demand (24marketreports). Even experienced painters run into these problems, usually from rushing sessions or skipping proper preparation.
Sinking In (Dull, Matte Patches)
Sinking in is when the oil from a top layer absorbs into the dry layer beneath, leaving flat, colorless-looking spots. It’s one of the most common issues in multi-layer oil painting.
Cause: too much solvent in upper layers, or an overly absorbent ground.
Fix: oiling out. Apply a thin mixture of stand oil diluted 1:4 with Sansodor or mineral spirits using a soft cloth. Rub gently into the dull areas, wipe excess, and let dry before painting over (Winsor & Newton).
Applying varnish alone will not fix it. Varnish masks the surface gloss but doesn’t replace the missing oil content in the sunken layer.
Cracking
A cracked paint layer cannot be repaired. The only real solution is prevention.
Research by Fuster-Lopez et al. found that selective cracking in oil paintings results from both intrinsic pigment properties and environmental factors, with certain pigment-medium interactions accelerating fracture. Organic yellow pigments mixed into other colors showed particular susceptibility to fine micro-cracks over time.
Prevention:
- Follow fat over lean, every layer
- Avoid thick impasto in early layers
- Let each layer dry fully before adding the next
- Don’t use ivory black in thick underpainting layers
Muddy Color
Muddy color almost always comes from over-mixing on the canvas, not from the paints themselves.
Mix colors thoroughly on the palette before applying. Once a stroke is on the canvas, leave it. Working a stroke back and forth lifts and mixes the layers beneath, reducing chroma and creating gray-brown mud.
Also common: mixing complementary colors too heavily, or painting over a still-wet layer with a contrasting color without enough opacity.
Bleeding and Discoloration
Bleeding happens when oil from the paint migrates into an unsized or poorly primed surface, creating halos of darkened fibers around painted areas.
Key point: this is a surface preparation failure, not a paint failure. Once the oil has penetrated the canvas fibers, it cannot be reversed. The solution is proper sizing and priming before starting.
Oil Painting Process for Beginners vs. Advanced Painters

The same core process applies at every skill level. What changes is the number of layers, the complexity of the mediums, and how tightly each session is controlled.
The NEA reports that 41% of U.S. art schools incorporated oil paints in fine arts curricula in 2023. Most of those programs start students with a simplified 3-stage workflow before introducing indirect layering and glazing.
The Simplified 3-Stage Process for Beginners
You do not need to do every step of the full process to start painting in oil. A workable beginner workflow:
- Stage 1: tone the primed canvas with a thin earth-color wash, let dry
- Stage 2: block in shapes and values in a mid-range color, lean and direct
- Stage 3: add color and detail in a single session (alla prima), or build one clean fat layer on top
This skips the multi-session underpainting and glazing workflow entirely. You’re still following fat over lean (the wash is lean, the final layer is fat), but the structure is simple enough to finish in 1-2 sessions.
Bob Ross built an entire teaching method on this kind of simplified direct approach, painting wet-into-wet on a pre-oiled canvas. The fundamentals of what oil painting is and why it behaves the way it does are worth understanding before adapting any shortcut method to your own work.
Advanced Workflow: Multiple Glaze Sessions
Complex indirect painting works differently. The structure looks more like this:
Session 1: detailed grisaille underpainting in raw umber, full value study.
Sessions 2-3: dead color layer, colors muted and values re-established in thin opaque passes.
Sessions 4+: transparent glazes to build color, scumbling for light, impasto for texture in specific passages.
Johannes Vermeer and Rembrandt both worked this way, building luminous effects through repeated thin layers over carefully planned underpaintings. The painting’s surface has depth because it literally is deep, with multiple transparent layers stacked over a solid value structure. More on how the full range of oil painting techniques fits into this kind of workflow is worth exploring once the basics are solid.
What Beginners Can Skip (and What They Can’t)
| Step | Beginner | Advanced |
|---|---|---|
| Sizing raw canvas | Skip (buy pre-primed) | Do it for linen and panels |
| Full grisaille underpainting | Optional | Standard for indirect painting |
| Glazing | Skip initially | Core technique for color depth |
| Fat over lean | Cannot skip | Cannot skip |
| Final varnish | Recommended | Always |
Fat over lean and proper surface prep cannot be skipped at any level. The rest scales with how much time and complexity you want in your process.
For a practical starting point, preparing the canvas for oil painting correctly is the single most important technical decision a beginner can make before touching paint.
FAQ on Oil Painting Process
What is the oil painting process step by step?
The process runs in order: prepare and prime the surface, apply an underpainting, build color layers following the fat over lean rule, and finish with varnish. Each stage must dry before the next begins. Skipping steps causes cracking and poor adhesion.
What does fat over lean mean in oil painting?
Each paint layer must contain more oil than the one beneath it. Lean layers use more solvent, fat layers more oil medium. Reversing this causes the top layer to crack as the paint film dries and contracts at different rates.
How long should you wait between oil painting layers?
A thin wash can be ready in 24 to 48 hours. Thicker paint takes longer. Use the fingernail test: press gently into the paint edge. If it feels firm with no mark left, the layer is ready for the next session.
Do you need to prime a canvas before oil painting?
Yes. Raw canvas absorbs oil directly from the paint, leaving pigment under-bound and damaging the fibers over time. Apply acrylic gesso or an oil ground in two to four coats and let each coat dry fully before painting.
What is an underpainting in oil painting?
An underpainting is a lean first layer that establishes composition, values, and shadow placement before any color work begins. Raw umber thinned with Gamsol is the standard choice. It dries fast, sits matte, and fits cleanly into the fat over lean structure.
What oil painting mediums should beginners use?
Start with Gamsol as your solvent and linseed oil as your medium. Keep it simple. One solvent, one oil. Adding Liquin speeds drying if needed. Avoid mixing multiple mediums until you understand how each one affects paint consistency and drying time.
How do you fix dull patches in an oil painting?
Dull patches are caused by sinking in, where oil absorbs into the dry layer beneath. Fix it by oiling out: rub a thin mix of stand oil and mineral spirits into the affected area with a soft cloth, wipe excess, and let dry.
When should you varnish an oil painting?
With damar varnish, wait 6 to 12 months for full cure. With Gamvar by Gamblin, you can varnish once the thickest areas are firm to the touch, sometimes in as little as 2 to 3 weeks for thinly painted work.
What is the difference between alla prima and indirect oil painting?
Alla prima completes the painting wet-into-wet in a single session. Indirect painting builds across multiple dry sessions using glazing, scumbling, and layered color. Most studio painters use a hybrid of both, depending on the subject and level of detail required.
What are the most common oil painting problems?
Sinking in, cracking, and muddy color are the three most frequent issues. Sinking in comes from too much solvent in upper layers. Cracking comes from violating fat over lean. Muddy color comes from over-working strokes on the canvas instead of mixing on the palette.
Conclusion
This article on the oil painting process covers everything from gesso priming and imprimatura to glazing, scumbling, and final varnish.
The technical side, fat over lean, pigment drying rates, paint film adhesion, is not optional. Get that structure right and the creative side has room to actually work.
Whether you’re doing a direct alla prima study or building an indirect layered painting across multiple sessions, the same principles apply.
Raw umber underpaintings, linseed oil ratios, Gamvar timing. None of it is complicated once the logic behind it clicks.
Start simple. Follow the sequence. And if something goes wrong, sinking in, cracking, muddy color mixing, you now know exactly why it happened and how to fix it.