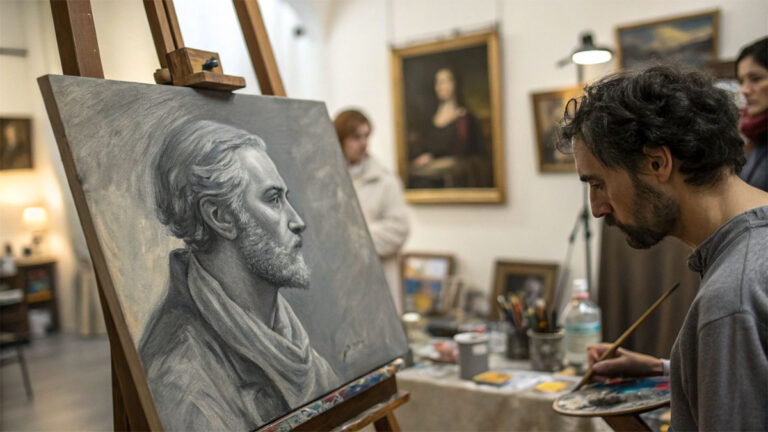
The luminosity in a Rembrandt portrait or a Vermeer interior does not come from a single layer of paint. It comes from stacked transparent films, each one dry before the next goes on.
Oil painting glazing techniques are behind some of the most convincing depth and color richness in the history of painting, and they are fully learnable today with the same principles the Old Masters used.
This guide covers everything from how transparent paint layers work optically, to the mediums that control drying time, to the specific approaches used for portrait painting, fabric, and still life subjects.
You will also find the most common glazing mistakes and exactly how to avoid them.
What is Glazing in Oil Painting

Glazing is the application of thin, transparent layers of oil paint over a fully dried surface. Each layer lets light pass through, reflect off the underlayers, and return to the eye with a depth and inner glow that direct, opaque painting simply cannot replicate.
That’s the short version. The longer one involves centuries of refinement by artists who understood that oil painting behaves unlike any other medium when its transparency is used deliberately.
Glazing is not washing. It is not scumbling. A wash is a diluted, water-based application. Scumbling drags semi-opaque paint over a dry surface, leaving broken coverage. A glaze, by contrast, is a continuous, transparent oil film that sits on the surface and modifies the color beneath it without hiding it.
The optical effect comes down to physics. Light enters the transparent film, hits the opaque layer beneath, and bounces back through the glaze on its way out. That return trip shifts the color the eye sees. Stack several glazes and the effect compounds. This is additive color mixing, not subtractive. The result is a color richness and luminosity that cannot be achieved by mixing pigments on a palette.
Paint transparency is not uniform across all colors. Some pigments are inherently transparent. Others are opaque by nature. Understanding this distinction is the foundation of the technique.
According to the National Endowment for the Arts, 62% of professional artists prefer oil paints for their color vibrancy and blending properties, which makes glazing one of the most widely relevant techniques in the medium.
Glazing vs. Direct Painting
Direct painting, or alla prima, places color in a single session. It’s fast and gestural. Glazing is the opposite approach: slow, deliberate, and built across multiple dried layers.
Neither is better. They solve different problems. Direct painting handles loose, expressive work well. Glazing handles depth, color temperature shifts, and luminosity in ways direct painting cannot.
Key difference: In direct painting, color is mixed before it hits the canvas. In glazing, color is mixed optically on the canvas, layer by layer, after each one dries.
What Glazing is Not
A common mistake: treating any thinned oil paint as a glaze. That’s wrong. Thinning with solvent alone strips the oil binder and leaves a fragile, matte film. That’s a lean wash, not a glaze.
A proper glaze uses an oil or alkyd medium to maintain the paint film’s integrity while reducing opacity. The paint layer must be both transparent and structurally sound.
Opaque pigments like Titanium White or Cadmium Yellow do not become glazes by adding medium. They become thinned opaque paint. The pigment itself determines whether glazing is possible.
How Glazing Works
The mechanics of glazing are not complicated once you understand what light actually does inside a layered paint film.
Light enters the surface of a transparent glaze, travels through the paint film, and strikes the opaque underlayer. It reflects back through the glaze and exits toward the viewer. During that round trip, the glaze absorbs certain wavelengths and lets others pass. The result is a color the viewer sees as richer and more three-dimensional than a single mixed layer would appear.
This is why glazing produces colors that feel lit from within. The light source is literally inside the paint stack, not just bouncing off the surface.
Optical Color Mixing Through Layers
On a palette, mixing blue and yellow makes green. In glazing, a blue glaze over a yellow underpainting also appears green, but the green has a dimension and vibrancy that the palette-mixed version lacks.
Why it looks different: The eye is seeing two separate color events simultaneously. The blue of the glaze and the yellow beneath it interact as light passes through, rather than as pigment particles blended together.
This is the same optical principle behind Pointillism, just applied vertically in depth rather than laterally across a surface.
Drying Time and Layer Dependency
Each glaze layer must be fully dry before the next is applied. Not just surface-dry. Through-dry.
Apply a glaze over wet or tacky paint and the layers mix, lifting the underlayer and destroying the transparency. The whole method depends on a clean separation between dry and wet paint films.
With traditional linseed oil, this can mean days between layers. Alkyd mediums cut that to 24 hours or less. Galkyd (Gamblin) dries in approximately 24 hours for thin layers. Liquin (Winsor & Newton) typically reaches touch-dry in 6 to 24 hours depending on film thickness and ambient conditions.
How the Underpainting Surface Affects Glazing
The quality of the surface beneath a glaze directly determines the quality of the glaze itself. A rough, uneven underpainting creates uneven glaze coverage. Smooth, well-dried underlayers allow glazes to flow evenly and build up cleanly.
This is also why value structure in the underpainting matters so much. The glaze modifies color but rarely transforms value dramatically. If the light and dark relationships are not established before glazing begins, they cannot easily be fixed through glazes alone.
Paints That Work for Glazing
Not every oil paint glazes. The pigment determines this, not the brand or the medium added to it.
Transparent pigments let light pass through the paint film. Opaque pigments block it. Semi-transparent pigments fall in between and can work in glazing, though with less clarity than fully transparent colors. Most tube labels now carry a transparency rating: a filled square means opaque, an empty square means transparent, a half-filled square means semi-transparent.
The oil paints segment held a leading art and craft materials market share of 38.21% within the paints segment in 2024, according to Fortune Business Insights, which reflects just how central oil paint remains across professional and hobbyist work.
Transparent Pigments for Glazing
Reliable transparent colors:
- Burnt Sienna (warm, earthy, excellent for skin tone glazes)
- Phthalo Blue (cool, high-tinting strength, use sparingly)
- Quinacridone Red (clean, brilliant, strong optical mixing)
- Transparent Oxide Red (warm, versatile for shadow glazing)
- Prussian Blue (deep, transparent, good for cool shadow layers)
- Dioxazine Purple (highly transparent, strong tinting strength)
Raw Umber is a good choice for transparent underpainting layers. It’s not fully transparent but dries faster than most earth colors and holds up well under glazes.
Pigments to Avoid
Titanium White: the most opaque pigment in common use. One touch turns any mix chalky and kills transparency entirely.
Cadmium Yellow and Cadmium Red: both opaque. They work beautifully in direct painting but fail completely as glazing colors.
Zinc White is more transparent than Titanium and can be used cautiously in very diluted glazes to cool a tone slightly, but it carries its own risks: it makes the paint film brittle over time.
Student Grade vs. Artist Grade for Glazing
Student grade paints often use fillers and pigment extenders to reduce cost. These additives reduce transparency and increase opacity in colors that should behave as glazes. A Burnt Sienna in a student range is frequently nowhere near as transparent as the same color in an artist grade range.
For glazing specifically, artist grade matters more than in any other oil technique. The transparency ratings on the tube are also less reliable in student ranges. Testing on a white ground before committing to a glaze layer is always worth doing.
Glazing Mediums

A glazing medium does two things: it increases the transparency of the paint, and it maintains a sound, flexible paint film that won’t crack over time. Getting the medium wrong is one of the most common reasons glazing fails.
The choice of medium also affects drying time, finish (matte, satin, or gloss), and how well the glaze layer bonds to the dried surface beneath it. There is no single “best” glazing medium. There are trade-offs with every option.
Fast-drying mediums like Liquin can cut drying time by up to 50% compared to straight linseed oil, according to art materials research, which changes the practical workflow of building multiple glaze layers significantly.
Traditional Oil Mediums
Linseed oil is the classic glazing medium. It increases flow, extends the paint, and produces a rich, slightly warm film. The trade-off is drying time: expect several days between layers, longer in cool or humid conditions. Linseed also yellows over time, which affects pale or cool glazes.
Stand oil is linseed that has been heat-polymerized. It flows more slowly, levels out brush marks, and yellows less than regular linseed. Good for smooth, even glaze layers where brush texture would be a problem.
Walnut oil yellows less than linseed and has a slightly cooler tone. Slower to dry than linseed but preferred by many artists working with pale or cool-toned glazes. Gamblin and M. Graham both produce walnut oil-based paints that work well for glazing.
Alkyd Mediums
Alkyd resins are the modern solution to the slow drying problem in glazing. They produce a strong, flexible film and dramatically reduce the wait time between layers.
| Medium | Drying Time (Thin Layer) | Finish | Best For |
|---|---|---|---|
| Liquin Original (Winsor & Newton) | 6-24 hours | Low-gloss satin | Detail glazing, flexible layering |
| Galkyd (Gamblin) | ~24 hours | Glossy, enamel-like | Fast layer buildup, jewel-like clarity |
| Galkyd Lite (Gamblin) | 1-2 days | Less gloss than Galkyd | Retaining brushstrokes while glazing |
| Gamblin Solvent-Free Gel | 1-2 days | Glossy | Solvent-free workflow, clear glazes |
Liquin dries a bit more slowly than Galkyd, which gives more working time on the palette. Galkyd produces a harder, more enamel-like finish. Neither is better in absolute terms. It depends on the painter’s working pace and the finish they want.
The Fat Over Lean Rule
This is not optional. It is the structural principle that prevents glazed paintings from cracking as they age.
Each successive paint layer must contain more oil than the layer beneath it. Lean layers (less oil, more solvent) go down first. Fat layers (more oil, less solvent) go on top. If a fat layer dries under a lean layer, the fat layer keeps moving slightly while the lean layer above it has already hardened. Cracks follow.
In practical glazing terms: underpaintings are lean. Each glaze layer adds slightly more medium, increasing the oil-to-pigment ratio as you build up the surface. Alkyd mediums sit in the middle of the fat-over-lean spectrum, which is one reason they work so well as glazing mediums.
Damar Varnish in Glazing Mediums
Traditional glazing recipes used Damar varnish mixed with linseed or stand oil and a solvent like turpentine. Damar adds a slight resin body to the glaze, improving adhesion and giving the film a subtle gloss.
A common traditional recipe: 50% odorless mineral spirits, 40% stand oil, 10% Damar varnish. This produces a medium-bodied glaze that levels well and dries in a few days.
Most painters these days use alkyd mediums instead, since they’re more predictable and easier to source. But Damar-based mediums are still worth knowing for anyone working in a traditional or historically accurate approach.
Oil Painting Glazing Techniques

Glazing is not one thing. It’s a family of related methods that each produce a different visual result. Knowing which approach to use for a given problem is what separates controlled glazing from experimental layering.
The oil painting techniques that rely on glazing span from tight realist work to looser, atmospheric painting. The method adapts to the goal.
Wet-into-Dry Glazing
The standard form. A transparent glaze is applied over a fully dried, opaque or semi-opaque underlayer. This is the foundation of the indirect oil painting method used by the Old Masters.
The key is waiting. The underlayer must be completely dry before the glaze goes on. A thin film of transparent paint, brushed out evenly with a soft brush and minimal pressure, lets the underlayer show through completely while shifting the color and adding depth.
Most portrait painters working in a realistic style use wet-into-dry glazing to build skin tones over a grisaille or umber underpainting. The warmth of skin comes from layering warm transparent glazes (Burnt Sienna, Quinacridone Red) over the cooler, value-structured base.
Optical Color Mixing

Rather than mixing two pigments together on the palette, optical mixing places them in separate layers. The eye does the mixing.
What makes it different: Palette-mixed color is physically combined. Optically mixed color retains the character of each pigment separately, which creates a vibrancy that mixed color cannot match.
Titian used this approach extensively in the Venetian glazing technique, building warm and cool layers alternately to produce skin tones with a depth that no single mixed color achieves. The same principle applies today, using modern pigments with better lightfastness and transparency ratings than anything Titian had available.
Toning with a Single Glaze
A single transparent color, applied thinly across the whole canvas or a large area, pulls a composition together. This is tonal glazing used as a unifier rather than a color builder.
Painters use this to:
- Cool down a passage that reads too warm
- Push a background further into distance
- Add a color harmony across disconnected areas
- Knock back an area that is drawing too much attention
A very thin Burnt Umber or Raw Umber glaze over a whole painting can add an aged, unified quality. A cool blue glaze in shadow areas pushes them back and adds atmospheric perspective without repainting anything.
Glazing vs. Scumbling
These two techniques are often confused but produce opposite optical effects.
| Technique | Paint Consistency | Application | Visual Result |
|---|---|---|---|
| Glazing | Transparent, fluid | Over dark or mid-tone layers | Deepens and enriches color |
| Scumbling | Semi-opaque, dry | Dragged over darker layers | Lightens, softens, adds texture |
Glazing works dark over light (the transparent dark glaze modifies the lighter underlayer). Scumbling works light over dark (dry, broken coverage of a lighter color over a darker base). Both are indirect techniques. Both depend on a dry underlayer. They just produce different results and are often used together in the same painting.
Artist Paul Fenniak, whose figurative work demonstrates both techniques, uses scumbling to soften edges in skin and glazing to deepen shadow passages, alternating between the two approaches within the same portrait to build surface complexity.
Building Underpainting for Glazing
The underpainting is not a sketch. It is a working painting, finished in value, that the glazes will then color. If the underpainting is weak, the glazes will not save it. This is where most beginners underestimate the method.
Professional artists drive 50% of demand in the oil painting materials market (24 Market Reports, 2024), and among that group, underpainting preparation is consistently cited as the foundation of any successful layered painting approach.
Grisaille Underpainting
Grisaille is a monochromatic underpainting in gray, built entirely in values from dark to light. The grisaille technique establishes every tonal relationship in the composition before any color is introduced. When glazes go over a completed grisaille, they add color without disrupting the value structure.
This approach is slow. It requires painting the whole composition twice, in a sense. The payoff is complete control: value decisions and color decisions are made separately, which simplifies each one.
Common grisaille pigments:
- Ivory Black and Titanium White (classic, cool-toned)
- Raw Umber and White (warm, fast-drying)
- Lamp Black and White (neutral, even tone)
Verdaccio Underpainting
Verdaccio is a green-gray underpainting used specifically for skin tones. The green in the underpaint complements the warm pinks and reds of skin glazes applied above it, and where the green shows through in shadows, it reads as a cool, realistic shadow tone.
Renaissance painters used verdaccio extensively for portrait work. The greenish cast in the shadows of many 15th and 16th century panel paintings comes directly from verdaccio showing through warm glaze layers above it.
A typical mix: Raw Umber, Ivory Black, and a small amount of Viridian or Phthalo Green. The tone should be a desaturated yellow-green, not a bright or saturated green.
Umber Wash Underpainting
A fast, practical method. Raw Umber thinned with mineral spirits is brushed over the canvas, then wiped back to establish lights and pushed into darks to establish shadows. The whole underpainting dries in a few hours because the lean, solvent-heavy mixture has almost no oil content.
This is the fastest way to get a value-structured surface ready for glazing. The trade-off is less refinement than a full grisaille. But for painters who find grisaille too time-consuming, the umber wash is a solid, historically grounded alternative.
Rembrandt’s workshop relied heavily on umber-based underpaintings. Scientific analysis of his paintings confirms that the broad value structure in many of his works was established with brown earth tones in the first layer, with glazing applied selectively in later stages to build depth in the shadows and add color to mid-tones.
Glazing for Specific Subjects

The core method stays the same across subjects: transparent paint over a dry underlayer. What changes is how many glaze layers are needed, which pigments work best, and where the glaze is applied versus left alone.
Getting this wrong is where most painters stall. Glazing skin is not the same as glazing fabric, and glazing a dark background requires completely different thinking than building luminosity in a focal area.
Skin Tones and Portrait Work
Skin is the most common reason painters turn to glazing. Opaque, directly-mixed flesh paint tends to look chalky or flat, while glazed skin reads as having depth below the surface.
Typical glaze sequence for skin over grisaille:
- First glaze: warm Raw Sienna or diluted Burnt Sienna across the whole face, establishing the base warmth
- Second glaze: Quinacridone Red or Alizarin Crimson in the cheeks, lips, ears, and knuckles
- Third glaze: cool Phthalo Blue or Prussian Blue into the shadows under the chin, eye sockets, temples
- Final corrections: localized warm or cool glazes to adjust specific passages
The warm-cool alternation across layers is what gives glazed portraits their three-dimensional quality. Opaque painting typically handles this in a single layer, which limits the optical complexity.
Caravaggio used bistre (brown tonal underpainting) in his shadow areas and grisaille under his lights, then layered warm flesh glazes selectively across the light passages. The green-gray underpainting shows through in cool shadow areas, giving his skin tones their characteristic depth.
Fabric and Drapery
Dark glaze builds depth in fabric folds.
A transparent Burnt Umber or Dioxazine Purple glaze into the shadowed creases of clothing pushes them back optically without muddying the color. The transparent dark sits below the light passages and creates shadow depth that an opaque dark cannot replicate.
Titian’s approach to fabric: opaque paint in the highlighted areas, transparent glazes building up depth in the mid-tones and shadows. The velvet and satin textures in his paintings come directly from this interplay between dense, opaque lights and luminous, transparent darks.
Backgrounds and Atmospheric Depth
https://www.youtube.com/shorts/VZXeuB-JgVw
A single thin glaze across a background can add aerial perspective without repainting. Cool blue-gray glazes push backgrounds further into the distance. Warm yellow-brown glazes add an aged, unified quality.
This is also how painters correct a background that has come forward too much. Rather than scraping and repainting, a cool, slightly warm-neutralizing glaze can shift the spatial relationship between the background and the focal subject.
Vermeer used ultramarine glazes selectively in fabric and background passages. The Rijksmuseum’s technical analysis of “The Milkmaid” confirms lapis lazuli (natural ultramarine) glazed over a black-and-white underpainting in the blue cloth, which produces the gem-like depth the painting is known for.
Still Life: Reflective Surfaces and Color Saturation
Glazing is particularly effective for glass, ceramic, and fruit in still life work. These subjects require both depth and saturation, and glazing delivers both without the paint surface becoming opaque and dull.
For reflective objects, the approach is layered glazes in the mid-tones and shadow areas, with opaque light passages applied last. The impasto technique on highlights sits over the transparent glaze layers, creating a push-pull effect where the thick, opaque highlights visually advance over the deeper, transparent shadows.
A Phthalo Blue glaze over a dark gray underpainting in the shadow of a glass vessel produces a depth and transparency that suggests the glass surface rather than just describing it. Direct painting alone rarely achieves that effect convincingly.
Common Glazing Mistakes
Most glazing failures come down to three things: impatience, the wrong medium ratio, or misunderstanding what transparent actually means in practice.
A 2023 art survey found that 67% of new painters made mistakes from overworking wet paint, a problem that surfaces directly in glazing when painters apply a second layer too soon and lift or contaminate the glaze beneath it.
Glazing Over Undried Paint
The most common mistake. Full stop.
The underlayer must be through-dry, not just surface-dry. A surface that feels dry to the touch can still have wet paint beneath it, especially in thick passages. Applying a glaze over a semi-dry surface lifts the underlayer and mixes it into the glaze, producing a muddy, contaminated layer with no transparency.
With linseed oil, expect 3-7 days minimum between glazing layers on any passage that was painted with more than a thin film. With Liquin or Galkyd, that drops to 24-48 hours for thin layers, but thick underpaintings still need longer.
Too Much Medium
Excess medium creates: a greasy, slow-drying surface that attracts dust, a film that yellows faster as it ages, and a layer that can crack as it cures unevenly.
A glaze should be transparent because the paint layer is thin, not because it has been diluted with large amounts of oil. The medium-to-paint ratio matters. Experienced painters use just enough medium to improve flow, not to make the paint “runnier.”
Yellowing from excess linseed-heavy glazes can become visible within a year in some cases, particularly in passages stored away from light. Stand oil yellows less than regular linseed and is a better long-term choice for pale or cool glaze layers.
Opaque Pigments Applied as Glazes
Titanium White added to any glaze ruins it. Cadmium colors used as glazes produce a thinned opaque layer, not a transparent one. This is one of those rules that looks obvious but catches painters repeatedly.
The fix is simple: check the transparency rating on the tube before mixing any color into a glaze. If it shows a filled square (opaque), it does not belong in a glazing layer. Period.
Ignoring Fat Over Lean
Cracks. This is what happens.
A lean glaze applied over a fat layer dries faster than the layer beneath it. The slow-drying fat layer beneath keeps moving while the lean glaze above has already hardened. The result is visible cracking, sometimes within months of finishing the painting.
Each successive glaze should contain a slightly higher ratio of oil or medium. Alkyd mediums (Liquin, Galkyd) naturally fall in the middle of the fat-over-lean spectrum and are generally safer than straight linseed oil for this reason.
Over-Glazing
Too many glaze layers, especially dark ones, drive a painting into a muddy, lifeless darkness that loses all the luminosity glazing was supposed to create.
Signs you’ve gone too far:
- The painting looks darker overall than intended
- Shadow areas have lost distinction from mid-tones
- The surface has become slick and paint no longer adheres cleanly
The practical limit varies by painting, but most portrait painters work with 4-8 glaze layers total before the surface becomes difficult to work on. After that, the enamel-like surface resists further paint adhesion and corrections become tricky.
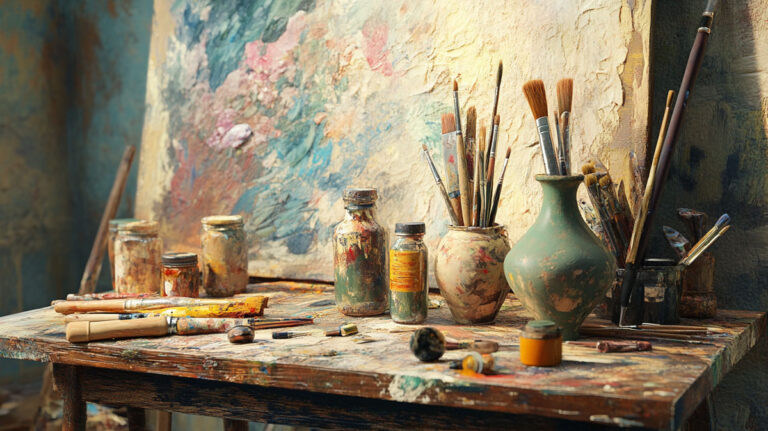
Tools and Surfaces for Glazing
The wrong brush ruins a glaze layer. The wrong surface makes the whole process harder. These choices matter more in glazing than in almost any other oil technique, precisely because the method relies on thin, controlled paint application.
According to a Trekell art materials survey, over 60% of oil painters in the US used hog bristle brushes in 2023. For glazing specifically, that’s the wrong choice. Hog bristle brushes are built for moving thick paint, not for applying transparent films.
Brushes for Glazing
Soft brushes only. Stiff bristles drag and streak a glaze layer, create uneven coverage, and risk scratching or lifting the underlayer.
Best options:
- Kolinsky sable: the gold standard for smooth glaze application, expensive but worth it for portrait and figure work
- Synthetic sable equivalents (Da Vinci Colineo, Winsor & Newton Monarch): good performance, more affordable, easier to clean
- Soft flat brushes: for spreading glazes across broad areas evenly
- Fan brushes: useful for blending glaze edges and creating seamless transitions
About 60% of new painters now choose synthetic brushes for affordability and easy care, according to the same Trekell data. For glazing, high-quality synthetics perform comparably to natural sable in most situations.
Surfaces: Canvas, Linen, and Panel
Each surface holds glazes differently. This affects both how the glaze spreads and how it looks when dry.
| Surface | Texture | Glaze Behavior | Best For |
|---|---|---|---|
| Linen (oil-primed) | Fine weave | Spreads evenly, pools slightly in weave | Portrait, figure, detailed work |
| Cotton canvas (acrylic-primed) | Medium weave | More absorption, glaze sinks in slightly | Landscape, looser glazing approaches |
| Wood panel (oil-primed) | Smooth | Very even coverage, no texture interference | Tight realism, Old Master approaches |
Oil-primed vs. acrylic-primed: Oil-primed surfaces are non-absorbent, which means the glaze sits on the surface and can be moved and adjusted for longer. Acrylic-primed surfaces absorb slightly, which means the glaze sets faster and is harder to rework once applied. Both work. The choice depends on how much working time you need.
Palette Knives and Glaze Mixing

Palette knives belong in the mixing process, not the application. Mixing a glaze with a brush introduces air bubbles and uneven pigment distribution. A palette knife gives a clean, well-integrated mix every time.
The only time a palette knife touches a glazed surface is for corrective scraping if a glaze layer is still wet and has gone wrong. In that case, a flexible painting knife can cleanly remove the whole glaze without damaging the underlayer, allowing a fresh start once the surface re-dries.
Artists like Rembrandt van Rijn and Johannes Vermeer built their multi-layer painting processes on the same fundamental principle: controlled tools, clean separation between layers, and patient attention to what each material does. The chiaroscuro effects in Rembrandt’s portraits and the soft luminosity in Vermeer’s interiors both depend on these same conditions being met consistently across many sessions.
FAQ on Oil Painting Glazing Techniques
What is glazing in oil painting?
Glazing is the application of thin, transparent oil paint layers over a fully dried surface. Light passes through each layer, reflects off the underlayer, and returns to the eye as deeper, more luminous color than any single mixed paint layer can produce.
What is the difference between glazing and scumbling?
Glazing applies a transparent dark film over a lighter underlayer, deepening color and adding depth. Scumbling drags semi-opaque light paint over a darker surface, softening and lightening it. Opposite optical effects. Both depend on a dry underlayer.
What medium should I use for oil painting glazing?
Alkyd mediums like Liquin (Winsor & Newton) or Galkyd (Gamblin) are the most practical. They speed drying to 6-24 hours and maintain a strong paint film. Traditional options include linseed oil, stand oil, and walnut oil, which dry much slower.
Which oil paints are best for glazing?
Only transparent pigments work. Burnt Sienna, Phthalo Blue, Quinacridone Red, Dioxazine Purple, and Transparent Oxide Red are reliable choices. Avoid Titanium White and Cadmium colors entirely. Check the tube’s transparency rating before mixing any glaze.
How long should I wait between glaze layers?
With linseed oil, wait 3-7 days minimum. With Liquin or Galkyd, 24-48 hours is usually enough for thin layers. Thick underpaintings need longer regardless of medium. Glazing over a semi-dry surface lifts the underlayer and kills transparency.
What is the fat over lean rule in glazing?
Each successive paint layer must contain more oil than the one beneath it. Lean layers (less oil) go first. Fatter layers follow on top. Reversing this causes the upper layer to dry before the lower one finishes moving, which leads to cracking.
Can I glaze over an acrylic underpainting?
Yes. Oil paint bonds to a fully cured acrylic surface. The acrylic layer must be completely dry and ideally primed with an oil-compatible ground. Many painters use a fast-drying acrylic grisaille as the base layer before switching to oil glazes.
Why does my glaze look muddy instead of transparent?
Usually one of three causes: the underlayer was not fully dry, an opaque pigment was used, or too much medium diluted the paint film unevenly. Strip the glaze while wet with a palette knife and start again once the surface re-dries.
Did the Old Masters really use glazing?
Yes, extensively. Titian built skin tones through alternating warm and cool glaze layers. Rembrandt used dark transparent glazes to deepen shadow passages. Vermeer applied ultramarine glazes over black-and-white underpaintings to create his characteristic gem-like fabric colors.
Is glazing suitable for beginners?
The method is straightforward but requires patience. Beginners often struggle with waiting for layers to dry fully. Starting with a simple umber underpainting and one or two transparent glaze layers is enough to learn the optical principle before adding complexity.
Conclusion
This article on oil painting glazing techniques has covered the full process, from choosing transparent pigments and mixing the right glazing medium, to building a solid underpainting and applying each layer with patience.
The fat-over-lean rule, proper drying time, and soft brushes are not optional details. They determine whether the paint film holds up over years or starts cracking within months.
Titian, Rembrandt, and Vermeer used indirect painting methods because layered transparent color produces optical depth that direct mixing simply cannot replicate.
The same is true today. Whether you are working on portrait painting or still life, glazing gives you control over color saturation, color temperature, and luminosity that no other technique matches.