Most people pick up a brush, put oil paint on canvas, and wonder why the result looks nothing like what they had in mind.
The gap is almost always technique. Not talent.
Learning oil painting techniques is what turns paint consistency, layer order, and medium selection from sources of frustration into tools you actually control. From alla prima wet-on-wet to glazing, impasto, and the fat over lean rule, each method solves a specific problem.
This guide covers the core techniques used by painters from the Old Masters through to working artists today, with the practical detail you need to apply them.
What Are Oil Painting Techniques
Oil painting techniques are specific methods for applying, layering, or manipulating oil-based pigments on a surface to achieve a desired visual result.
Two paintings can both use oil on canvas and look nothing alike. That difference comes down to technique.
Techniques vary by how paint is applied (brush vs. palette knife), the consistency of the paint (thick vs. thin), the order of layers, drying time between sessions, and the medium mixed in. Change one of those variables and you change the character of the entire painting.
A single painting rarely relies on just one method. Most finished works combine several techniques across different stages, from the first toned ground all the way to the final glaze or varnish.
How techniques differ from painting styles
Technique and painting style are not the same thing. Style is visual and conceptual. Technique is procedural.
Impressionist painters and photorealists both used impasto at different points. Realist painters often used glazing. Technique belongs to any style that finds it useful.
| Technique Type | Primary Variable | Examples |
|---|---|---|
| Application method | Tool and pressure | Impasto, palette knife, dry brush |
| Layering method | Layer order, drying time | Glazing, scumbling, alla prima |
| Ground preparation | Surface and base color | Grisaille, imprimatura |
| Medium-based | Paint consistency and drying | Fat over lean, solvent wash |
The global oil painting material market was valued at approximately $2.8 billion in 2023 and is projected to reach $4.9 billion by 2032, according to Dataintelo. That growth reflects sustained interest in oil painting across professional, student, and hobbyist segments worldwide.
Professional artists account for roughly 38% of preference for oil paint over acrylics for gallery and exhibition work, per the U.S. Bureau of Labor Statistics (2023).
Alla Prima (Wet-on-Wet Painting)

Alla prima is an Italian phrase meaning “at once.” Paint is applied to a still-wet surface, and the entire piece is finished before the first layers dry.
No waiting. No separate drying sessions. Just continuous, direct painting from start to finish.
How alla prima works
The technique works because oil paint stays workable for hours, sometimes days, depending on the medium used and paint thickness. That open time is what makes wet-on-wet blending physically possible.
Key characteristics:
- All layers applied in a single session (or across multiple sessions before any layer dries)
- Color mixing happens both on the palette and directly on the canvas
- Brush marks stay visible, adding energy to the surface
- Works best on smaller canvases where completion time is manageable
The technique dates to 16th-century Venetian painters like Titian. It gained wider adoption after commercial tube paints became available in the mid-19th century, which made it practical to paint outdoors.
John Singer Sargent is one of the most studied examples of alla prima in portraiture. His brushwork is confident, loaded, and rarely corrected. That directness is the defining character of the method.
Where alla prima fits in practice
Best suited for: plein air landscapes, portrait studies, smaller compositional sketches.
Less suited for: large complex compositions, work requiring fine detail over multiple sessions, paintings where tonal control through glazing is the goal.
Artists sometimes use a walnut oil or safflower oil-based paint (like M. Graham) to extend open time. Adding poppy oil slows drying even further, keeping the surface workable longer. Your mileage will vary depending on studio temperature and humidity.
One practical issue worth knowing: once you have a thick wet layer down, applying more paint over it gets tricky. The existing paint will pick up and mix with new applications unless you use a light, confident stroke and don’t overwork it.
Glazing

Oil painting glazing is the process of applying thin, transparent layers of paint over a thoroughly dried base. Each glaze changes the color or tone of what sits below it without covering it up.
The result is a luminosity that straight opaque paint simply cannot replicate.
The optical mechanism behind glazing
When light hits a glazed surface, it passes through the transparent paint layer, reflects off the opaque underpainting below, and bounces back through the glaze again. That double pass changes how the color reads. The effect is sometimes compared to stained glass.
The thicker the glaze, the more light bends. Too thick and the layer turns cloudy. There’s a point of diminishing returns that takes practice to find.
Common glazing pigments (transparent):
- Alizarin Crimson
- Ultramarine Blue
- Viridian Green
- Yellow Ochre (semi-transparent)
Pigments to avoid in glazes: Titanium White, Cadmium colors, and other opaque pigments. They block light rather than filter it.
Old Masters and glazing

Rembrandt used glazing extensively to deepen shadows and build contrast in skin and clothing. National Gallery scientific analyses found that his glazing medium was primarily linseed oil, sometimes heat-bodied stand oil, with no exotic resins despite decades of speculation to the contrary.
Vermeer employed subtle glazes especially in skin tones. His layers were so fine that scholars have described the effect as an inner glow. The translucency in works like “Girl with a Pearl Earring” comes directly from this stacked-glaze approach.
Glazing originated in northern Europe partly for practical reasons. Cold, damp conditions meant thin paint layers dried more reliably than thick ones, and artists lacked the range of bright pigments available today. Glazing let them mix colors optically that they couldn’t produce any other way.
Medium selection for glazing
| Medium | Drying Speed | Notes |
|---|---|---|
| Linseed oil | Moderate | Yellows slightly over time; good flow |
| Stand oil | Slow | Self-leveling, excellent for smooth glazes |
| Liquin (Winsor & Newton) | Fast | Alkyd-based; good for layered work on a schedule |
| Walnut or safflower oil | Moderate-slow | Less yellowing than linseed; preferred for light colors |
The fat over lean rule applies directly here. Every glaze layer sits over a leaner layer below. That means your underpainting should be thinned with solvent, not oil. Reverse the order and you risk cracking as the painting ages.
Impasto
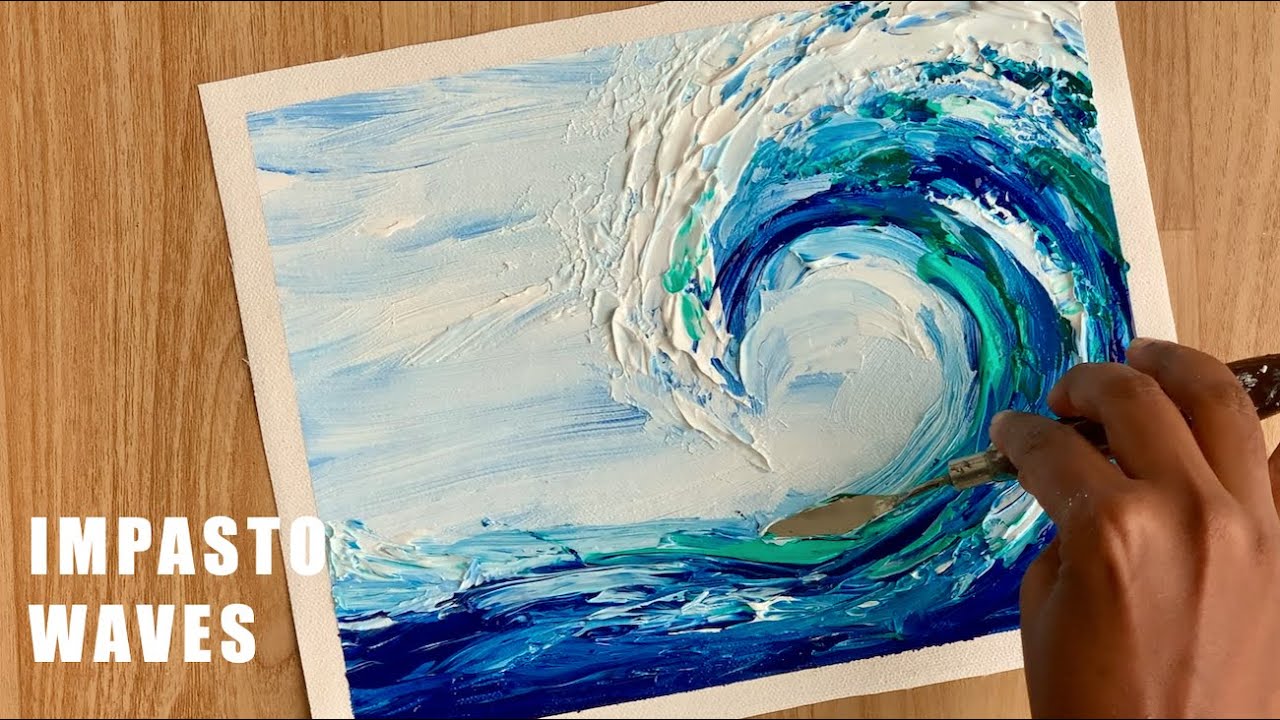
Impasto is the application of paint in thick, textured layers that stand visibly off the canvas surface. Brush marks and palette knife ridges are left intentional and intact.
It’s the opposite of smooth. That’s the point.
Tools and results
A palette knife and a stiff hog bristle brush produce very different impasto surfaces. The knife creates sharp ridges and flat planes. The brush leaves directional strokes with more organic variation. Most painters use both in the same piece.
Palette knife impasto: bold, geometric, sculptural. Good for rock faces, water surfaces, and abstract passages.
Brush impasto: more textural variation, softer edges between thick and thin areas. Better for foliage, hair, or complex surface detail.
Van Gogh is the most recognizable example of impasto at full intensity. His visible, directional brushwork in works like “The Starry Night” wasn’t incidental. It was the content. The physical movement of the paint carries the emotional weight of the image.
Lucian Freud used thick, loaded bristle brushwork to build up flesh tones in his portraits. The paint surface itself reads as skin.
Technical considerations
Thick paint takes much longer to dry than thin paint. A heavily impasto layer can take weeks or months to cure fully through its entire depth.
Two risks to know:
- Cracking: Paint dries from the outside in. Very thick, oil-rich layers can crack as the surface dries faster than the interior. Keeping oil medium additions moderate reduces this risk.
- Sinking: If impasto is applied over an absorbent layer without enough binder, the paint can sink and lose its surface sheen unevenly.
Many painters combine impasto with smoother underlayers for contrast. The textured areas read as closer to the viewer, while smooth transitions recede. This creates depth without relying entirely on color temperature or value shifts.
Underpainting (Grisaille and Imprimatura)

An underpainting is a preparatory layer applied before color. It maps out the composition, establishes tonal value, and gives subsequent layers something structured to build on.
There are two main approaches, and they serve different purposes.
Grisaille

Grisaille is a full monochrome underpainting, usually in neutral gray or warm brown. It establishes the complete tonal structure of the painting before any color is introduced.
Once dry, color glazes are layered over the grisaille, and the underlying value structure carries through each transparent glaze. The result is a painting where tone and color are built separately rather than simultaneously.
This is how many classical and academic realist painters worked. The value problem is solved first. Then color is applied as a secondary consideration.
Imprimatura
An imprimatura is a thin toned wash, not a full tonal rendering. It eliminates the white of the canvas and establishes a mid-tone ground to paint against.
Working against a toned ground rather than a white canvas has a practical effect: it’s much easier to judge color and value relationships. White canvas makes everything look darker than it is. A mid-tone ground lets you add both lights and darks from the start.
Common imprimatura colors: Raw Umber, Burnt Sienna, Yellow Ochre, or neutral gray. The choice affects color temperature across the whole painting.
| Underpainting Type | What It Does | Best For |
|---|---|---|
| Grisaille | Full tonal map in monochrome | Layered glazing work, classical realism |
| Imprimatura | Toned ground, eliminates white | Direct painting, alla prima, portrait work |
| Dead coloring | Rough color block-in, muted tones | Multi-session studio paintings |
Took me a while to understand that the choice of underpainting type commits you to a whole sequence of decisions downstream. A grisaille pushes you toward a glazing approach. An imprimatura suits direct painting. They’re not interchangeable starting points.
Scumbling

Scumbling is the application of semi-opaque or opaque paint dragged loosely over a dried layer below, leaving parts of the underlying surface visible through broken coverage.
It’s basically the inverse of glazing. Where glazing adds dark over light through transparent layers, scumbling drags light over dark through opaque or semi-opaque ones.
How scumbling works in practice
The brush is loaded with a small amount of paint, then dragged or scrubbed lightly across the surface. The texture of the layer below catches the paint on its peaks, while recesses remain exposed. The result is a broken, uneven coverage that reads differently from either a flat opaque layer or a transparent glaze.
Typical applications:
- Atmospheric effects in skies (pale over blue, creating haze)
- Foliage edges where hard outlines would look stiff
- Fabric highlights dragged over a dried mid-tone
- Skin tones where warmth needs to show through a cooler layer
Leonardo da Vinci’s sfumato technique involves a related principle: barely-there transitions between tones, achieved through very light, soft applications over dried layers. Whether pure sfumato counts as scumbling depends on who you ask, but the underlying logic (soft, dry application over dry paint) is shared.
Scumbling vs. glazing at a glance
Glazing: transparent, adds dark or color shift over light, requires full drying between layers.
Scumbling: semi-opaque to opaque, adds light over dark, dry brush application, broken surface coverage.
Most painters who use one use both. A glazed shadow next to a scumbled highlight creates strong contrast in painting that holds up across viewing distances. The combination is especially useful in landscape painting where atmospheric depth depends on layered light and shadow interactions.
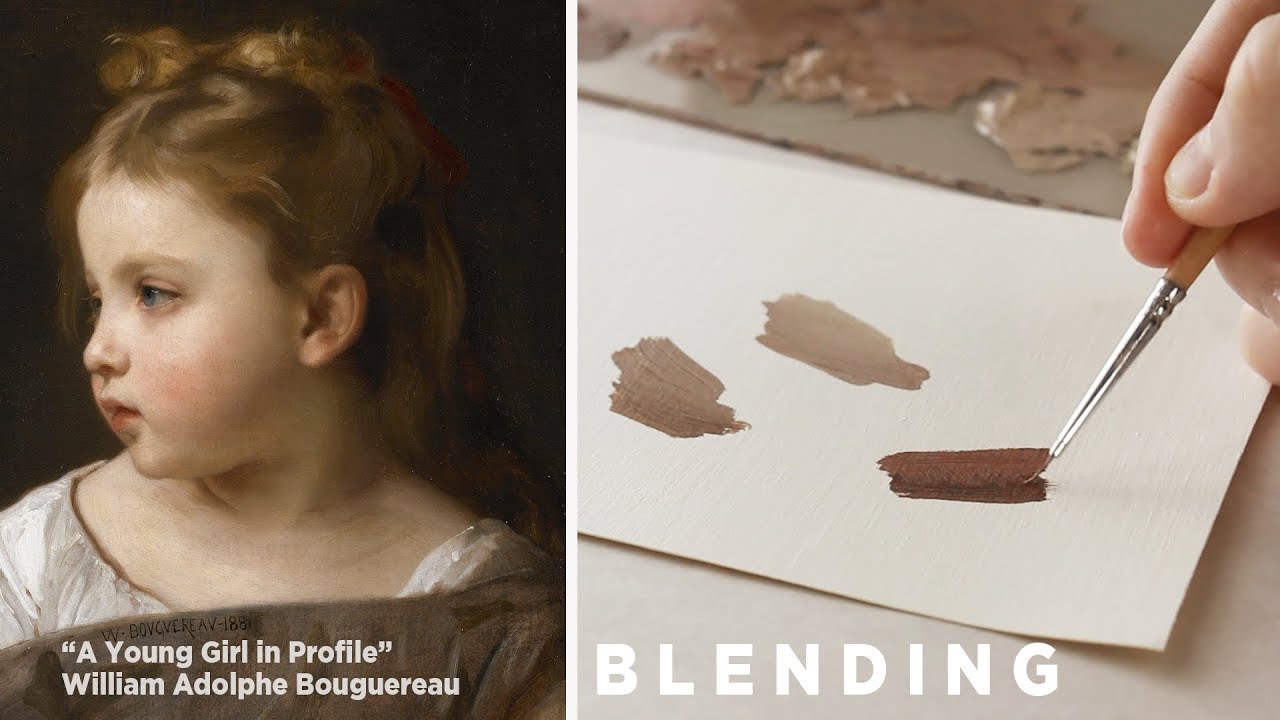
Blending and Soft Edge Techniques

Oil paint’s open time is what separates it from every other painting medium when it comes to blending. Acrylic painters fight the clock. Oil painters don’t have that problem.
Drying time ranges from two days to a week depending on oil painting mediums, paint thickness, and studio temperature, according to Fine Art Tutorials. That window is what makes smooth color transitions physically achievable.
Soft edges vs. hard edges
Not every edge in a painting should be soft. Edge control is what directs a viewer’s attention.
- Hard edges pull the eye toward them and suggest sharpness or proximity
- Soft edges recede and create atmospheric depth
- Lost edges disappear entirely, merging shapes with their surroundings
Leonardo da Vinci’s sfumato technique is the most studied example of lost-edge painting. Layers so thin and so gradual that no defined transition exists between light and shadow. The Mona Lisa’s expression reads differently depending on viewing angle partly because of this.
John Singer Sargent regularly used hard and soft edges within the same portrait, keeping detail at the eyes and losing form at the collar or hair.
Tools for blending
Fan brush: good for sky gradients and soft hair; easy to overuse and lose texture.
Soft filbert brush: the most versatile blending tool for portraits and figure work.
Dry blending: a clean, dry brush passed lightly over wet paint to merge two adjacent colors without fully mixing them.
Over-blending is the most common mistake. When you soften every edge, the painting loses contrast and reads flat at any distance past a meter. Leave the hard edges alone where you want focus.
Fat Over Lean Rule

The fat over lean rule is the structural principle that governs how oil paint layers interact over decades. Get it wrong and the damage shows up years later, not during the painting process.
The rule: each successive layer must contain more oil (fat) than the layer below it (lean). Lean layers dry fast. Fat layers dry slow. Applying a slow-drying layer under a fast-drying one causes the surface to harden before the interior, creating stress and cracking.
Why cracking happens without it
Oil paint dries through oxidation, not evaporation. The surface skin forms first. If the layer below is still drying and contracting while the top has already hardened, tension builds across the paint film.
Winsor & Newton describes three linked rules that work together: fat over lean, thick over thin, and slow-drying over fast-drying. Violate any one of them and the risk of cracking or delamination increases.
The practical workflow looks like this:
- Layer 1 (lean): paint thinned with odorless mineral spirits or turpentine, no oil added
- Layer 2: paint straight from the tube, little or no medium
- Layer 3+ (fat): paint mixed with linseed oil, stand oil, or Liquin
Where beginners go wrong
Most beginners ignore fat over lean entirely because nothing breaks immediately. Cracking in oil paintings typically appears between 5 and 20 years after completion, long after the error is unfixable.
Alkyd mediums like Gamblin’s Galkyd add oil to the paint mix and accelerate drying, which makes them technically fat but fast. Using them in lower layers is generally acceptable. Using them over thick linseed-rich paint is not, per Natural Pigments technical guidance.
One rule of thumb: if you’re adding a medium, add less than 25% to any given layer. More than that and the paint becomes too fluid to control and takes longer to set properly.
Mediums and Their Effect on Technique
The medium you add to oil paint changes how it handles, how fast it dries, and what the finished surface looks like. Different techniques need different mediums. Using the wrong one in the wrong context creates real problems.
According to Jackson’s Art Blog, linseed oil has been the dominant painting medium since roughly the 1400s, valued for its versatility in both blending and glazing applications.
Traditional oil mediums
Three mediums dominate classical and realist workflows.
Linseed oil: the most general-purpose choice. Increases flow, adds gloss, strengthens the paint film. Yellows slightly in dark storage but bleaches back with light exposure.
Stand oil: thick, self-leveling, ideal for smooth glazes. Made from linseed oil that has been heat-processed to increase viscosity. Brush marks level out as it dries.
Walnut and safflower oils: slower drying than linseed, less prone to yellowing. Preferred for light colors and whites where linseed’s slight yellow cast would shift the hue.
Alkyd mediums
Alkyd resins are a modern development that changed how many painters approach layered work.
Liquin Original (Winsor & Newton) cuts drying time to hours rather than days and improves paint flow for glazing and detail work. Gamblin’s Galkyd functions similarly with a slightly different consistency. Both are widely used by contemporary plein air and studio painters.
The tradeoff: alkyd mediums have a noticeable smell, create a glossy finish, and can become overly slick if overused. Adding more than 15-20% to any paint mixture tends to make the paint unmanageable and harder to control, per Chuck Black Art.
Solvents and their role
Thin, not bind. Solvents like turpentine and odorless mineral spirits reduce paint viscosity by diluting the oil in the paint. The solvent evaporates and leaves behind a weaker, more porous film than oil-rich paint.
That is exactly what you want in early lean layers. It creates a faster-drying, absorbent base that subsequent fat layers can grip.
Turpentine has a strong smell. Most painters today work with odorless mineral spirits (OMS), which are safer in enclosed studio spaces and handle identically for thinning purposes.
| Medium | Effect on Drying | Best Use |
|---|---|---|
| Linseed oil | Moderate (slows) | General purpose, all layers |
| Stand oil | Slow | Final glazes, smooth surfaces |
| Liquin / Galkyd | Fast (hours) | Layered glazing, plein air |
| OMS / turpentine | Very fast | Lean underpainting layers only |
Painting Surfaces and Their Influence on Technique
The surface you paint on affects how paint behaves from the first brushstroke. Technique choices that work on one ground can fail completely on another.
High-quality linen canvas demonstrates 30-50% greater tensile strength than cotton duck canvas of equivalent weight, according to material testing following ASTM D5034 protocols, per Canvas ETC. That structural difference matters for large-scale work and heavily impasto surfaces.
Linen vs. cotton canvas
Winsor & Newton describes linen’s key advantage as dimensional stability: its warp and weft threads weigh the same, making it less prone to expansion and contraction with humidity changes.
Cotton is more elastic and stretches easily. That suits beginners and plein air painters who want a practical, affordable surface. It becomes a liability on very large paintings where the canvas can slacken under heavy paint layers over time.
| Surface | Best For | Weakness |
|---|---|---|
| Cotton canvas | Studies, beginners, plein air | Less archival, can slacken |
| Linen canvas | Exhibition work, glazing, fine detail | Cost, humidity-sensitive |
| Wood panel | Smooth glazing, detailed realism | Weight, prone to warping |
Gamblin, Williamsburg, and Old Holland paints behave differently across these surfaces. Gamblin’s higher oil content gives it a longer open time that suits canvas. Old Holland’s stiffer, more concentrated paints handle well on smooth panels where impasto ridges stay crisp.
Priming and gesso
Priming changes how gesso interacts with the paint layers above it. The two main options are acrylic gesso and oil-based primer, and they are not interchangeable for all purposes.
Acrylic gesso is more absorbent and dries fast. Early paint layers sink into it, which can leave a dull, chalky appearance unless the surface is re-oiled before painting (a process called “oiling out”).
Oil primer creates a less absorbent surface with a slightly slick feel. Paint slides more freely, colors stay vivid, and glazing is easier. Traditional lead white oil primer is still considered the benchmark by many classical painters, though it is harder to source and requires longer drying time before use.
Toned grounds vs. white grounds
A white ground forces the painter to build every tone from the ground up. Every shadow needs paint. Nothing comes for free.
A toned ground gives a free mid-tone that shows through in any unpainted area. Lights and darks are built in both directions from the start, which makes painting faster and color temperature relationships easier to judge.
Most classical portrait painters toned their grounds warm (Raw Umber, Burnt Sienna). Cool toned grounds suit landscape painting and nighttime scenes where a warm ground would fight the dominant color temperature of the image.
The canvas preparation process sets conditions for every technique that follows. Choosing the wrong ground for the intended painting method creates friction at every subsequent stage.
FAQ on Oil Painting Techniques
What is the fat over lean rule in oil painting?
Each paint layer must contain more oil than the one below it. Lean, solvent-thinned layers go first. Oil-rich layers come last. Reversing this causes the surface to harden before the interior cures, leading to cracking over time.
What is alla prima painting?
Alla prima means completing a painting in one session while all layers remain wet. Paint is applied wet-on-wet, allowing direct color mixing on the canvas. John Singer Sargent and Claude Monet both worked this way regularly.
How does glazing work in oil painting?
Glazing involves applying thin, transparent paint layers over a fully dried surface. Light passes through the glaze, reflects off the layer below, and returns through the paint. The result is a luminosity that direct opaque painting cannot replicate.
What is impasto technique?
Impasto is thick, textured paint applied with a brush or palette knife, leaving visible ridges on the surface. Van Gogh used it to convey movement and emotion. The paint stands physically off the canvas rather than lying flat.
What is the difference between grisaille and imprimatura?
A grisaille is a full monochrome underpainting that establishes tonal value before color is added. An imprimatura is simply a thin toned wash that eliminates the white ground. Grisaille takes longer but gives more structural control over layered work.
What oil painting mediums should beginners use?
Start with odorless mineral spirits for lean early layers and refined linseed oil for later ones. Liquin is useful for speeding drying time. Avoid using too much of any medium, as excess oil weakens the paint film and causes problems later.
What is scumbling in oil painting?
Scumbling is dragging semi-opaque paint loosely over a dried layer, leaving parts of the surface below visible. It adds light over dark, opposite to glazing. Common in plein air painting for atmospheric skies and soft foliage edges.
Does the painting surface affect oil painting technique?
Significantly. Linen canvas suits glazing and fine detail work. Cotton canvas works well for studies and direct painting. Wood panels give the smoothest surface for tight realist work. Acrylic gesso and oil primer also behave differently under paint layers.
What is sfumato technique in oil painting?
Sfumato is Leonardo da Vinci’s method of creating imperceptible transitions between tones through extremely thin, soft paint applications. No hard edges exist. The effect creates a hazy, three-dimensional quality most visible in the Mona Lisa’s face and background landscape.
Can oil painting techniques be combined in one painting?
Yes, and most finished works do exactly that. A typical painting might begin with an imprimatura, use glazing for shadows, scumbling for highlights, and impasto for focal texture. Technique choice at each stage depends on the specific visual problem being solved.
Conclusion
This article on oil painting techniques covers the methods that actually shape how a painting is built, from the structural logic of fat over lean to the optical depth of glazing and the raw texture of impasto.
None of these techniques exist in isolation. Grisaille underpaintings feed into glazing workflows. Scumbling works alongside impasto. Medium selection affects every layer in the sequence.
Understanding how linseed oil, stand oil, and alkyd mediums change paint behavior gives you real control over drying time, paint consistency, and paint film stability.
The painters who used these methods, from Vermeer to Van Gogh, worked within the same physical constraints you do. Technique is what they used to work around them.