That blank canvas stares back at you, but applying paint directly to raw fabric spells disaster for your artwork.
What is gesso in painting becomes the first question every serious artist must answer before touching brush to surface.
This white, chalky primer transforms ordinary canvas into professional painting ground. Gesso prevents paint absorption, creates proper tooth for adhesion, and protects your work from deterioration over time.
Without proper surface preparation, even Golden Artist Colors and premium pigments lose their vibrancy. Raw canvas sucks paint deep into its fibers, leaving dull, lifeless results that fade quickly.
This guide covers everything from basic acrylic gesso application to advanced texturing techniques.
You’ll learn which surfaces need priming, how to apply multiple coats properly, and troubleshooting common problems that ruin paintings.
Whether you’re working with watercolor painting techniques or heavy oil applications, understanding gesso fundamentals separates amateur work from professional results.
Types of Gesso Available Today

Acrylic Gesso
Acrylic gesso dominates today’s art supply market. This water-based primer dries fast and cleans up easily with soap and water.
Artists appreciate its non-toxic nature compared to traditional formulations. The quick-drying properties let you start painting within hours instead of days.
Benefits of Acrylic Primer
Modern acrylic formulas provide excellent tooth for paint adhesion. They work well for both acrylic painting and mixed media applications.
Student-grade options cost less but offer thinner coverage. Professional versions like Golden Artist Colors and Liquitex Basics provide superior opacity and durability.
Application Properties
The consistency feels similar to thick house paint. Most brands apply smoothly with brushes or rollers without leaving heavy texture marks.
Cleanup happens easily while wet. Once dry, acrylic gesso creates a permanent, flexible surface that won’t crack or flake.
Oil-Based Gesso
Traditional oil-based gesso uses alkyd or linseed oil binders instead of acrylic polymers. This type takes much longer to cure properly.
Oil primers provide superior adhesion for oil painting techniques. Many professional artists still prefer them for archival work.
Drying Characteristics
Oil gesso requires 24-48 hours between coats. Complete curing can take several weeks depending on thickness and humidity levels.
The extended drying time allows for smoother application. Brush marks level out naturally as the primer settles.
Professional Applications
Winsor & Newton makes respected oil-based primers. These products cost more but offer exceptional longevity for serious artwork.
The superior flexibility prevents cracking over time. This makes oil gesso ideal for large canvases that may expand and contract.
Clear Gesso
Clear gesso provides surface preparation without hiding the underlying material. It maintains the natural appearance of wood grain or canvas texture.
This transparent primer works perfectly for projects where you want substrate visibility. Mixed media artists frequently choose clear formulations.
Specialty Uses
Watercolor paper preparation often uses clear sizing instead of white primer. This preserves the paper’s natural absorbency while providing protection.
Canvas treatments with clear gesso maintain fabric texture while preventing paint absorption. The result looks more organic than traditional white grounds.
Application Techniques
Apply thin, even coats to avoid cloudy buildup. Multiple light layers work better than single thick applications.
Clear primers show every imperfection in surface preparation. Sand carefully and remove all dust before application.
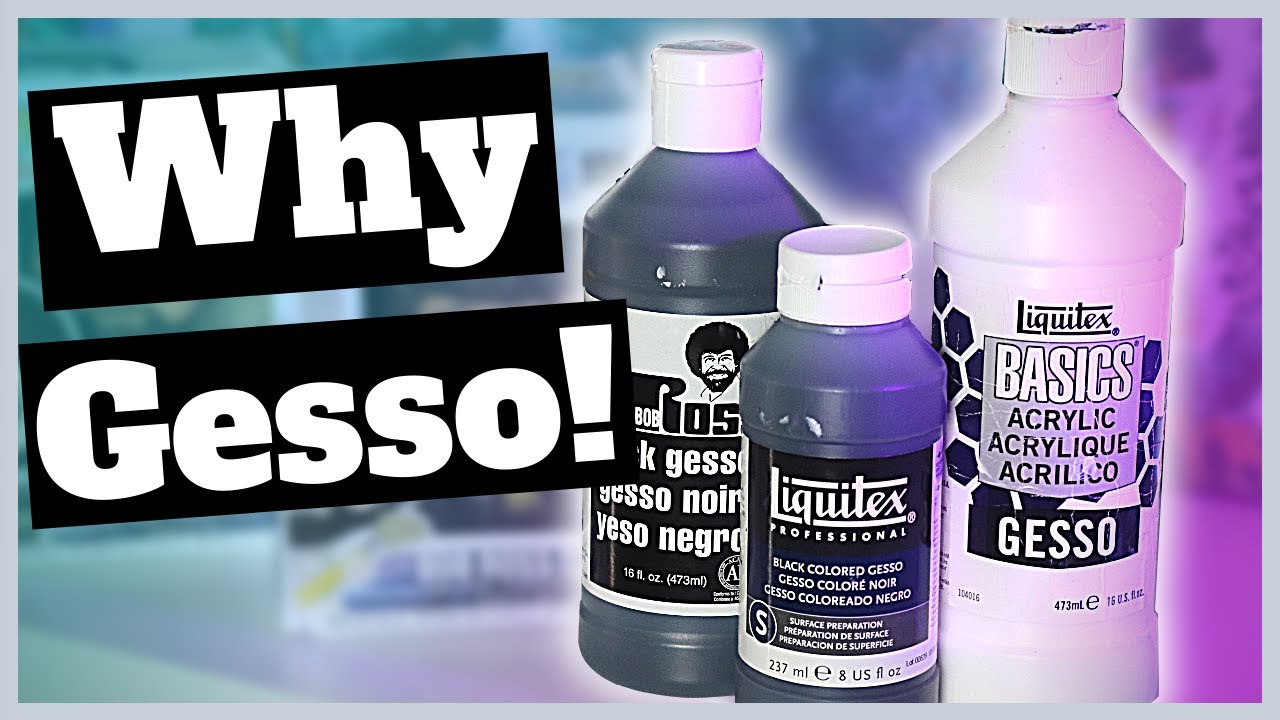
Colored Gesso
Pre-tinted gesso eliminates the need for separate underpainting steps. Colored grounds influence the final painting’s mood and color harmony.
Warm tones like ochre or burnt sienna create inviting atmospheres. Cool grays or blues provide sophisticated backdrops for portraits.
Impact on Painting Process
Colored grounds affect how subsequent paint layers appear. Transparent glazes interact differently over tinted surfaces than white ones.
The colored base shows through thin paint areas. This creates natural unity without extra effort.
Popular Color Choices
Neutral grays work well for realistic subjects. They provide middle values that make both lights and darks easier to judge.
Raw umber creates excellent portrait grounds. The warm brown enhances skin tones and creates natural shadows.
What Gesso Is Made From

Binder Components
The binder holds everything together and creates the film that adheres to your painting surface. Modern gesso uses either acrylic polymer or oil-based binders.
Acrylic polymers form flexible, water-resistant films. They cure through water evaporation rather than chemical oxidation.
Acrylic Polymer Systems
These synthetic resins provide excellent adhesion to most surfaces. They remain flexible after drying, preventing cracks from temperature changes.
The polymer content determines quality levels. Higher concentrations create stronger, more durable films.
Oil-Based Binders
Traditional formulations use alkyd resins or refined linseed oil. These create harder, more brittle films than acrylics.
Oil binders cure through oxidation, forming chemical cross-links. This process continues for months after initial drying.
Pigment and Fillers
Titanium dioxide provides the brilliant white color in most gesso formulations. This pigment offers superior opacity and lightfastness.
Some cheaper products use zinc white or lithopone instead. These alternatives provide less coverage and may yellow over time.
Primary Fillers
Calcium carbonate (chalk) adds body and creates the characteristic tooth texture. This inexpensive filler bulks up the formula without compromising performance.
The particle size affects surface texture. Finer grades create smoother finishes while coarser ones provide more grip.
Texture Modifiers
Silica particles enhance tooth and improve paint adhesion. These microscopic additions create ideal surface roughness for brush application.
Some manufacturers add marble dust or pumice for extra texture. These natural minerals provide unique working characteristics.
Additives and Modifiers
Flow agents help the gesso spread evenly during application. These chemicals reduce surface tension and prevent streaking.
Without proper flow control, brush marks become prominent and coverage appears uneven.
Leveling Compounds
These additives help brush marks disappear as the gesso dries. The surface becomes smoother without additional sanding.
Professional formulas contain more sophisticated leveling agents. Student grades often lack these expensive components.
Anti-Foaming Agents
Vigorous mixing introduces air bubbles that create surface defects. Anti-foaming additives prevent bubble formation during manufacture and application.
Foam problems appear as tiny craters in the dried surface. These defects telegraph through paint layers and affect final appearance.
Preservatives and Stabilizers
Water-based formulas need protection from bacterial growth. Preservatives extend shelf life and prevent spoilage during storage.
UV stabilizers protect the dried film from sun damage. These additives prevent yellowing and maintain color stability.
Temperature stabilizers prevent freezing damage during shipping. They allow products to survive cold warehouse conditions without separation.
Surfaces That Need Gesso
Canvas and Fabric
Raw canvas absorbs paint like a sponge without proper preparation. Unprimed cotton or linen fibers pull pigments deep into the weave, creating dull, lifeless colors.
Professional artists always prime their surfaces. This simple step transforms cheap canvas into professional-quality painting support.
Cotton vs. Linen Considerations
Cotton canvas costs less and accepts gesso easily. The smooth weave provides excellent working surfaces for detailed painting techniques.
Linen canvas offers superior durability but requires more careful preparation. The irregular weave creates natural texture that many artists prefer.
Pre-Primed Options
Dick Blick and other suppliers sell pre-primed canvases for convenience. These ready-to-paint surfaces save time but limit customization options.
Student-grade pre-primed canvases often use thin, inadequate coatings. Professionals typically add extra gesso layers for better paint adhesion.
Wood Panels
Hardboard and plywood need thorough sealing before painting. Raw wood absorbs moisture and causes paint layers to crack over time.
Ampersand panels come pre-primed but additional coats improve performance. The factory primer provides basic protection but lacks professional thickness.
Grain Considerations
Masonite boards offer smooth surfaces ideal for detailed work. Their dense composition requires less gesso than porous woods.
Plywood grain patterns show through thin primer coats. Sand lightly between applications to minimize wood texture telegraphing.
Moisture Protection
Wood panels expand and contract with humidity changes. Proper sealing prevents moisture absorption that causes warping and paint failure.
Apply gesso to all surfaces, including edges and backs. This complete coverage maintains dimensional stability over time.
Paper and Cardboard
Watercolor paper works well for mixed media when properly prepared. Heavy-weight papers handle wet applications without significant buckling.
Illustration board provides stable surfaces for detailed work. The laminated construction resists warping better than single-sheet papers.
Preventing Warping Issues
Stretch paper before priming to minimize buckling problems. Tape edges securely to rigid backing boards during application.
Lightweight papers require careful moisture control. Apply thin, quick-drying coats to prevent excessive curling.
Canvas Boards
Student-grade canvas boards offer affordable painting surfaces. The cardboard backing provides rigid support for classroom use.
Quality varies significantly between manufacturers. Fredrix produces superior boards with better primer application than cheaper alternatives.
Alternative Surfaces
Metal surfaces need special preparation for paint adhesion. Clean thoroughly with degreasing agents before primer application.
Glass and ceramic substrates require specialized primers designed for non-porous materials. Standard gesso formulations won’t adhere properly.
Synthetic Materials
Plastic panels accept modified acrylic primers after proper cleaning. Remove all oils and residues that prevent adhesion.
Some experimental artists paint on unconventional supports. Each material requires testing to determine optimal preparation methods.
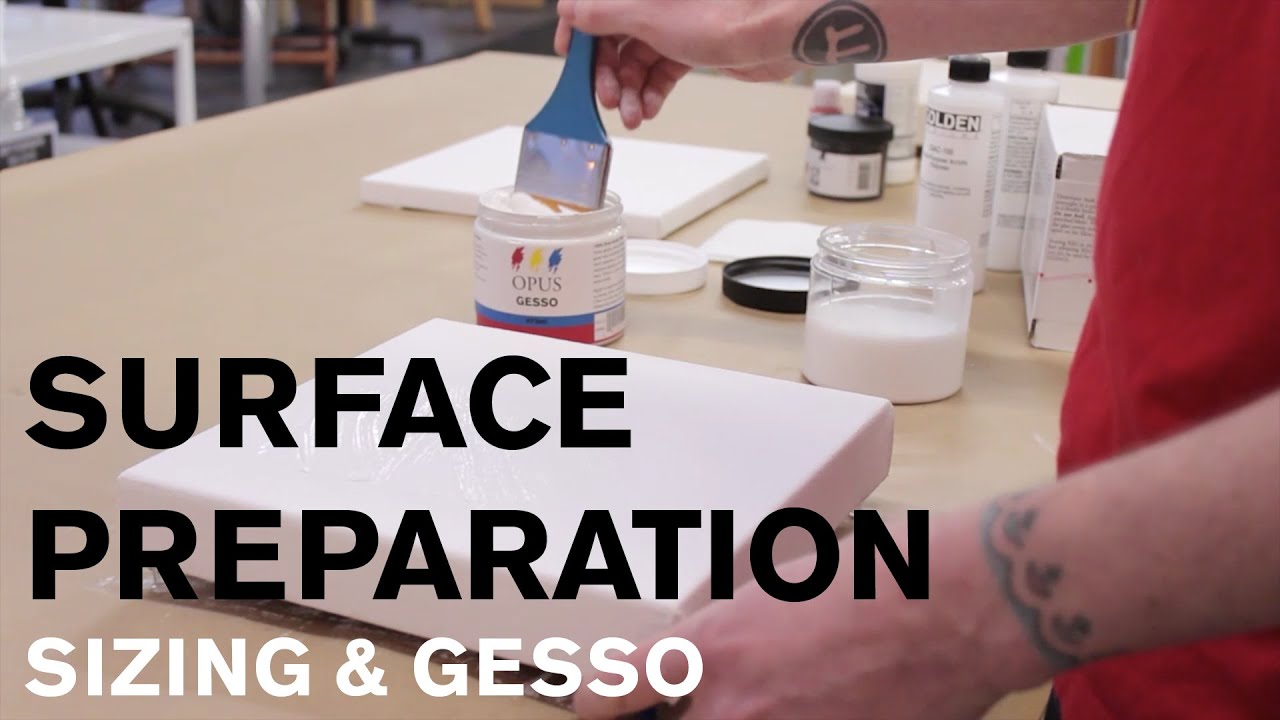
How to Apply Gesso Properly

Surface Preparation Steps
Cleaning Requirements
Remove all dust, oils, and contaminants before starting. Even fingerprints can cause adhesion problems in critical areas.
Degreasing becomes essential for wooden panels. Use appropriate solvents to eliminate manufacturing residues and handling oils.
Sanding Procedures
Rough surfaces need light sanding for smooth primer application. Use fine-grit sandpaper to avoid deep scratches.
Canvas surfaces rarely require sanding unless heavily textured. Wood panels benefit from 220-grit preparation sanding.
Dust Removal
Vacuum or blow away all sanding debris thoroughly. Trapped particles create bumps and imperfections in the dried primer film.
Tack cloths work well for final cleaning. These specialized rags capture fine dust without leaving residue.
Application Tools and Methods

Brush Selection
Synthetic brushes work best for water-based gesso application. Natural bristles absorb too much water and lose stiffness.
Wide, flat brushes cover large areas efficiently. Use 2-4 inch widths for most canvas and panel work.
Brush Technique
Apply gesso in thin, even strokes across the surface. Work quickly to maintain wet edges and prevent overlap marks.
Cross-hatching creates the most uniform coverage. First coat goes horizontally, second coat vertically for complete fill.
Roller Applications
Foam rollers provide smooth, professional finishes with minimal texture. They work faster than brushes for large surfaces.
Short-nap rollers create slight texture that improves paint adhesion. Avoid long-nap rollers that leave heavy patterns.
Roller Benefits
Coverage remains more consistent than brush application. The continuous film prevents thin spots that cause problems later.
Cleanup takes less time with disposable foam rollers. Replace rollers between coats to maintain quality standards.
Spray Considerations
Airbrush application creates glass-smooth surfaces ideal for detailed work. Thin the gesso appropriately for spray equipment.
Ventilation becomes critical during spray application. Use proper respiratory protection and adequate air movement.
Layering and Drying
First Coat Application
Apply the initial coat thinly to avoid runs and sags. Heavy applications take longer to dry and may crack.
Coverage should be complete but not thick. You’ll see the substrate through the first layer, which is perfectly normal.
Sanding Between Coats
Light sanding removes brush marks and surface imperfections. Use 400-grit paper for smooth results.
Dust removal again becomes critical after sanding. Any particles left behind will show in subsequent coats.
Multiple Layer Benefits
Three coats typically provide optimal painting surfaces. Each layer builds opacity and smooths surface irregularities.
Professional applications often use four or more coats. The extra thickness provides superior paint adhesion and longevity.
Drying Guidelines
Allow complete drying between coats to prevent problems. Rushing the process causes poor adhesion and surface defects.
Temperature and humidity affect drying times significantly. Plan extra time during cold or humid conditions.
Common Application Mistakes
Thickness Problems
Too thick application creates slow drying and potential cracking. Build up coverage gradually with multiple thin coats.
Too thin coverage provides inadequate protection and poor paint adhesion. Don’t try to save money by stretching the product.
Inadequate Drying
Applying second coats over tacky surfaces causes lifting and poor adhesion. Test with light finger pressure before proceeding.
Trapped moisture under subsequent layers creates long-term problems. Ensure complete curing between applications.
Poor Surface Prep
Skipping cleaning steps causes the most adhesion failures. Take time for proper preparation to avoid starting over completely.
Contaminated surfaces reject primer application and create weak bonds. Clean thoroughly even if surfaces appear clean initially.
Different Gesso Techniques

Smooth Finish Methods
Cross-Hatching Application
Cross-hatching creates the smoothest possible gesso surfaces. Apply the first coat horizontally, then the second coat vertically for complete coverage.
This technique eliminates brush marks and fills canvas weave completely. Professional artists use this method for detailed realism work.
Sanding for Glass-Like Surfaces
Sand between each coat with progressively finer grits. Start with 220-grit and finish with 400-grit for mirror-smooth results.
Wet sanding the final coat creates an almost glass-like finish. This technique works perfectly for photorealism paintings.
Multiple Thin Coats Approach
Apply four to six thin layers instead of two thick ones. Each coat builds opacity while maintaining smoothness.
Professional-grade gesso works better for this technique. Student formulas often lack the flow properties needed for smooth application.
Textured Gesso Applications
Brush Marks for Character
Leave deliberate brush strokes in the final gesso coat. These marks add surface interest and complement loose painting styles.
Natural bristle brushes create more pronounced texture than synthetic ones. The irregular bristle patterns produce organic-looking surfaces.
Palette Knife Texturing
Drag palette knives through wet gesso to create directional textures. This technique works well for expressionism and abstract work.
Vary pressure and angle for different effects. Heavy pressure creates deep grooves while light touches produce subtle ridges.
Adding Texture Mediums
Mix sand, pumice, or modeling paste into gesso for extreme textures. These additives create unique painting surfaces impossible to achieve otherwise.
Coarse textures suit abstract and experimental work. Fine textures enhance impressionism and plein air techniques.
Toned Grounds
Mixing Gesso with Paint
Add small amounts of color to white gesso for toned grounds. Raw umber and burnt sienna create popular warm undertones.
Color temperature affects the entire painting’s mood. Cool grays create sophisticated portraits while warm ochres suggest sunlit scenes.
Impact on Painting Process
Colored grounds eliminate stark white surfaces that intimidate beginners. The middle-value base makes both lights and darks easier to judge accurately.
Traditional masters used colored grounds extensively. Leonardo da Vinci and other Renaissance artists preferred warm, neutral undertones.
Specialty Techniques
Absorbent Grounds
Mix chalk or marble dust into gesso for increased absorbency. These grounds work well for glazing techniques and watercolor painting effects.
Absorbent surfaces create unique paint handling characteristics. Colors appear more matte and blend differently than on standard gesso.
Experimental Approaches
Try unconventional additives like coffee grounds or sawdust. These materials create one-of-a-kind textures for mixed media work.
Test experimental grounds on sample pieces first. Some additives may affect paint adhesion or archival properties.
Working with Different Paint Types Over Gesso
Acrylic Paint Compatibility
Direct Application Benefits
Acrylic paints bond perfectly to acrylic gesso without additional preparation. The similar chemistry creates superior adhesion and longevity.
Colors remain vibrant and true over properly prepared gesso surfaces. The white ground reflects light back through transparent glazes.
Color Brilliance Considerations
Acrylic gesso provides optimal color saturation for modern pigments. The bright white base enhances color mixing and luminosity.
Titanium dioxide content affects reflectivity significantly. Higher-quality gesso formulations provide better color support.
Oil Paint Applications
Proper Curing Time
Allow acrylic gesso to cure completely before applying oil paints. Insufficient drying causes adhesion problems and paint film defects.
Professional applications require 48-72 hours minimum curing time. Humid conditions extend this period significantly.
Fat Over Lean Principle
Oil painting’s fundamental rule applies over gesso grounds. Start with lean mixtures and gradually increase oil content in subsequent layers.
Gesso provides the lean foundation layer. Each paint application should contain slightly more oil than the previous layer.
Long-Term Adhesion
Properly cured acrylic gesso provides excellent support for oil paintings. Many contemporary masters use this combination for archival work.
Canvas preparation becomes critical for oil painting longevity. Poor gesso application causes paint layer failures decades later.
Watercolor and Gouache
Absorbency Modifications
Standard gesso creates surfaces too slick for traditional watercolor techniques. Mix in absorbent materials for proper paint handling.
Watercolor paper preparation requires different approaches. Light gesso applications preserve paper absorbency while providing protection.
Sizing Considerations
Watercolor gesso often includes sizing agents that control absorbency. These formulations allow traditional watercolor techniques on non-paper surfaces.
Heavy-bodied gouache works better than transparent watercolors over gesso grounds. The opacity compensates for reduced absorbency.
Mixed Media Applications
Material Compatibility
Gesso provides neutral surfaces for combining different media types. Collage elements adhere well to properly prepared gesso grounds.
Test adhesion with each material before committing to large works. Some synthetic materials require special primers for proper bonding.
Experimental Approaches
Modern artists push gesso beyond traditional boundaries. Jean-Michel Basquiat and other contemporary artists used gesso creatively in mixed media works.
Layer different media over gesso for unique effects. The stable base supports unconventional material combinations.
Surface Preparation Variables
Different media require different gesso preparations. Smooth surfaces suit detailed work while textured grounds complement gestural approaches.
Planning ahead saves time and materials. Consider all media types before beginning surface preparation.
Buying Guide and Product Recommendations

Budget vs. Professional Options
Student-Grade Characteristics
Student-grade gesso costs less but requires more coats for proper coverage. These formulas contain less titanium dioxide and more fillers.
Blick Art Materials offers decent student options that work fine for practice pieces. Expect thinner consistency and reduced opacity compared to professional grades.
Artist-Quality Differences
Professional formulas provide superior coverage and smoother application. Golden Artist Colors sets the standard for archival quality and consistency.
Liquitex Basics bridges the gap between student and professional grades. Their formula offers good value without compromising essential performance characteristics.
Cost-Benefit Analysis
Calculate cost per square foot of coverage, not just container price. Professional gesso often covers more area despite higher initial cost.
Quality differences become obvious after the first coat. Cheap formulas require extra layers that eliminate any savings.
Brand Comparisons
Consistency Variations
Winsor & Newton produces smooth, creamy textures ideal for brush application. Their formula flows well without sacrificing opacity.
Golden offers thicker consistency that works better for textured applications. The heavy body holds brush marks and knife textures effectively.
Coverage Performance
Professional brands typically cover 100-150 square feet per quart. Student grades may only cover 75-100 square feet with similar opacity.
Fredrix gesso provides excellent coverage at moderate prices. Many art schools choose this brand for classroom use.
Texture and Finish Quality
Some brands dry to glossy finishes while others remain matte. Ampersand produces consistently matte surfaces preferred by most artists.
Surface texture varies between manufacturers. Test different brands to find textures that suit your painting style.
Container Sizes and Storage
Shelf Life Considerations
Unopened acrylic gesso lasts 2-3 years when stored properly. Freezing temperatures destroy the formula permanently.
Opened containers remain usable for 6-12 months with proper sealing. Add plastic wrap under the lid to prevent skin formation.
Proper Storage Conditions
Store between 60-80°F away from direct sunlight. Temperature extremes cause separation and texture changes.
Contamination reduces shelf life significantly. Use clean brushes and avoid introducing foreign materials into containers.
Bulk vs. Small Quantities
Large containers offer better value for frequent users. Michaels Stores and Jerry’s Artarama stock various sizes for different needs.
Small containers work better for occasional use or color experiments. Buy only what you’ll use within a year for best results.
Reading Product Labels
Understanding Ingredients
Titanium dioxide should appear near the top of ingredient lists. Higher concentrations provide better opacity and coverage.
Avoid products listing “titanium dioxide extender” as the primary white pigment. These formulas offer inferior hiding power.
Coverage Specifications
Manufacturer coverage claims assume thin, even application over smooth surfaces. Textured substrates require 25-50% more product.
Professional recommendations often exceed label specifications. Plan for extra material when working on important pieces.
Application Guidelines
Follow manufacturer dilution ratios exactly. Over-thinning reduces adhesion and coverage significantly.
Drying times vary with temperature and humidity. Allow extra time during cold or humid conditions.
Troubleshooting Gesso Problems
Adhesion Issues
Poor Surface Preparation
Contaminated surfaces cause the most adhesion failures. Clean thoroughly even if substrates appear spotless.
Oil residues from handling create invisible barriers that prevent proper bonding. Use degreasing agents on all wooden surfaces.
Environmental Factors
High humidity prevents proper curing and weakens adhesion. Use fans or dehumidifiers to improve drying conditions.
Temperature extremes affect film formation significantly. Maintain 65-75°F during application and initial drying.
Remedial Actions
Strip failed gesso completely before reapplying. Partial removal creates weak spots that fail again quickly.
Sand thoroughly and clean with tack cloths. Start the preparation process completely over for reliable results.
Cracking and Flaking
Thickness Application Errors
Thick application causes cracking as moisture evaporates unevenly. Build coverage gradually with multiple thin coats.
Single heavy coats develop surface skins that trap moisture underneath. The resulting stress causes inevitable cracking.
Temperature and Humidity Factors
Rapid temperature changes cause expansion and contraction that leads to cracking. Maintain stable conditions during curing.
Forced drying with heat guns or hair dryers creates surface stress. Allow natural air drying for best results.
Prevention Strategies
Apply thin, even coats and allow complete drying between applications. Patience prevents most cracking problems.
Use flexible formulas for surfaces that move. Canvas requires more flexible primers than rigid panels.
Uneven Coverage
Application Technique Problems
Brush marks indicate improper application speed or technique. Work quickly to maintain wet edges throughout application.
Overlap marks show where wet gesso meets partially dried areas. Plan application patterns to avoid this problem.
Dilution Issues
Over-thinning reduces hiding power and creates streaky coverage. Follow manufacturer recommendations exactly.
Inconsistent mixing causes coverage variations within single coats. Stir thoroughly before and during application.
Correction Methods
Sand uneven areas smooth before applying additional coats. Light sanding removes high spots and brush marks.
Apply subsequent coats in perpendicular directions. Cross-hatching technique provides the most uniform coverage.
Paint Compatibility Problems
Lifting and Poor Adhesion
Incompatible formulas cause paint lifting over gesso surfaces. Test new paint brands on sample pieces first.
Oil paints applied over insufficiently cured gesso create adhesion problems. Allow 48-72 hours minimum curing time.
Color Shifts and Staining
Some pigments stain through inadequately sealed gesso. Raw umber and other earth tones commonly cause problems.
Apply additional gesso coats over staining areas. Two extra coats usually prevent bleed-through completely.
Solution Approaches
Use barrier coats of shellac or specialized sealers for problem pigments. These products prevent most staining issues.
Compatibility testing saves time and materials. Test all combinations before starting important work.
Making Your Own Gesso

Basic Recipe Components
Acrylic Medium Base
Acrylic polymer medium forms the binder foundation for homemade gesso. Use matte medium for traditional surface characteristics.
Golden Artist Colors sells pure acrylic mediums perfect for gesso making. Their consistency and quality match commercial formulations.
Titanium White Pigment
Pure titanium dioxide provides superior opacity compared to zinc white alternatives. Artist-grade pigments work better than house paint versions.
Mix pigment gradually to avoid lumps and streaking. Proper dispersion takes patience but creates professional results.
Calcium Carbonate Filler
Chalk powder adds body and creates the characteristic tooth texture. Use precipitated chalk for smoothest mixing.
Marble dust provides alternative texturing options. Coarse grades create more aggressive surface tooth for heavy paint applications.
Mixing Procedures
Proper Ratios and Measurements
Start with 2 parts acrylic medium, 1 part titanium white, and 1 part calcium carbonate. Adjust proportions based on desired opacity and texture.
Precise measurements ensure consistent results between batches. Keep detailed notes for successful formulations.
Blending Techniques
Mix dry ingredients first, then add acrylic medium gradually. This prevents lumping and ensures smooth dispersion.
Electric mixers create better dispersion than hand stirring. Use paint mixing attachments for best results.
Consistency Adjustments
Add water sparingly to adjust viscosity. Too much water weakens the binder and reduces adhesion.
Thick consistency suits textured applications while thin formulas work better for smooth finishes.
Cost Savings Analysis
Material Cost Breakdown
Homemade gesso costs roughly 40-60% less than commercial versions. Bulk ingredient purchases increase savings significantly.
Professional-grade ingredients cost more initially but create superior results. Don’t compromise quality for minimal savings.
Time Investment Considerations
Mixing takes 30-45 minutes plus cleanup time. Factor labor costs when calculating actual savings.
Batch production improves efficiency. Make larger quantities to justify setup time and effort.
Quality Comparisons
Well-made homemade gesso equals commercial quality when proper ingredients are used. Poor recipes create inferior results.
Testing on sample pieces reveals performance differences. Compare adhesion, coverage, and working characteristics.
Custom Formulations
Texture Modifications
Add sand, pumice, or marble dust for increased surface texture. These materials create unique painting characteristics.
Fiber additives like cotton provide subtle texture variation. Experiment with different materials for custom effects.
Absorbency Adjustments
Increase chalk content for more absorbent surfaces. This modification suits watercolor and glazing techniques.
Reduce chalk for less absorbent grounds. Oil painting benefits from less absorbent preparations.
Color Additions
Tint white gesso with small amounts of raw umber or burnt sienna. Colored grounds eliminate stark white surfaces.
Color mixing requires careful measurement for consistency. Document successful color formulations for future use.
Professional Tips and Best Practices

Studio Setup for Gesso Work
Ventilation Requirements
Proper air circulation prevents fume buildup and speeds drying times. Open windows or use exhaust fans during application.
Dust control becomes critical during sanding operations. Use dust collection systems or work outdoors when possible.
Clean Workspace Importance
Dedicate specific areas for gesso work away from finished paintings. Contamination ruins completed artwork quickly.
Cover surrounding surfaces with plastic sheeting. Gesso spatters travel farther than expected during application.
Tool Organization
Keep gesso brushes separate from painting brushes. Cross-contamination affects paint application and color mixing.
Label storage containers clearly. Dried gesso resembles other white materials and causes confusion.
Time Management
Batch Preparation Benefits
Prime multiple surfaces simultaneously for efficiency. Setup time represents significant overhead for single pieces.
Group similar-sized pieces for consistent application technique. This approach improves quality and speed.
Drying Time Planning
Schedule gesso work 2-3 days before painting sessions. Rushed drying causes adhesion problems and surface defects.
Plan additional time during humid seasons. Moisture extends curing times significantly beyond normal expectations.
Project Scheduling
Complete all surface preparation before starting paintings. Interrupting painting sessions for gesso work breaks creative flow.
Maintain inventory of prepared surfaces. Ready-to-paint supports enable spontaneous creative sessions.
Quality Control
Testing on Sample Pieces
Try new formulations on test panels before important work. Sample testing reveals problems before they affect finished pieces.
Keep test panels for reference. Document successful techniques and formulations for future projects.
Consistency Checking
Compare coverage and texture between batches. Variations affect painting performance and final appearance.
Adjust mixing procedures to maintain consistent results. Small changes compound over time without careful monitoring.
Documentation Practices
Record environmental conditions during application. Temperature and humidity data helps troubleshoot problems.
Photograph surface preparation stages. Visual records assist with quality improvement and training others.
Advanced Techniques
Gradient Applications
Create gradual texture transitions across single surfaces. Smooth-to-rough gradients suit specific compositional needs.
Apply different formulations in zones. This technique provides varied working characteristics within single paintings.
Selective Priming Methods
Prime only specific areas for mixed media work. Partial priming creates interesting surface contrasts.
Mask areas carefully to create clean edges. Tape removal timing affects edge quality significantly.
Integration with Painting Process
Consider final composition during surface preparation. Surface planning improves painting efficiency and results.
Match preparation techniques to intended painting styles. Smooth grounds suit detailed realism while textured surfaces complement expressive approaches.
Plan value distributions during ground preparation. Strategic toning eliminates unnecessary painting steps.
FAQ on What Is Gesso In Painting
What exactly is gesso?
Gesso is a white primer coating applied to canvas, wood, or paper before painting. It contains acrylic polymer, titanium dioxide, and calcium carbonate fillers. This surface preparation creates proper tooth for paint adhesion while preventing absorption into raw materials.
Do I need gesso for acrylic painting?
Yes, acrylic painting requires proper surface preparation for optimal results. Raw canvas absorbs paint unevenly, creating dull colors and poor adhesion. Even pre-primed canvas often benefits from additional gesso coats for professional-quality painting surfaces.
Can I paint directly on canvas without gesso?
Painting on raw canvas without primer causes paint to soak deep into fibers. Colors appear flat and lifeless while the canvas deteriorates faster. Professional artists always use canvas preparation to protect their work and achieve vibrant results.
What’s the difference between student and professional gesso?
Student-grade gesso contains less titanium dioxide and more fillers, requiring multiple coats for adequate coverage. Professional formulas like Golden Artist Colors provide superior opacity, smoother application, and better archival properties for serious artwork.
How many coats of gesso should I apply?
Apply three coats minimum for optimal painting surfaces. Sand lightly between coats with fine-grit paper. Professional applications often use four or more coats, with each layer building opacity and smoothness for superior paint adhesion.
Can I use gesso for oil painting?
Acrylic gesso works perfectly for oil painting when properly cured. Allow 48-72 hours drying time before applying oil paints. The primer must cure completely to prevent adhesion problems and ensure long-term archival quality results.
What surfaces need gesso primer?
Canvas, wood panels, hardboard, and paper all require gesso preparation. Metal and plastic surfaces need specialized primers. Masonite boards and plywood benefit from multiple coats to seal grain patterns and prevent paint absorption.
How do I apply gesso smoothly?
Use synthetic brushes and apply thin, even coats in cross-hatch patterns. First coat horizontal, second vertical for complete coverage. Professional application requires patience and proper drying time between layers for smooth results.
Can I make my own gesso?
Mix acrylic medium, titanium white pigment, and calcium carbonate for homemade gesso. This costs 40-60% less than commercial versions. Use precise ratios and quality ingredients to match professional-grade performance and consistency.
Why is my gesso cracking or peeling?
Thick application causes most cracking problems. Apply multiple thin coats instead of single heavy layers. Poor surface preparation, contamination, or applying over insufficiently dried layers also cause adhesion failures and flaking issues.
Conclusion
Understanding what is gesso in painting transforms amateur efforts into professional-quality artwork.
This primer creates the foundation that separates lasting masterpieces from deteriorating experiments.
Surface preparation determines your painting’s longevity and visual impact.
Whether you choose Liquitex Basics for student work or premium Winsor & Newton formulas for gallery pieces, proper gesso application remains non-negotiable.
The techniques covered here apply across all painting mediums. Oil-based gesso suits traditional approaches while modern acrylic formulations offer convenience and safety for contemporary studios.
Canvas coating protects your investment in time and materials. Raw surfaces absorb expensive pigments while properly primed grounds showcase colors at their brilliant best.
Start with quality artist materials and take time for thorough preparation.
Jerry’s Artarama and other suppliers offer everything needed for professional results. Your future self will thank you when paintings remain vibrant decades later.