

Nothing destroys expensive art brushes faster than improper cleaning. Professional artists know that learning how to clean oil paint brushes properly extends tool life by years and maintains painting quality.
Oil paint creates unique cleaning challenges compared to watercolor painting or acrylic painting. The oil-based medium bonds permanently to bristles without proper solvent cleaning techniques.
This guide covers everything from immediate brush care during painting sessions to deep cleaning protocols for stubborn dried paint. You’ll learn which cleaning supplies work best, proper storage methods, and how to avoid common mistakes that ruin brushes.
Whether you’re working with expensive sable brushes or everyday synthetic brushes, these proven techniques will keep your painting equipment performing like new for years.
Essential Cleaning Supplies and Tools

Solvents and Thinners
Primary Cleaning Agents
Turpentine works as the traditional choice for oil paint removal. It cuts through paint effectively but produces strong fumes. Many artists prefer mineral spirits as a less toxic alternative that still dissolves oil-based paints completely.
Odorless mineral spirits provide the same cleaning power without the harsh smell. They cost more but create a better studio environment. Professional artists often keep both regular and odorless versions on hand.
Natural Alternatives
Citrus-based solvents offer eco-friendly options for brush cleaning. These natural products work slower than traditional thinners but produce fewer toxic fumes. They’re particularly useful for artists working in poorly ventilated spaces.
Cleaning Containers and Equipment
Storage Solutions
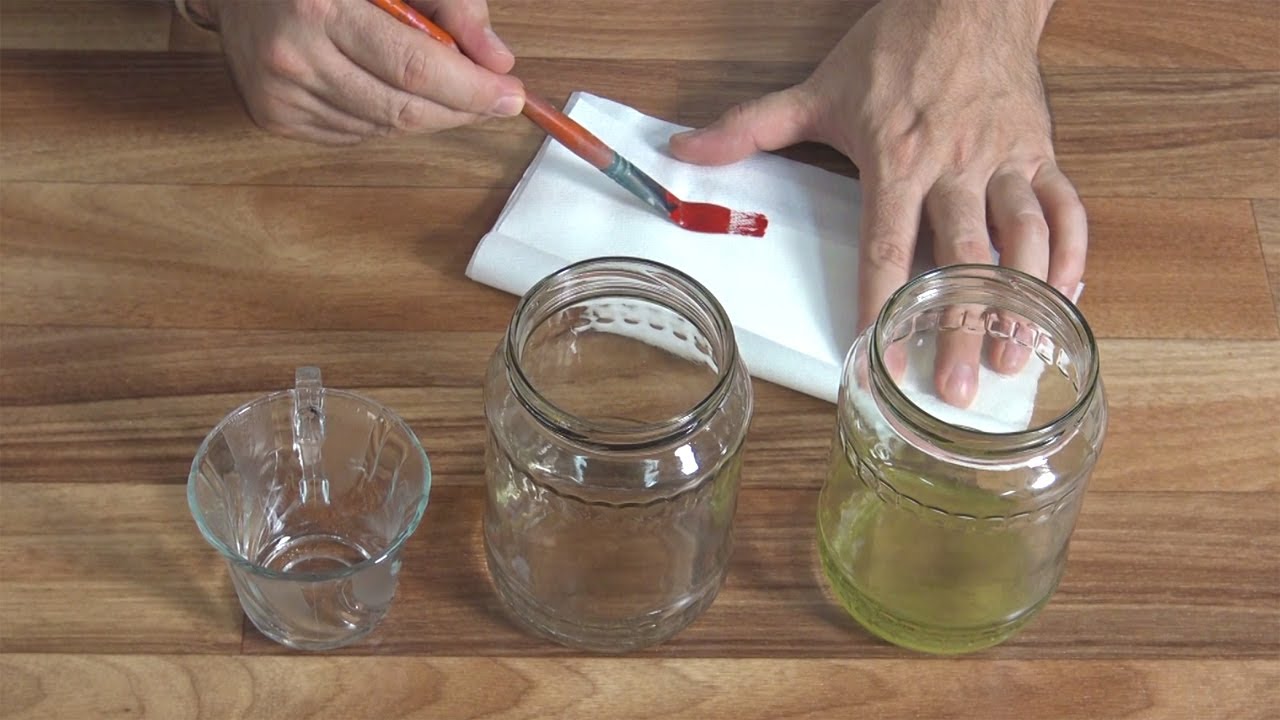
Glass jars work best for solvent storage and brush cleaning. Mason jars are perfect because they seal tightly and won’t crack from solvent exposure. Avoid plastic containers since many solvents will dissolve them over time.
Wire mesh screens placed inside jars help remove paint from bristles. The mesh acts like a scrubbing surface. You can buy commercial brush washers or make your own using hardware cloth.
Essential Supplies
Paper towels and cotton rags are necessary for wiping excess paint. Old t-shirts work better than paper towels for final cleaning steps. Keep separate rags for different paint colors to prevent contamination.
Brush holders keep wet brushes organized during painting sessions. Simple glass jars work fine, but specialized brush rests prevent bristles from touching container bottoms.
Soap and Water Solutions
Effective Cleaning Agents
Dish soap removes oil paint residue after solvent cleaning. Dawn and similar grease-cutting formulas work particularly well. The surfactants break down oil-based binders that solvents might miss.
Specialized brush soaps like Master’s Brush Cleaner condition bristles while cleaning. These products extend brush lifespan and maintain bristle flexibility. Professional artists consider them worth the extra cost.
Gentle Options
Baby shampoo provides a mild alternative for natural bristles. Sable and other expensive brushes benefit from gentler cleaning agents. The pH-balanced formula won’t damage delicate fibers.
Immediate Brush Care During Painting
Between Color Changes
Quick Cleaning Techniques
Wipe excess paint on your palette before switching colors. Use firm pressure to remove as much paint as possible from the bristles. This prevents unwanted color mixing in your next application.
Quick rinse techniques work for minor color changes. Dip the brush in solvent and wipe on a rag. For similar colors, this might be sufficient to prevent contamination.
Color Contamination Prevention
Clean brushes thoroughly when switching between complementary colors. Red and green create muddy mixtures if brushes aren’t properly cleaned. The same applies to other complementary colors that sit opposite each other on the color wheel.
Separate brushes for warm and cool colors reduce cleaning frequency. Many artists keep dedicated brushes for earth tones, which tend to contaminate other colors easily.
Short Breaks and Interruptions
Temporary Storage Methods
Store brushes in painting medium for breaks under 30 minutes. Dip clean brushes in linseed oil or alkyd medium to prevent paint from drying on the bristles. This works for lunch breaks or brief interruptions.
Wrapping Techniques
Plastic wrap keeps brushes moist for longer periods. Wrap the bristles tightly to prevent air exposure. Wet paint stays workable for several hours using this method.
Aluminum foil also works but requires more careful wrapping. Make sure no air pockets remain around the bristles. The foil method works better for flat brushes than round ones.
Time Limits
Never leave paint on brushes for more than a few hours. Oil paint begins setting up within 4-6 hours depending on the pigment and medium used. Titanium white and zinc white dry particularly fast.
Dried paint becomes much harder to remove once it starts curing. What takes 30 seconds to clean when wet might require 10 minutes of scrubbing later. The time investment in immediate care pays off significantly.
Remove brushes from temporary storage every hour to check paint consistency. If the paint feels tacky, clean the brush immediately rather than risk permanent damage to the bristles.
Step-by-Step Deep Cleaning Process
Initial Paint Removal
Excess Paint Elimination
Wipe bristles thoroughly on paper towels before any liquid cleaning. Remove as much paint as possible using firm pressure. Work from the ferrule toward the tip to avoid pushing paint deeper into the bristles.
Squeeze out remaining paint using gentle pressure between your fingers and a rag. This prevents paint from settling near the ferrule, where it’s hardest to remove later.
Working Direction
Always work from the metal ferrule toward the brush tip. This prevents paint contamination from spreading into hard-to-reach areas. Reverse wiping pushes paint deeper into the bristle bundle.
Solvent Cleaning Phase
First Rinse Protocol
Dip the brush in used solvent for the initial cleaning. Swirl gently against the container bottom or wire mesh screen. This removes bulk paint without wasting clean solvent.
Used turpentine or mineral spirits work fine for this first pass. Save your clean solvents for the final cleaning stages.
Second Rinse Technique
Transfer to clean solvent for thorough paint removal. Work the bristles gently against wire mesh or container sides. The clean solvent dissolves remaining paint particles and color residue.
Synthetic brushes handle more aggressive cleaning than natural bristles. Adjust your pressure accordingly to prevent damage.
Brush Manipulation Methods
Rotate the brush while cleaning to reach all bristle surfaces. Press gently against mesh screens to work solvent between individual bristles. Never bend bristles sharply or twist the ferrule.
Check cleaning progress by examining the solvent color. Clear solvent indicates thorough paint removal. Cloudy or colored solvent means more cleaning is needed.
Ferrule Attention
Clean around the ferrule carefully where paint tends to accumulate. Use a small brush or cotton swab to remove stubborn paint from this area. Paint buildup here can loosen bristles over time.
Soap and Water Washing

Temperature Guidelines
Use warm water between 100-110°F for soap washing. Hot water can damage natural bristles and loosen ferrule adhesives. Cold water won’t activate soap effectively.
Application Methods
Apply a small amount of dish soap directly to wet bristles. Work into a lather using gentle circular motions in your palm. The soap breaks down remaining oil residues that solvents miss.
Specialized brush soaps condition bristles while cleaning. These products contain ingredients that maintain bristle flexibility and extend brush lifespan.
Massage Techniques
Gently massage soapy bristles in your palm using circular motions. Apply light pressure to work soap between individual bristles. Avoid harsh scrubbing that can damage delicate fibers.
Completion Indicators
Rinse until water runs completely clear with no soap residue. Soap buildup can stiffen bristles and affect paint application. The clean brush should feel smooth and flexible when wet.
Special Cleaning Situations
Stubborn Paint Removal
Dried Paint Challenges
Dried paint requires extended soaking in solvent before scrubbing. Submerge affected bristles for 10-15 minutes to soften hardened paint. Never try to scrape dried paint off dry bristles.
Ferrule Area Problems
Paint trapped near the ferrule needs special attention. Use dental picks or small brushes to work solvent into tight spaces. This area determines brush performance, so thorough cleaning is critical.
Multiple Cleaning Cycles
Severely contaminated brushes may need several cleaning cycles. Alternate between solvent cleaning and soap washing until bristles are completely clean. Patience prevents permanent brush damage.
Different Brush Types
Natural Bristle Care
Natural bristles like sable and hog hair require gentler handling. These organic fibers can be damaged by excessive heat or aggressive cleaning. Use lukewarm water and mild soaps.
Sable brushes need the most delicate care due to their high cost and fine texture. Clean immediately after use and avoid leaving paint on them for any extended period.
Synthetic Brush Handling
Synthetic brushes tolerate more aggressive cleaning methods. They resist damage from solvents and can handle warmer water temperatures. However, they still benefit from gentle treatment.
Brush Shape Considerations
Flat brushes clean differently than round ones due to their shape. Work cleaning solutions across the flat surface and between bristles. Round brushes need rotation during cleaning to reach all surfaces.
Fan brushes require spreading the bristles during cleaning to remove paint from between the individual hairs. Clean each section of the fan separately for thorough results.
Expensive Brush Preservation
Investment Protection
High-quality brushes from professional manufacturers deserve extra care. These tools can last decades with proper maintenance but cost significantly more to replace.
Kolinsky sable brushes represent the pinnacle of brush quality. Their fine points and excellent paint-holding capacity make them worth the careful cleaning investment.
Professional Standards
Professional artists often spend more time cleaning expensive brushes than painting with them. This time investment protects valuable tools and maintains consistent painting quality.
Store valuable brushes separately from everyday brushes. Use protective cases or holders that prevent bristle damage during storage. The investment in proper storage pays for itself in extended brush life.
Proper Brush Drying and Storage

Drying Techniques
Bristle Reshaping
Shape wet bristles immediately after cleaning. Use your fingers to restore the original brush form while bristles are still damp. Once dry, bristles hold their shape permanently.
Natural bristles reshape more easily than synthetic ones when wet. Work quickly before they begin to dry and stiffen.
Positioning Methods
Lay brushes flat on clean towels for drying. This prevents water from running into the ferrule and loosening the adhesive. Never stand wet brushes upright in containers.
Flat brushes dry best when laid completely flat. Round brushes can be positioned on their sides with bristles extending over table edges.
Air Circulation Requirements
Good ventilation speeds drying and prevents mold growth. Position brushes where air can circulate around all surfaces. Avoid enclosed spaces or plastic bags during drying.
Humid environments slow drying significantly. Use fans or dehumidifiers in damp studios to prevent bristle deterioration.
Long-term Storage Methods
Brush Roll Systems
Brush rolls protect bristles during transport and storage. Canvas or bamboo rolls allow air circulation while keeping brushes organized. Roll loosely to avoid compressing bristles.
Store rolls horizontally to prevent weight pressure on brush tips. Vertical storage can bend bristles over time.
Standing Storage Solutions
Brush holders work well for frequently used brushes. Keep bristles pointing upward to maintain their shape. Glass jars or ceramic containers provide stable bases.
Professional artists often use multiple holders to separate brush types. Keep oil painting brushes separate from watercolor painting and acrylic painting brushes.
Protective Covers
Plastic caps protect brush tips during storage but must allow air circulation. Remove caps periodically to check for moisture buildup. Trapped moisture promotes mold and bristle rot.
Paper sleeves work better than plastic for long-term storage. They protect bristles while allowing moisture to escape naturally.
Climate Considerations
Humidity Effects
High humidity softens natural bristles and can loosen ferrule adhesives. Sable brushes are particularly sensitive to moisture changes. Store expensive brushes in climate-controlled environments when possible.
Low humidity makes bristles brittle and prone to breakage. Balance is key for brush preservation.
Temperature Guidelines
Store brushes at room temperature between 65-75°F. Extreme temperatures can damage both natural and synthetic brushes. Avoid attics, basements, or areas near heating vents.
Freezing temperatures make bristles extremely brittle. Heat above 85°F can soften adhesives and cause bristle loss.
Pest Prevention
Moths and other insects attack natural bristle brushes. Cedar blocks or lavender sachets deter pests without chemical damage. Check stored brushes regularly for signs of insect activity.
Maintaining Brush Quality Over Time

Regular Maintenance Routines
Weekly Deep Cleaning
Schedule thorough brush cleaning sessions weekly, even for lightly used brushes. Paint residue accumulates gradually and becomes harder to remove over time. Consistent maintenance prevents permanent staining.
Use specialized brush soaps during weekly cleanings to condition bristles. These products remove built-up residues that daily cleaning might miss.
Monthly Assessments
Examine brush condition monthly for signs of wear or damage. Check ferrule tightness, bristle alignment, and overall brush quality. Early detection prevents minor problems from becoming major issues.
Professional brush maintenance includes checking for loose bristles or ferrule separation. Address problems immediately to extend brush life.
Performance Monitoring
Monitor how brushes hold paint and maintain their points. Declining performance often indicates cleaning inadequacy rather than brush wear. Adjust cleaning routines based on performance changes.
Extending Brush Lifespan
Rotation Strategies
Use multiple brushes for different painting techniques rather than overworking single brushes. Rotation reduces wear on individual brushes and allows proper drying between uses.
Keep separate brush sets for different painting mediums. Cross-contamination between oil paint, acrylics, and watercolors shortens brush life.
Load Management
Avoid overloading brushes with paint. Excess paint works deeper into bristles and becomes harder to clean. Light, controlled loading maintains brush responsiveness and extends life.
Paint consistency affects brush wear. Thick, heavy paints require more cleaning effort and cause more bristle stress than properly thinned paints.
Pressure Application
Use minimal pressure during painting and cleaning. Heavy-handed techniques bend bristles permanently and accelerate wear. Let the brush do the work rather than forcing it.
Gentle handling during cleaning prevents bristle damage. Aggressive scrubbing shortens brush life more than paint contamination does.
Replacement Decision Making
Damage Assessment
Replace brushes when bristles lose their original shape permanently. Splayed or curved bristles indicate irreversible damage. Fighting damaged brushes produces poor results and wastes time.
Ferrule loosening signals the end of brush usefulness. Once bristles start falling out regularly, replacement becomes necessary.
Performance Standards
Professional work requires brushes that perform consistently. When a brush no longer holds its point or applies paint evenly, replacement becomes cost-effective. Time spent compensating for poor brush performance exceeds replacement costs.
Expensive brushes justify longer restoration attempts than cheap ones. Weigh restoration time against replacement costs when making decisions.
Cost-Benefit Analysis
Calculate brush replacement costs against time spent on excessive maintenance. High-quality brushes often cost less per year of service than cheap ones requiring frequent replacement.
Keep records of brush purchase dates and performance to identify the most cost-effective brands and types for your specific painting style and maintenance routine.
Common Mistakes and How to Avoid Them
Cleaning Errors
Insufficient Solvent Cleaning
Many artists rush through solvent cleaning stages. They dip briefly in turpentine and assume the brush is clean. This leaves paint residue that soap can’t remove completely.
Use two separate solvent containers – one for initial cleaning, another for final rinse. The second container should stay relatively clean for effective paint removal.
Aggressive Scrubbing Damage
Harsh scrubbing destroys natural bristles faster than paint contamination. Artists panic when they see dried paint and attack brushes with excessive force. This bends bristles permanently and shortens brush life.
Soak first, scrub gently is the golden rule for stubborn paint. Time and solvent do most of the work.
Incomplete Soap Removal
Soap residue left in bristles affects paint application quality. The brush feels stiff and won’t hold paint properly. Many artists don’t rinse thoroughly after washing.
Rinse until water runs completely clear. Test by shaking excess water from the brush – it should feel smooth and flexible.
Storage Problems
Wet Brush Storage Issues
Storing brushes before they’re completely dry causes mold growth and bristle rot. Even slightly damp bristles can develop problems in enclosed containers. This destroys expensive brushes quickly.
Allow 24 hours drying time before enclosed storage. Feel the ferrule area – it should be completely dry.
Improper Positioning Damage
Standing wet brushes upright lets water run into the ferrule. This loosens the adhesive holding bristles in place. The damage appears gradually as bristles fall out during use.
Always lay brushes flat or hang them bristle-down while drying.
Container Contamination
Dirty storage containers transfer old paint to clean brushes. Artists forget to clean jars and holders regularly. Cross-contamination ruins subsequent painting sessions.
Clean storage containers monthly with soap and water. Replace when they become permanently stained.
Timing Mistakes
Delayed Cleaning Consequences
Waiting even a few hours makes paint removal exponentially harder. Artists underestimate how quickly oil painting mediums begin setting up. What takes 30 seconds when wet requires 15 minutes when tacky.
Clean brushes immediately after each painting session. No exceptions.
Rushed Cleaning Problems
Hurried cleaning leaves paint residue that accumulates over time. Artists skip steps to save time but spend more time later dealing with stained brushes. The false economy costs more in brush replacement.
Budget adequate time for proper brush maintenance. Quality cleaning takes 5-10 minutes per brush.
Over-cleaning Effects
Excessive cleaning with harsh solvents damages bristles unnecessarily. Some artists clean brushes multiple times per session out of anxiety. This strips natural oils from natural bristles.
Clean only when necessary. Between similar colors, simple wiping often suffices.
Alternative Cleaning Methods

Water-Mixable Oil Paint Brushes
Simplified Process
Water-mixable oils eliminate solvent cleaning completely. These paints clean with soap and water alone. The process resembles acrylic painting brush care more than traditional oil techniques.
Rinse brushes in water, apply soap, and wash normally. The specialized binders respond to water-based cleaning.
Compatibility Considerations
Don’t mix traditional and water-mixable oil brushes. Cross-contamination affects paint behavior. Keep separate brush sets for different painting mediums.
Clean brushes immediately with water-mixable oils. They dry faster than traditional oils once exposed to air.
Brush Cleaning Machines
Ultrasonic Benefits
Ultrasonic cleaners use high-frequency vibrations to remove paint from bristles. Professional studios use these for expensive brush maintenance. The cleaning action reaches deep into bristle bundles.
Fill with appropriate solvent and run 3-5 minute cycles. Check progress frequently to avoid over-cleaning.
Commercial Washers
Brush washing stations provide continuous solvent circulation. They filter and recycle solvents automatically. Large studios find them cost-effective for high-volume brush cleaning.
Artist tool manufacturers make portable versions for smaller studios. They reduce solvent waste and improve cleaning consistency.
DIY Solutions
Homemade brush washers use pump systems to circulate cleaning solvents. Artists build them using aquarium pumps and filter materials. These cost less than commercial units.
Wire mesh screens in glass jars create effective manual cleaning systems. The mesh provides scrubbing surfaces while containing bristles safely.
Emergency Cleaning Techniques
Field Cleaning Methods
Plein air painting requires portable cleaning solutions. Pre-moistened cleaning wipes remove most paint without solvents. They work adequately for temporary cleaning between sessions.
Small containers of mineral spirits handle serious cleaning needs outdoors. Seal containers tightly to prevent evaporation and spills.
Minimal Supply Situations
Paper towels and cooking oil can substitute for proper cleaning supplies temporarily. The oil dissolves paint while towels remove residue. This works for emergency situations only.
Baby wipes remove water-based paints effectively. They contain mild surfactants that break down acrylic and watercolor painting residues.
Temporary Preservation
Plastic wrap keeps brushes workable for several hours without cleaning. Wrap bristles tightly to exclude air. This buys time until proper cleaning supplies become available.
Refrigeration extends the preservation time to 12-24 hours. Cold temperatures slow paint curing significantly. Remove brushes gradually to avoid condensation damage.
Environmental and Health Considerations
Safe Solvent Disposal
Local Regulations
Solvent disposal requires following local hazardous waste guidelines. Most municipalities ban pouring turpentine or mineral spirits down drains. Contact waste management services for approved disposal methods.
Art supply stores often accept used solvents for recycling. This service reduces environmental impact and disposal costs.
Recycling Methods
Used solvents can be recycled through settling and filtering. Let paint contaminated solvents sit for weeks until sediment settles. Pour off clear solvent for reuse.
Coffee filters remove fine particles from settled solvents. This extends solvent life and reduces waste volume significantly.
Container Guidelines
Store used solvents in original containers with proper labels. Glass jars work for temporary storage but use metal containers for long-term storage. Plastic containers may dissolve from solvent contact.
Cleaning containers should have tight-fitting lids to prevent evaporation. Vapor buildup creates fire hazards and toxic exposure risks.
Ventilation Requirements
Studio Air Circulation
Proper ventilation removes toxic fumes during brush cleaning. Open windows and doors create cross-ventilation patterns. Position work areas near fresh air sources when possible.
Turpentine and paint thinner vapors are heavier than air. Exhaust fans should be positioned low to remove settled vapors effectively.
Fume Extraction Systems
Professional exhaust fans remove solvent vapors at the source. Install them near cleaning stations to capture fumes before they spread. Variable speed controls adjust extraction based on solvent use.
Activated carbon filters scrub toxic compounds from exhausted air. This prevents outdoor air pollution while protecting indoor air quality.
Personal Protection
Work outdoors when possible for brush cleaning with strong solvents. Natural air circulation provides better protection than mechanical ventilation systems. Plein air painting sessions offer natural ventilation advantages.
Avoid cleaning supplies in enclosed spaces like basements or small rooms. Poor ventilation concentrates toxic vapors to dangerous levels.
Personal Protective Equipment

Skin Protection
Nitrile gloves protect hands from solvent absorption through skin. Latex gloves dissolve when exposed to turpentine or mineral spirits. Change gloves frequently during extended cleaning sessions.
Natural bristles and synthetic brushes both require skin protection during handling. Even mild solvents can cause dermatitis with repeated exposure.
Respiratory Safety
Use respirators with organic vapor cartridges for extensive solvent cleaning. Paper dust masks provide no protection against chemical vapors. Professional artist tools include proper respiratory equipment.
Work in short sessions to minimize vapor exposure. Take breaks in fresh air between cleaning sessions.
Eye Protection
Safety glasses prevent splashing during aggressive brush maintenance. Solvent vapors also irritate eyes during prolonged exposure. Position work areas to avoid vapor accumulation near face level.
Eco-Friendly Alternatives
Low-Toxicity Solvents
Citrus-based cleaners provide safer alternatives to traditional solvents. They work slower but produce fewer toxic fumes. Professional artists accept longer cleaning times for health benefits.
Odorless mineral spirits reduce vapor exposure while maintaining cleaning effectiveness. They cost more but create safer studio environments.
Water-Based Systems
Water-mixable oil painting eliminates solvent needs entirely. These paints clean with soap and water systems only. Studio ventilation requirements drop significantly.
Steam cleaning systems use heated water vapor for paint removal. They work effectively on wet paint and reduce chemical exposure completely.
Biodegradable Options
Plant-based brush soaps break down naturally in wastewater systems. They clean effectively while reducing environmental impact. Look for phosphate-free formulations that won’t harm aquatic systems.
Specialized brush soaps often include conditioning agents from natural sources. These products maintain brush quality while supporting environmental responsibility.
Health Impact Minimization
Exposure Reduction
Limit daily solvent exposure to 2-3 hours maximum. Rotate between different cleaning techniques to reduce cumulative exposure. Keep solvent containers closed when not actively cleaning.
Professional brush maintenance can use less toxic methods for routine cleaning. Reserve strong solvents for stubborn dried paint situations only.
Warning Signs
Headaches, dizziness, or nausea indicate excessive solvent exposure. Stop work immediately and seek fresh air. Chronic symptoms require medical evaluation and studio ventilation improvements.
Skin irritation or burning sensations mean inadequate protective equipment. Upgrade gloves and improve handling techniques to prevent direct contact.
Long-term Considerations
Cumulative solvent exposure affects liver and nervous system function over decades. Artist tool selection should prioritize health impact alongside performance. Document exposure levels for medical reference.
Studio cleanup routines should minimize vapor generation. Clean brushes systematically rather than leaving open solvent containers around work areas.
FAQ on How To Clean Oil Paint Brushes
Can I use water to clean oil paint brushes?
Water alone won’t remove oil paint from brushes. Oil and water don’t mix, so you need solvents like turpentine or mineral spirits first. After solvent cleaning, soap and warm water remove remaining residue and condition bristles.
What’s the best solvent for cleaning oil paint brushes?
Odorless mineral spirits provide the safest, most effective cleaning. Turpentine works but produces toxic fumes. Citrus-based solvents offer eco-friendly alternatives. Avoid harsh chemicals that damage natural bristles or synthetic brushes.
How long can I leave paint on brushes before cleaning?
Clean brushes immediately after painting. Oil paint starts drying within 2-4 hours depending on pigments and medium. Dried paint becomes exponentially harder to remove and can permanently damage expensive sable brushes.
Should I clean brushes between different colors?
Yes, when switching between contrasting colors or from dark to light shades. Quick wiping suffices for similar colors. Paint contamination creates muddy mixtures and affects color theory applications in your work.
What soap works best for oil paint brush cleaning?
Dish soap like Dawn cuts through oil residues effectively. Specialized brush soaps condition bristles while cleaning. Baby shampoo works gently for delicate natural bristles. Avoid harsh detergents that strip natural oils.
How do I remove dried paint from brushes?
Soak brushes in solvent for 15-30 minutes to soften dried paint. Use wire mesh screens for gentle scrubbing. Multiple cleaning cycles may be needed. Patience prevents bristle damage from aggressive scrubbing.
Can I store wet brushes temporarily during painting?
Store brushes in painting medium or wrap in plastic for breaks under 30 minutes. For longer breaks, clean completely. Wet paint hardens quickly, making removal difficult later.
How should I dry brushes after cleaning?
Reshape bristles while damp, then lay brushes flat on towels. Never stand wet brushes upright – water runs into the ferrule and loosens adhesive. Allow 24 hours for complete drying.
What’s the difference between cleaning natural and synthetic brushes?
Natural bristles require gentler handling and cooler water temperatures. Synthetic brushes tolerate more aggressive cleaning and warmer water. Both need immediate cleaning, but natural brushes are more sensitive to harsh treatment.
How often should I deep clean my brushes?
Deep clean weekly even for lightly used brushes. Paint residue accumulates gradually. Monthly condition assessments help identify wear or damage early. Professional brush maintenance prevents costly replacements.
Conclusion
Mastering how to clean oil paint brushes transforms your painting experience and protects valuable artist tools.
Proper cleaning techniques prevent paint buildup, extend brush lifespan, and maintain consistent performance across different painting styles.
The investment in quality cleaning supplies pays dividends through reduced brush replacement costs.
Whether working with hog hair brushes or premium Kolinsky sable, consistent maintenance routines preserve bristle integrity and painting precision.
Studio cleanup becomes efficient with systematic approaches to solvent disposal and ventilation management.
Professional artists understand that time spent on brush maintenance directly impacts painting quality and long-term tool investments.
Remember that immediate care prevents most cleaning problems. Paint consistency, proper storage, and regular maintenance schedules keep your painting equipment performing optimally for years.
These fundamental skills support artistic growth and protect your creative investments.


