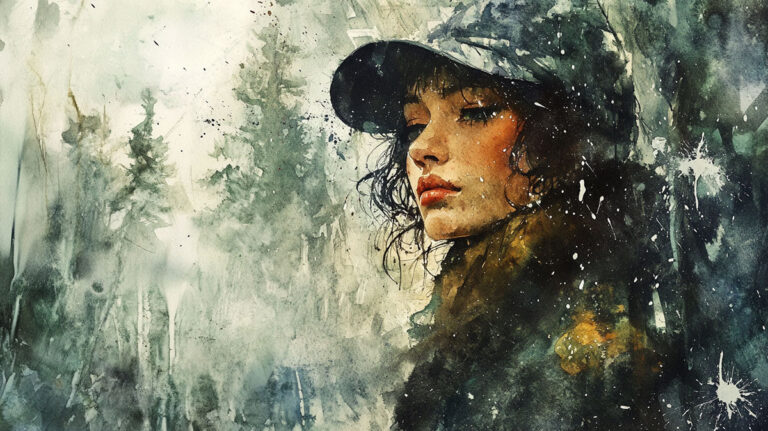
Watercolor painting has a way of surprising you, especially when it comes to techniques like backwash or bloom effects.
These effects happen when wet paint meets an already saturated surface, pushing the pigment outward and creating unexpected textures.
If you’ve ever wondered what is backwash/bloom effects technique in watercolor painting, this article breaks it down.
You’ll learn how to use this technique intentionally to add depth and texture to your work.
From understanding how water control influences the spread of pigment, to recognizing the importance of watercolor paper absorbency, the goal is to help you gain control over those unpredictable blooms.
We’ll cover the essentials: managing water-to-paint ratios, troubleshooting common issues like unwanted backruns, and creating dynamic effects through wet-on-wet methods.
By the end, you’ll have the knowledge to embrace or prevent blooms, depending on what you want in your painting.
Watercolor Washes: The Foundation of Every Painting

Watercolor washes are where every painting begins. Whether it’s the sky in a landscape or the soft underlayers of a portrait, these washes form the groundwork. You can’t just splash water and pigment and hope for the best.
There’s control, even in looseness. There’s planning, even when it looks spontaneous.
Wet-on-Wet: The Key to Fluid Transitions
Wet-on-wet is the go-to technique for creating smooth gradients and soft transitions. You start by wetting the paper, then apply the watercolor.
The paint spreads organically, pooling in some areas, thinning out in others.
This method allows for those accidental blooms and backruns-what some might call mistakes but often become the most interesting parts of the painting.
Of course, that depends on how much water you use. Too much, and the paint can backwash, creating textures that weren’t planned.
Managing Water Control: The Essential Skill
Water is both your ally and your enemy in watercolor. The balance between too much and too little water can make or break a wash.
Too much water and you risk those unwanted blooms. Too little, and the paint dries too fast, leaving harsh edges where you wanted softness.
Saturation and absorbency of your paper play huge roles here, so choosing the right materials matters.
Common Pitfalls: When Washes Go Wrong
There’s no sugar-coating it: washes can go wrong fast. Overworking a wet wash leads to muddy colors and streaks.
If you’re layering washes, you need to let each layer dry completely. Otherwise, the pigments lift and mix unintentionally, causing patches of uneven color.
Watercolor Blooms: Turning Accidents into Art
Watercolor blooms are unpredictable. You control them, or you don’t. That’s the reality.
They happen when wet paint hits a surface already saturated with water, pushing the pigment out and leaving behind these irregular, almost organic shapes.
Some call it the bloom effect. Others know it as a backwash. Either way, it’s about understanding how water and pigment interact on the page.
Creating Intentional Blooms
Here’s the thing: blooms don’t have to be accidents. You can create them on purpose. It starts with the wet-on-wet technique, making sure your paper is thoroughly soaked but not overly drenched.
The right amount of water control will give you that signature bloom effect without the chaos.
You apply a more diluted color, then drop in a more saturated pigment while it’s still wet. The color bleeds outward, forming the bloom.
It’s all about timing. Too dry, and nothing happens. Too wet, and the colors blur into a muddy mess. The surface tension of your paper matters, too.
Different watercolor paper brands react differently depending on their absorbency and texture.
When Blooms Go Wrong
Not every bloom works in your favor. If you’re layering washes and one section is still wet, you’ll get a bloom where you didn’t intend.
That’s how accidents happen. And sure, you could try to fix it by reworking the area, but then you risk damaging the paper or lifting too much pigment. It’s a fine line between intentional effects and total disaster.
The real pitfall? Thinking you can predict everything. Watercolor has a way of reminding you who’s in charge.
So, if you’re asking yourself what is backwash/bloom effects technique in watercolor painting, it’s not just about creating pretty textures. It’s about letting go of control just enough to let water and pigment do what they’re going to do.
Exploring Backwashes and Feathering Techniques

Backwashes happen when one section of your watercolor is wetter than another, and the water starts pushing the pigment around.
That’s how you get those unpredictable blooms or backruns. It’s all about controlling water-to-paint ratios.
Too much water, and your carefully placed colors get disrupted. Too little water, and everything dries too quickly, leaving harsh lines where you didn’t want them.
Using Backwashes Intentionally
You can actually use backwashes as part of your design, but it takes practice. The key is knowing where the water will flow and how it will carry the pigment.
It’s not something you control perfectly. Watercolor never gives you that. But with enough experience, you learn how to manipulate the process just enough.
Start by laying down a wash-wet-on-wet, preferably. Then, drop more water into an already wet section. The pigment will get pushed outward, creating that feathered look around the edges.
Different papers react in different ways. Absorbent watercolor paper is more forgiving, allowing more time for the backwash to develop.
Less absorbent paper gives sharper edges. You’ll also notice that pigment pooling occurs where the water gathers, giving you stronger, more concentrated areas of color.
Feathering Edges for Soft Transitions
Feathering is related, but more controlled. Instead of letting the water do all the work, you guide it. After applying a wash, you can use a clean, damp brush to soften the edges of your paint.
This creates a gradual transition between colors or fades out a wash into the paper. The trick is using just the right amount of water-too much and you’re back to dealing with unintended blooms. Too little, and the feathering effect doesn’t happen at all.
Gradients are a common use for feathering. Whether you’re transitioning from dark to light or blending two colors, feathering helps avoid that harsh line between sections.
It’s not just about aesthetics, either. Feathered edges can help lead the viewer’s eye across the painting or emphasize the softer areas of focus.
Common Mistakes with Backwashes and Feathering
The first mistake? Overworking the paint. The more you mess with a wet area, the worse the backwash gets. It becomes muddy, losing any sense of direction.
Another problem is using too much water when feathering. That turns the whole section into a bloom, erasing the soft transition you were aiming for.
Textural Effects in Watercolor

Texture in watercolor isn’t just about what you paint-it’s about how the paint reacts with the paper. The texture of your watercolor paper itself plays a huge role.
Rougher paper gives you more pronounced texture, while smoother paper will soften the effects. But that’s only the start. You can push watercolor to create textures that go beyond the surface.
Using Salt for Crystalized Patterns
Sprinkling salt on a wet wash creates this crystallized texture. The salt absorbs water, pulling the pigment toward it and leaving behind these irregular, textured spots.
The effect is almost instant, but you need to wait for the whole thing to dry before brushing the salt off. The trick? Timing. Too much water, and the salt dissolves or spreads too far.
Too little, and nothing happens. You need that perfect amount of wetness for the pigment to react to the salt.
Scratching and Lifting for Hard Edges
Scratching into the paper while the paint is still wet gives you sharp, almost etched lines. You can use the back of your brush or even a palette knife for this. It creates a strong contrast with the softness of watercolor washes.
Lifting, on the other hand, is the opposite. You blot out pigment using a clean, dry brush or paper towel.
It’s like erasing parts of your painting, giving you highlights or subtle textures within the wash. The more absorbent the paper, the easier it is to lift pigment without damaging the surface.
Splattering for Dynamic Texture
This one’s messy, but that’s the point. You load your brush with paint and flick it onto the paper, creating a random, textured splatter effect.
The size of the splatter depends on how much paint you use and how you angle the brush.
Bigger drops create more pronounced texture, while fine splatter gives an almost mist-like effect.
This technique works well for adding texture to landscapes or abstract backgrounds, bringing that extra level of unpredictability.
Common Mistakes with Textural Effects
A big mistake is overusing these techniques. Too much salt, too many scratches, or excessive splattering can make a painting look chaotic instead of textured. Another issue? Not letting the paper dry enough before applying new layers.
Wet washes can bleed into your textures, muddying the effect and causing backruns or blooms where you don’t want them. This is where you really need control-knowing when to stop.
It’s easy to get carried away with textures, but less is usually more.
Lifting Techniques: Removing and Adjusting Color

Lifting is one of the most useful techniques in watercolor, especially when you’ve got too much pigment on the paper or need to adjust the color saturation.
The process is straightforward-remove paint from the surface using water and a brush, or even a tissue, but it’s not as simple as it sounds.
Timing matters. The wetter the paint, the easier it is to lift. Once it dries completely, especially on more absorbent watercolor paper, lifting becomes more difficult.
Lifting Wet Paint
When the paint is still wet, you can blot areas with a paper towel to create highlights or correct a mistake. It’s immediate.
A dry brush works too, especially if you want more precision. The brush absorbs the excess water and pigment, leaving a lighter area behind.
This technique is perfect for creating textures like clouds, soft highlights, or even abstract patterns.
Lifting Dry Paint
Lifting dry paint takes more patience and often requires a stiff brush. You dampen the brush, then scrub lightly at the area you want to lighten.
This is more challenging on rough or textured paper since the pigment sinks deeper into the surface.
Pigment granulation can also make this tricky because it leaves uneven color after lifting. You’ll often need multiple passes to get the effect you want.
Softening Harsh Edges
Sometimes, the edges of a wash dry too hard, creating unwanted lines or transitions. Lifting can help soften these edges.
Using a damp brush, you can gently lift some pigment from the dried area, feathering it out into the surrounding color.
The key is controlling how much water is on your brush-too much, and you’ll cause a bloom or backwash effect.
Common Pitfalls with Lifting
One of the biggest mistakes? Overworking the paper. The more you lift, especially in the same area, the more you risk damaging the surface.
This is particularly true with thin or delicate watercolor papers. You’ll start to see the fibers break down, leaving a rough, uneven texture that doesn’t take new paint well.
Special Effects in Watercolor Painting

Watercolor is unpredictable, but that’s where the magic happens-especially when you’re after special effects. It’s all about exploiting the natural flow of water and pigment. Control is a myth; it’s more about guiding the process.
The Splattering Effect
Splattering is the fastest way to introduce chaos into a painting. You load the brush with watery paint and flick it onto the paper.
The results are random, but you can control the size of the splatters based on the brush size and how much pigment you use.
Granulating pigments tend to add extra texture to the effect. Splattering works great for skies, foliage, or abstract textures.
Using Alcohol for Texture
Rubbing alcohol reacts with watercolor in surprising ways. When dropped onto wet paint, the alcohol repels the water and creates hard-edged, circular patterns.
The effect is sudden, and the size of the spots depends on how much alcohol you use. It’s like reverse feathering, pulling pigment away rather than blending it.
This technique adds texture quickly, especially in areas where you want a break from soft transitions.
Creating Scratches for Rigid Textures
This is a bit more aggressive, but scratching into wet paper with the back of your brush or a palette knife can leave hard, defined lines.
When the paper dries, those scratched areas remain white, adding a strong contrast to the softer washes. It’s ideal for things like grasses, branches, or any element where you need hard edges without using a brush.
Using Salt for Crystalline Patterns
Sprinkling salt on a wet wash creates a crystal-like texture, pulling pigment toward the salt granules. The timing is crucial; too early, and the salt dissolves. Too late, and nothing happens.
The effect varies depending on how much water is in the wash and the type of paper used.
Rougher watercolor paper gives a more dramatic result since the salt has more surface to interact with. This technique is perfect for landscapes, snow scenes, or abstract pieces.
Common Pitfalls with Special Effects
Overuse is the biggest issue. It’s easy to get carried away, adding effects everywhere. What should be an accent can end up overwhelming the painting.
Timing matters too-waiting too long can leave you with either a lack of reaction or backwash where you didn’t expect it, similar to what is backwash/bloom effects technique in watercolor painting.
Building Confidence in Watercolor through Practice

Watercolor doesn’t let you fake it. You have to practice, and a lot of it. The unpredictability?
It only becomes an asset after you’ve messed up countless times. It’s about learning the way water moves on the page, how pigment pools or spreads, and controlling that without overthinking it.
Repetition and Muscle Memory
This isn’t a medium where you can casually pick up the brush and hope for a masterpiece. You need to repeat the same techniques-wet-on-wet, wet-on-dry, lifting, and splattering-over and over until they stop feeling foreign.
Repetition builds muscle memory. You start to understand how much water-to-paint ratio is needed for a smooth gradient or how to avoid those unwanted backruns when layering a wash.
Even simple tasks like applying a watercolor wash take practice to master. Getting an even spread without puddling or streaks requires the right balance of water and pigment.
Learning from Mistakes
Mistakes will happen. A lot. And every one of them teaches you something. You learn more from a bloom gone wrong than a perfect wash.
The trick is to analyze what went wrong-did you apply too much water?
Was the pigment too diluted? Or maybe the paper absorbency wasn’t what you expected. These small details matter, and understanding them comes from failing enough times that they stop surprising you.
Backwash effects, or unintentional blooms, happen when there’s too much water. This is common when you’re still getting used to controlling moisture levels.
You’ll probably ask yourself, what is backwash/bloom effects technique in watercolor painting? And the answer is simple: it’s something that you can control through practice-or let it work in your favor when you can’t.
Building Trust in Your Process
Watercolor requires you to trust the process. Not everything is going to go as planned, and that’s fine.
Over time, you’ll learn when to let go, when to stop overworking an area, and when a mistake can turn into an opportunity for something new.
FAQ on What Is Backwash/Bloom Effects Technique In Watercolor Painting
What causes backwash or bloom effects in watercolor?
Backwash or bloom effects happen when there’s an imbalance in the moisture levels of the paper.
Wet paint spreads into a more saturated area, pushing pigment outwards and creating unpredictable textures. It’s all about controlling how much water sits on the surface versus how much pigment you’re applying.
How do you intentionally create bloom effects in watercolor?
To create blooms on purpose, use the wet-on-wet technique. Start with a wet surface, apply a wash, and then drop more water into it.
The paint will spread out, causing the bloom effect. Timing matters-too much water can make the effect too chaotic, so watch the water-to-paint ratio.
Can you prevent unwanted backwash in watercolor?
Yes, you can. Avoid applying too much water to an already wet area. Let the first layer dry before adding more paint.
Another trick is to test your paper’s absorbency first. Rougher papers may prevent unwanted blooms by soaking up extra water, giving you better control.
Does the type of paper affect bloom effects?
Absolutely. Watercolor paper with higher absorbency controls the bloom better, while less absorbent paper might give you more dramatic blooms.
Rough texture papers can spread the pigment more unevenly, creating softer blooms, while smoother papers result in sharper edges around the bloom effect.
What materials work best for creating backwash effects?
A few key tools can help. Use a soft watercolor brush that holds water well, and choose a more absorbent paper.
You can also experiment with granulating pigments for added texture in your blooms. Always have a tissue handy to blot areas where blooms might get out of control.
Can you fix accidental blooms in watercolor?
Fixing accidental blooms is tricky. One way is to lift the excess pigment while the paint is still wet using a clean, dry brush.
Another method is to wait for it to dry and carefully lift the unwanted bloom with a damp brush. Be careful not to overwork the area.
How do backwash and bloom effects contribute to a painting?
Bloom effects add texture and a sense of spontaneity to watercolor paintings. They create interesting, organic shapes that can give the piece a dynamic, fluid feel.
When controlled, they offer a way to enhance landscapes, skies, or abstract elements by giving them depth and character.
What common mistakes lead to unwanted blooms?
Too much water is the most common issue. When one area of the paper holds more water than another, it pushes the pigment, creating a bloom.
Another mistake is not letting the paint dry before applying more layers, leading to uncontrolled backwash. Water control is key.
Can blooming effects be used in detailed work?
While blooms are often associated with looser, more abstract work, they can be incorporated into detailed paintings.
Use controlled amounts of water and focus on smaller areas. This way, you can introduce texture without losing detail. Managing water-to-paint ratio becomes more crucial in this context.
How does the bloom effect relate to other watercolor techniques?
The bloom effect is closely tied to the wet-on-wet technique, which relies on water and pigment interactions.
While backwash can be seen as an accident, it can also be used purposefully alongside techniques like lifting or feathering to create complex textures and transitions within a painting.
Conclusion
Understanding what is backwash/bloom effects technique in watercolor painting gives you more control over your artwork, even when the medium itself thrives on unpredictability.
These effects occur when water and pigment meet in varying levels of saturation, leading to blooms that can either enhance or disrupt a piece.
By mastering water control, timing, and choosing the right watercolor paper, you can prevent unwanted blooms or intentionally use them to add texture and depth.
Techniques like lifting, wet-on-wet, and managing the water-to-paint ratio all come into play.
Whether it’s through careful planning or embracing the natural flow of watercolor, backwash and bloom effects offer a unique way to make your paintings more dynamic.
Learning when to let these effects happen and when to avoid them is key to improving your overall watercolor technique.
The more you practice, the more you’ll know how to make them work for you.