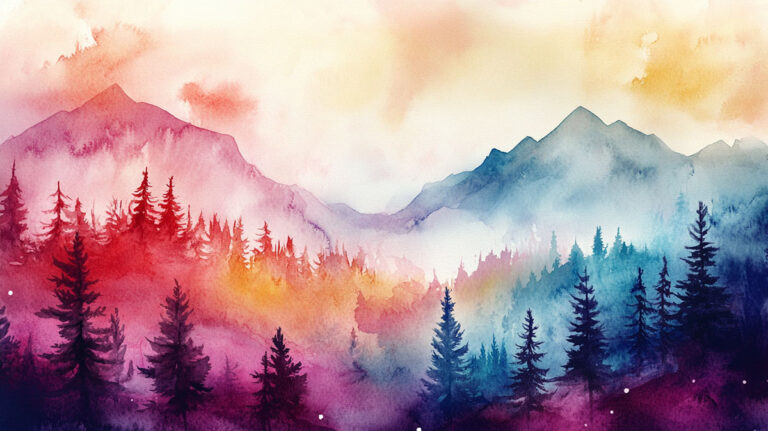
Every convincing watercolor sky starts the same way: a single wash that shifts smoothly from deep blue at the top to pale light near the horizon.
That is the graduated wash technique in watercolor painting at work. It controls how pigment concentration changes across a painted area, producing continuous tonal transitions without hard lines or visible brush marks.
Painters use it for skies, water, backgrounds, skin tones, and underpainting layers. It is one of the first techniques worth learning properly, because almost everything else in watercolor painting builds on the same brush control and water management skills it requires.
This guide covers what the technique is, how it works, the main variations, materials that affect results, and how it compares to other wash methods.
What is Graduated Wash in Watercolor Painting

A graduated wash is a controlled, continuous tonal transition within a single painted area. Pigment concentration changes with each stroke, moving from dark to light, light to dark, or one color to another, without visible breaks or hard lines between values.
Also called a graded wash, the technique sits at the core of watercolor painting. It produces skies that fade naturally toward the horizon, backgrounds that recede into distance, and value transitions that feel smooth rather than mechanical.
<strong>The key distinction from a flat wash:</strong> a flat wash holds one consistent tone throughout. A graduated wash actively changes pigment-to-water ratio as you move across the paper, producing that soft color gradient painters use to show light, depth, and atmosphere.
The global fine art watercolor paints market was valued at USD 3.67 billion in 2024, according to Proficient Market Insights, growing at a CAGR of 6.9% through 2031. Interest in foundational techniques like the graduated wash is a direct driver of that growth, as beginner and intermediate painters seek structured, teachable methods.
Artists like [J.M.W. Turner and Winslow Homer built entire atmospheric painting styles around wash-based color transitions. Homer, in particular, spent nearly three decades developing his wash layering approach across close to 700 watercolors, according to Sotheby’s research.
How a Graduated Wash Works

The mechanics are straightforward. Each horizontal stroke picks up a slightly different pigment-to-water ratio than the one before it. Tilt the board at roughly 10 to 15 degrees, and gravity pulls the wet bead of paint downward, blending naturally into the next stroke as you work.
The core variables:
- Pigment load: Start with a fully saturated brush for the darkest value; reduce pigment each stroke to lighten progressively
- Water volume: Adding more water per stroke dilutes pigment and drops the color saturation
- Board angle: Too steep and the bead runs fast, causing streaks; too flat and the bead stalls, creating uneven pooling
- Working speed: Each stroke must meet the still-wet edge of the previous one. A dry edge creates a hard line mid-wash
The drying window matters more than most painters expect. Cold press paper absorbs paint roughly 30% faster than hot press, according to research from Watercolor Affair. That faster absorption shrinks the window you have to rework each stroke, so brush loading decisions need to be made before the brush touches the paper.
Types of Graduated Wash
Not all graduated washes work the same way. The type you use depends on whether you are changing value, color temperature, or hue across the painted area.
| Wash Type | What Changes | Common Use |
|---|---|---|
| Light to Dark | Increasing Density: Starting with a watery mix and gradually charging the “bead” with more pigment as you move down. | Creating deep foreground shadows, the depth of fabric folds, or drawing the eye toward a focal point. |
| Dark to Light | Decreasing Density: Starting with concentrated color and introducing clear water to the brush with every stroke. | Receding sky backgrounds (atmospheric perspective) and soft, fading water reflections. |
| Color to Color | Hue Transition: One pigment is gradually replaced by another in the same continuous wash. | Sunsets (Yellow to Red), transition zones in foliage, or shifts in color temperature (Warm light to Cool shadow). |
| Variegated Graduated | Multi-Dimensional: Multiple colors are introduced while simultaneously managing a tonal shift from top to bottom. | Complex atmospheric skies, moody storm clouds, and “lost-and-found” edges in professional backgrounds. |
The variegated graduated wash is the trickiest variation. It combines color-to-color blending with a simultaneous value transition. Most sunset sky paintings rely on this approach: a dark, saturated orange or red at the horizon shifting upward through pink into a cooler, lighter blue-violet.
Painters working with wet-on-wet technique sometimes use a variegated graduated wash as a base layer, letting the colors bleed and soften before adding detail on top.
Tools and Materials That Affect the Result
The quality of a graduated wash depends almost entirely on materials. Technique matters, but the wrong paper or an underpowered brush will fight every stroke you make.
Paper weight and surface texture: 140lb (300gsm) cold press is the standard starting point. Papers lighter than 300gsm buckle under heavy washes, which breaks the flat working angle and interrupts paint flow. According to Edinburgh Art Workshop, paper at 300gsm and above resists warping under repeated wet applications.
Hot press paper slows absorption and allows more blending time. It produces harder-edged gradients and crisper value transitions. Cold press paper creates soft, organic gradations with natural texture in the wash.
See the breakdown of how surface type affects wash behavior:
| Paper Type | Absorption Speed | Gradient Edge | Best For |
|---|---|---|---|
| Cold Press | Moderate: The standard “all-rounder.” The fibers allow for a comfortable working window. | Soft & Organic: The texture (tooth) breaks up the wash slightly, creating a natural, professional look. | Loose skies, landscapes, and general illustrative work. |
| Hot Press | Slow: Paint sits on the surface longer because the fibers are compressed flat. | Crisp & Controlled: Perfect for high-detail work where you need to manage exactly where a color stops. | Botanical studies, fine-line illustration, and digital-ready product renders. |
| Rough Press | Very Fast: The deep “valleys” in the paper suck up moisture rapidly. | Bold & Textured: Creates “sparkle” where the brush skips over the deep texture, leaving white gaps. | Expressive, atmospheric work and rugged, high-contrast scenery. |
Read more about how cold press vs hot press watercolor paper behaves before deciding which surface to use for your wash work.
Brush selection: Mop brushes and wide wash brushes hold larger water reserves, making it easier to load consistently per stroke. A brush that runs dry mid-stroke forces you to reload, which almost always creates a hard line. The mop brush in watercolor work is especially useful here because its belly holds enough paint to complete a full horizontal stroke without a reload.
Pigment transparency matters too. Transparent pigments like Quinacridone Magenta, Phthalo Blue, and Phthalo Green graduate more cleanly than opaque ones. Transparent pigments allow light to pass through the wash layer and reflect off the paper, creating luminosity. Opaques sit on top of the surface and can look chalky or muddy when diluted heavily.
Brands like Daniel Smith, Winsor & Newton, and Schmincke behave noticeably differently in high dilution. Daniel Smith pigments tend to granulate, which adds texture to a wash. Schmincke paints stay consistently smooth. Neither is wrong, but the behavior changes how you plan each stroke.
Step-by-Step Process for a Basic Graduated Wash
Before you start: mix enough paint for the full area. Running out mid-wash and stopping to mix more is almost always fatal to the gradient. Mix generously, then mix a bit more.
Tilt the board before picking up the brush. Adjusting the angle after you have started disrupts the bead and changes how fast paint flows.
- Load the brush fully for the first stroke. Drag it horizontally across the top edge of the area, left to right in a single confident pass
- Pick up slightly less pigment (or slightly more water) for the second stroke. Work quickly. Drag across just below the first stroke, overlapping the wet bead at the bottom edge
- Continue adjusting the ratio per stroke. If going dark to light, add more water each time. If going light to dark, add more pigment
- Collect the final bead at the bottom with a squeezed-out or dry brush. Leaving a heavy wet bead causes a bloom that backruns into the wash as it dries
- Leave it flat or at a slight angle until fully dry. Do not force-dry with a heat gun or hairdryer mid-wash as this locks in hard edges and streaks
The whole sequence should feel fast. If you are stopping to think between strokes, the wet edge is probably drying. Most experienced painters work through a full-page graduated wash in under two minutes.
For reference on how to blend watercolor paint beyond the basic wash sequence, layering and wet-on-wet approaches build on the same timing and brush control skills.
Common Mistakes and How to Fix Them
Most problems with a graduated wash come from one of three causes: wrong timing, inconsistent brush loading, or interrupting the process mid-wash.
Streaking is the most common issue. It happens when a stroke dries partially before the next one overlaps its wet edge. The fix is speed, not water volume. Work the full width of each stroke in a single pass and keep the pace steady.
Blooms and backruns appear when a wet brush touches an area that has already started to dry. The fresh water pushes the drying pigment outward, creating a bloom shape with a hard edge. This can be intentional (see the blooming technique in watercolor painting), but in a graduated wash it is usually a mistake. Avoid going back into any area that has lost its shine.
Uneven gradients almost always trace back to inconsistent brush loading rather than technique. If some strokes are darker or lighter than expected, the issue is how paint was picked up, not how it was applied.
A few specific fixes worth knowing:
- Hard line mid-wash: usually means the board angle is too steep, or paint dried before the next stroke connected
- Muddy color in a color-to-color wash: the two pigments are mixing in the brush rather than on the paper. Clean the brush between loading each color
- Bead pooling at the bottom: the board angle is too high, or too much water is loaded in the final strokes
If the wash has fully dried with visible defects, glazing technique can correct uneven value areas. A thin, transparent glaze over a lighter patch darkens it without disturbing the layer underneath. This only works cleanly with transparent pigments. Opaques tend to lift the dried wash below when rewet.
Knowing how to use lifting technique in watercolor painting also helps. While the wash is still wet, a dry brush or clean damp brush can pull pigment back out of an area that has gone too dark, effectively correcting the gradient before it locks in permanently.
The online art courses market, which covers techniques like graduated wash, was valued at USD 2.34 billion in 2024 according to Business Research Insights. The number shows how many painters are actively working to get foundational wash control right, not just as a creative hobby but as a structured, learnable skill.
Where Graduated Wash is Used in Watercolor Paintings

The graduated wash shows up in almost every subject category in watercolor painting techniques. It is not a specialty tool for advanced painters. It is a core building block used at every skill level.
Skies and Atmospheric Backgrounds
The sky is where most painters first learn the graduated wash. A classic clear-sky wash transitions from a deeper blue overhead to a lighter, warmer tone near the horizon, reflecting how the atmosphere scatters light differently at different angles.
The color temperature shift is important here. The upper sky is cooler and more saturated. Near the horizon it becomes lighter and noticeably warmer, often picking up a pale yellow-ochre or soft orange hue. A graduated wash handles both the value change and the temperature shift in a single continuous pass.
Field naturalist and watercolorist John Muir Laws documents this approach directly in his sky-painting tutorials: a blue graded wash lightening toward the horizon, followed by a pale warm stroke along the horizon line while the wash is still wet.
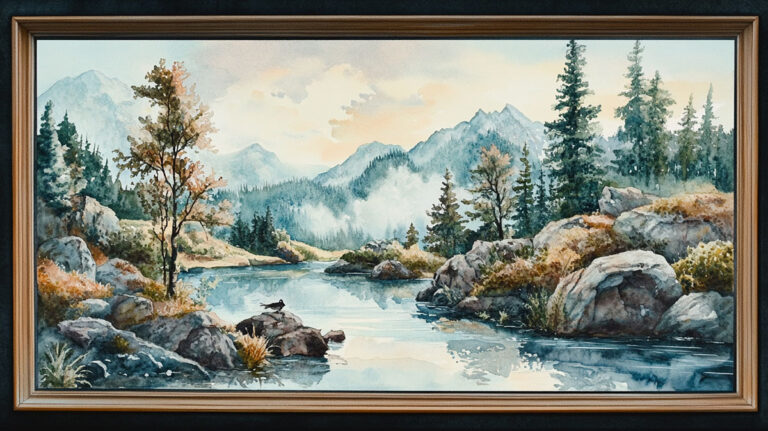
Landscape Depth and Atmospheric Perspective
Distant hills, mountains, and tree lines in landscape painting rely on value and color temperature shifts to create depth. A graduated wash applied to a distant landform, pulling from a cool mid-tone into near-white at the far edge, reads as recession without hard edges or overworked detail.
Key applications in landscape work:
- Distant mountain ranges fading into pale sky value
- Mist and fog effects over water or valleys
- Open foreground areas where tone shifts from shadow into light
This connects directly to atmospheric perspective: objects further away appear lighter, cooler, and less detailed. The graduated wash produces that visual effect without painting individual elements in the distance at all.
Water and Reflections
Still water reflects the sky and typically shows a tonal shift from darker near the foreground to lighter at the horizon. A graduated wash handles this naturally when the board is tilted and the pigment-to-water ratio drops with each stroke moving upward through the reflection zone.
Color temperature also shifts in water. Foreground water reflects overhead sky color (cooler, darker). Water near the horizon reflects the lighter, warmer near-horizon sky. That two-axis change, value and temperature simultaneously, is what makes painting water in watercolor feel so tricky. A graduated wash manages both axes in one continuous pass rather than requiring separate layers.
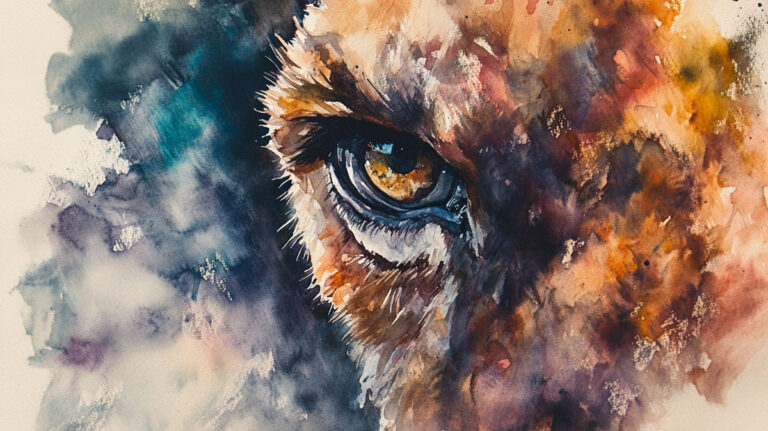
Portraiture, Figure Work, and Fabric
Skin tone gradients across a cheek, forehead, or neck are short-range graduated washes. The transition from a lit area to a shadow area on the face uses the same mechanics: decreasing pigment load per stroke, or shifting slightly toward a cooler or more saturated tone in the shadow zone.
Fabric and clothing folds behave similarly. A sleeve curving away from a light source shows a smooth, continuous tonal drop that a graduated wash produces more cleanly than any dry-brush approach.
Research involving over 200 participants found that just 45 minutes of creative activity, including painting, significantly lowered cortisol levels regardless of skill level, according to Black Alphabet / Crown Counseling art therapy research. The graduated wash is one of those techniques that rewards practice with visible results, which tends to keep painters engaged long enough to feel those effects.
Underpainting and Base Layers
A graduated wash is frequently the first layer of a painting, not the last. Applied as an underpainting, it establishes a tonal foundation across a large area before detail work begins on top.
Why it works as a base:
- Transparent pigments let later layers show through without muddying
- A dried graduated wash accepts subsequent wet-on-dry layers cleanly
- It sets the light direction across the whole painting from the first stroke
Painters working in the tradition of watercolor glazing technique often start with a broad graduated underpainting and build specific details through successive dry glazes on top. John Singer Sargent used this kind of layered approach across his large watercolor panels, establishing broad value structure before committing to any specific form.
Graduated Wash vs. Other Watercolor Wash Techniques

Most painters encounter four core wash types early on: flat, graduated, variegated, and wet-into-wet. Knowing which one to use (and when to combine them) determines whether a painting reads as controlled and intentional or muddy and accidental.
According to Daniel Smith Artists’ Materials, each wash type serves a distinct visual purpose: flat wash for even tone, graduated wash for smooth value transitions, variegated wash for color-to-color shifts, and wet-into-wet for fluid, uncontrolled blending.
| Wash Type | What it Produces | Control Level | Best Use |
|---|---|---|---|
| Flat Wash | Single Even Tone: A solid, unvarying “sheet” of color with no visible brush marks or shifts. | High: Requires a steady hand and a consistent “bead” of water to maintain uniformity. | E-commerce product backgrounds, blocked-in shapes, and clean architectural elements. |
| Graduated Wash | Smooth Gradient: A seamless transition from dark to light (tonal) or one color to another (hue). | High: Managed by progressively adding more water or a second pigment to the brush. | Atmospheric skies, creating 3D volume in skin tones, and receding horizons. |
| Variegated Wash | Multi-Hue Interaction: Multiple colors applied to a wet surface, allowing them to touch and mingle without fully mixing. | Medium: The “flow” is guided by the brush, but the pigments do their own work on the paper. | Complex sunset backgrounds, autumn foliage, and vibrant, expressive color work. |
| Wet-into-Wet | Soft Blooms: Organic, “feathered” transitions and unpredictable, fluid shapes. | Low: You relinquish control to the moisture level and gravity of the paper fibers. | Misty atmospheric effects, soft-focus backgrounds, and loose, impressionistic florals. |
Graduated Wash vs. Flat Wash

The flat wash maintains one consistent pigment-to-water ratio throughout. No change, no transition. It looks uniform when done correctly, which is exactly what it is supposed to do.
Key difference: a flat wash asks you to keep everything the same. A graduated wash asks you to change something deliberately with every stroke. One requires consistency. The other requires controlled progression.
Both are foundational. Learn the flat wash technique in watercolor first if you are just starting out. The muscle memory for brush loading and bead management transfers directly to graduated wash work.
Graduated Wash vs. Wet-into-Wet
Wet-into-wet works on pre-wetted paper and relies on water tension and pigment diffusion rather than brush control. You drop or stroke paint onto wet paper and let it move. The results are soft, unpredictable, and often beautiful, but not precisely controlled.
A graduated wash, by contrast, is applied to dry paper (usually) and is entirely controlled through brush loading decisions made before each stroke. Same wet look, fundamentally different process.
Painters often combine both. A graduated wash dries first. Then the painter wets a specific section and drops in a second color wet-into-wet for a softer bloom within the gradient. This is how many complex sunset skies are built: graduated structure first, wet-into-wet color variation on top.
For a direct look at how the two interact in practice, the full breakdown of wet-on-wet technique in watercolor painting covers timing, paper preparation, and how to control (or deliberately lose) the edges between pigment zones.
Graduated Wash vs. Variegated Wash
A variegated wash is the graduated wash’s less predictable sibling. Both involve change across the painted area, but variegated work switches between different hues rather than changing a single color’s value or saturation.
The practical distinction:
- Graduated: one color, changing concentration
- Variegated: two or more colors blending or transitioning
Both techniques appear together in most sunset paintings. The sky first gets a graduated wash dropping from dark to light top-to-bottom. Then a second color is introduced wet-into-wet at the horizon, creating a variegated zone within the gradient.
Painters who want to build complex sky and background effects will eventually work with all three in the same passage. Practicing them separately first makes the combined approach much less stressful.
The online art courses market, which now covers every level of watercolor technique from basic washes to complex multi-layer work, was growing at a CAGR of 11.2% as of 2024, according to Business Research Insights. That growth reflects exactly this pattern: painters learning foundational techniques like the graduated wash before building toward more complex, layered approaches.
For more context on how wash techniques fit within the broader practice, see the full guide on watercolor painting and the range of watercolor painting materials that support each method.
FAQ on What Is Graduated Wash Technique In Watercolor Painting
What is a graduated wash in watercolor painting?
A graduated wash is a controlled tonal transition within a single painted area. Pigment concentration changes with each stroke, moving smoothly from dark to light or light to dark, without visible breaks or hard lines between values.
What is the difference between a graduated wash and a flat wash?
A flat wash maintains one consistent tone throughout. A graduated wash changes pigment-to-water ratio per stroke, producing a smooth color gradient. One requires consistency. The other requires deliberate, controlled progression from start to finish.
What paper works best for a graduated wash?
lb (300gsm) cold press watercolor paper is the standard starting point. Lighter paper buckles under heavy washes, breaking the flat working angle. Cold press absorbs paint faster than hot press, so brush loading decisions need to happen before each stroke.
What brush should I use for a graduated wash?
A mop brush or wide wash brush works best. Both hold enough water to complete a full horizontal stroke without reloading. Running dry mid-stroke almost always creates a hard line in the gradient.
Why does my graduated wash look streaky?
Streaking usually means a stroke dried before the next one overlapped its wet edge. Work faster, not wetter. Each stroke needs to meet the still-wet bead from the previous one. A dried edge creates a permanent hard line that cannot be fixed once set.
What is a variegated graduated wash?
A variegated graduated wash blends two or more colors while simultaneously shifting tonal value. Sunset skies use this often: a dark saturated orange at the horizon transitioning upward through pink into a cooler, lighter blue-violet near the top of the sky.
Which pigments work best for a smooth graduated wash?
Transparent pigments like Phthalo Blue, Quinacridone Magenta, and Phthalo Green graduate most cleanly. They allow light to pass through and reflect off the paper. Opaque pigments sit on the surface and can look chalky or muddy when heavily diluted.
How does board angle affect a graduated wash?
A 10 to 15 degree tilt lets gravity pull the wet paint bead downward, helping each stroke blend into the next. Too steep and the bead runs fast, causing streaks. Too flat and the bead stalls, creating uneven pooling across the wash area.
Can a graduated wash be used as an underpainting?
Yes. A dried graduated wash accepts subsequent layering technique cleanly. Transparent pigments let later detail work show through without muddying. It establishes light direction and tonal structure across the whole painting from the very first stroke.
How is a graduated wash different from wet-on-wet technique?
Wet-on-wet relies on pre-wetted paper and pigment diffusion. Results are soft and unpredictable. A graduated wash is applied to dry paper and controlled entirely through deliberate brush loading per stroke. Same flowing appearance. Completely different process and level of control.
Conclusion
This conclusion is for an article presenting the graduated wash technique in watercolor painting as one of the most practical, transferable skills a painter can develop.
Mastering the graded wash means understanding pigment dilution, board angle, brush loading, and drying time as a single connected system, not separate steps.
That control carries into every subject area, from painting a sunset to building smooth tonal transitions in portraiture and figure work.
The technique also sits at the foundation of more advanced methods. Watercolor masking techniques, layered glazing, and wet-into-wet work all benefit from the brush discipline the graduated wash builds first.
Practice the wash repeatedly on scrap paper before applying it to finished work. Consistency comes from repetition, not from better materials.