A pinch of table salt can do something no brush can replicate.
The salt texture technique in watercolor painting is one of the few methods that produces genuinely organic, unpredictable crystal patterns by letting chemistry do the work. Salt absorbs moisture from a wet wash, pulling pigment with it and leaving behind starburst marks, frost-like spots, and natural textures across the paper surface.
It works on night skies, botanicals, seascapes, rock surfaces, and abstract backgrounds. The results vary based on salt grain size, paper type, pigment choice, and timing.
This guide covers how the technique works, why salt creates watercolor texture, which salt types to use, how to apply and remove salt correctly, and how to combine it with other watercolor painting materials and methods.
What is the Salt Texture Technique in Watercolor

The salt texture technique is a method of sprinkling salt crystals onto wet watercolor paint to create organic, irregular patterns as the paint dries.
Salt absorbs the moisture in the wet wash and pulls pigment toward each crystal. This leaves behind lighter star-shaped or snowflake-like marks surrounded by slightly darker edges where the displaced pigment settles.
The result looks nothing like what a brush can produce. Frost on glass, coral textures, starfields, foliage, rocky surfaces. All achievable with a pinch of ordinary table salt.
The global watercolor paints market was valued at $3.14 billion in 2024 and is projected to grow at a CAGR of 5.32% through 2035 (MRFR, 2024), driven largely by rising hobbyist demand and interest in techniques exactly like this one.
It works because of one simple property: salt is hygroscopic. It draws moisture toward itself.
Sprinkle it onto wet paint, and it immediately starts pulling water and pigment from the surrounding area. The paint dries around the crystal, locking in the mark. Remove the salt once dry, and the texture stays.
The technique sits comfortably within watercolor painting techniques that rely on the medium’s unpredictability rather than fighting it.
Unlike methods that require precise brushwork, salt texture is deliberately loose. That’s the point. The less you try to control it, the better it tends to look.
Why Salt Creates Texture in Watercolor

Salt is made of sodium chloride. It is hygroscopic by nature, meaning it actively pulls moisture from its environment.
When a salt crystal lands on wet paint, it starts drawing water molecules toward itself. As water migrates to the crystal, it carries pigment particles with it. This is osmosis working in a very visible, practical way.
The lighter center mark forms where the water was pulled away. The slightly darker ring around it forms where displaced pigment settled as the wash dried outward from the crystal.
Key factor: pigment particle size matters. Granulating pigments (ultramarine blue, burnt sienna, raw umber) have larger particles that don’t flow as freely. The salt effect is less dramatic on them. Non-granulating, transparent pigments like phthalo blue or quinacridone red flow easily with the pulled water, producing larger and more defined crystal marks.
House of Watercolor notes that salt is also hygroscopic from the air, meaning humid studio conditions actually affect results. Salt that has absorbed ambient moisture before application produces weaker marks, or sometimes none at all.
The reaction stops when the wash dries completely. Once dry, the salt has nothing left to absorb. This is why timing is so important, and why the technique genuinely can’t be rushed.
Types of Salt and How Each Affects the Result
Not all salt produces the same pattern. Grain size is the main variable, and the differences are bigger than most people expect.
| Salt Type | Crystal Size | Mark Produced | Best Used For |
|---|---|---|---|
| Table Salt (Iodized) | Fine | The “Stardust” Effect: Creates a dense field of tiny, uniform “sparkles” where the salt pulls pigment from the fibers. | Subtle atmospheric grain, distant sand dunes, or adding a soft “grit” to a flat wash. |
| Sea Salt (Coarse) | Large | The “Starburst” Bloom: Produces dramatic, jagged patterns with a high degree of contrast between the center and the edges. | Craggy rock faces, barnacles on a ship’s hull, and large-scale architectural weathering. |
| Kosher Salt | Medium | Irregular Clusters: Its flaky, uneven structure creates varied, organic shapes that feel less “mechanical” than table salt. | Dense autumn foliage, gravel paths, and the “crusty” textures of salt flats or dried earth. |
| Epsom Salt | Variable | The “Frost” Pattern: Higher moisture content leads to softer, feathery “fractal” blooms that look crystalline. | Winter frost on a window, abstract “ice” textures, and dreamy, celestial backgrounds. |
Epsom salt behaves differently from sodium chloride because its crystal structure is different. The marks it produces are softer and less defined, which works well for subtle frost or atmospheric effects.
Most watercolor artists default to table salt or coarse sea salt. Table salt for detail, rock salt for drama. That said, worth testing all of them on a scrap sheet before committing to a finished piece.
Grain Size vs. Pattern Size
Bigger grain, bigger mark. This is consistent across all salt types.
Fine table salt might produce dozens of tiny spots across a wash. A few crystals of rock salt in the same area produce three or four large starburst blooms instead. Both are useful. Neither is better in absolute terms.
What changes with grain size is also density of coverage. Fine salt spreads more evenly. Coarse salt, applied by hand, drops in clusters, creating uneven but often more interesting distributions.
Which Salt Works Best for Specific Effects

Night sky: fine table salt over a deep indigo or phthalo blue wash.
Snow or frost: Epsom salt or a mix of fine and coarse for varied crystal sizes.
Rough rock texture: coarse sea salt or rock salt, applied thickly.
Botanical backgrounds: kosher salt for organic, leaf-like marks that don’t overpower the subject.
How to Apply the Salt Texture Technique Step by Step

Timing is the hardest part to get right. Everything else is straightforward.
The paint needs to be wet but not pooling. You want to see a sheen on the paper surface. If the paint is too wet, salt dissolves into it and produces nothing. If it’s already dull and drying, the salt has no moisture left to pull.
When to Add Salt (Wet vs. Damp Stage)
Too wet: salt dissolves, leaves no mark. The wash looks slightly disturbed but no crystal pattern forms.
Correct (sheen visible): salt produces clear starburst or crystal marks. This is the window to aim for.
Too dry: salt sits on the surface with zero reaction. No moisture to absorb.
The window between “too wet” and “too dry” is roughly 2 to 5 minutes on 300gsm cold press paper in average studio conditions. Humidity, paper weight, and wash thickness all shift that window. You get a feel for it after a few attempts.
Apply by sprinkling from a few inches above the paper. Don’t dump or press the salt in. Even scattering gives better coverage than clumping it in one area.
Then leave it. Don’t touch the paper. Don’t tilt it. Don’t try to blow-dry it. Let it dry completely on its own, which takes at least 20 to 30 minutes for a standard wash.
How to Remove Salt Without Damaging the Paper

Once fully dry, brush the salt off gently with a soft brush or the side of your hand.
Never rub. Rubbing while any moisture remains smears the pigment and destroys the pattern. Even if the surface feels dry, the layers underneath might not be.
Some coarse crystals, particularly rock salt, may stick slightly if the wash was quite wet when applied. A soft brush handles those easily. The paper surface on quality watercolor paper (Arches, Fabriano) holds up fine to this process. Cheaper student-grade paper can pill or roughen if rubbed too aggressively.
Paper and Pigment Variables That Change the Outcome
Two painters using the same salt on the same day can get completely different results if they’re working on different paper or with different pigments.
Paper type is the bigger variable.
The choice between cold press or hot press watercolor paper affects how water moves through the surface. Cold press has tooth. Water moves more slowly, giving salt more time to work. The marks are rougher, less defined, more organic.
Hot press is smooth. Water spreads faster and more evenly, but also dries faster. Salt marks on hot press tend to be crisper and more defined, but the window for application is shorter. Easier to miss the timing on hot press, especially in a dry studio.
| Variable | Effect on Salt Marks |
|---|---|
| Cold Press Paper | Organic Texture: The peaks and valleys of the “tooth” trap the salt crystals, creating a more natural, multidimensional bloom. The extra drying time allows for a more dramatic pigment “pull.” |
| Hot Press Paper | Crisp Precision: Because the surface is smooth, the salt pulls pigment across a flat plane, resulting in very sharp, star-shaped marks. However, the “window” to apply salt is much shorter before it dries. |
| 300gsm+ Paper | Sustained Reaction: Thicker paper acts as a reservoir for moisture. This keeps the wash in the “active” stage longer, allowing the salt to continue pulling pigment for several minutes. |
| Transparent Pigments | High Clarity: Without opaque fillers, light passes through the wash easily, making the white “starbursts” created by the salt appear brighter and more luminous. |
| Granulating Pigments | Textured Depth: The heavy pigment particles settle into the salt’s “gravity well,” creating dark, gritty borders around the white center of the bloom-perfect for simulating stone or rust. |
| Student-Grade Paint | Muted Results: Often contains synthetic fillers or brighteners that resist being moved by the salt, resulting in faint or “muddy” textures rather than clean blooms. |
Heavier paper (300gsm and above) is genuinely worth using here. It holds more water, extends the reaction window, and doesn’t buckle under a wet wash. 140gsm paper works, but dries faster and warps more, making the whole process harder to manage.
Daniel Smith and Winsor & Newton artist-grade paints consistently produce stronger salt effects than student-grade alternatives. The pigment load is higher and the binders don’t interfere with water flow the same way cheaper paints can.
Common Mistakes When Using Salt in Watercolor

Most failed attempts come down to one of three problems: wrong timing, wrong amount, or removing the salt too soon.
Adding salt too early is the most common one. If the wash is still very wet and pooling, the salt dissolves instead of creating marks. The paper looks slightly disturbed, nothing more.
Adding salt too late is the opposite failure. If the surface sheen is gone and the paint already looks matte, no reaction happens. Salt just sits there.
Other common mistakes:
- Using too much salt. Oversaturating the wash pulls out too much moisture, creating a muddy or overworked result rather than clean crystal marks
- Removing salt before the wash is completely dry, which smears the pigment and ruins the pattern
- Applying salt to a second wet layer over a previous dry wash. The salt reacts with the new layer only, sometimes creating unexpected and unwanted color shifts
- Using old, clumped salt that has absorbed humidity. Pre-dry it in an oven at 150 degrees for an hour if you suspect it has taken on moisture
One thing that surprises beginners: using salt over very dark or heavily pigmented washes often produces less visible marks. The contrast between the lighter crystal center and the surrounding dark paint is there, but it reads as subtle. For maximum visibility, mid-tone washes work best.
Online art tutorial platforms reported a 38% increase in art paint sales among consumers aged 18 to 35 in 2023 (Market Growth Reports), suggesting a large wave of newer painters who are likely encountering salt texture for the first time, without the trial-and-error experience to avoid these common pitfalls.
Creative Applications of Salt Texture in Watercolor Paintings
Salt texture is not a one-subject technique. It fits across a surprisingly wide range of subject matter, and the results stay organic enough that they rarely look forced.
The global online art courses market reached $2.34 billion in 2024 (Business Research Insights), with watercolor consistently among the most searched technique categories. Salt texture appears in a huge share of beginner and intermediate tutorials, largely because the visual payoff is immediate and the subject range is broad.
Here is where painters actually put it to use:
| Subject | Salt Type | Effect Achieved |
|---|---|---|
| Night Sky / Galaxies | Fine Table Salt | The “Stardust” Field: Creates a dense, twinkling array of tiny white pinpoints against deep Indanthrone or Phthalo washes. |
| Snow & Frost | Epsom or Mixed Grain | Crystalline Growth: The higher moisture in Epsom creates feathery, fractal-like patterns that mimic hoarfrost on glass or fresh powder. |
| Underwater / Coral | Coarse Sea Salt | Organic “Blooms”: Large crystals create circular, bubble-like voids and porous textures that resemble aquatic life and seafloor minerals. |
| Rock & Earth | Rock Salt | Eroded Surface: Produces deep, aggressive “craters” and uneven staining that replicates the heavy weathering of granite or dried mud. |
| Florals & Foliage | Kosher Salt | Soft Complexity: Its flat, irregular flakes create subtle “mottled” patterns that suggest leaf clusters and petals without using defined brushstrokes. |
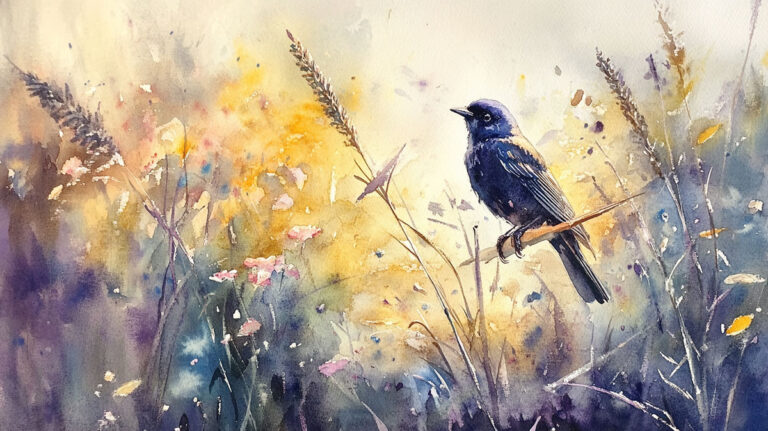
Night skies are the most popular application by a wide margin. A deep indigo or phthalo blue wash, still fully wet, with fine table salt scattered across it produces convincing star fields without any masking fluid or white paint.
Rock salt creates the larger bright spots for prominent stars. Table salt fills in the field around them. Using both in the same wash produces a layered depth that single-size salt can’t match.
Abstract Backgrounds and Mixed Media Work
Salt texture in abstract painting removes the pressure of subject matter entirely.
Jackson’s Art Blog notes that salt texture has historically carried a reputation as a hobbyist approach, but that gap between hobbyist and professional watercolor use has narrowed considerably in contemporary practice. Artists like Louise De Masi have used it consistently in finished botanical and wildlife work, not just as a background filler.
In abstract work, the unpredictability of salt is the point. You choose the color and the wash intensity. Salt handles the surface decisions.
- Works over wet-on-wet washes for layered, atmospheric texture
- Pairs well with wet-on-wet technique where soft edges already exist
- Mixes with alcohol drops for contrasting hard and soft marks in the same wash
Florals, Botanicals, and Wildlife
Kosher salt over a green botanical background produces marks that read as leaves, veining, or texture without looking mechanical.
Emily Wassell (watercolor artist) describes dropping small amounts of salt over loose floral compositions to add emphasis around leaves and stems, rather than across the full wash. Selective application, not blanket coverage.
Key distinction: salt used as an accent in florals versus salt used as the primary texture in backgrounds. Both valid. But accent use tends to produce more finished results for detailed botanical subjects.
Wildlife painters use it for fur, scales, and feather texture. The Jackson’s Art Blog demonstration on Daler-Rowney ink shows pronounced dappled effects on loose animal forms, where salt pulls darker concentrations of pigment that mimic natural patterning.
Combining Salt Technique with Other Watercolor Methods
Salt works best when it’s part of a layered process, not the only technique on the page.
Used alone across an entire painting, the salt pattern becomes visually repetitive. Used selectively, in combination with other methods, it adds texture in the right places while letting other areas breathe.
Salt Over Wet-on-Wet Washes
Probably the most effective combination.
A wet-on-wet base wash already has soft, blended edges. Adding salt into that wet layer creates crystal marks that feel consistent with the loose quality of the wash below. The two methods share the same visual language: organic, unpredictable, non-mechanical.
Timing still applies. The salt goes in while the wet-on-wet wash still has its sheen, not once it starts to dull.
- Apply a wet-on-wet sky wash (multiple colors dropped in wet)
- While sheen is visible, scatter fine salt across the wash
- Leave completely flat to dry, minimum 25 minutes
Masking Fluid Before Salt
Winsor & Newton demonstrate this combination directly: apply masking fluid first, let it dry, lay a wash over the masked area, then add salt while the wash is still wet.
Once fully dry, remove the salt and then the masking fluid. The result combines the sharp, defined edges of masked whites with the organic, irregular salt marks surrounding them. Hard edges and soft texture in the same area.
Useful for: starfields where you want a defined moon or planet shape alongside scattered stars. Or botanical work where preserved petal edges sit against a textured background.
More on how to use masking fluid alongside these approaches.
Glazing Over Salt-Textured Layers
Once a salt-textured wash is completely dry and the salt has been removed, the surface can be glazed over with a transparent layer.
The glaze shifts the color temperature of the salt marks without erasing them. A warm yellow glaze over a cool blue salt-textured wash, for instance, pushes the marks toward green while keeping the crystal pattern intact underneath.
Rule of thumb: keep the glaze thin and transparent. Heavy or opaque washes on top will fill in the salt marks and reduce their visibility.
Glazing is covered in more depth in the guide to glazing technique in watercolor painting.
J.M.W. Turner used layered wash combinations in his watercolors extensively, building depth through multiple transparent applications rather than single heavy washes. That same logic applies here: salt texture in one layer, color and tone adjustment in the next.
Salt Combined with Splattering and Blooms

Three techniques that share similar visual logic: salt marks, splattering technique, and watercolor blooms all produce organic, non-mechanical marks on wet washes.
Used together, they can create very complex textured surfaces without looking overworked, because none of the marks are manually placed with a brush.
Order matters:
- Lay the initial wash
- Add blooms or drops while very wet
- As it moves toward damp (sheen visible), add salt
- Let dry completely before any further work
Doing it in the wrong sequence produces muddy, conflicting results. Blooms need very wet paint to spread. Salt needs damp paint to mark. They require slightly different moisture levels, so the sequencing matters more than it might seem.
The blooming technique in watercolor painting covers the bloom side of this combination in detail.
For creating texture in painting more broadly, salt is one of several approaches that produce surface variation without relying on brushwork alone. The others include dry brush, sponge texture, and palette knife work, each suited to different surfaces and effects.
FAQ on What Is Salt Texture Technique In Watercolor Painting
What is the salt texture technique in watercolor painting?
The salt texture technique involves sprinkling salt crystals onto wet watercolor paint to create organic, irregular patterns. Salt absorbs moisture and displaces pigment, leaving behind crystal marks like starbursts, frost, or snowflakes as the wash dries.
How does salt create texture in watercolor?
Salt is hygroscopic. It pulls water and pigment displacement occurs as moisture migrates toward each crystal. Lighter centers form where water was drawn away, with slightly darker rings where the displaced pigment settles around the crystal edge.
When should you add salt to a watercolor wash?
Add salt while the wash still has a visible sheen on the paper surface. Too wet and the salt dissolves. Too dry and nothing happens. The timing window on 300gsm cold press paper is roughly 2 to 5 minutes after applying the wash.
What type of salt works best for watercolor painting?
It depends on the effect you want. Fine table salt produces small, tight marks. Coarse sea salt or rock salt creates large, dramatic blooms. Kosher salt falls in between. Epsom salt produces softer, feathery patterns due to its different crystal structure.
Does paper type affect the salt texture result?
Yes, significantly. Cold press paper holds water longer, giving salt more time to react and producing rougher, more organic marks. Hot press paper dries faster, creating crisper marks but shortening the application window. Heavier paper (300gsm+) performs best for this technique.
How do you remove salt from a watercolor painting?
Wait until the wash is completely dry, then brush salt off gently with a soft brush or your hand. Never rub while any moisture remains. Coarse rock salt may stick slightly if the wash was very wet, but a soft brush handles it easily.
Can you use salt with granulating watercolor pigments?
Yes, but results are subtler. Granulating pigments like ultramarine blue or burnt sienna have larger particles that flow less freely. Non-granulating, transparent pigments produce more defined crystal marks because the particles travel more easily with the pulled water.
What subjects work best with the salt texture technique?
Night skies, snow scenes, underwater textures, rock surfaces, loose botanicals, and abstract backgrounds all work well. The technique mimics natural textures that are irregular by nature. Salt over a deep indigo wash is a reliable method for painting a night sky with star fields.
Can you combine salt with other watercolor techniques?
Yes. Salt pairs well with blooming effects, masking fluid, wet-on-wet washes, and glazing. Apply blooms first while very wet, then add salt as the wash moves toward damp. Glazing over a dried salt-textured layer shifts color without erasing the crystal pattern.
Why is my salt not creating any texture in watercolor?
Three likely causes: salt added too late (wash already dull and dry), salt that has absorbed ambient humidity before use, or paint applied too thinly with too little water. Pre-dry salt in an oven at 150 degrees for one hour if studio humidity is high.
Conclusion
This conclusion is for an article presenting the salt texture technique in watercolor painting as one of the most accessible ways to add genuine surface variation without relying on brushwork alone.
Salt grain size, paper weight, pigment granulation, and application timing all shape the final crystal pattern. Get those four variables right, and the results are consistently strong.
The technique works across subject matter. Night skies, frost scenes, coral textures, loose botanicals. It also combines cleanly with wet-on-wet washes, masking fluid, and glazing layers for more complex finishes.
Student-grade materials and rushed drying are the two things most likely to produce weak results. Use 300gsm cold press paper, artist-grade pigments, and patience.
Salt costs nothing. The payoff, when timed correctly, is hard to replicate any other way.