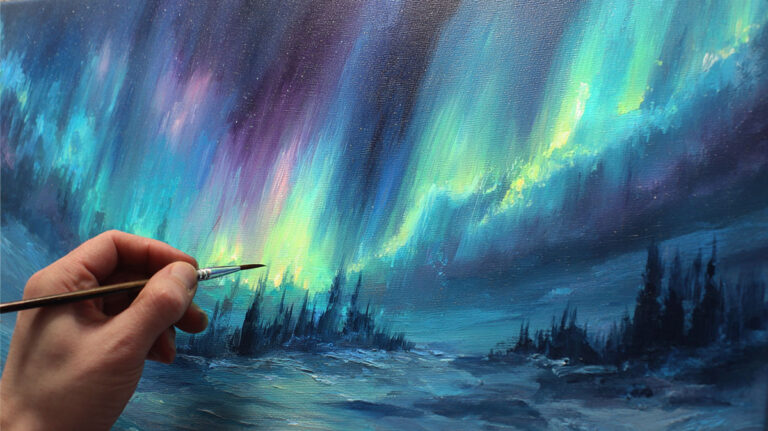
Staring up at a starlit sky fills most people with wonder, but capturing that cosmic beauty on canvas seems impossible until you know the right techniques. Learning how to paint night sky scenes opens up a world of atmospheric painting possibilities that few artists master.
The challenge isn’t just mixing the right dark blues or placing stars convincingly.
Night sky painting demands understanding of color temperature, atmospheric perspective, and celestial light behavior that separates amateur attempts from professional nocturne art.
This guide walks you through every step of creating convincing stellar compositions. You’ll discover essential materials, master gradient techniques, and learn multiple methods for painting realistic stars and moonlight effects.
By the end, you’ll have the skills to paint everything from peaceful starry nights to dramatic cosmic landscapes that rival the masters.
Essential Materials and Setup

Paint Selection for Night Scenes
Ultramarine blue forms the backbone of any stellar composition. This pigment captures the deep midnight atmosphere better than any other color on your palette.
Prussian blue adds that cold, distant quality you need for space painting. Mix it sparingly with your ultramarine to avoid muddy results.
Purple mixtures bring magic to cosmic scenery. Alizarin crimson mixed with ultramarine creates those rich twilight zones where stars emerge.
Don’t overlook Payne’s gray. This NASA Hubble-inspired tone mimics the subtle variations in deep space perfectly.
Brush Types and Star Techniques
Large flat brushes handle sky washes like pros. Get a 2-inch flat for sweeping gradients across your canvas preparation.
Small round brushes become your star-making tools. Size 2 rounds work best for constellation art details.
Fan brushes scatter distant starfields with one gentle stroke. This technique saves hours of individual dot work.
Natural bristles hold more paint than synthetic ones. Trust me on this – you’ll need that paint consistency for smooth blending.
Canvas and Surface Preparation
Dark ground beats white ground every time for night landscape painting. Tone your canvas with burnt umber first.
Priming a canvas properly prevents paint from sinking in. Two thin coats work better than one thick application.
Surface texture matters for stellar atmosphere creation. Rough canvas adds natural paint application variations that enhance cosmic realism.
Consider working on masonite board for ultra-smooth gradients. The surface stays perfectly flat under wet paint layers.
Creating the Base Sky

Building Dark Foundation Colors
Start with deep blues straight from the tube. Ultramarine blue mixed with tiny amounts of burnt umber creates that midnight base.
Temperature shifts happen naturally in real skies. Cool blues dominate the zenith while warm purples creep along horizons.
Color mixing rules change at night. Colors appear muted and shifted toward blue-violet ranges.
Avoid adding too much white early on. It kills the darkness you need for dramatic nocturne art effects.
Sky Gradient Fundamentals
Wet-on-wet blending creates those seamless atmospheric transitions. Work fast before paint starts setting up.
Start dark at the top and gradually lighten toward the horizon. This mimics how our eyes perceive space painting naturally.
Use horizontal brush strokes for calm nights. Vertical strokes suggest wind and movement in your celestial artwork.
Atmospheric perspective applies to night skies too. Distant areas appear lighter and less saturated.
Cloud Formation in Darkness
Soft cloud edges disappear into darkness naturally. Don’t overdefine them – suggestion works better than detail.
Moonlit highlights on cloud tops create drama without destroying the night effect. Use cool whites with blue undertones.
Storm clouds add tension to stellar compositions. Paint them darker than your base sky for maximum contrast impact.
Keep cloud shapes simple and flowing. Complex forms get lost in darkness anyway.
Star Painting Methods

Understanding Star Types and Brightness
Primary stars demand attention through size and intensity. Think of Vincent van Gogh’s bold approach to celestial bodies.
Background stars create depth without competing. Make them smaller and dimmer than your focal stars.
Star clusters follow natural patterns. Study real constellation photographs for authentic placement ideas.
Avoid placing stars randomly. Real astronomy art shows logical groupings and spacing relationships.
Traditional Brush Techniques
Dot painting with round brush tips works for precise star placement. Load your brush fully and touch the canvas lightly.
Cross-hatching around bright stars suggests that twinkling effect. Use tiny intersecting lines radiating outward.
Layering builds star brightness gradually. Start with base dots, then add highlights for luminous effects.
Value scale principles apply to stars. Some should be bright white, others barely visible gray.
Alternative Star Creation Methods
Splatter techniques using old toothbrushes create convincing distant starfields. Mask areas you want to protect first.
Salt texture works magic on wet paint. Sprinkle table salt on damp sky areas for organic star patterns.
Masking fluid preserves white areas for later star additions. Paint over it, then remove when dry for crisp star shapes.
Texture in painting helps suggest the vastness of space. Rough application mimics atmospheric disturbance.
Advanced Star Rendering
Twinkling effects come from irregular star edges. Don’t make every star perfectly round – nature isn’t that precise.
Warm stars (yellow-white) versus cool stars (blue-white) add scientific accuracy to your cosmic painting approach.
Shooting stars need directional streaks. Paint them with quick, confident strokes that taper at both ends.
Consider the milky way as a subtle backdrop. Use dry brush techniques to suggest its cloudy structure across your night scene composition.
Moon Painting Fundamentals

Moon Phases and Strategic Positioning
Crescent moons create instant drama in your nocturne art. Position them off-center using basic composition principles for maximum visual impact.
Full moons work as powerful focal points but can overwhelm smaller canvases. Balance their intensity with darker surrounding areas.
Hidden moons behind storm clouds suggest mystery without losing the light source. This technique works especially well in romanticism inspired pieces.
Lunar Surface Details and Color Temperature
Crater shadows follow the same light source rules as terrestrial objects. Study NASA photographs for authentic surface textures.
Moonlight appears blue-white to human eyes, not yellow. Mix titanium white with tiny amounts of ultramarine for accurate color temperature representation.
Atmospheric perspective affects the moon too. Low horizon moons appear warmer and larger than overhead positions.
Moonlight’s Environmental Impact
Moonlight creates soft cast shadows that add depth without harsh contrasts. These shadows lean toward purple and blue hues.
Reflected moonlight on water needs careful handling. Use horizontal brush strokes to suggest the water’s surface movement.
Tree silhouettes against moonlit skies require crisp edges. Contour definition separates landscape elements from the luminous background.
Creating Mood and Atmosphere
Color Psychology in Night Scenes

Cool blues naturally suggest calm, peaceful nights perfect for meditation or reflection. Claude Monet’s water lily nocturnes demonstrate this principle beautifully.
Warm accent colors create comfort within the coolness. Add subtle oranges or yellows in distant windows or firelight.
Complementary colors between warm and cool zones generate visual tension. Orange streetlights against blue skies create compelling contrast.
Weather Effects on Emotional Response
Clear starry nights suggest hope and wonder. Pack your canvas with distant starfields for optimistic cosmic landscapes.
Stormy atmospheres demand dramatic cloud formations and limited visibility. This approach channels J.M.W. Turner’s expressive weather techniques.
Misty conditions soften everything, creating mysterious and ethereal moods. Use sfumato techniques to blend forms into atmospheric haze.
Compositional Elements for Emotional Impact
Low horizons emphasize the sky’s vastness and humanity’s small place in the universe. This technique appears frequently in sublime landscape traditions.
Silhouetted forms against luminous skies create powerful mystery. Trees, buildings, or figures become dark shapes that viewers can interpret personally.
Directional lines guide the eye toward your chosen emphasis points. Use shorelines, roads, or fence lines strategically.
Advanced Techniques and Details

Light Pollution Integration
City glow on horizons adds contemporary realism to your night scenes. Mix orange and pink tints with your dark base colors.
Balancing natural moonlight with artificial illumination requires careful value control. Keep artificial lights warmer than natural light sources.
Gradation from pure darkness to light pollution creates convincing atmospheric effects. Work these transitions slowly and smoothly.
Celestial Object Integration
Planets appear as bright, steady points unlike twinkling stars. Venus often appears near the horizon in evening or morning skies.
Shooting stars need confident, directional strokes. Paint them quickly while your base sky remains workable for natural blending.
Galaxy suggestions work best with dry brush techniques. Don’t overwork these areas, they should whisper rather than shout.
Advanced Surface and Texture Techniques
Impasto clouds using palette knife work create dramatic three-dimensional effects. This technique echoes Vincent van Gogh’s bold mark-making approaches.
Glazing thin color layers over dried paint builds atmospheric depth gradually. Each layer adds subtle complexity to your cosmic scenery.
Texture in art serves both visual and tactile purposes. Rough paint application suggests wind and movement in night air.
Professional Finishing Methods
Scumbling light colors over dark areas creates natural atmospheric effects. Use dry brush techniques for best results.
Edge refinement separates amateur from professional work. Soften some star edges while keeping others sharp for natural variation.
Consider chiaroscuro principles when placing your darkest darks against lightest lights. This creates maximum dramatic impact in your stellar compositions.
Troubleshooting Common Problems
Color Mixing Issues
Muddy night colors happen when you mix too many pigments together. Stick to ultramarine blue, Prussian blue, and one purple mixture maximum.
Clean blues require careful brush management. Wipe your brushes for oil painting between each color to prevent contamination.
Temperature consistency problems show up as patches of warm and cool areas that fight each other. Plan your color temperature strategy before you start painting.
Star Placement Mistakes
Overcrowded starfields destroy the sense of vast space your night scene needs. Less is more when it comes to stellar painting.
Unrealistic star sizes make your cosmic artwork look amateurish. Study real astronomy photographs for authentic proportions.
Poor spacing creates uncomfortable visual rhythm patterns. Stars should cluster naturally, not march across your canvas in rows.
Value and Contrast Problems
Sky areas that appear too light for night effects need darker glazing layers. Value in painting determines whether your scene reads as nighttime.
Insufficient contrast between stars and sky makes celestial objects disappear. Push your darkest areas darker to make stars pop.
Lost details in shadow areas require careful tonal planning. Reserve your absolute darkest values for the deepest space areas only.
Common Technical Failures
Paint that won’t blend smoothly usually means your medium is too thick or your canvas isn’t properly prepared. Check your painting medium consistency.
Harsh edges where soft transitions belong destroy atmospheric effects. Use sfumato technique for seamless blending.
Cracking paint results from applying thick layers over wet underpainting. Allow proper drying time between applications.
Finishing Techniques

Final Detail Work
Star twinkle effects come from tiny radiating lines around your brightest celestial points. Use a liner brush loaded with pure white paint.
Atmospheric sparkle suggests distant moisture and adds magical quality to night air. Spatter technique with diluted white paint creates this effect naturally.
Edge refinement separates professional work from beginner attempts. Some stars need sharp edges while others should blend softly into surrounding darkness.
Surface Quality and Texture
Impasto techniques for cloud highlights add three-dimensional interest. Pablo Picasso used thick paint application for dramatic texture effects.
Aerial perspective principles apply to finishing touches. Distant elements need softer edges and reduced contrast.
Surface variations across your canvas create visual interest. Smooth sky gradients contrast beautifully with textured star cluster areas.
Protection and Preservation
Varnishing dark paintings requires special attention to gloss levels. Matte finishes often work better than high gloss for night scenes.
UV protection becomes critical for dark pigments that fade faster than light colors. Quality varnish prevents color shifts over time.
Proper drying means waiting at least six months for oil painting before applying final varnish. Rushing this step causes clouding and adhesion problems.
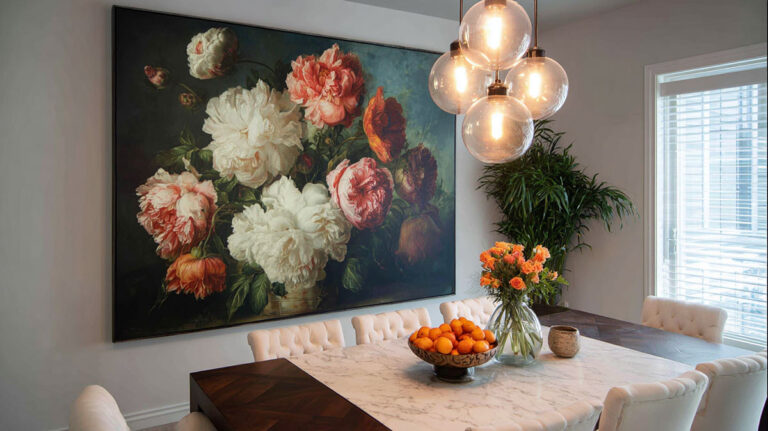
Display Considerations
Dark frame choices support night scene aesthetics better than light frames. The frame shouldn’t compete with your celestial composition.
Matting decisions affect how viewers perceive your painting’s mood. Dark mats create intimate viewing while light mats add brightness.
Lighting your finished night sky requires careful consideration. Avoid direct spotlights that create glare on star areas.
Professional Presentation
Proper documentation includes photographing your work under consistent lighting conditions. This preserves accurate color records for reproduction.
Signature placement should complement your composition rather than distract from it. Lower corners usually work best for night scenes.
Storage methods for cosmic paintings need protection from dust and UV exposure. Interleaving tissue prevents surface damage during transport.
FAQ on How To Paint Night Sky
What colors do I need to paint realistic night skies?
Ultramarine blue forms your base, mixed with Prussian blue for depth. Add purple mixtures using alizarin crimson and ultramarine for twilight zones.
Titanium white creates stars and moonlight. Payne’s gray handles subtle atmospheric variations perfectly.
How do I make stars look natural instead of artificial?
Vary star sizes and brightness levels like real constellations. Use dot painting techniques with small round brushes for precision.
Add cross-hatching around bright stars for twinkling effects. Avoid placing stars in perfect rows or patterns.
Should I use acrylic or oil paint for night sky scenes?
Oil painting allows better blending for smooth gradients. Acrylic painting dries faster but requires quick work.
Both mediums work well with proper brush technique. Choose based on your comfort level and drying time preferences.
How do I create smooth sky gradients without streaks?
Use wet-on-wet blending with large flat brushes. Work horizontally from dark to light areas while paint remains workable.
Keep brush strokes consistent and overlap slightly. Blend immediately before paint begins setting up.
What’s the best way to paint the moon realistically?
Study lunar photographs for accurate crater details and surface texture. Mix cool whites with tiny amounts of ultramarine blue.
Paint atmospheric halos around the moon using soft, circular motions. Avoid making it perfectly white.
How do I avoid muddy colors when mixing night sky tones?
Limit your palette to three colors maximum per mixture. Clean brushes between each color application religiously.
Mix colors on your palette first, not on the canvas. Test mixtures on scrap paper before committing.
What brush techniques work best for painting stars?
Small round brushes create precise star dots. Fan brushes scatter distant starfields with single strokes.
Splatter techniques using toothbrushes add natural randomness. Layer different star brightness levels for depth.
How do I paint atmospheric perspective in dark scenes?
Distant objects appear lighter and less saturated than foreground elements. Atmospheric perspective applies to night scenes too.
Use cooler colors for distant areas. Soften edges on background elements progressively.
What’s the secret to painting convincing moonlight on landscapes?
Moonlight casts soft shadows leaning toward purple and blue tones. Illuminate object edges facing the moon subtly.
Reflected moonlight on water needs horizontal brush strokes. Keep moonlight effects cooler than sunlight temperatures.
How do I fix stars that look too bright or artificial?
Glaze thin dark layers over overly bright stars to reduce intensity. Soften some star edges while keeping others sharp.
Add atmospheric haze around problem areas. Natural variation in star brightness prevents mechanical appearance.
Conclusion
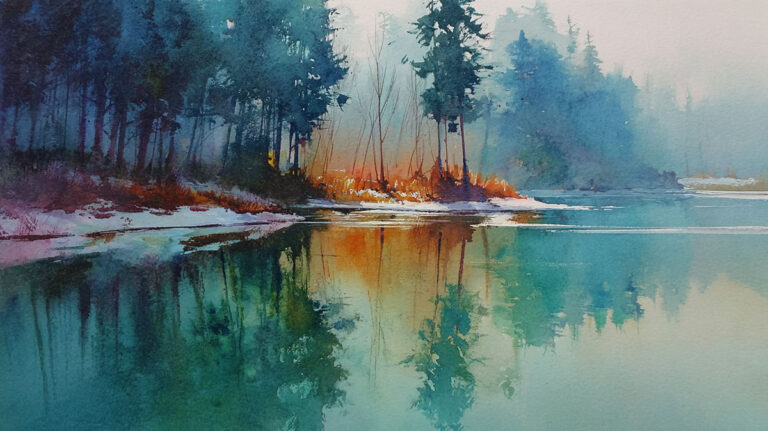
Mastering how to paint night sky scenes transforms your artistic capabilities and opens doors to cosmic landscape possibilities. These techniques work whether you prefer watercolor painting or oil mediums.
Remember that stellar compositions require patience and layering. Don’t rush your paint application or blend colors carelessly.
Practice with simple moonlit scenes before attempting complex galaxy paintings or aurora effects. Georges Seurat and other impressionism masters spent years perfecting their atmospheric techniques.
Your brush strokes will improve with each nocturne attempt. Study real astronomy photographs for authentic star placement and constellation patterns.
The most important lesson involves value relationships between dark sky areas and luminous celestial objects. Push those contrasts for dramatic impact.
Start painting tonight. Your first cosmic artwork awaits on that blank canvas.