Watch light dance through layers of transparent paint, creating colors that glow from within. Learning how to use glazing in painting unlocks depth and luminosity impossible through direct color application.
Renaissance masters like Leonardo da Vinci built entire paintings through systematic transparent layering. Their techniques remain relevant for modern artists working in oil painting, acrylic painting, and watercolor painting.
Optical mixing through glazing produces cleaner, more vibrant colors than palette mixing alone. This comprehensive guide covers material selection, color theory applications, and professional techniques for achieving professional results.
You’ll master transparent paint application, understand pigment transparency ratings, and avoid common mistakes that ruin hours of work.
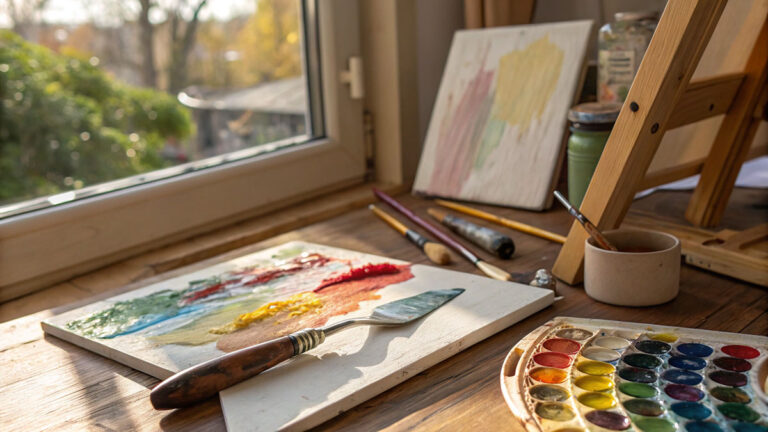
Essential Materials and Tools

Paint Types for Glazing
Oil paints remain the gold standard for transparent paint layers. Leonardo da Vinci mastered this medium centuries ago. The slow drying time gives you room to work.
Traditional oil painting offers unmatched transparency control. Pigments like ultramarine blue and alizarin crimson create stunning optical effects.
Acrylic painting requires specific glazing mediums to slow drying. Golden Artist Colors makes reliable products for this purpose. The quick-dry nature can be tricky for beginners.
Mediums and Additives
Glazing medium preparation determines your success. Traditional recipes use stand oil mixed with turpentine at specific ratios.
Modern synthetic options include alkyd mediums and acrylic glazing gels. Liquitex offers consistent results. Winsor & Newton provides professional-grade alternatives.
Drying time varies dramatically between medium types. Oil glazes need 24-48 hours between layers. Acrylics dry in 2-4 hours but cure differently.
Brush Selection and Tools
Soft brushes eliminate streaking in transparent layers. Natural bristles work best with painting mediums containing solvents.
Fan brushes create atmospheric effects in landscapes. Round sables blend seamlessly. Flat brushes cover large areas evenly.
Alternative tools include sea sponges and lint-free cloths. Some artists use fingers for subtle gradations. Clean tools prevent contamination between colors.
Color Theory for Glazing

Transparent versus Opaque Pigments
Understanding pigment transparency ratings saves frustration later. Transparent pigments allow light penetration. Opaque colors block light transmission completely.
Quinacridone pigments offer exceptional clarity. Ultramarine blue, alizarin crimson, and phthalo green work beautifully in glazes. Avoid cadmiums and titanium white for pure transparency.
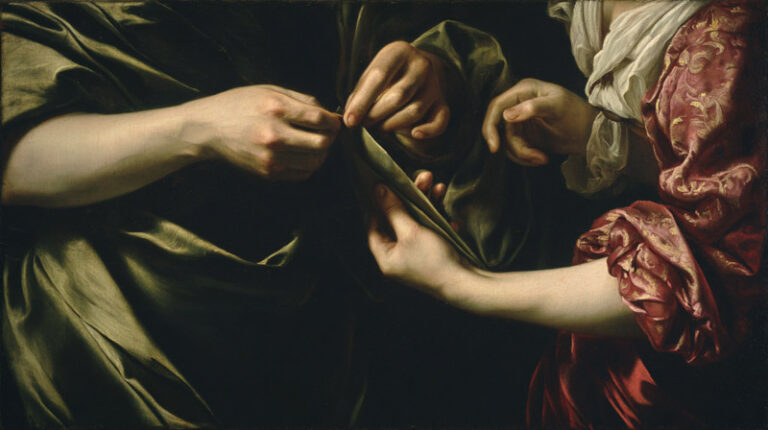
Traditional masters like Johannes Vermeer built entire paintings using transparent layers. Rembrandt van Rijn combined opaque and transparent techniques masterfully.
Understanding Color Temperature
Warm glazes push colors toward yellow and red. Cool glazes shift toward blue and violet. This principle creates atmospheric depth.
Temperature shifts happen through optical mixing. A warm glaze over cool underpainting creates vibration. The eye perceives colors differently than physical mixing produces.
Color theory becomes crucial here. Complementary colors in glazes create neutral grays without muddiness.
Creating Secondary Colors Through Glazing
Optical mixing produces cleaner colors than palette mixing. Yellow over blue creates more luminous greens than premixed paint.
Purity remains intact through transparent layering. Primary colors maintain their intensity. Secondary colors appear more vibrant.
The color wheel guides these decisions. Analogous color schemes work naturally in glazing systems.
Basic Glazing Techniques

Preparing the Base Layer
Surface preparation determines glaze adhesion. Oil paintings need complete drying before glazing begins. Test with gentle finger pressure.
Texture affects glaze behavior significantly. Smooth surfaces create even films. Canvas weave can show through thin glazes.
Gesso provides ideal tooth for glazing. Multiple thin coats work better than single thick applications. Sand lightly between coats if needed.
Mixing the Glaze
Paint to medium ratios control transparency levels. Start with 1:1 ratios and adjust as needed. Too much medium creates runny, uncontrollable glazes.
Consistency should resemble thin cream. Test on paper scraps before applying to your painting. Working time varies with room temperature and humidity.
Mix only what you need immediately. Oil glazes skin over quickly once exposed to air. Acrylics set up even faster in warm conditions.
Application Methods
Even coverage requires specific techniques. Load your brush fully but avoid drips. Work in sections that you can complete while the glaze remains workable.
Gradient applications need careful planning. Start with full strength color and fade to pure medium. Overlap areas while wet to avoid hard edges.
Avoid going back over partially dry glazes. This lifts the underlying layer and creates muddy results. Plan your moves before starting each section.
Working with Multiple Layers
Building depth requires patience between coats. Each layer must cure completely before adding the next. Rush this process and risk cracking or lifting.
Layer sequence affects the final result dramatically. Warm colors typically go first, followed by cooler glazes. This mimics natural light behavior.
Atmospheric perspective develops through successive cool glazes. Distance appears greater with each transparent layer. Masters like Claude Monet understood this principle intuitively.
Track your layer count to maintain consistency across the painting. More layers create deeper, richer colors but require extended drying times between applications.
Advanced Glazing Methods

Multiple Layer Glazing
Building depth requires strategic planning. Each transparent layer modifies everything beneath it.
Successive layers create complex optical effects impossible through direct painting. Renaissance masters used up to twenty glazes in single passages.
Color intensity increases with layer count. Three transparent reds appear deeper than one opaque application. Plan your sequence before starting.
Planning Layer Sequences
Warm colors typically go down first. Cool glazes create shadows and depth over warm underpainting.
Temperature progression mimics natural light behavior. Paul Cézanne understood this relationship intuitively.
Test combinations on sample boards. What looks right in theory may disappoint in practice.
Selective Glazing Approaches
Masking protects areas from unwanted glaze application. Frisket film works well for hard edges.
Targeted application creates focal points naturally. Glaze only the areas needing color modification or depth.
Soft edges require different approaches. Feather glazes into surrounding areas while wet. Hard transitions look artificial and draw unwanted attention.
Combining with Other Techniques
Scumbling over dried glazes adds surface interest. Dry brush techniques create texture variation.
Mixed approaches offer more expressive possibilities. Direct painting accents can punctuate glazed passages effectively.
Abstract painters often combine glazing with impasto. The contrast between transparent and opaque areas creates visual excitement.
Practical Applications
Portrait Glazing Techniques

Skin tone development happens gradually through glazing. Start with warm undertones, add cool shadows later.
Luminous flesh tones result from proper layer sequencing. Yellow ochre base, then raw sienna, finally transparent red glazes create convincing skin.
Different ethnicities require adjusted color temperatures. Cool undertones work for some skin types, warm for others. Study reference photos carefully.
Building Convincing Skin
Base layers establish overall value structure. Glazes modify color temperature without destroying underlying form.
Color shifts happen subtly in life. Ears appear redder than cheeks. Noses catch more reflected light.
Chiaroscuro effects develop through careful glaze placement. Caravaggio pushed dramatic light and shadow relationships.
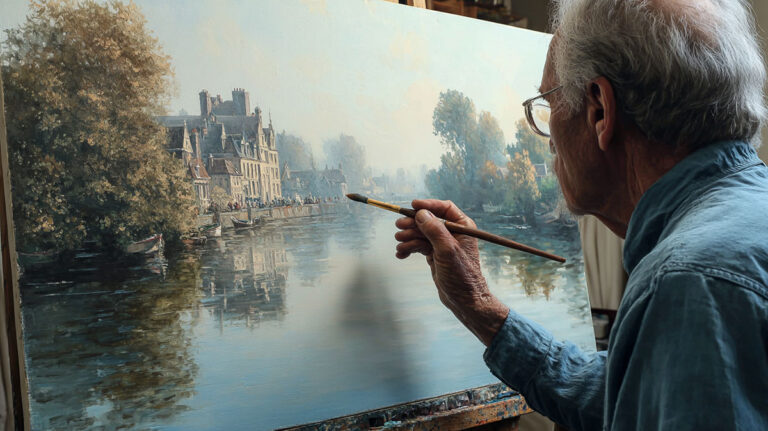
Landscape Applications
Atmospheric effects require systematic glazing approaches. Distance appears cooler and lighter than foreground elements.
Aerial perspective develops through progressive cool glazes. Each layer pushes elements further back visually.
Sky color changes throughout the day. Morning light differs from afternoon warmth. Evening brings completely different color temperatures.
Water and Reflective Surfaces
Water mirrors sky colors but appears darker. Glaze reflections with slightly deeper versions of sky colors.
Surface movement breaks up perfect reflections. Horizontal brush strokes suggest gentle waves. Vertical marks indicate calm water.
J.M.W. Turner painted water brilliantly through glazing. His atmospheric effects still inspire painters today.
Still Life Glazing
Glass objects require multiple transparent layers. Build reflections gradually through successive glazes.
Material illusions depend on proper color saturation control. Metals reflect surrounding colors. Fabrics absorb and modify light differently.
Fruit surfaces show subsurface scattering effects. Red apples glow when glazed properly over warm underpainting.
Creating Surface Qualities
Different materials reflect light uniquely. Silk appears different from cotton even in identical colors.
Surface preparation affects final appearance. Smooth underpainting works for glass. Textured bases suit rough fabrics better.
Photorealism artists push glazing to extreme limits. Chuck Close built portraits entirely through systematic color layering.
Common Problems and Solutions
Drying Issues
Thick glazes crack during drying. Keep applications thin and even throughout the process.
Climate affects drying patterns significantly. High humidity slows oil paint curing. Low humidity causes acrylic glazes to set too quickly.
Uneven drying creates visible lap marks. Work in manageable sections that stay wet until completion.
Preventing Cracks and Wrinkles
Fat over lean principle applies to glazing. Each layer should contain equal or more medium than the previous coat.
Temperature fluctuations during drying cause problems. Maintain steady conditions for best results.
Forced drying with heat guns creates surface tension. Allow natural curing for professional quality.
Color Problems
Muddy results come from over-glazing. Stop before colors turn gray and lifeless.
Color intensity diminishes with excessive layering. Three to five glazes usually provide optimal results.
Color harmony breaks down when too many hues compete. Limit your palette for cohesive results.
Maintaining Color Purity
Brush contamination creates unwanted color mixing. Clean brushes between different color families.
Medium quality affects transparency directly. Cheap mediums cloud easily and reduce optical clarity.
Test glazes on sample boards first. What appears correct when wet may disappoint after drying.
Technical Application Difficulties
Lifting previous layers ruins hours of work. Ensure complete drying before applying new glazes.
Brush marks show more in transparent passages. Use soft brushes and light pressure throughout application.
Dust contamination becomes obvious in glazed surfaces. Work in clean environments and cover wet paintings.
Avoiding Streaks and Marks
Even application requires steady hand movement. Practice consistent pressure on sample surfaces first.
Working time varies with temperature and medium choice. Hot days reduce working time significantly.
Composition planning helps avoid reworking areas. Map out glaze placement before starting application.
Troubleshooting Common Mistakes
Dull glazes often result from insufficient medium. Add more glazing medium to restore transparency.
Contrast loss happens when values become too similar. Maintain strong light and shadow relationships throughout the glazing process.
Some areas resist glaze application. Previous paint layers may contain wax or silicone. Sand lightly and clean with appropriate solvents before reapplying.
Maintaining Glazed Paintings

Proper Drying and Curing
Oil glazes need months to fully cure. Surface dry doesn’t mean chemically stable.
Touch tests work for checking progress. Gentle finger pressure reveals soft spots that need more time.
Temperature affects curing rates dramatically. Cold studios slow the process significantly. Warm conditions speed chemical reactions but can cause cracking.
Understanding Cure Times
Different painting mediums cure at varying rates. Alkyd mediums dry faster than traditional oil recipes.
Thick applications take longer than thin glazes. Plan accordingly when layering multiple transparent coats.
Humidity plays a huge role in acrylic curing. High moisture content slows chemical crosslinking in polymer films.
Environmental Factors
Air circulation helps solvent evaporation. Stagnant air prolongs drying times unnecessarily.
Direct sunlight damages wet paint films. UV exposure causes color shifts and surface defects.
Dust settlement becomes permanent in tacky glazes. Cover works during extended drying periods.
Testing for Completeness
Surface hardness indicates curing progress. Properly cured glazes resist fingernail impressions.
Solvent tests reveal incomplete curing. Mineral spirits shouldn’t dissolve or soften finished glazes.
Chemical stability develops gradually. Paintings aren’t truly stable for several months after completion.
Varnishing Glazed Works
Compatible varnish types prevent interaction with underlying glazes. Test compatibility on sample pieces first.
Application timing affects final appearance significantly. Varnish too early and trap solvents beneath the protective layer.
Traditional masters waited years before varnishing. Modern materials allow shorter waiting periods but patience still pays off.
Varnish Selection
Removable varnishes protect better long-term. Future conservation treatments become possible with proper varnish choice.
Gloss levels affect color appearance. Matte varnishes reduce color saturation visually.
Spray applications provide more even coverage than brush methods. Practice technique on test panels before treating finished paintings.
Protection Methods
Glazed surfaces remain vulnerable until fully cured. Handle carefully during this critical period.
UV protection prevents long-term color degradation. Museum-quality glass blocks harmful wavelengths effectively.
Climate control maintains stable conditions. Temperature swings stress paint films and cause dimensional changes.
Long-term Care
Display considerations affect painting longevity. Direct sunlight fades colors over time, especially transparent pigments.
Cleaning methods must respect glazed surfaces. Harsh solvents dissolve glazes completely.
Professional conservation becomes necessary for valuable works. Amateur cleaning attempts often cause irreversible damage.
Display Environment
Gallery lighting provides ideal illumination without heat buildup. LED systems offer excellent color rendering properties.
Humidity control prevents panel movement and canvas expansion. Consistent conditions preserve dimensional stability.
Wall placement affects viewing angles and lighting conditions. Consider composition and focal point relationships.
Cleaning Protocols
Surface dust removal requires gentle techniques. Soft brushes work better than cloths for textured surfaces.
Stain removal needs professional assessment first. Home remedies often worsen problems permanently.
Regular maintenance prevents major restoration needs. Annual professional cleaning preserves glazed surfaces effectively.
Restoration Considerations
Glaze removal during restoration requires extreme care. Original transparent layers hold historical and artistic value.
Color matching becomes difficult with aged glazes. Pigments shift differently over decades of exposure.
Documentation helps future conservators. Photograph paintings regularly to track changes over time.
Working with Conservators
Professional assessment identifies problems early. Small issues become major restoration projects without intervention.
Treatment records preserve important information. Future work builds on previous conservation efforts effectively.
Insurance requirements often mandate professional documentation. Regular condition reports protect investment value and artistic integrity.
FAQ on How To Use Glazing In Painting
What is glazing in painting?
Glazing applies transparent paint layers over dried base colors. Light passes through multiple layers, creating optical color mixing effects impossible through direct painting methods.
Renaissance masters pioneered these techniques for luminous results.
Which paints work best for glazing?
Transparent pigments like ultramarine blue, alizarin crimson, and phthalo green create the clearest glazes. Oil paints offer the longest working time.
Acrylic painting requires glazing mediums to slow drying and maintain transparency.
How long should glazes dry between coats?
Oil glazes need 24-48 hours minimum between applications. Acrylic glazes dry in 2-4 hours but require complete curing.
Test dryness with gentle finger pressure before applying subsequent layers.
What brush types work best for glazing?
Soft brushes eliminate streaks in transparent layers. Natural bristles work well with oil painting mediums containing solvents.
Fan brushes create atmospheric effects. Round sables blend seamlessly across large areas.
Can you glaze over any dried paint?
Most dried paint accepts glazes, but waxy or silicone-contaminated surfaces resist application. Sand lightly and clean problem areas first.
Test glaze adhesion on inconspicuous areas before proceeding with full application.
How many glaze layers can you apply?
Three to five layers typically provide optimal results without color muddiness. Excessive glazing creates dull, lifeless surfaces.
Johannes Vermeer sometimes used twenty layers, but this requires exceptional skill and patience.
What’s the difference between glazing and scumbling?
Glazing uses transparent colors over darker areas. Scumbling applies opaque or semi-opaque paint over lighter passages.
Both techniques modify underlying colors but create opposite optical effects in finished paintings.
How do you fix glazing mistakes?
Remove wet glazes immediately with appropriate solvents. Dried mistakes require careful sanding or complete repainting of affected areas.
Prevention through proper planning eliminates most glazing problems before they occur.
Why do my glazes look muddy?
Over-glazing causes muddy results. Too many layers or incompatible colors create dull, gray appearances.
Limit your color harmony and maintain strong value relationships throughout the glazing process.
What’s the best medium for oil glazing?
Traditional recipes combine stand oil with turpentine at specific ratios. Modern alkyd mediums provide consistent results with faster drying.
Golden Artist Colors and Winsor & Newton offer professional-grade alternatives for reliable transparency.
Conclusion
Mastering how to use glazing in painting opens doors to luminous effects that direct color application cannot achieve. Patient layering builds depth and color richness impossible through traditional methods.
Titian and Peter Paul Rubens proved glazing’s power centuries ago. Their techniques remain relevant for contemporary artists seeking professional results.
Transparent pigments work magic through optical mixing. Each layer modifies underlying colors while maintaining clarity and brilliance.
Watercolor painting naturally incorporates glazing principles. Oil painting offers maximum control over transparency and working time.
Practice develops intuition for paint consistency, drying times, and color interaction. Start with simple subjects before attempting complex portrait work.
Color psychology influences viewer response to glazed passages. Warm glazes advance while cool layers recede, creating natural atmospheric perspective.
Success requires patience, quality materials, and systematic approaches to transparent layering.