Forget everything you know about delicate brushwork and careful blending. Palette knife painting transforms your canvas into a playground of bold textures and dramatic effects.
Learning how to paint with a palette knife opens doors to expressive techniques that brushes simply cannot achieve. The tool creates thick, sculptural paint applications that catch light beautifully.
Professional artists from Vincent van Gogh to modern masters have used knife techniques to add energy and movement to their work. This isn’t just a beginner’s alternative to brushes.
This guide covers everything from selecting the right knives and paint consistency to mastering impasto techniques and creating stunning textural effects. You’ll discover how to:
- Choose proper materials and set up your workspace
- Master fundamental knife application methods
- Create bold surface textures that captivate viewers
- Mix colors directly on canvas for maximum impact
- Finish and preserve your textured masterpieces
Whether you’re exploring abstract expression or adding dramatic flair to landscapes, knife painting delivers results that demand attention.
Essential Materials and Setup

Choosing the Right Palette Knives
Painting knives differ significantly from mixing knives in both design and function. The blade shape determines your mark-making potential.
Trowel-shaped knives work best for broad, sweeping strokes. Diamond-shaped blades excel at detail work and precise applications.
Straight-edged knives create clean lines and sharp transitions. Curved blades produce softer, more organic marks.
Handle length affects your control and painting distance. Shorter handles offer precision for detailed work.
Paint Selection for Knife Work
Heavy body acrylic painting provides the thick consistency needed for impasto techniques. Oil painting mediums offer longer working times but require proper ventilation.
Paint consistency matters more than brand. Thick paint holds knife marks better than thin applications.
Golden Artist Colors and Liquitex offer excellent heavy body options. Winsor & Newton oils maintain their texture beautifully.
Load your palette with generous amounts. Knife painting consumes more paint than traditional brushwork.
Canvas and Surface Preparation
Canvas texture influences your final results dramatically. Rough surfaces grab paint aggressively while smooth canvases allow easier manipulation.
Priming becomes critical with knife work. Multiple gesso coats create the ideal working surface.
Cotton canvas handles heavy paint applications well. Linen provides superior durability for thick impasto layers.
Wood panels offer excellent support for aggressive knife techniques. Masonite boards work particularly well for beginners.
Workspace Organization
Position your palette at comfortable working height. Keep knives within easy reach during painting sessions.
Arrange colors logically around your palette edge. Place mixing areas in the center for color combinations.
Proper lighting prevents color judgment errors. Natural north light works best for accurate color assessment.
Ventilation becomes important with oil-based painting mediums. Open windows or use fans for air circulation.
Basic Palette Knife Techniques

Loading Paint onto the Knife
Pick up paint using the knife’s flat side. Avoid the sharp edge to prevent damage.
Amount control determines your stroke quality. Too little paint creates broken marks while excess paint becomes unmanageable.
Roll the knife slightly to gather paint evenly across the blade. This prevents uneven application during painting.
Multiple colors can be loaded simultaneously for interesting blending effects. Keep colors separated on the blade initially.
Fundamental Application Strokes
Flat application creates smooth, even surfaces. Press the loaded knife flat against the canvas and pull steadily.
Edge work produces fine details and sharp lines. Use the knife’s tip or side edge for precision marks.
Scraping techniques remove paint while creating interesting textures. Drag the clean knife edge through wet paint.
Pressure variations change your mark quality dramatically. Light touches create delicate effects while firm pressure builds heavy texture.
Paint Removal and Correction Methods
Scraping away wet paint offers immediate corrections. Clean your knife between scraping and application.
Blending techniques soften harsh transitions between colors. Work quickly while paint remains wet.
Mistakes often become creative opportunities. Many successful knife paintings incorporate “accidental” effects.
Layer removal requires gentle scraping motions. Avoid pressing too hard and damaging the canvas surface.
Creating Bold Textural Effects

Impasto Techniques
Building thick paint layers creates dramatic three-dimensional effects. Apply paint generously without worrying about waste.
Raised surface textures catch light differently than flat applications. This adds visual interest and depth to your work.
Directional stroke patterns guide the viewer’s eye through your composition. Consider your mark direction carefully.
Paint thickness can vary dramatically within single paintings. Combine thin and thick areas for contrast and visual excitement.
Surface Manipulation Methods
Crosshatching with the knife edge creates interesting linear patterns. Vary your angles for complex surface treatments.
Stippling effects result from repeated dabbing motions. This technique works well for foliage and textured surfaces.
Dragging techniques suggest movement and energy. Pull the knife through wet paint for dynamic effects.
Combine multiple techniques within single areas. This creates rich, complex surface treatments that engage viewers.
Mixing Textures Within Single Paintings
Smooth versus rough area contrasts create visual tension. Plan these relationships during your initial composition phase.
Transitioning between texture types requires careful planning. Gradual changes work better than abrupt shifts.
Strategic texture placement guides attention to your focal point. Heavy textures naturally draw the eye.
Consider viewing distance when planning textures. Some effects only work at specific distances from the artwork.
Advanced Surface Effects
Sgraffito techniques involve scratching through wet paint layers. Use various tools beyond just knives for different mark qualities.
Broken color applications create optical mixing effects. Apply colors side by side without blending completely.
Atmospheric effects result from careful texture control. Soft, smooth areas suggest distance while rough textures advance forward.
Experiment with unconventional tools alongside your knives. Fingers, palette knives, and found objects create unique surface treatments.
Different painting styles respond well to knife techniques. Abstract work often benefits from bold textural contrasts.
Study how Vincent van Gogh used palette knives in his later works. His thick applications demonstrate the technique’s expressive potential.
Color theory principles still apply with knife painting. Understanding complementary colors improves your mixing results.
Practice these fundamental techniques before attempting complex subjects. Master the tools before focusing on representation.
Color Mixing and Application Strategies

Direct Color Mixing on Canvas
Wet-into-wet blending happens naturally with knife techniques. Work quickly while paint remains workable.
Partial mixing creates color variation within single strokes. Don’t fully blend colors for more interesting results.
Load multiple colors on your knife simultaneously. This produces natural color transitions as you apply paint.
Color intensity stays stronger with knife mixing than brush blending. The tool doesn’t absorb paint like brushes do.
Creating Bold Color Contrasts
Complementary colors create maximum visual impact when applied with knives. Red against green produces striking effects.
Temperature contrasts add drama to your work. Warm oranges beside cool blues create visual excitement.
Value contrast maximization works particularly well with thick applications. Light paint over dark creates powerful focal points.
Study how Pablo Picasso used bold color contrasts in his knife work. His applications demonstrate fearless color choices.
Layering Colors Effectively
Underpainting with knives establishes your color foundation. Apply thin layers initially, building thickness gradually.
Overpainting creates depth and richness. Allow partial drying between layers for best results.
Broken color application lets underlying layers show through. This creates optical mixing effects similar to pointillism.
Color harmony emerges from thoughtful layering choices. Plan your color relationships before starting.
Specific Subject Matter Approaches

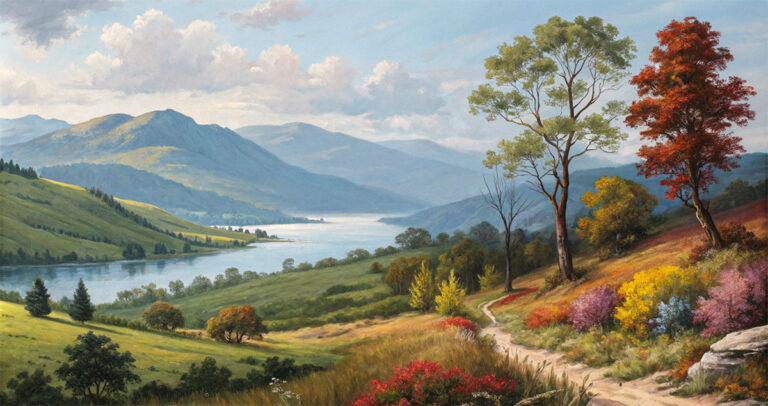
Landscape Painting with Palette Knives
Sky rendering benefits from horizontal knife strokes. Follow cloud formations with your blade direction.
Foreground texture creation uses vertical and diagonal marks. Build up grass and foliage with repeated dabbing motions.
Water surface effects require smooth, horizontal applications. Reflect sky colors in your water areas for realism.
Claude Monet pioneered knife techniques in landscape work. His later paintings show increasing texture and boldness.
Still Life Bold Treatment
Fruit and vegetable textures shine with knife applications. Build up the natural bumps and curves of organic subjects.
Fabric handling requires varied pressure applications. Light touches suggest soft materials while firm pressure creates stiff textures.
Reflective surface techniques use smooth, flat knife applications. Keep these areas relatively thin compared to textured elements.
Paul Cézanne revolutionized still life painting through bold applications. His apple paintings demonstrate knife technique mastery.
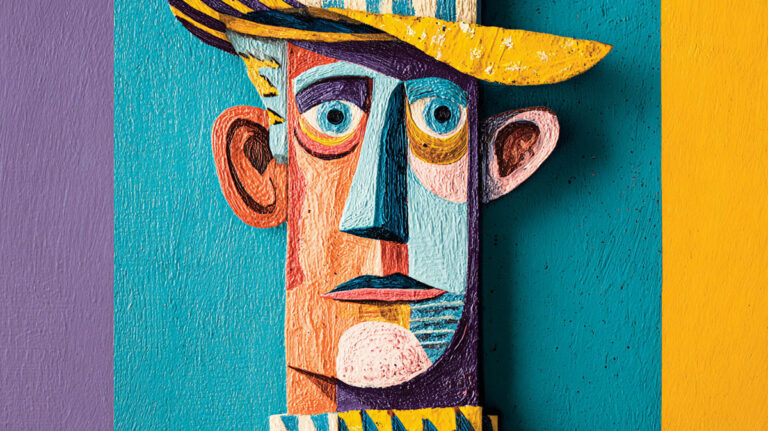
Abstract and Expressionistic Approaches
Emotional color application ignores traditional color mixing rules. Let feelings guide your choices.
Gestural mark making expresses energy and movement. Work quickly and intuitively with your knife.
Composition through texture becomes your primary concern. Plan textural relationships instead of realistic representation.
Abstract work allows complete creative freedom. Experiment without worrying about realistic results.
Expressionism movements used knife techniques extensively. Willem de Kooning created powerful emotional statements through bold applications.
Color Psychology Applications
Color psychology influences viewer responses to your work. Red creates energy while blue suggests calm.
Emotional expression happens through color choices and application methods. Aggressive strokes suggest tension while smooth applications feel peaceful.
Advanced Palette Knife Techniques
Combining Knife Work with Other Tools

Integration with brush techniques creates interesting contrasts. Use brushes for detail work after establishing knife foundations.
Finger applications add organic qualities to mechanical knife marks. Blend harsh edges with fingertip pressure.
Sgraffito techniques involve scratching through wet paint layers. Use various tools for different linear qualities.
Jackson Pollock combined knives with unconventional tools. His innovative approaches expanded painting possibilities.
Creating Specific Visual Effects
Light reflection simulation uses smooth, flat applications. Keep reflective areas clean and unworked.
Movement expression happens through directional stroke patterns. Guide the viewer’s eye with your knife direction.
Atmospheric perspective creates depth through texture control. Smooth distant areas and rough foreground elements.
Study J.M.W. Turner for atmospheric effects. His seascapes demonstrate masterful knife technique applications.
Problem-Solving Common Issues
Muddy color prevention requires clean knife maintenance. Wipe your blade between different color applications.
Overworking wet paint destroys texture and creates mud. Know when to stop and let areas dry.
Balance heavy texture areas with smoother passages. Too much texture everywhere overwhelms viewers.
Color saturation decreases with overmixing. Apply colors boldly without excessive blending.
Advanced Color Strategies
Primary colors maintain maximum intensity when applied directly. Avoid overmixing these pure hues.
Secondary color creation happens naturally through knife blending. Let colors mix partially on the canvas surface.
Analogous color schemes work beautifully with knife techniques. The tool naturally blends adjacent colors.
Texture and Light Interaction
Chiaroscuro effects become more dramatic with thick paint applications. Light catches raised areas while shadows hide in valleys.
Surface variety creates visual interest through light play. Plan your texture placement to work with your light source.
Form emerges through textural modeling rather than traditional shading. Build up raised areas and scrape down shadows.
Rhythm develops through repeated textural patterns. Create visual beats with your mark-making.
Study Henri Matisse for bold color applications. His fauve period demonstrates fearless knife work.
Professional artists like Georgia O’Keeffe used knives selectively. Her flower paintings show strategic texture placement.
En plein air painting benefits from knife speed. Capture changing light conditions quickly with bold applications.
Finishing and Preserving Palette Knife Paintings

Knowing When to Stop
Completion points become obvious once you recognize the signs. Fresh paint appearance starts deteriorating with excessive manipulation.
Overworking temptations plague every artist working with thick applications. Step back frequently to assess your progress.
Set your painting aside for several hours. Return with fresh eyes to evaluate what still needs attention.
Digital photos reveal areas you might miss while standing close. Take pictures throughout your painting process.
Recognizing Optimal Stopping Points
Paint freshness indicates perfect timing for completion. Muddy areas suggest you’ve worked too long in those spots.
Visual harmony emerges when all elements work together. Stop when adding more paint doesn’t improve the overall effect.
Unity develops naturally through consistent knife applications. Avoid mixing different application styles unnecessarily.
Professional artists like Mark Rothko knew exactly when to stop. His color field paintings demonstrate restraint and timing.
Managing Creative Energy
Work in focused bursts rather than marathon sessions. Knife painting demands physical and mental energy.
Decision fatigue affects paint application quality. Stop before your choices become less confident.
Plan major areas before starting each session. This prevents aimless mark-making during painting.
Drying and Curing Considerations
Thick Paint Drying Times
Heavy body acrylics dry much slower in thick applications. Expect several days for complete curing.
Oil paint requires weeks or months for full drying with impasto techniques. Plan accordingly for exhibition deadlines.
Surface cracking becomes a real concern with extremely thick applications. Monitor your paint thickness carefully.
Environmental factors dramatically affect drying rates. Humidity and temperature changes influence curing times.
Cracking Prevention Methods
Apply paint in reasonable thicknesses to prevent structural problems. Extremely thick areas crack as they cure.
Fat over lean principles apply to oil painting with knives. Add more medium to upper layers.
Support your canvas properly during drying. Unsupported areas flex and create stress cracks.
Rembrandt van Rijn understood paint application limits. His impasto areas remain crack-free centuries later.
Environmental Control
Room temperature affects paint behavior significantly. Cold studios make paint stiffer and harder to manipulate.
Humidity levels influence drying characteristics. High humidity slows acrylic drying considerably.
Air circulation helps but avoid direct drafts on wet paint. Fans can create dust problems on tacky surfaces.
Protect work areas from temperature fluctuations. Consistent conditions produce better results.
Varnishing Textured Surfaces

Application Challenges
Traditional brush varnishing doesn’t work well on heavily textured surfaces. Brushes skip over raised areas.
Spray varnishes provide even coverage across varied surface heights. Apply multiple thin coats rather than single thick applications.
Test varnish application on practice pieces first. Different varnish types react differently to thick paint textures.
Timing matters critically with varnish application. Paint must cure completely before sealing.
Gloss Level Considerations
High gloss varnishes create dramatic light reflection on textured surfaces. This can overwhelm subtle color relationships.
Satin finishes often work better with knife paintings. They protect without creating excessive shine.
Matte varnishes flatten textural effects visually. Use sparingly on heavily textured areas.
Test small areas before committing to full varnish applications. You can’t easily remove varnish once applied.
Protection Without Flattening Effects
Isolating coats protect paint before final varnishing. This allows future varnish removal if needed.
Multiple thin coats build protection gradually. Avoid single heavy applications that pool in texture valleys.
Consider framing options that protect without varnishing. Glass or acrylic glazing provides protection while preserving texture appearance.
Professional conservation standards recommend removable varnishes. Plan for future maintenance needs.
Long-term Preservation Strategies
Document your painting process and materials used. Future conservators need this information.
Storage considerations become important with textured works. Face-to-face storage can damage raised paint areas.
Climate control prevents expansion and contraction damage. Stable environments preserve paintings longer.
Watercolor painting offers different preservation challenges. UV protection becomes more critical with transparent mediums.
Professional Handling Guidelines
Transport textured paintings carefully using protective facing materials. Bubble wrap can leave permanent impressions.
Installation requirements differ from flat paintings. Allow extra depth in framing specifications.
Professional framers understand knife painting needs. Discuss your textural requirements before work begins.
Insurance valuations should account for technique difficulty. Knife paintings often require more time investment than brush work.
Study how Diego Velázquez preserved paint integrity over centuries. His thick applications remain pristine today.
Museum conservation techniques offer insights for serious artists. Research professional preservation methods.
Sfumato techniques contrast beautifully with knife textures. Combine smooth and rough areas strategically.
Tenebrism effects intensify with thick paint applications. Dramatic light and shadow relationships become more powerful.
Master these preservation techniques early in your knife painting journey. Good habits prevent costly conservation problems later.
FAQ on How To Paint With A Palette Knife
What’s the difference between palette knives and painting knives?
Painting knives have angled necks and flexible blades designed for paint application. Palette knives feature straight handles for mixing colors only.
The blade shape determines functionality. Painting knives create textured strokes while mixing knives blend painting mediums on your palette.
Can beginners learn palette knife techniques easily?
Yes, knife painting is often easier than brush techniques for beginners. Thick paint applications hide mistakes better than thin brushwork.
Start with simple subjects like landscapes or abstract compositions. Build confidence before attempting detailed work.
What paint consistency works best for knife painting?
Heavy body acrylics and oils provide ideal thickness for knife work. Thick paint holds knife marks and creates dramatic impasto effects.
Avoid thin paints that don’t maintain texture. Add medium if your paint feels too stiff.
How do I prevent muddy colors when mixing with knives?
Clean your knife between different colors. Limited palettes reduce muddy mixing accidents significantly.
Work quickly while colors remain distinct. Overmixing destroys color intensity and creates dull results.
Which subjects work best for palette knife painting?
Landscapes, flowers, and abstract work suit knife techniques perfectly. Bold subjects benefit from dramatic textural treatments.
Avoid fine detail subjects initially. Focus on broad shapes and strong color relationships instead.
How long do thick palette knife paintings take to dry?
Acrylic painting dries within hours to days depending on thickness. Oil paint requires weeks for complete curing.
Environmental factors affect drying times significantly. Humidity and temperature influence paint behavior considerably.
Can I combine palette knives with brushes?
Absolutely. Many artists use brushes for details after establishing knife foundations. Mixed techniques create interesting textural contrasts.
Plan your tool usage strategically. Use knives for bold areas and brushes for precise elements.
What canvas works best for heavy knife applications?
Sturdy canvases handle thick paint better than thin surfaces. Linen canvas provides superior durability for aggressive applications.
Prime surfaces properly with multiple gesso coats. Well-prepared surfaces prevent paint absorption issues.
How do I fix mistakes in wet knife paintings?
Scrape away wet paint immediately with a clean knife edge. Quick corrections prevent color contamination.
Many “mistakes” become interesting textural effects. Embrace accidents as creative opportunities rather than problems.
Should I varnish heavily textured knife paintings?
Yes, but use spray varnishes for even coverage. Brush varnishing skips over raised textural areas.
Test varnish on practice pieces first. Different products react uniquely to thick paint applications.
Conclusion
Mastering how to paint with a palette knife transforms your artistic expression through bold, textural applications. This technique opens creative possibilities that traditional brushwork cannot match.
Impasto techniques create sculptural surfaces that interact beautifully with light. Your paintings gain dimensional qualities that captivate viewers from every angle.
Start with simple subjects and heavy body paints. Build confidence through experimentation rather than perfection.
Expressionism and fauvism movements prove knife painting’s expressive power. Artists like Paul Gauguin and Henri Matisse used these techniques to revolutionize art.
Creative freedom emerges when you embrace the tool’s natural characteristics. Stop fighting for precise control and let the knife guide your mark-making.
Practice consistently with different subjects and color theory applications. Each painting session teaches new textural possibilities.
Your artistic journey benefits tremendously from knife painting skills. These techniques add energy and spontaneity to any painting style you choose to explore.