Most watercolor problems start here, before a single detail gets painted.
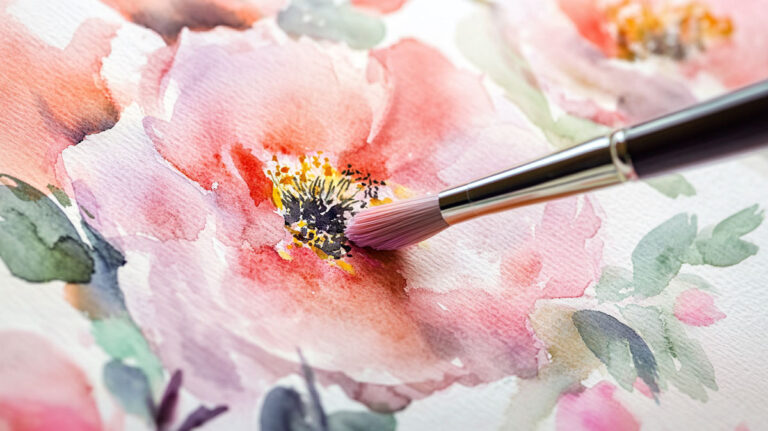
The flat wash technique is one of the first skills any watercolor artist needs to get right. It covers everything from clear skies to shadow planes to base layers, and when it goes wrong, the rest of the painting usually does too.
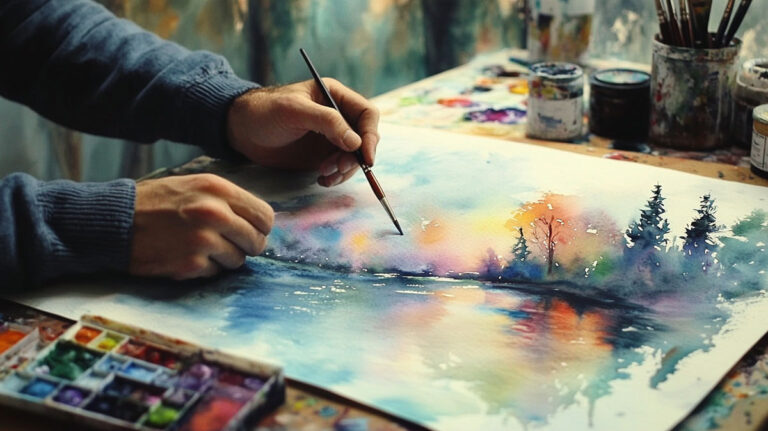
This guide breaks down what the flat wash is, how the mechanics actually work, which tools and paper weights make a difference, and where most beginners go wrong with paint consistency and brush loading.
By the end, you’ll know exactly how to apply a clean, even wash and when to use it.
What is Flat Wash in Watercolor Painting

A flat wash is a watercolor technique that applies a single, uniform tone across a surface with no shift in value or hue from start to finish.
The paint mix stays consistent throughout. No gradients, no color transitions. Just one even layer of pigment spread cleanly from one edge to the other.
It sounds basic. And it is, conceptually. But getting it right is another story.
The flat wash sits at the foundation of watercolor painting. Skies, water, shadow areas, backgrounds. Most of these start with a clean flat wash before anything else goes on the paper.
| Wash Type | Color/Value Behavior | Typical Use |
|---|---|---|
| Flat Wash | Static: Maintains a single, uniform hue and value across the entire area. | Minimalist backgrounds, solid shapes, and clean architectural base layers. |
| Graduated Wash | Linear Shift: Progressively moves from high saturation to high transparency (or vice versa). | Atmospheric skies, creating 3D volume on curved objects, and receding water. |
| Variegated Wash | Chromatic Shift: Two or more distinct colors are introduced and allowed to mingle while wet. | Sunsets, autumn foliage, and complex, multi-tonal underpaintings. |
| Wet-on-Wet | Diffusion: Pigment travels freely across saturated fibers, creating “lost edges.” | Misty mornings, soft-focus background “bokeh,” and atmospheric depth. |
The global watercolor paints market was valued at around $1.86 billion in 2024, growing at roughly 5.9% annually through 2035 (Wise Guy Reports). That growth reflects how many people are picking up watercolor for the first time and needing to learn exactly this kind of foundational technique.
How the Flat Wash Works

The mechanics rely on two things: gravity and the wet bead.
You tilt your board at roughly 15 to 30 degrees. That angle lets gravity pull the loaded paint downward as you work, keeping the bottom edge of each stroke wet and ready to pick up into the next pass.
That bottom edge is the bead. Pick it up with each new stroke. Let it dry between passes, and you get a hard line. That’s a streak.
The process in sequence:
- Load the brush fully with pre-mixed paint
- Lay the first horizontal stroke across the top of the area
- Let the bead form at the bottom of the stroke
- Bring the next stroke just below, overlapping slightly to pick up the bead
- Continue downward without revisiting drying areas
- Remove excess paint at the end with a dry brush
Speed matters. Watercolor dries fast, especially in warm or dry environments. Going back into a stroke that’s already starting to set causes backruns and blooms.
Key rule: keep the brush moving forward, not back.
Tools and Materials That Affect the Result

Brush choice changes everything. A small round brush is close to useless for a large flat wash. You’ll run out of paint capacity mid-stroke and interrupt the wet bead.
The best options for flat washes are mop brushes, flat wash brushes, and hake brushes. These hold a large volume of paint and release it smoothly across the paper surface. The mop brush in particular is a go-to for most watercolor artists doing large washes.
Paper is just as important. Legion Paper notes that 140 lb (300 gsm) paper is the most commonly used weight but can buckle during heavy washes if it hasn’t been stretched beforehand. 300 lb paper handles more water and is better suited to heavy wash techniques without warping.
| Paper Weight | Behavior with Flat Wash | Best For |
|---|---|---|
| 90 lb (190 gsm) | High Warp Risk: The thin fibers react instantly to moisture, creating “valleys” where paint puddles and dries unevenly. | Quick sketches, dry brush studies, and practice where flat washes aren’t the priority. |
| 140 lb (300 gsm) | The Standard: Handles moderate washes well. For large, saturated flat washes, it requires “stretching” (taping down) to prevent buckling. | Professional illustrations, client commissions, and most standard e-commerce background work. |
| 300 lb (640 gsm) | The “Board” Experience: Remains bone-flat even under heavy saturation. Allows for the longest “open time” to manipulate a gradient. | Heavy wet-on-wet techniques, massive variegated washes, and premium gallery-quality pieces. |
Surface texture also plays a role. Cold press vs. hot press watercolor paper behave differently. Cold press gives a slight texture that helps hold pigment in place. Hot press is smooth and tends to let paint flow more freely, which can make keeping a flat tone harder for beginners.
Paint consistency is the third variable. Too much water and the wash turns blotchy. Too little and the brush drags. A rough ratio of one part paint to four parts water is a reasonable starting point, though this varies by pigment brand and pigment load.
Step-by-Step Process for Painting a Flat Wash
The single biggest reason a flat wash fails is running out of mixed paint halfway through. Mix more than you think you need before you start. Always.
Once the paint dries in the first half of your wash, any new mix you add won’t match. The colors are never the same twice, and trying to blend them wet-on-dry creates a tide mark.
Preparing Your Paint Mix
Start here, not with the brush on paper. Mix your full puddle of color first.
- Use a large palette with plenty of mixing room
- Aim for roughly 1:4 paint-to-water ratio as a baseline
- Mix at least double what you estimate you’ll need
- Test the color value on scrap paper before committing
Laying the First Stroke
Set your board at 15 to 30 degrees. Load the brush fully.
Lay the first stroke horizontally across the top of the wash area. Work with confidence. Hesitant brushwork leads to uneven pigment distribution.
You should see the bead forming at the bottom edge almost immediately. That’s exactly what you want.
Managing the Wet Bead
The bead is the key to even coverage. Every stroke should start by picking up the bead left by the previous one.
Keep overlapping passes slightly. Move steadily downward. Don’t rush so fast that you skip the bead, but don’t pause long enough for any stroke to start drying before the next pass covers it.
At the bottom of the wash, collect the remaining bead with a dry brush or a piece of paper towel. Leaving it will create a puddle that dries darker than the rest of the wash.
Common Problems and How to Fix Them

Most flat wash problems come down to the same handful of causes.
Solving Watercolour notes that streaky, uneven washes almost always result from paint drying before the artist can finish the pass, usually because the mix was too thin or the area was too large for the brush being used.
Streaks and uneven tone – inconsistent paint mix or going back into paint that’s already starting to set. Work in one direction only.
Hard edges mid-wash – stopping partway through and letting the bead dry. If you have to stop, remove the bead first with a dry brush.
Backruns and blooms – dropping wet paint into an area that’s damp but not fully wet. The difference in water content causes the bloom. Avoid touching a damp wash with a wetter brush.
Tide marks – uneven drying across the wash, usually from inconsistent board angle or uneven paper absorbency. Arches 140 lb cold press is often recommended specifically because its sizing makes it more forgiving and consistent.
Patchy coverage – running out of paint mid-wash and mixing a second batch. The second mix almost never matches. This comes back to preparation.
When to Use a Flat Wash
The flat wash works best for large areas that need consistent tone with no value variation. Skies on overcast days, calm water, solid shadow planes, wide background areas.
It’s also the standard approach for underpainting and base layers in watercolor. J.M.W. Turner regularly used layered washes as the structural base of his compositions, applying thin flat washes of warm yellow followed by cool blue before adding details on top. According to the Wallace Collection’s documentation of his methods, these early wash layers established both the light source and the color temperature before any detail work began.
Good uses:
- Clear skies and overcast backgrounds
- Still water with no reflections
- Flat shadow areas in architectural subjects
- Color blocking before layering
- First layer in a multi-wash approach
Where it doesn’t fit: textured surfaces, areas that need organic variation, or anywhere a soft blend between colors is the goal. A flat wash applied to a complex foreground will look stiff and mechanical.
There are also specific painting styles where the flat wash shows up as a deliberate visual choice rather than just a functional one. Minimalism and certain approaches to abstract work use flat, even color fields as a core part of the composition’s visual color structure rather than as a background technique.
Knowing when NOT to use it matters as much as knowing how. A flat wash in the wrong place flattens a painting. It removes the value variation that gives a subject depth and visual interest.
Flat Wash vs. Other Wash Types
The flat wash is one of four core wash types in watercolor painting. The others are graduated, variegated, and wet-on-wet. Each produces a fundamentally different result.
Choosing the wrong one for a given area is one of the most common compositional mistakes in watercolor. Flat where you need a gradient reads as stiff. Gradient where you need flat draws unnecessary attention to a background area.
| Wash Type | Tone/Color Behavior | Edge Quality | Best Use |
|---|---|---|---|
| Flat Wash | Static: Constant pigment-to-water ratio across the entire surface. | Hard & Defined: Clean, crisp boundaries that separate shapes clearly. | Architectural rendering, graphic backgrounds, and blocked-in local color. |
| Graduated Wash | Tonal Shift: A smooth transition from high saturation to paper white. | Hard & Defined: Typically contained within a specific shape or the entire paper edge. | Atmospheric perspective in skies, receding ground planes, and rounded forms. |
| Variegated Wash | Chromatic Shift: Two or more wet colors mingling on the page. | Soft & Organic: Edges between colors are blurred, though the outer boundary is controlled. | Sunsets, vibrant foliage, and complex under-paintings for “glow” effects. |
| Wet-on-Wet | Dynamic: Pigment follows the path of least resistance in the water. | Diffused & Blurry: Total “lost edges” where shapes melt into the background. | Mist, distant mountains, soft clouds, and “bokeh” depth-of-field effects. |
Flat Wash vs. Graduated Wash
Daniel Smith Artists’ Materials describes the graduated wash as ideal for creating depth in skies and providing atmosphere in backgrounds, while the flat wash works best when no visible shift in value is wanted.
Setup is nearly identical. Both require a tilted board, pre-mixed paint, and the bead technique.
The difference is in execution. For a flat wash, the paint mix stays constant from the first stroke to the last. For a graduated wash, water is added progressively to each brush load, diluting the pigment and shifting the tone lighter as you move down.
Well, the thing is: switching between the two mid-painting is pretty common. A sky might start as a flat wash at the top and transition into a graduated wash near the horizon.
Flat Wash vs. Variegated Wash
Single color vs. multiple colors. That’s the core difference.
A variegated wash blends two or more colors while the paper is still wet, creating soft transitions that can’t be replicated on dry paper. According to Watercolor Affair, a flat wash has the same uniform color and tone all over, while a variegated wash has different color and tone in various places.
The flat wash gives you control and consistency. The variegated wash gives you movement and color variation. Both can share the same surface preparation and board angle.
Variegated washes can be tricky to keep clean. Incompatible pigments mixed wet can turn muddy fast.
Flat Wash vs. Wet-on-Wet
Wet-on-wet is applied to pre-dampened paper. Pigment spreads beyond the brush path, blooming outward in unpredictable ways. The flat wash is applied to dry paper with full control over edges and coverage.
Key difference: flat wash gives you hard, defined edges. Wet-on-wet gives you soft, diffused ones.
The dry brush technique sits at the opposite end of the spectrum from wet-on-wet, depositing paint only on the raised texture of the paper. The flat wash lands somewhere in the middle: controlled, smooth, and edge-defined without the texture of dry brush.
Practicing the Flat
Knowing the technique is one thing. Getting consistent results is a different challenge. Most artists need dedicated practice runs before flat washes start looking clean and professional.
Starting with just 15 to 20 minutes of focused daily practice, rather than longer irregular sessions, leads to faster skill development in watercolor techniques generally (Newsbytes, 2024). For flat washes specifically, short timed exercises build the muscle memory needed to keep the brush moving at a consistent pace.
Value Scale Exercises
The standard starting exercise. Paint a row of flat wash swatches using a single pigment, progressing from near-full strength on the left down to a very pale dilution on the right.
- Use one color only (French Ultramarine or Burnt Sienna work well)
- Aim for 5 to 7 distinct steps in the scale
- Keep each swatch the same size and let them dry fully before judging tone
This trains both paint dilution judgment and brush consistency at the same time.
Useful tip from Watercolor Misfit: mixing water-to-paint ratios is the first real skill to master before moving to any other watercolor exercise.
Pigment Selection for Practice
Pigment type affects how flat washes behave, and this matters more than most beginners expect.
Non-granulating pigments (like Phthalo Blue or Quinacridone Rose) produce consistently smooth washes. Good for early practice because results are predictable.
Granulating pigments (like Cobalt Blue or Ultramarine Blue) have heavier particles that settle into paper texture as they dry. According to Strathmore Artist Papers, pigments with larger or irregularly shaped particles tend to granulate more, creating mottled, textured effects even in flat wash applications.
For learning purposes, start with non-granulating colors. Granulating pigments add a variable that’s hard to diagnose when you’re still troubleshooting bead control and paint consistency.
Timed Practice Runs
Time pressure is a useful training tool. Flat washes fail when the artist slows down and lets strokes begin drying between passes.
Set a timer. Practice laying a wash across a half-sheet in under 90 seconds. Speed up the pace until you can do it without thinking about the bead.
Sketchbook vs. full sheet: sketchbooks are fine for value scales and pigment tests. For full wash practice, use individual sheets at the correct paper weight, since a sketchbook’s binding can create uneven tension across the surface and affect how the wash dries.
Artists like Winslow Homer, one of the most recognized watercolorists in American art history, built his fluency in wash technique through constant observational study and repetition on location. His ability to cover large areas with clean, even washes in fast-changing outdoor light came from that kind of disciplined, repeated practice rather than any single breakthrough insight.
The mechanics of a flat wash transfer directly into the glazing technique, where multiple transparent flat washes are layered on top of each other once dry to build depth and color saturation. Getting the flat wash right first makes everything that follows considerably easier.
FAQ on What Is Flat Wash Technique In Watercolor Painting
What is a flat wash in watercolor painting?
A flat wash is a single, uniform layer of color applied across watercolor paper with no shift in tone or hue.
It relies on consistent paint consistency, a tilted board, and horizontal brush strokes that pick up the wet bead with each pass.
What is the flat wash technique used for?
It works best for large areas needing even coverage: clear skies, calm water, shadow planes, and underpainting base layers.
It also sets the foundation for layering and glazing techniques applied on top once the wash dries.
How is a flat wash different from a graduated wash?
A flat wash keeps the same tone from top to bottom. A graduated wash shifts progressively from dark to light by adding water to each successive brush load.
What brush should I use for a flat wash?
A mop brush, hake brush, or wide flat wash brush works best.
These hold enough pigment load to cover large areas without running dry mid-stroke, which is the most common cause of streaking.
What paper is best for a flat wash?
140 lb cold press paper works for most applications but may buckle without stretching. 300 lb paper handles heavier water control and stays flat without any preparation.
Why does my flat wash look streaky?
Streaks usually mean the paint started drying between strokes. Work faster, keep the board angled, and always pick up the wet bead before laying the next horizontal pass.
How much paint should I mix before starting?
Always mix more than you think you need. Running out mid-wash forces a second mix, which almost never matches the first batch in color saturation or dilution.
Can I fix a flat wash once it starts drying?
Not easily. Going back into a drying wash causes backruns and bloom effects.
If you notice an issue early, remove the bead and let it dry fully before deciding whether a second wash layer can correct it.
What is the correct board angle for a flat wash?
Tilt the board at 15 to 30 degrees. This angle lets gravity pull the wet bead downward, keeping the bottom edge of each stroke active and ready to blend into the next pass.
How do I practice the flat wash technique?
Start with value scale exercises using a single pigment. Paint timed runs across a half-sheet to build pace.
Use non-granulating colors like Phthalo Blue first, since their smooth paint flow makes it easier to diagnose consistency problems.
Conclusion
This conclusion is for an article presenting the flat wash technique in watercolor painting as exactly what it is: a foundational skill that affects every layer that follows.
Get the paint consistency right, maintain your board angle, and keep the wet bead moving. Those three things solve most problems before they start.
Paper weight matters. Brush choice matters. And mixing enough pigment before the first stroke matters more than almost anything else.
Practice it with single-pigment value scale exercises. Build speed. Move from non-granulating pigments toward more unpredictable ones as your brush control improves.
The flat wash is the starting point for layering, glazing, and clean color blocking. Master it here, and the rest of watercolor painting gets easier.