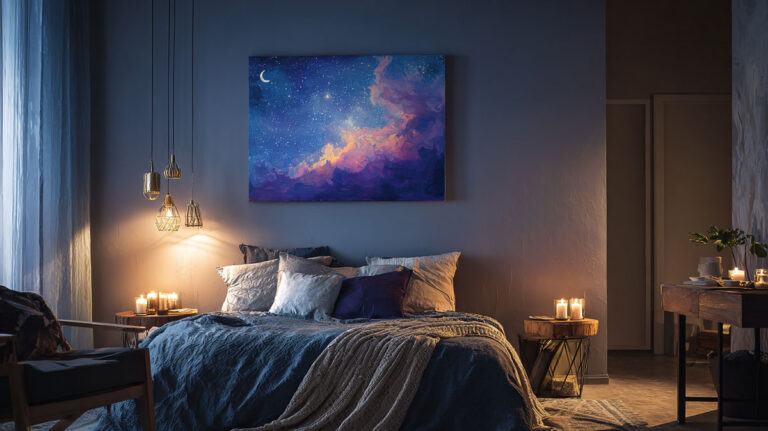
That golden moment when the sky explodes into warm oranges and deep purples captivates everyone, but capturing it on canvas feels impossible.
Learning how to paint a sunset requires more than throwing orange paint across your canvas. The luminous glow, atmospheric perspective, and color temperature shifts challenge even experienced painters.
Most sunset attempts end up muddy or flat because painters miss the subtle color relationships that create that magical evening light.
Understanding color theory and proper brush techniques makes the difference between amateur and professional results.
This guide covers everything from selecting the right painting mediums to mastering cloud formations and water reflections.
You’ll learn specific color mixing formulas, wet-on-wet blending methods, and composition strategies that create dramatic sunset paintings. By the end, you’ll confidently paint glowing skies that capture golden hour lighting with authentic atmospheric effects.
Essential Materials and Tools for Glowing Effects

Paint Selection for Maximum Color Impact
Transparent pigments create the luminous sunset colors you’re after. They let light pass through layers, creating that natural glow effect.
High-chroma colors give you the intensity needed for dramatic evening sky painting. Cadmium Orange, Quinacridone Rose, and Ultramarine Blue form your core sunset palette.
Acrylic painting works great for beginners learning sunset techniques. The fast-drying nature lets you build layers quickly without waiting around.
Oil painting gives you more working time for smooth sky gradients. You can blend colors directly on the canvas while they stay wet.
Watercolor painting creates soft, ethereal sunset effects naturally. The transparent medium mimics how light actually behaves in the atmosphere.
Brush Types for Different Sunset Elements
Flat brushes handle sky gradients better than anything else. They lay down smooth, even color transitions across large areas.
Round brushes work perfectly for cloud details and soft edges. Size 6 and 8 rounds cover most sunset cloud work.
Fan brushes create realistic atmospheric effects with minimal effort. They’re perfect for those wispy, high-altitude clouds that catch the evening light.
Different types of paintbrushes serve specific purposes in sunset paintings. Each shape creates unique marks and textures.
Canvas Preparation for Luminous Results
Cotton canvas or linen canvas both work well for sunset paintings. Linen holds up better for heavy paint application.
Smooth canvas surfaces work best for realistic sunset effects. Too much texture can interfere with smooth color blending.
Gesso affects how your sunset colors appear. White gesso makes colors more vibrant, while toned grounds can add warmth.
Medium-sized canvases (16×20 inches) give you enough space for detailed sky work. Smaller sizes can feel cramped for complex atmospheric effects.
Additional Tools for Glowing Effects
Palette knives create broken color effects that suggest sparkling light on water. They’re perfect for reflective surfaces.
Sponges help create soft, atmospheric textures in cloud formations. Natural sea sponges work better than synthetic ones.
Spray bottles keep acrylic paints workable longer. This gives you more time for smooth color transitions.
Building Your Color Palette
Mixing Sunset Oranges and Reds

Primary colors form the foundation of any sunset palette. Cadmium Yellow and Cadmium Red create pure, clean oranges.
Add white sparingly to sunset mixtures. Too much white kills the intensity and creates chalky, dull colors.
Secondary colors like orange become your sunset workhorses. Mix several orange variations before you start painting.
Quinacridone Rose mixed with Cadmium Yellow creates more sophisticated oranges than basic red-yellow combinations.
Balancing Warm and Cool Elements
Complementary colors create the contrast that makes sunsets dramatic. Orange sky against purple shadows creates visual impact.
Ultramarine Blue mixed with a touch of Quinacridone Violet gives you rich purple-grays. These cool colors make your warm sunset hues pop.
Color temperature shifts across the sky during golden hour lighting. Warmest colors appear near the horizon, cooling as you move upward.
Dioxazine Purple works perfectly for distant mountains and cool shadow areas. It provides necessary cool contrast without looking artificial.
Creating Glow Through Color Relationships
Color intensity matters more than exact hue matching. Saturated colors next to grayed colors create the illusion of glowing light.
Analogous color schemes work naturally for sunset paintings. Yellow, orange, and red flow together like real atmospheric effects.
Place your most intense colors strategically around the sun’s position. Let them fade gradually toward the edges of your composition.
Color harmony principles guide successful sunset palettes. Stick to warm dominance with cool accents for best results.
Specific Paint Recommendations
Cadmium Yellow Light handles the brightest sunset areas. It mixes cleanly with other warm colors without muddying.
Cadmium Orange eliminates guesswork in sunset mixing. Having it pre-mixed saves time and gives consistent results.
Alizarin Crimson adds depth to sunset reds. Its transparent nature creates rich, glowing effects when layered.
Raw Umber neutralizes overly bright colors when needed. A tiny amount tones down harsh sunset mixtures.
Composition Strategies for Dramatic Impact
Horizon Line Placement
Composition decisions make or break sunset paintings. Your horizon line placement determines the entire mood.
High horizons focus attention on landscape elements. This works well when you have interesting foreground silhouettes.
Low horizons let the dramatic sky dominate the painting. Most successful sunset paintings use this approach.
Breaking composition rules sometimes creates stronger impact. Center-placed horizons can work if other elements provide visual interest.
Focal Point Development
Focal point placement guides viewer attention through your sunset scene. The sun’s position naturally becomes your primary focus.
Visual weight around the light source needs careful management. Too much detail competes with the main attraction.
Directional lines lead eyes toward your focal area. Cloud formations and shorelines create natural leading elements.
Silhouette shapes provide perfect contrast against bright sunset skies. Trees, buildings, and mountains work as strong compositional anchors.
Foreground Integration
Reflected light affects all foreground elements during golden hour. Everything picks up warm color from the sky above.
Value contrast between dark foregrounds and bright skies creates drama. Push these relationships for maximum impact.
Color echoes throughout your sunset composition create unity. Repeat sky colors in water reflections and foreground shadows.
Negative space around silhouetted objects needs attention. Clean edges against the sky read better than fuzzy ones.
Advanced Composition Techniques
Asymmetrical balance works better than symmetry in sunset scenes. Nature rarely creates perfectly centered compositions.
Movement through your painting keeps viewers engaged. Cloud directions and water flow guide visual paths.
Scale relationships between sky and land elements affect emotional impact. Vast skies create feelings of awe and wonder.
Multiple focal points weaken sunset compositions. Keep secondary interests subtle and supportive of your main light source.
Working with Natural Light Patterns
Study how atmospheric perspective affects distant elements. Mountains fade to purple-gray, not blue.
Cloud formations follow perspective rules just like ground-level objects. They appear smaller and closer together with distance.
Light source positioning affects every element in your painting. Cast shadows and reflected light must stay consistent throughout.
Chiaroscuro principles apply to landscape painting too. Strong light-dark contrasts create dramatic sunset effects.
Painting Techniques for Luminous Sky Effects
Wet-on-Wet Blending Methods

Wet-on-wet technique creates the smoothest sky gradients possible. Work quickly while your base colors stay moist on the canvas.
Start with your lightest colors near the horizon. Add progressively darker tones as you move upward in the sky.
Keep a spray bottle handy when working with acrylics. Mist the canvas lightly to extend your blending time during golden hour painting.
Blend acrylic paint by working in overlapping horizontal strokes. Never go back over areas that have started to set.
Working Time Management
Set up your entire palette before touching the canvas. You won’t have time to mix colors once you start the wet blending process.
Work in sections no larger than 12 inches wide. Larger areas dry too quickly for smooth transitions.
Color application sequence matters more than perfect mixing. Lay down your base wash, then add color variations while everything’s still wet.
Temperature and humidity affect your working time significantly. Expect faster drying on hot, dry days.
Glazing for Color Depth
Use glazing in painting to build luminous sunset effects gradually. Transparent layers create depth that opaque paint cannot match.
Mix glazing medium with your sunset colors for proper consistency. Pure paint straight from the tube appears flat and lifeless.
Transparent layer application requires patience between coats. Each glaze must dry completely before adding the next.
Quinacridone colors work perfectly for sunset glazes. Their natural transparency creates rich, glowing effects when layered.
Building Color Intensity Gradually

Start with weak color mixtures and build intensity slowly. You can always add more color, but removing it becomes difficult.
Each glaze layer should be barely visible when applied. The cumulative effect creates stunning color depth.
Warm glazes over cool underpainting create complex sunset hues. This mimics how atmospheric particles scatter light naturally.
Scumbling for Atmospheric Effects
Scumbling technique creates soft, hazy effects perfect for distant atmospheric conditions. Drag dry paint lightly across your surface.
Use a fan brush loaded with very little paint for cloud scumbling. The broken color effect suggests moisture and particles in the air.
Light scumbling over dark underpainting creates luminous effects. This works especially well for rim lighting on cloud edges.
Work with colors slightly lighter than your base layer. Too much contrast makes the effect look artificial rather than atmospheric.
Cloud Formation and Light Interaction

Understanding Cloud Types in Sunset Scenes
Cumulus clouds create dramatic silhouettes against evening skies. Their defined edges catch and reflect the warm light beautifully.
Cirrus clouds appear as wispy streaks across the sky. Paint them with quick, confident brush strokes using a liner brush.
Stratus formations create layered effects perfect for complex sunset compositions. Each layer catches light differently depending on its height.
Mixed cloud systems offer the most interesting sunset opportunities. Combine different cloud types for varied textures and lighting effects.
Painting Clouds That Glow
Light source in composition determines how clouds appear illuminated. Position affects every cloud in your painting.
Core shadow and reflected light principles apply to clouds just like solid objects. The sun creates definite light and shadow patterns.
Cloud edges closest to the light source appear brightest and warmest. Gradually cool and darken colors as you move away from the sun.
Backlit clouds show rim lighting effects around their edges. Use pure, warm colors for these highlight areas.
Edge Treatment for Realistic Forms
Hard edges work best where clouds meet bright sky areas. Soft edges suggest moisture and atmospheric blending.
Cloud illumination varies based on density and distance from the sun. Thick clouds show strong value contrasts.
Use sfumato techniques for realistic cloud softness. Blend edges while paint remains workable.
Never outline clouds with dark lines. Real clouds have soft, natural transitions into the surrounding atmosphere.
Color Temperature on Cloud Surfaces
Sunlit cloud surfaces pick up warm orange and yellow tones. Shadow areas appear cooler, often purple or blue-gray.
Cloud surface colors change dramatically based on the sun’s position. Low sun creates more extreme warm-cool contrasts.
Distance affects cloud color temperature too. Closer clouds show more intense color variations than distant ones.
Reflected light from the ground can warm up cloud undersides. This effect becomes stronger closer to sunset.
Water and Reflection Techniques

Painting Sunset Reflections in Water
Reflection laws govern how sunset colors appear in water surfaces. Direct reflections appear directly below their light sources.
Reflections always appear slightly darker than the objects they mirror. Water absorbs some light, reducing overall brightness.
Vertical elements reflect straight down, regardless of your viewing angle. Horizontal elements like clouds stretch across water surfaces.
Paint water in watercolor using horizontal brush strokes to suggest surface movement.
Color Shifts in Water Reflections
Water reflections show cooler temperatures than sky colors. The water surface acts like a filter, removing some warmth.
Reflection patterns break up with surface movement. Calm water shows clear reflections; choppy water creates broken color areas.
Sunset reflections often appear more intense than expected. Dark water backgrounds make reflected colors appear more saturated.
Add touches of the water’s local color to all reflections. Pure reflections without water influence look unrealistic.
Creating Water Movement
Gentle waves create horizontal streaks of reflected color. Paint these with confident horizontal brush strokes.
Still water requires perfect reflection accuracy. Every sky element must have its corresponding water counterpart.
Paint ocean waves by observing their rhythm and spacing patterns. Waves follow predictable size relationships.
Choppy water surfaces scatter reflected light into sparkles. Use broken brushwork to suggest this light-catching texture.
Surface Texture Effects on Reflections
Smooth water surfaces act like mirrors, showing clear reflections. Textured surfaces break reflections into abstract color patterns.
Foam and spray pick up ambient light colors from the sky. They appear lighter and warmer than the surrounding water.
Wind direction affects reflection patterns on water. Cross-winds create different textures than onshore breezes.
Use palette knife painting techniques for textured water surfaces. The broken color effect suggests moving water perfectly.
Shoreline Integration
Wet sand reflection effects create secondary focal points in sunset paintings. The sand acts like a mirror for sky colors.
Beach and water edge transitions need careful observation. Foam patterns and wave action create complex color relationships.
Rocky shoreline silhouettes provide strong contrast against reflected sunset colors. Keep these shapes simple but accurate.
Vegetation silhouettes against water require clean edges. Fuzzy plant shapes compete with the water’s reflective qualities.
Advanced Water Techniques
Perspective in water reflections follows the same rules as land-based perspective. Distant reflections appear smaller and less detailed.
Atmospheric perspective affects water surfaces too. Distant water appears lighter and less saturated.
Multiple light sources create complex reflection patterns. Account for both direct sun and sky light in your water painting.
Time of day affects water color dramatically. Evening light creates warm water tones, while midday produces cooler blues and greens.
Landscape Elements and Silhouettes
Tree and Vegetation Silhouettes
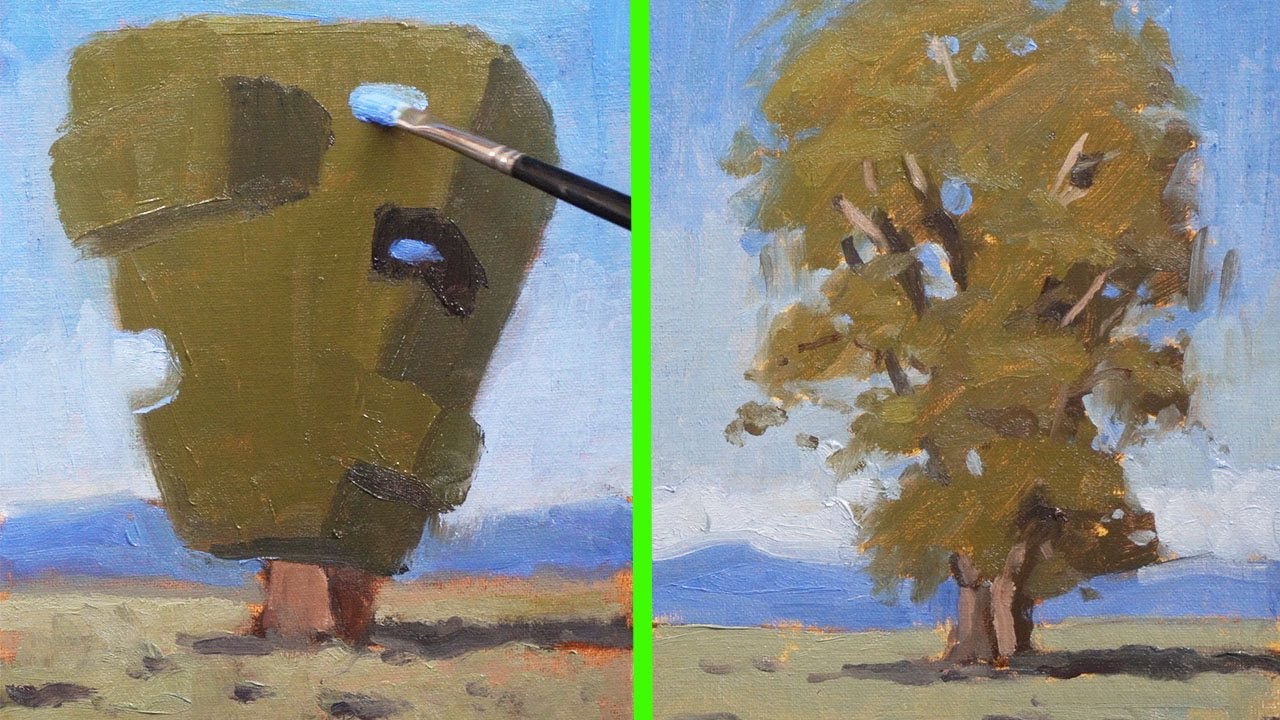
Shape variety keeps sunset silhouettes interesting and natural. Avoid repetitive tree forms that create boring skylines.
Overlapping forms create depth in landscape painting compositions. Place some trees in front of others to suggest distance.
Size relationships establish scale in your sunset scene. Distant trees appear smaller while foreground elements dominate the composition.
Paint trees in acrylic using confident, gestural strokes. Overworked tree silhouettes lose their natural character.
Creating Believable Tree Shapes
Study real tree structures before simplifying them into silhouettes. Each species has distinctive branch patterns and overall shapes.
Edge quality affects how silhouettes read against bright sunset skies. Sharp edges work best for most tree forms.
Avoid outlining trees with dark paint. Instead, paint the sky color right up to the tree edges for clean, natural transitions.
Group smaller trees together to create larger, more interesting silhouette masses. Individual small trees often appear weak in compositions.
Building and Structure Integration
Architectural silhouettes add human elements to peaceful sunset scenes. Simple building shapes work better than complex details.
Window glow effects suggest interior lighting beginning as daylight fades. Use warm yellows and oranges for realistic interior light colors.
Roofline treatments need careful attention to perspective rules. Using vanishing points keeps building proportions accurate.
Urban sunset approaches differ from rural scenes. City silhouettes create more complex, layered compositions.
Mountain and Hill Formations
Atmospheric perspective principles guide successful mountain painting. Distant peaks appear lighter and cooler than foreground hills.
Color shifts with distance follow predictable patterns. Mountains progress from purple-gray to blue-gray as they recede.
Ridge line treatments affect the overall mood of sunset paintings. Smooth, flowing lines create peaceful feelings while jagged peaks add drama.
Valley fog and haze effects often accompany sunset lighting conditions. These atmospheric elements add mystery and depth to landscape compositions.
Advanced Lighting and Glow Techniques
Creating the Illusion of Light Source

Color temperature around the sun reaches its warmest point during golden hour lighting. Pure yellows and oranges concentrate near the light source.
Radiating light patterns spread outward from the sun’s position. Cloud formations and atmospheric particles make these rays visible.
Avoid painting the sun as a perfect white circle. Real sunsets show the sun as warm yellow or orange, often partially obscured by atmosphere.
Never make the sun the brightest element in your painting. The sky immediately around it should glow more intensely.
Lens Flare Effects in Paint
Atmospheric glow around bright light sources occurs naturally in humid conditions. This soft halo effect makes sunset paintings more believable.
Paint atmospheric glow using soft, transparent layers of warm color. Build these effects gradually rather than applying them all at once.
Vertical light rays appear when the sun breaks through cloud gaps. Paint these using clean, confident brush strokes.
Horizontal light streaks occur when the sun sits low on the horizon. These effects work especially well in seascape paintings.
Backlighting Effects
Rim lighting on objects creates dramatic silhouette effects. Warm light catches the edges of trees, buildings, and figures.
Transparent elements like leaves show internal glow when backlit. This effect adds interest to tree silhouettes without destroying their simple shapes.
Color spill from strong light sources affects all nearby elements. Everything near the sunset picks up warm color reflections.
Chiaroscuro principles apply to landscape work too. Strong light-dark contrasts create powerful sunset drama.
Secondary Light Sources
Reflected light in shadows prevents them from appearing flat and lifeless. Sky light fills shadow areas with cool, subtle color.
Sky light color influence affects everything in your sunset painting. Even shadow areas pick up warm reflected light from the glowing sky.
Bounce light from water surfaces creates secondary illumination. This effect becomes especially strong during golden hour conditions.
Ambient light color mixing requires understanding how multiple light sources interact. Warm direct light combines with cool sky light throughout the scene.
Finishing Touches and Refinement

Final Color Adjustments
Pushing color relationships further often improves sunset paintings dramatically. Don’t settle for timid color choices.
Add accent colors sparingly to avoid destroying your sunset’s color harmony. Small touches of pure color create sparkle without overwhelming the composition.
Color contrast relationships need final evaluation. Increase contrast between warm and cool areas for maximum impact.
Temperature inconsistencies become obvious during final review. Check that all warm areas truly feel warm and cool areas read as properly cool.
Edge Quality Control
Soft edges work best for atmospheric effects and distant elements. Use dry brush techniques to soften harsh transitions.
Sharp edges direct attention to important focal areas. Reserve your clearest edges for the most important elements.
Lost edges create mystery and prevent overworked appearance. Let some elements disappear into shadows or atmospheric haze.
Found edges provide necessary clarity and definition. Use these strategically to guide viewer attention through your sunset composition.
Final Glow Adjustments
Sparkle highlights add life to sunset paintings. Place tiny touches of pure, warm color in areas where light catches surfaces.
Avoid adding details that compete with your sunset’s main attraction. Every element should support the overall lighting effect.
Value relationships need final checking. Ensure your darkest darks and lightest lights create sufficient contrast.
Step back frequently during finishing work. Fresh eyes catch problems that close-up work misses.
Common Refinement Areas
Reflection accuracy often needs correction during final stages. Water reflections must follow proper perspective and color rules.
Cloud edge quality affects the entire painting’s believability. Soften overly hard cloud edges that fight the atmospheric mood.
Foreground elements sometimes need simplification. Remove details that don’t contribute to the overall sunset effect.
Color saturation levels require final balancing. Too much saturation everywhere creates garish results.
When to Stop Working
Know when your sunset painting is complete. Overworking destroys the fresh, spontaneous quality that makes sunset paintings appealing.
Fresh brushwork often looks better than perfectly blended areas. Maintain some gestural quality in your paint application.
Color mixing on the canvas creates more interesting effects than perfectly premixed colors. Let some mixing happen during application.
Trust your initial color instincts. Second-guessing often leads to muddy, overworked color relationships that lack the punch of decisive color choices.
Common Mistakes and Quick Fixes
Overworking Color Areas
Recognizing when to stop prevents the most common sunset painting disasters. Fresh color looks better than perfectly smooth blending.
Overworked areas lose their luminous quality and become muddy. Step back frequently to check if you’re destroying natural color vibrancy.
Fix painting mistakes by scraping wet paint off with a palette knife. Clean the area and start fresh rather than trying to work over muddy colors.
Set a timer when blending sunset skies. Limit yourself to 10-15 minutes per section to maintain spontaneous brushwork.
Fixing Muddy Color Mixtures
Muddy sunset colors result from mixing too many pigments together. Stick to three colors maximum for any mixture.
Complementary colors mixed in equal amounts always create gray. Use tiny amounts of cool colors to neutralize warm sunset hues.
Scrape off muddy areas while paint remains wet. Clean your palette knife between scrapes to avoid spreading the muddy color.
Color theory knowledge prevents mixing mistakes. Understanding which colors work together saves time and frustration.
Restoring Color Vibrancy
Add pure color accents to dull sunset areas. Small touches of unmixed paint bring life back to overworked sections.
Glazing over dull areas with transparent warm colors restores glow. Mix glazing medium with pure orange or yellow for best results.
Scumble light, warm colors over dark, muddy sections. This broken color technique suggests atmospheric sparkle and light.
Tint muddy areas with pure white mixed with your original sunset color. This often saves overworked sky sections.
Working Around Dried Paint Issues
Wet your brush with glazing medium when working over dry acrylic paint. This helps new colors blend with the existing surface.
Soft blending over dried areas requires patient layering. Build smooth transitions with multiple thin applications.
Use a clean, damp brush to soften hard edges in dried paint. Work quickly before the surface dries again.
Oil painters can use painting medium to reactivate dried areas. A small amount of medium makes the surface workable again.
Color Temperature Problems
Temperature inconsistencies destroy sunset painting believability. All warm areas must read as genuinely warm, not neutral.
Cool colors creeping into warm sunset areas happen when you don’t clean your brush properly. Rinse thoroughly between warm and cool applications.
Fix overly warm shadow areas by glazing with cool, transparent colors. Ultramarine blue or dioxazine purple work well for this correction.
Balancing temperature harmony throughout your painting requires stepping back frequently. Distance reveals temperature problems that close-up work misses.
Identifying Temperature Inconsistencies
Photograph your painting with your phone. Digital images often reveal color temperature problems invisible to your eyes.
Squint at your sunset painting to simplify color relationships. Temperature problems become obvious when detail disappears.
Compare your painting to reference photos of real sunsets. This helps identify areas where your color temperature feels unnatural.
Ask someone else to look at your painting. Fresh eyes catch temperature problems you’ve become blind to.
Correcting Cool Colors in Warm Areas
Layer warm glazes over accidentally cool areas. Build warmth gradually rather than trying to fix everything with one application.
Warm light painting effects require consistent temperature throughout all illuminated areas. Check every lit surface for proper warmth.
Use complementary colors to neutralize unwanted cool tones. A tiny amount of orange neutralizes blue undertones.
Scumble warm, opaque colors over cool mistakes. This technique works especially well for correcting sky areas.
Value and Contrast Issues
Checking glow effectiveness requires viewing your painting from across the room. Successful sunset glow reads clearly at a distance.
Weak contrast makes sunset paintings appear flat and lifeless. Push your lightest lights and darkest darks further apart.
Use a value scale to check your sunset’s tonal range. Most successful sunset paintings use the full value spectrum.
Contrast for impact means your sunset should have pure darks and brilliant lights. Avoid settling for middle values throughout.
Adjusting Contrast for Impact
Add pure white mixed with yellow to your brightest sky areas. This creates the intense glow that makes sunset paintings compelling.
Dark foreground silhouettes provide necessary contrast against bright skies. Make these shapes darker than they appear in nature.
Strengthen shadow areas with rich, dark colors rather than muddy grays. Use burnt umber or ultramarine blue for clean, dark mixtures.
Tone adjustments often require multiple layers. Build contrast gradually rather than trying to achieve it all at once.
Correcting Flat-Looking Skies
Layer transparent warm colors over flat sky areas. Multiple glazes create depth that single paint applications cannot achieve.
Atmospheric effects prevent flat appearance in sunset skies. Add subtle clouds or haze to break up large, empty sky areas.
Vary your color temperature across the sky surface. Pure warm near the sun, gradually cooling toward the zenith creates natural variation.
Gradation prevents flat color areas. Even subtle value and color changes add interest to large sky sections.
Adding Punch to Weak Compositions
Visual impact comes from strong value contrasts and bold color relationships. Timid color choices create forgettable sunset paintings.
Move your horizon line to create more dramatic proportions. Small adjustments in horizon placement dramatically affect composition strength.
Add foreground elements for scale and contrast. Trees, rocks, or buildings provide necessary dark shapes against bright sunset skies.
Emphasis in sunset paintings comes from contrast and color intensity. Concentrate your brightest, warmest colors around your focal point.
FAQ on How To Paint A Sunset
What colors do I need to paint a realistic sunset?
Start with cadmium yellow, cadmium orange, quinacridone rose, and ultramarine blue. These primary colors create clean sunset mixtures without muddying.
Add alizarin crimson and raw umber for depth. Dioxazine purple works perfectly for cool shadow areas and distant mountains.
Which painting medium works best for sunset paintings?
Acrylic painting suits beginners due to fast drying and easy cleanup. Oil painting allows longer blending time for smooth sky gradients.
Watercolor painting creates natural atmospheric effects but requires more skill to control.
How do I avoid muddy colors in my sunset sky?
Limit mixtures to three colors maximum. Clean your brush thoroughly between warm and cool color applications.
Never mix complementary colors in equal amounts. Use tiny amounts of cool colors to neutralize warm sunset hues without creating gray.
What brush techniques work best for painting sunset skies?
Wet-on-wet blending creates smooth color transitions. Work quickly with horizontal brush strokes while paint stays moist.
Use flat brushes for sky gradients and fan brushes for atmospheric effects. Round brushes handle cloud details effectively.
How do I paint clouds that look three-dimensional?
Study real cloud formations to understand their light and shadow patterns. Sunlit areas appear warm while shadow sides show cooler colors.
Use chiaroscuro principles with strong value contrasts. Soft edges suggest moisture while hard edges define cloud boundaries.
Where should I place the horizon line in sunset paintings?
Low horizon placement emphasizes dramatic sky effects. High horizons work when foreground elements provide interest.
Follow composition rules of thirds for balanced placement. Avoid centering the horizon unless other elements create visual interest.
How do I paint believable water reflections?
Reflections appear slightly darker than their sky counterparts. Water absorbs some light, reducing overall reflection brightness.
Paint vertical elements reflecting straight down. Use horizontal brush strokes to suggest water movement and broken reflection patterns.
What’s the biggest mistake beginners make painting sunsets?
Overworking color areas destroys luminous quality. Stop blending once colors look natural rather than pursuing perfect smoothness.
Most beginners also make the sun too bright and white. Real sunsets show warm yellow or orange suns, often partially obscured.
How do I create the glowing effect around the sun?
Use transparent glazes of warm colors around the light source. Build atmospheric glow gradually with multiple thin layers.
Never paint the sun as the brightest element. The sky immediately surrounding it should glow more intensely than the sun itself.
How long should a sunset painting take to complete?
Working time varies by medium and complexity. Simple acrylic sunsets take 2-3 hours while detailed oil paintings require multiple sessions.
En plein air painting demands speed due to changing light conditions. Studio work allows more deliberate color development.
Conclusion
Mastering how to paint a sunset transforms your landscape artwork from amateur attempts into compelling pieces that capture golden hour magic. The techniques covered here give you the foundation for creating luminous evening sky paintings.
Remember that successful sunset paintings depend on understanding atmospheric perspective and proper color harmony relationships. Warm colors near the light source, cooling gradually toward the edges.
Practice wet-on-wet blending regularly to develop smooth sky gradients. Master cloud formations by studying real weather patterns and light interaction.
Value contrast creates the drama that makes sunset paintings memorable. Push your darks darker and lights brighter than they appear in nature.
Don’t rush the process. Building luminous effects through glazing and careful color mixing takes patience, but the results justify the effort.
Start with simple compositions and gradually add complexity as your skills develop. Each sunset painting teaches new lessons about light, color psychology, and atmospheric effects.