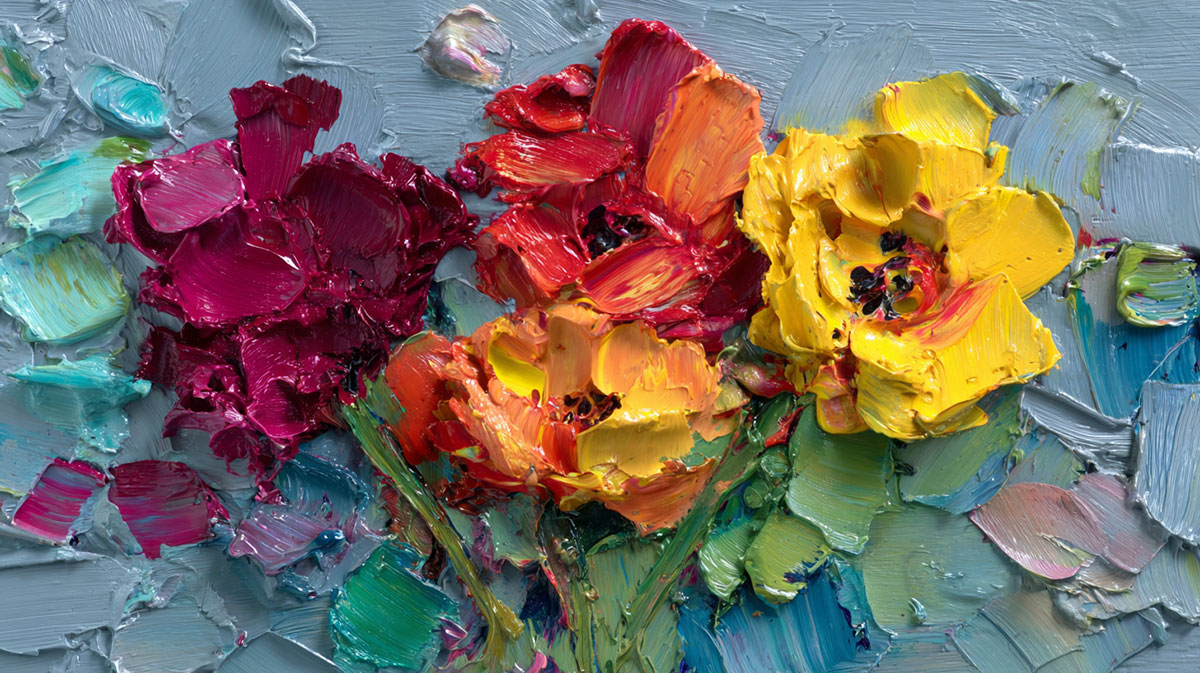

Most painters reach for brushes, but the palette knife creates effects no brush can match. Learning how to use a palette knife opens up exciting possibilities for texture creation, paint mixing, and bold artistic expression that transforms ordinary paintings into dynamic works of art.
Whether you’re working with oil painting or acrylic painting techniques, the palette knife offers unparalleled control over paint application and color blending.
This versatile tool excels at creating impasto textures, smooth gradients, and expressive mark-making that brushes simply cannot achieve.
This guide covers essential palette knife techniques, from basic paint loading to advanced texture creation methods. You’ll discover specific applications for landscape painting, still life work, and abstract compositions, plus troubleshooting tips for common challenges.
By the end, you’ll confidently use palette knives to create stunning visual effects and add professional-quality textures to your artistic toolkit.
Basic Palette Knife Techniques

Loading Paint onto the Knife
Getting paint onto your palette knife isn’t rocket science, but there’s definitely a right way to do it. Start by scooping a small amount of paint with the edge of your knife blade. The paint consistency matters more than you might think.
For thick applications, you want your paint straight from the tube. Thin paint just slides off and makes a mess. Hold the knife at a slight angle when loading to prevent drips.
Proper Paint Quantity for Different Effects
Less is more when you’re starting out. A pea-sized amount covers more canvas than you’d expect. Too much paint creates muddy colors and wastes materials.
For texture work, load more paint onto the knife. For blending, use smaller amounts. Your painting technique will determine how much paint to load each time.
Paint Application Methods
The flat blade works best for spreading large areas of color. Keep your wrist loose and let the knife glide across the canvas surface. Rigid movements create choppy, uneven marks.
Edge work requires a steadier hand. Turn the knife perpendicular to create thin lines. This method works great for branches, fence posts, or architectural details in landscape paintings.
Pressure Control Methods
Light pressure creates subtle effects. Heavy pressure can damage your canvas or create unwanted ridges. Practice on paper first to get a feel for pressure variations.
The knife should feel like an extension of your hand. Don’t grip it like you’re trying to crush it. Relaxed movements produce better results.
Scraping and Removal Techniques
Sometimes you need to take paint off, not put it on. The knife edge works perfectly for scraping away wet paint. This technique is called sgraffito and creates interesting textural effects.
Use the flat blade to remove larger areas of paint. Work quickly before the paint starts to set. Clean your knife between scraping sessions to avoid color contamination.
Paint Mixing with Palette Knives
Color Blending Fundamentals
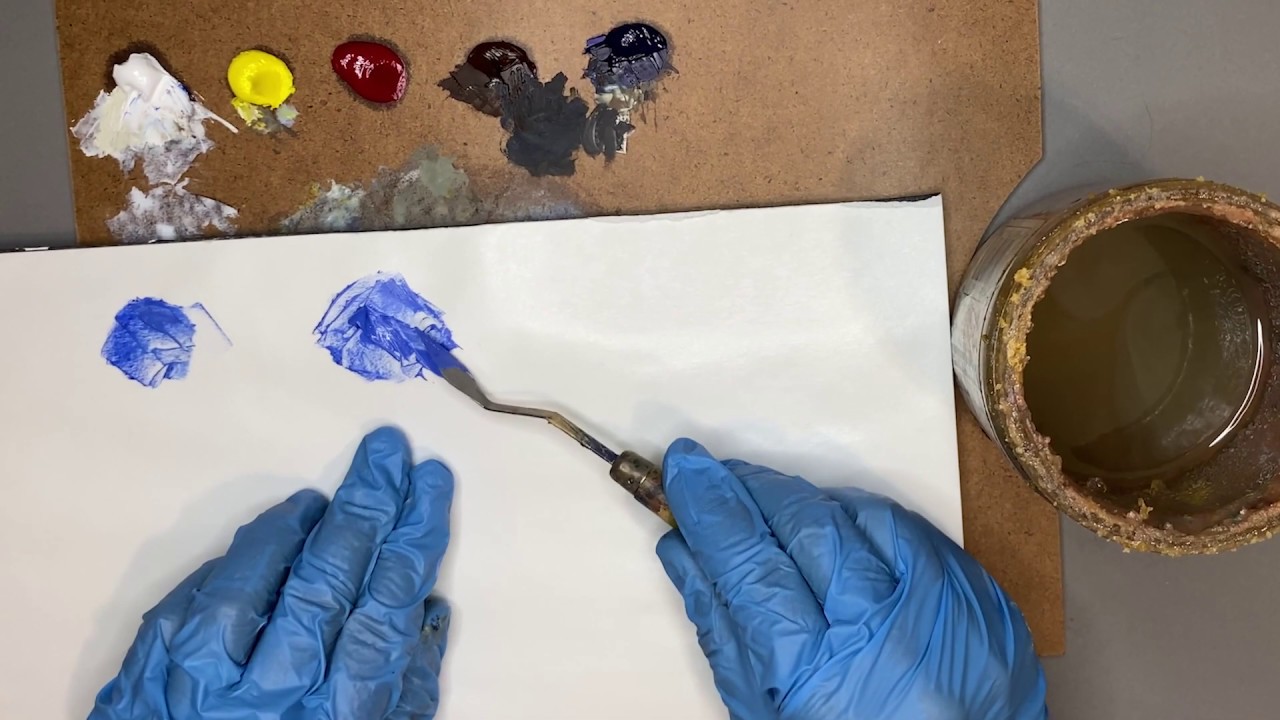
The palette knife gives you more control over color mixing than brushes ever could. Start with your lighter color and gradually add darker pigments. It’s easier to darken a color than to lighten it.
Mix colors on your palette, not on the canvas. This prevents muddy results and gives you consistent color throughout your painting session.
Creating Gradients and Transitions
Partial mixing creates beautiful gradient effects in oil painting and acrylic painting. Don’t mix colors completely-leave streaks of each original color visible.
The knife blade naturally creates these transitions as you drag it through partially mixed paint. This technique works especially well for sky effects and water reflections.
Advanced Mixing Techniques
Marbling and Swirling Effects
Load different colors onto separate areas of your knife blade. When you apply this to canvas, the colors create natural marbling patterns. This works great for cloud formations or abstract backgrounds.
The impasto technique really shines with palette knife work. Build up thick layers of paint to create dimensional effects that catch light differently from various viewing angles.
Temperature Adjustments
Understanding color theory helps with temperature mixing. Add warm colors (reds, oranges, yellows) to make mixtures warmer. Cool colors (blues, purples, greens) have the opposite effect.
Use your knife to test color temperatures on a separate piece of canvas. What looks right on the palette might look different when applied to your painting surface.
Palette Organization and Workflow

Strategic Paint Placement
Arrange colors logically on your palette. Put warm colors on one side, cool on the other. Keep your mixing area in the center where you can easily reach it.
The painting palette setup affects your entire workflow. A well-organized palette speeds up color mixing and prevents mistakes.
Clean Mixing Areas
Scrape your mixing area clean between color combinations. Leftover paint creates muddy mixtures and wastes fresh pigment. Use a palette knife specifically for cleaning-not your painting knife.
Keep a rag handy for wiping your knife clean. Dirty knives transfer unwanted colors into fresh mixtures. This simple habit saves time and materials.
Color Testing Procedures
Test mixed colors on a scrap piece of canvas before applying them to your main painting. Colors can look different under various lighting conditions or against different background colors.
Make color swatches for complex mixtures you might want to recreate later. Write down the proportions if you discover a particularly useful combination. Your future self will thank you for keeping these notes.
Texture Creation Techniques
Impasto Applications

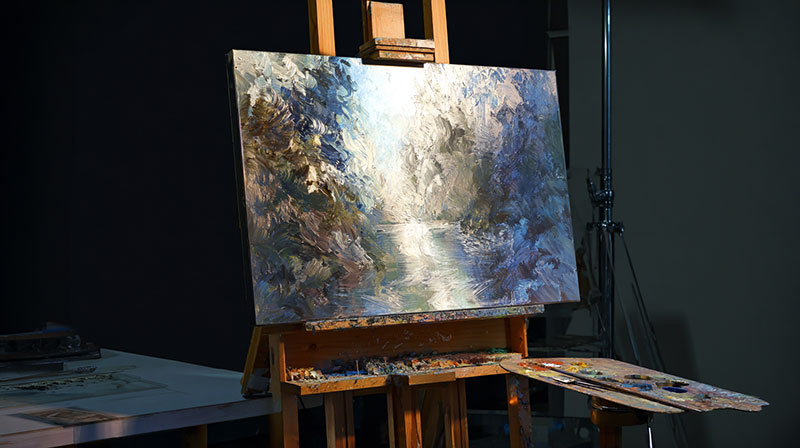
Impasto technique transforms flat paintings into sculptural experiences. Load your palette knife with thick paint straight from the tube. The goal is building dimensional layers that catch and reflect light differently from various angles.
Work quickly with impasto since thick paint takes longer to dry. Each knife stroke should be deliberate and confident.
Thick Paint Buildup Methods
Start with your darkest colors as a base layer. Build lighter colors on top using the flat blade of your knife. This creates natural color harmony through optical mixing.
Don’t smooth out every ridge and peak. Those textural elements are what make impasto so visually compelling.
Dimensional Texture Effects
Drag the knife edge through wet paint to create linear textures. Twist the blade slightly for curved lines. These marks add energy and movement to otherwise static compositions.
Cross-hatching with knife edges creates complex surface patterns. Layer perpendicular strokes for maximum textural impact.
Light Reflection Considerations
Position your easel where natural light hits the painting surface. Impasto textures change dramatically under different lighting conditions. What looks subtle in dim light becomes bold under bright illumination.
Consider how your finished painting will be displayed. Gallery lighting often comes from above, creating shadows in the paint valleys and highlights on the peaks.
Surface Pattern Creation
Crosshatching with Knife Edges
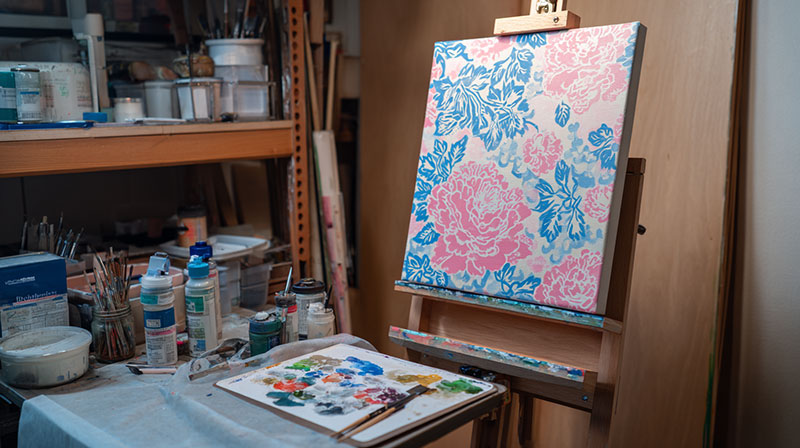
Use the thin edge of your knife to create parallel lines. Vary the spacing and pressure for organic-looking crosshatching patterns. This technique works especially well for rendering fabric textures or weathered wood surfaces.
Overlap your crosshatching in different directions. Multiple layers create depth and visual complexity that single-direction strokes can’t achieve.
Stippling and Dabbing Techniques
The flat blade makes excellent stippling marks when dabbed straight down onto the canvas. Vary your pressure to create different sized dots. This pointillism-inspired approach works great for foliage and textured backgrounds.
Clean your knife between color changes to keep stippling marks crisp and clear. Dirty knives create muddy, indistinct marks.
Directional Stroke Patterns
Follow the form of your subject with your knife strokes. Curved strokes for round objects, angular strokes for geometric shapes. This reinforces the three-dimensional illusion in your painting.
Directional lines created with palette knives are more expressive than brush marks. They carry more paint and create bolder statements.
Layering for Complex Textures
Wet-on-Wet Applications
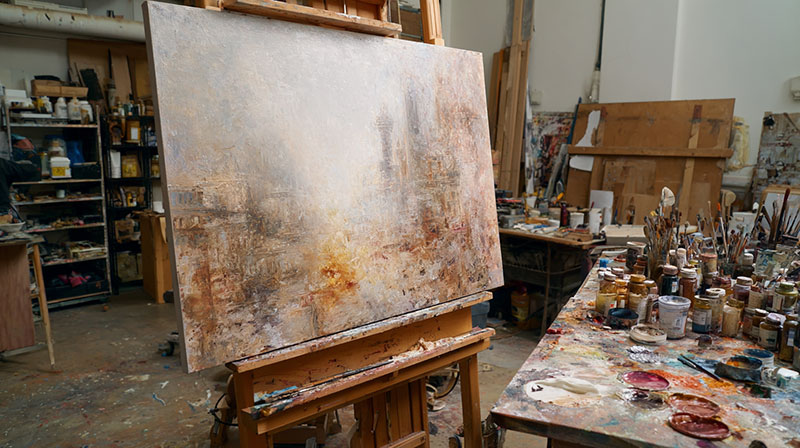
Apply wet paint over existing wet paint for seamless blending effects. The knife naturally mixes colors at the boundaries, creating soft transitions. This technique works perfectly for sky gradations and water reflections.
Work from light to dark in wet-on-wet applications. Dark colors easily overpower light ones, but the reverse is much harder to achieve.
Dry Brush Over Knife Work
Once your knife work dries, use a dry brush to add fine details. This combination technique gives you both bold textural elements and refined finishing touches. The contrast between techniques creates visual interest.
Scrape back sections of dry knife work to reveal underlying colors. This archaeological approach to painting creates rich, layered surfaces.
Transparent Layer Effects
Glaze thin, transparent layers over textured knife work using a soft brush. The texture shows through while the glaze modifies the color temperature or intensity. This technique adds depth without losing the original textural character.
Mix glazing medium with your paint for proper transparency. Pure paint rarely creates the subtle effects you want in glazing work.
Subject-Specific Applications
Landscape Painting Techniques

Sky and Cloud Formations
Clouds demand confident knife work. Load different values of gray and white onto your blade, then apply in broad, sweeping motions. Don’t overwork cloud edges-they should look soft and atmospheric.
The knife’s flat surface perfectly captures the broad planes of cloud masses. Use the edge for sharp, distant cloud definitions and the flat blade for closer, softer formations.
Water Surface Reflections
Horizontal knife strokes mimic water’s natural surface patterns. Start with the darkest reflection colors and add lighter strokes on top. Leave gaps between strokes to suggest water movement.
Vertical objects reflect as vertical shapes in still water. Use vertical knife strokes for these reflections, then add horizontal strokes to break them up and suggest gentle water movement.
Foliage and Tree Bark Textures
Tree bark textures respond beautifully to palette knife treatment. Use the edge to create vertical scoring marks, then add horizontal elements with the flat blade. Build up layers for complex bark patterns.
For foliage masses, dab the flat knife loaded with various greens. Don’t try to paint individual leaves-focus on the overall shape and color variations within leaf clusters.
Still Life Applications
Fabric and Drapery Effects
Fabric folds follow predictable light and shadow patterns. Use the knife edge to define sharp fold lines, then blend with the flat blade for gradual transitions. The knife naturally creates the linear quality that makes fabric look convincing.
Different fabric types require different knife approaches. Smooth silk needs subtle gradations, while rough canvas demands more aggressive textural treatment.
Metallic Surface Rendering
Metal surfaces reflect their surroundings with sharp clarity. Use the knife edge to create crisp reflection boundaries. Build up highlights with thick, opaque paint applied with confident strokes.
The value scale in metallic objects ranges from deep darks to brilliant highlights. Don’t be afraid to use pure white for the brightest reflections.
Fruit and Vegetable Textures
Each fruit type has distinctive surface characteristics. Smooth apples need gradual value transitions created with the flat blade. Rough orange peels benefit from stippling techniques using the knife tip.
Study your subject carefully before choosing your knife technique. The paint application should reinforce the visual characteristics of each surface type.
Abstract and Expressive Work
Gestural Mark-Making
Abstract painting frees you from representational concerns. Focus on the emotional impact of your knife marks. Bold, confident strokes convey energy and movement.
Vary your knife pressure to create different mark qualities. Light touches create delicate effects, while heavy pressure produces bold, aggressive marks.
Color Field Applications
Large color areas benefit from palette knife application. The knife covers canvas faster than brushes and creates more uniform paint surfaces. This technique works especially well for minimalism inspired pieces.
Build color fields in layers, allowing each to dry before adding the next. This prevents unwanted color mixing and maintains color purity.
Mixed Media Integration
Combine palette knife work with other mediums for complex artistic statements. Apply thick knife work first, then add collage elements or drawing materials on top. The textural variety creates visual excitement.
Consider the drying times of different mediums when planning mixed media pieces. Some combinations work better than others depending on your chosen materials.
Troubleshooting Common Issues
Paint Consistency Problems
Too Thick or Stiff Paint Solutions
Stiff paint fights against your knife and creates choppy, uneven marks. Add a small amount of painting medium to restore workability. For oil painting, use alkyd medium or a drop of turpentine.
Never add water to oil paints. This breaks the paint’s binding properties and causes future cracking problems.
Quick Fixes for Tube Paint
- Squeeze paint onto your palette 30 minutes before painting
- Place palette near a warm (not hot) light source
- Mix in appropriate medium gradually
- Test consistency on scrap canvas first
Cold weather makes paint stiffer. Warm your studio space or move your palette to a warmer location before starting your painting session.
Overly Wet Paint Management
Wet paint slides off the knife and creates muddy mixtures. This happens when you add too much medium or work in humid conditions. Blot excess medium with a paper towel or add a small amount of dry pigment to restore proper consistency.
Acrylic painting mediums dry faster than oils. Work in smaller sections when using acrylics with palette knives to prevent premature drying.
Humidity Control Tips
- Use a dehumidifier in your studio space
- Work during drier parts of the day
- Store paint tubes in a cool, dry location
- Cover your palette between painting sessions
Drying Time Considerations
Different painting mediums have vastly different drying times. Oil paints stay workable for hours or even days. Acrylics dry within minutes and become unworkable quickly.
Plan your painting approach based on your chosen medium’s working time.
Working Time Guidelines
Oil Paints:
- Standard oils: 6-12 hours workable time
- Fast-drying oils: 2-4 hours workable time
- Slow-drying oils: 24+ hours workable time
Acrylic Paints:
- Standard acrylics: 10-20 minutes workable time
- Slow-drying acrylics: 30-60 minutes workable time
- Open acrylics: 2-4 hours workable time
Knife Maintenance and Care
Cleaning Techniques for Different Paints
Clean your palette knife immediately after each painting session. Oil paint hardens into a cement-like substance that can damage knife blades permanently. Use appropriate solvents for thorough cleaning.
Soap and water work perfectly for acrylic cleanup. Oil paints require turpentine or mineral spirits followed by soap and water.
Step-by-Step Cleaning Process
- Remove excess paint with a rag or paper towel
- Apply appropriate solvent to dissolve remaining paint
- Scrub gently with an old toothbrush if needed
- Wash with soap and water to remove solvent residue
- Dry completely before storing
Never use steel wool or abrasive cleaners on knife blades. These scratch the surface and make future cleaning more difficult.
Blade Flexibility Preservation
Palette knife blades should flex without breaking. Stiff, inflexible blades indicate metal fatigue or damage from improper cleaning. Replace damaged knives rather than struggling with compromised tools.
Store knives flat in a drawer or knife roll. Standing them upright can cause blade warping over time.
Signs of Blade Damage
- Permanent bends that don’t flex back
- Rough or pitted surfaces from corrosion
- Loose handles that wobble during use
- Sharp nicks along the blade edge
Quality knives last for decades with proper care. Cheap knives often fail within months of regular use.
Handle Care and Storage
Wooden handles require occasional oiling to prevent cracking. Use linseed oil sparingly-too much attracts dust and makes handles sticky. Plastic handles need only soap and water cleaning.
Wrap individual knives in cloth or paper to prevent blade damage during storage.
Storage Best Practices
- Never store wet knives to prevent rust formation
- Keep blades separated to avoid scratching
- Store in low-humidity environments when possible
- Check stored knives monthly for signs of damage
Correcting Mistakes and Adjustments
Paint Removal While Wet
Scrape unwanted paint away with a clean knife blade. Work quickly before the paint begins to set. The palette knife excels at removing large areas of wet paint cleanly and efficiently.
For detailed removal work, use the knife edge to scrape away thin lines or small areas. This technique works especially well for correcting linear perspective errors.
Removal Techniques by Paint Type
Oil Paint Removal:
- Scrape with clean knife blade
- Wipe with solvent-dampened rag
- Repaint immediately if desired
Acrylic Paint Removal:
- Scrape quickly before drying begins
- Use damp cloth for stubborn areas
- Work fast-acrylics set permanently once dry
Overworking Prevention
Overworked paintings lose their freshness and become muddy. Set time limits for each painting session to maintain spontaneity. Step back frequently to assess your progress objectively.
The palette knife naturally prevents some overworking since it covers areas quickly. But you can still muddy colors by excessive blending or too many paint layers.
Warning Signs of Overworking
- Colors becoming gray and lifeless
- Loss of distinct value relationships
- Muddy, indistinct edges throughout
- Feeling frustrated with painting progress
Take breaks when you notice these signs. Fresh eyes often see solutions that tired eyes miss.
Color Correction Methods
Mix corrective colors on your palette before applying to the painting. Test corrections on a separate piece of canvas first to ensure the new color works with your overall color harmony.
Glazing techniques work well for subtle color corrections. Apply thin, transparent layers over dry knife work to adjust color temperature or intensity without losing textural qualities.
Common Color Problems and Solutions
Colors too warm: Add cool colors (blue, purple, or cool green)
Colors too cool: Add warm colors (red, orange, or warm yellow)
Colors too bright: Add complementary colors in small amounts
Colors too dull: Add pure color or increase color saturation
Work in thin layers when making color corrections. Heavy-handed corrections often create more problems than they solve.
FAQ on How To Use A Palette Knife
What’s the difference between a palette knife and a painting knife?
Palette knives have straight blades and long handles for mixing colors on your palette. Painting knives feature angled blades and shorter handles designed for direct canvas application. Both serve different purposes in your artistic toolkit, though many artists use the terms interchangeably.
How do I load paint onto a palette knife properly?
Scoop paint with the knife edge, keeping amounts small initially. The paint consistency should be thick enough to stay on the blade without dripping. Practice loading different amounts to understand how much paint creates various textural effects on canvas.
Can I use palette knives with watercolor painting?
Watercolor painting works better with brushes due to its fluid nature. Palette knives excel with thicker mediums like oils and acrylics. However, some artists use knives for scraping techniques or creating textures in mixed media watercolor work.
What’s the best palette knife size for beginners?
Start with a medium-sized knife (2-3 inches long) with moderate flexibility. This size handles most paint mixing tasks and basic texture creation. As your skills develop, add smaller knives for detail work and larger ones for covering broad canvas areas.
How do I clean my palette knife after painting?
Remove excess paint immediately with a rag. For oil paints, use turpentine or mineral spirits, then soap and water. Acrylics clean easily with just soap and water. Never let paint dry on the blade, as it becomes extremely difficult to remove.
Can palette knives replace brushes entirely?
Palette knives create unique textures and effects that brushes cannot match, but they can’t replicate fine detail work or smooth gradations that brushes excel at. Most professional artists use both tools strategically, choosing based on the desired artistic effect and painting technique.
What painting techniques work best with palette knives?
Impasto technique, color blending, and texture creation are perfect for knife work. Abstract painting, landscape work, and expressive mark-making benefit greatly from palette knife applications. The tool naturally creates bold, confident strokes that add energy to paintings.
How do I prevent paint from becoming muddy when using a knife?
Keep your knife clean between color applications. Mix colors on the palette, not on the canvas. Work with complementary colors carefully, as they create gray when overmixed. Use separate knives for different color families when possible.
What’s the proper grip for holding a palette knife?
Hold the knife like a pencil, with your thumb and index finger controlling the blade near the ferrule. Keep your wrist flexible and let your arm move naturally. Avoid gripping too tightly, which creates stiff, unnatural marks and causes hand fatigue.
How do I create different textures with a palette knife?
Use the flat blade for smooth applications and broad textures. The edge creates fine lines and detailed marks. Vary your pressure and angle for different effects. Stippling, crosshatching, and dragging techniques each produce unique surface qualities and visual interest.
Conclusion
Mastering how to use a palette knife transforms your artistic capabilities beyond traditional brush techniques.
This versatile tool opens doors to impasto textures, dynamic color blending, and expressive mark-making that elevates ordinary paintings into compelling visual experiences.
From basic paint loading to advanced texture creation, palette knives excel across multiple painting styles.
Whether you’re creating atmospheric landscapes, detailed still life work, or bold expressionism pieces, the knife’s unique characteristics support your creative vision.
Remember that paint consistency and proper knife maintenance directly impact your results.
Clean blades, appropriate mediums, and confident application techniques ensure professional-quality outcomes. Practice different pressure variations and stroke directions to develop your personal artistic voice.
The palette knife rewards bold, decisive movements over tentative approaches.
Trust your instincts, work quickly with wet paint, and don’t overwork your surfaces. These habits develop naturally as you gain experience with this powerful artistic implement.


