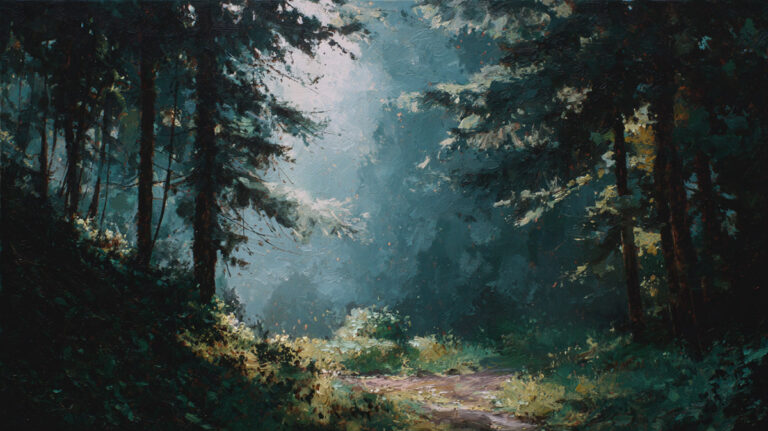
Every painting you’ve ever stopped to look at twice made a decision about depth. So what is perspective in art, and why does it matter so much?
Perspective is the system artists use to create the illusion of three-dimensional space on a flat surface. It’s the reason a hallway in a painting feels like it recedes, why mountains look distant, and why a Renaissance fresco can trick your eye into seeing a room that doesn’t exist.
This guide covers how perspective actually works, from vanishing points and the horizon line to atmospheric depth and curvilinear systems. You’ll learn the differences between one-point, two-point, and three-point perspective, see how artists from Brunelleschi to Escher used (and broke) the rules, and pick up practical ways to improve your own perspective drawing skills.
What Is Perspective in Art

Perspective is a technique used to represent three-dimensional space on a flat surface. It controls how depth, distance, and spatial relationships appear to anyone looking at a drawing or painting.
That sounds simple enough. But it took artists roughly a thousand years to figure out a reliable system for doing it.
Before the 15th century, most European paintings looked flat. Figures in the background were often the same size as those in the foreground. Buildings didn’t recede. Landscapes didn’t breathe. The spatial illusion we take for granted today just wasn’t there.
Perspective changed all of that. It gave artists a mathematical framework for creating convincing depth on a picture plane, whether they were working with oil paint, fresco, or graphite on paper.
There are two main categories. Linear perspective uses geometry, vanishing points, and converging lines to map objects in space. Atmospheric perspective relies on shifts in color, value, and detail to suggest distance without any geometric construction at all.
Both serve the same goal: making a two-dimensional surface feel like a window into real space. And both are still foundational to how painting styles across centuries handle pictorial space.
The Art Basel and UBS Global Art Market Report found that global art sales reached an estimated $57.5 billion in 2024. Paintings remained the most purchased medium. Every one of those paintings, whether figurative or abstract, makes decisions about how space is treated on a surface. That’s perspective at work, even when the artist isn’t drawing a single vanishing point.
How Perspective Works on a Flat Surface
The whole trick of perspective is fooling your eyes into seeing depth where none exists. You’re looking at a flat surface, a canvas or a sheet of paper, but your brain reads it as a three-dimensional scene.
How? Through a few specific visual cues that mimic the way we actually see the world.
The Picture Plane and the Illusion
Think of the picture plane as an invisible sheet of glass standing between you and whatever scene you’re drawing. Everything you see gets “projected” onto that glass.
That’s the concept Leon Battista Alberti described in his 1435 treatise De Pictura. He called it a window. It’s still the best way to understand what perspective does.
The picture plane is where the illusion happens. Every line, every shape, every shift in tone exists on this flat surface. But if the perspective is handled well, your brain stops seeing the surface and starts seeing space.
Vanishing Points and Converging Lines
Parallel lines converge. That’s the core principle. Railroad tracks, hallway walls, rows of buildings. In real life, parallel lines never meet. But in your field of vision, they appear to merge at a single point on the horizon.
That point is the vanishing point. And the lines heading toward it are called orthogonal lines.
Place the vanishing point on a horizon line, draw your orthogonals toward it, and you’ve got a basic perspective framework. Objects closer to the vanishing point appear farther away. Objects closer to the viewer appear larger.
The Horizon Line and Eye Level
The horizon line always sits at eye level. Always. If you’re standing on a beach, it’s where the ocean meets the sky. If you’re lying on the ground, it drops. If you’re on a rooftop, it rises.
This is why using vanishing points correctly depends entirely on where you place the horizon. Get it wrong, and nothing else in the drawing will feel spatially consistent. I’ve seen plenty of otherwise solid drawings fall apart because the horizon line shifted halfway through the piece.
Scale Reduction and the Ground Plane
Objects shrink as they get farther from the viewer. That’s scale reduction, and it’s one of the simplest depth cues.
The ground plane is the horizontal surface your objects sit on, like a floor or a field. Combined with scale reduction, it creates the spatial “stage” for everything in the scene. Space in visual art depends on these two working together. Without them, objects just float.
Types of Linear Perspective

Linear perspective comes in three main types. Each adds more vanishing points and handles different viewing angles. Most artists start with one-point and work their way up, though honestly, two-point gets you through about 80% of real-world drawing situations.
| Perspective Type | Vanishing Points | Visual Logic | Best For |
| One-Point | 1 (on the horizon) | Everything converges to a single “Center.” | Roads, hallways, and direct frontal views. |
| Two-Point | 2 (on the horizon) | You are looking at the “Edge” of an object. | Buildings, corners, and street scenes. |
| Three-Point | 3 (2 on horizon, 1 above/below) | You are looking Up or Down at a subject. | Skyscrapers and dramatic “Bird’s or Worm’s Eye” views. |
One-Point Perspective
One vanishing point. One direction of depth. That’s it.
You’re looking straight down a road, a corridor, or a tunnel. All the receding lines converge toward a single point on the horizon. It’s the simplest system and the first one most people learn.
Masaccio’s The Holy Trinity (1427) is one of the earliest paintings to fully apply this. The ceiling coffers all converge to a single vanishing point at the base of the cross. It was so convincing that viewers reportedly thought the wall had a real room behind it.
One-point works great for anything viewed head-on. But turn the subject even slightly, and you need a second vanishing point.
Two-Point Perspective
Two vanishing points on the horizon line, one left, one right. This is the setup you use when viewing an object from a corner angle. Think of standing at a street intersection, looking at the corner of a building. Vertical lines stay vertical, but the two visible walls each recede toward their own vanishing point.
Two-point perspective is the standard for architectural drawing and most realistic scene construction. Landscape painting and composing a painting with buildings almost always require it.
A common beginner mistake: placing the two vanishing points too close together. It creates extreme distortion, like a fisheye lens effect that looks wrong but is hard to diagnose if you don’t know what caused it.
Three-Point Perspective
Add a third vanishing point, above or below the horizon, and now vertical lines converge too.
Look up at a skyscraper. The building’s sides taper as they rise. That’s three-point perspective. Look down from a cliff, and the same thing happens in reverse. The vertical convergence adds drama, height, and a sense of physical presence that one-point and two-point can’t match.
Concept artists and comic book illustrators use this constantly. Foreshortening becomes much more aggressive in three-point setups, which is exactly why it works for action scenes and dynamic camera angles.
The NCES School Pulse Panel Survey in November 2024 found that 93% of U.S. public schools offer visual arts instruction. Drawing fundamentals, including one-, two-, and three-point perspective, remain among the core skills taught in those classrooms.
Atmospheric Perspective

Linear perspective gives you geometry. Aerial perspective gives you atmosphere.
Also called atmospheric perspective, this technique creates the illusion of depth through changes in color, value, and sharpness. Objects in the distance lose contrast. Colors shift toward blue and gray. Details soften and edges blur.
You’ve seen this in real life. Stand on a mountain and look at a range of peaks stretching into the distance. The closest ones are sharp, dark, and full of detail. The farthest ones are pale, hazy, and almost invisible. That’s atmospheric perspective, and it happens because light scatters as it passes through moisture and particles in the air.
The Science Behind the Haze
Light scattering is the reason distant objects look blue and washed out. Shorter wavelengths (blue light) scatter more than longer wavelengths (red, orange). So the more atmosphere between you and an object, the more blue gets mixed in.
Artists use this principle by reducing color saturation and shifting hues toward cooler tones for distant objects. Foreground elements stay warm, saturated, and high in contrast. Background elements go cool, muted, and low in contrast.
No vanishing points needed. No ruler. Just careful observation of how color theory works in the real world.
Leonardo da Vinci and Sfumato
Leonardo da Vinci didn’t invent atmospheric perspective, but he understood it better than anyone in his era. His observations on optics, light scattering, and human vision led him to develop the sfumato technique.
He described it as painting “without lines or borders, in the manner of smoke.” In practice, it meant applying sometimes 20 to 40 thin layers of translucent paint to eliminate hard edges entirely. The Mona Lisa’s background is the textbook example. Mountains dissolve into haze, each layer more muted than the last.
The sfumato technique wasn’t just about faces. It was Leonardo’s way of unifying form, light, and atmosphere into a single, cohesive visual experience. He combined it with chiaroscuro to model three-dimensional forms on flat surfaces.
Atmospheric Perspective in Landscape Painting
Chinese shan shui painters understood atmospheric depth by around 1000 CE, centuries before Europeans codified linear perspective. Their scroll paintings used mist, empty space, and gradation to suggest vast distances.
In Western art, the Hudson River School painters of the 19th century made atmospheric perspective their signature. J.M.W. Turner pushed it even further, dissolving entire landscapes into light and color.
Impressionist painters like Claude Monet later used atmospheric effects not just for distance, but as the subject itself. The haystacks and water lilies weren’t really about haystacks and water lilies. They were about how light and atmosphere transform what we see.
The History of Perspective in Western Art

Perspective didn’t appear overnight. It was the result of centuries of artists struggling to make flat surfaces look like real space, and mostly failing until one Florentine architect cracked the code around 1415.
Before Brunelleschi: Flat Worlds
Egyptian art used hierarchical scaling. Important figures were large. Less important ones were small. Spatial depth wasn’t the point.
Byzantine icons followed similar logic. Figures floated on gold backgrounds. Gothic art made some attempts at spatial depth, but the results were inconsistent. Buildings tilted at odd angles. Figures in the background were sometimes the same size as those in the foreground.
Artists knew something was off. They could see that the real world had depth and convergence. They just didn’t have a systematic way to translate it onto a surface.
Brunelleschi’s Experiment
Around 1415, Filippo Brunelleschi stood at the entrance of the Florence Cathedral and conducted an experiment that changed everything.
Using a small painted panel and a mirror, he demonstrated that a painting could perfectly match the real scene behind it if it followed mathematical rules of convergence. Parallel lines had to meet at a single vanishing point. Objects had to shrink at a consistent rate.
His original panels are lost. But the effect was immediate. According to Britannica, Brunelleschi’s formulation of linear perspective governed how artists depicted space for roughly four hundred years, from the early Renaissance until the late 19th century.
Leon Battista Alberti codified these principles in writing in 1435 with De Pictura. He dedicated the work to Brunelleschi directly. Now any artist with the book could learn the system.
Perspective in Renaissance Painting
Adoption was fast. Masaccio’s The Holy Trinity (1427) was the first painting to fully use Brunelleschi’s system. The fresco was so realistic that it appeared to cut a real architectural space into the wall of Santa Maria Novella in Florence.
From there, perspective became the technical backbone of Renaissance painting.
Key figures and their contributions:
- Raphael Sanzio used one-point perspective in The School of Athens to create a vast, architecturally precise gathering of philosophers
- Albrecht Durer brought perspective techniques north of the Alps through detailed woodcuts and treatises
- Leonardo combined linear and atmospheric perspective in The Last Supper, using the architecture to direct the viewer’s eye to Christ at the center of the composition
- Andrea Mantegna used extreme foreshortening in Lamentation of Christ, pushing perspective to its dramatic limits
The camera obscura, a device that projects a real scene through a small hole onto a surface, reinforced perspective principles by showing artists exactly how convergence looked in practice. Johannes Vermeer is widely believed to have used one in his work.
Perspective Beyond the Western Tradition

Western art history sometimes treats Brunelleschi’s linear perspective as the “correct” way to handle space. It’s not. It’s one system. Other cultures developed completely different approaches, and they work just as well for what they’re trying to do.
Parallel Perspective in East Asian Art
Chinese and Japanese scroll paintings use what’s often called parallel or axonometric perspective. Lines that would converge in Western perspective stay parallel instead.
This isn’t a mistake or a limitation. It’s a deliberate choice that serves the scroll format perfectly. As you unroll a horizontal scroll, the scene shifts continuously. A single fixed viewpoint (which linear perspective requires) would break the experience. Parallel perspective lets the viewer travel through the landscape without locking into one position.
Chinese shan shui painting combined this parallel system with atmospheric effects, empty space, and vertical stacking of elements to create depth. Chinese paintings achieved spatial complexity through entirely different visual logic.
Reverse Perspective in Byzantine Art
In reverse perspective, lines diverge instead of converging. Objects get wider as they move “deeper” into the picture. It looks wrong if you’re expecting Western perspective rules.
But Byzantine icon painters used it intentionally. The effect pulls the sacred scene outward toward the viewer, rather than receding into the background. It creates a sense that the spiritual world is approaching you, not sitting passively behind a window.
The choice wasn’t about technical inability. It was about purpose. Religious paintings in the Byzantine tradition weren’t trying to simulate a physical room. They were mapping spiritual relationships.
Conceptual Scaling in Egyptian and Mesoamerican Art
Egyptian wall paintings used size to indicate importance, not distance. A pharaoh towers over servants regardless of where they stand in the scene.
Mesoamerican codices and murals followed similar principles. Spatial arrangement communicated narrative hierarchy, ritual sequence, and symbolic meaning rather than optical accuracy.
These systems remind us that “realistic” spatial representation is a cultural choice, not a universal standard. When artists like Pablo Picasso developed cubism in the early 20th century, they were partly rejecting the Renaissance perspective framework and returning to the idea that multiple viewpoints could exist in a single image. David Hockney has made similar arguments, creating photo-collages that reject the single vanishing point entirely.
Business Research Insights reports the global online art courses market reached $2.34 billion in 2024, growing at a CAGR of 11.2%. Courses on perspective remain among the most enrolled drawing fundamentals, right alongside composition and gesture drawing.
Curvilinear and Multi-Point Perspective
Standard linear perspective tops out at three vanishing points. But human vision doesn’t actually work that way. Your eyes curve. Your retina is spherical. And your peripheral vision distorts straight lines into arcs.
Curvilinear perspective tries to account for that.
Five-Point (Fisheye) Perspective
Five-point perspective uses four vanishing points arranged in a circle, plus one at the center. All straight lines curve toward their respective points, mimicking the barrel distortion of a wide-angle lens.
It was formally codified in 1968 by Andre Barre and Albert Flocon in La Perspective curviligne. But an early example shows up much earlier. According to Wikipedia, Jan van Eyck’s Arnolfini Portrait (1434) contains an approximated curvilinear perspective in the convex mirror at the center of the painting.
Urban sketchers like Paul Heaston have made five-point perspective popular again. His freehand curvilinear drawings pack entire rooms and streetscapes into single compositions, bending space in ways that feel surprisingly natural to the eye.
M.C. Escher and Impossible Spaces
Escher didn’t just break perspective rules. He weaponized them.
Works like Relativity and Ascending and Descending use internally consistent but mutually contradictory perspective systems. Stairs go up and down simultaneously. Gravity works in three directions at once. Each individual element follows correct geometric projection, but the whole scene is physically impossible.
His approach proves something useful for artists: understanding perspective well enough to break it deliberately produces far more interesting results than breaking it by accident.
Applications in VR and Concept Art
FOV settings: In virtual reality, field of view directly controls how much perspective distortion the user sees. Wider FOV increases peripheral curvature, similar to curvilinear perspective in traditional drawing.
Concept art: Film and game concept artists use multi-point setups to create dramatic environment shots. A cityscape viewed from street level with five-point curvature feels more immersive than a standard three-point layout.
Grand View Research valued the global 3D camera market at $4.69 billion in 2024, growing at a CAGR of 16.8%. Much of that growth is driven by AR/VR applications where accurate perspective rendering is the core technical challenge.
Perspective in Digital Art and 3D Modeling
Every 3D application handles perspective through virtual cameras. The math is the same math Brunelleschi figured out in 1415. The software just automates it.
But “automated” doesn’t mean “understood.” Took me a while to realize that adjusting a camera’s focal length in Blender is doing the exact same thing as choosing between one-point and three-point perspective on paper. Just with sliders instead of a ruler.
| Software | Primary Industry | Perspective Feature | Visual Advantage |
| Blender | Animation, VFX, Modeling | Virtual camera with focal length & depth of field | Mimics real-world cinematography and depth. |
| Autodesk Maya | Film, Game Development | Camera rigs & multi-lens simulation | Allows for complex, moving 3D perspectives. |
| SketchUp | Architecture, Design | Two-point perspective mode & FOV slider | Keeps vertical lines perfectly straight for blueprints. |
| Clip Studio Paint | Comics, Illustration | Built-in perspective rulers (1–5 point, fisheye) | Handles complex environments and “warped” views. |
| Procreate | Digital Painting (iPad) | Drawing guides with perspective assist | Snaps your brushstrokes to vanishing points automatically. |
How Virtual Cameras Replicate Perspective
A virtual camera in 3D software has a position (the station point), a direction (where you’re looking), and a focal length that determines how much convergence happens. Short focal lengths create wide FOV and dramatic convergence, like three-point perspective. Long focal lengths flatten the scene, closer to isometric or parallel projection.
According to Market Growth Reports, the 3D modeling software market was valued at roughly $33 billion in 2024. Blender alone exceeds 3 million downloads per month. All of these tools rely on the same underlying perspective geometry that Renaissance painters codified by hand.
Digital Painting Apps with Perspective Grids
Clip Studio Paint added a fisheye perspective ruler in a recent update, letting artists draw directly on a curvilinear grid. Procreate’s drawing guide supports one-point, two-point, and isometric perspective overlays.
These tools speed up the construction process, but they don’t replace the need to understand why lines converge. An artist who doesn’t grasp the horizon line concept will place vanishing points in wrong spots even with a digital grid active.
The Poliigon State of 3D 2024 survey found that Blender has the widest user base across categories, with particularly strong adoption in animation, advertising, and VFX. Its free price point and built-in camera tools make it the go-to starting point for artists transitioning from 2D perspective drawing to 3D environments.
Common Perspective Mistakes and How to Fix Them
Perspective errors are tricky because they often feel wrong before you can explain what’s wrong. A drawing looks “off” but you can’t point to the specific line causing the problem. Usually, it comes down to one of five issues.
Misplaced Horizon Line
The fix is simple: decide where eye level is before you draw anything else.
If the horizon line shifts halfway through a drawing, objects in the top half will appear to follow different spatial logic than objects in the bottom half. The result looks disjointed, like two separate scenes stitched together.
Always establish the horizon first. Every other perspective element depends on it.
Vanishing Points Too Close Together
This one catches a lot of people. When two vanishing points in a two-point perspective setup sit too close to each other, the resulting convergence is extreme. Objects warp and bulge like they’re being viewed through a magnifying glass.
The general rule: keep vanishing points outside the edges of your drawing area. If both points are visible within the frame, the distortion will almost certainly look unnatural. Wider spacing produces calmer, more believable convergence.
Inconsistent Object Scaling
Two figures standing at the same depth in a scene should be the same height. Sounds obvious, but beginners regularly draw one person larger than another at the same distance from the viewer because they’re focused on individual elements rather than the spatial system as a whole.
A visual hierarchy based on deliberate size difference is one thing. Accidental size inconsistency from ignoring perspective is another. Use the horizon line as a reference: if two figures stand on the same ground plane, the horizon should cross both at the same body point (typically the eyes for standing figures at eye level).
Ignoring Eye Level for Figures
The horizon always crosses standing figures at the viewer’s eye height. If you’re drawing a scene where the viewer is standing, every person of similar height in that scene will have the horizon line crossing through their head, regardless of how close or far they are.
Skip this rule and your figures will look like they’re standing on different floors, even when they’re supposed to share the same ground.
Mixing Perspective Systems
Drawing one building in one-point perspective and the building next to it in two-point, without accounting for how the two systems interact. It happens more than you’d think, especially in complex scenes with multiple structures at different angles.
The fix: every object in a scene shares the same horizon line and the same eye level. Vanishing points can differ per object (a rotated building will have its own pair), but they all sit on that shared horizon.
How to Practice Perspective Drawing
Perspective is a skill you build through repetition, not theory alone. Reading about vanishing points is fine, but it won’t click until your hand has drawn a few hundred of them.
Start Simple: Boxes and Rooms
One-point perspective boxes. That’s where everyone starts, and for good reason.
Draw a horizon line, place a single vanishing point, and construct a box. Then another. Then a row of them receding into space. Once that feels natural, draw a room interior from memory. A hallway. A kitchen.
The AOEU State of Art Education survey found that 90% of art teachers said they are most comfortable teaching two-dimensional mediums like drawing and painting. Perspective drawing falls squarely in that comfort zone, and classroom instruction typically begins with exactly these one-point box exercises.
Draw from Photo References
Find photos of streets, hallways, and buildings. Overlay them with lines (digitally or with tracing paper) to identify vanishing points, the horizon line, and orthogonal convergence. This trains your eye to see perspective in the real world, not just in textbook diagrams.
The goal is pattern recognition. After analyzing enough photos, you’ll start spotting convergence instinctively when sketching from life.
Grid Exercises for Two-Point Accuracy
Set up a two-point perspective grid and draw the same object (a house, a car, a piece of furniture) from multiple angles by repositioning the vanishing points. This teaches you how the form in two-dimensional art changes based on viewing angle, even when the object itself stays the same.
Varying the distance between vanishing points is part of the exercise. Close together for dramatic distortion. Far apart for subtle, gentle convergence. Both are valid, depending on what the scene calls for.
Recommended Resources
Scott Robertson’s How to Draw is the standard reference for perspective in concept art and industrial design. It covers everything from basic box construction to complex vehicle and environment perspectives.
Drawabox.com offers free, structured perspective exercises with community feedback. It’s rigid and repetitive by design, which is exactly what perspective practice requires.
Marshall Vandruff’s perspective lectures are frequently recommended by professional concept artists and illustrators. His approach emphasizes understanding the “why” behind perspective rules, not just the mechanical steps.
If you’re working in traditional media, practicing perspective across different painting mediums helps you see how the same spatial principles apply whether you’re using acrylic paint, watercolor, or dry media like graphite and charcoal. The rules don’t change. Only the tools do.
FAQ on What Is Perspective In Art
What is perspective in art for beginners?
Perspective is a technique for creating the illusion of depth on a flat surface. It uses vanishing points, a horizon line, and converging lines to make objects appear three-dimensional. Beginners usually start with one-point perspective drawing exercises.
What are the main types of perspective in art?
The main types are linear perspective (one-point, two-point, and three-point) and atmospheric perspective. Linear uses geometric convergence. Atmospheric uses shifts in color, value, and detail to suggest distance without geometry.
Who invented perspective in art?
Filippo Brunelleschi demonstrated linear perspective around 1415 in Florence. Leon Battista Alberti codified the system in his 1435 treatise De Pictura. Together, they gave Renaissance artists a mathematical framework for depicting spatial depth.
What is a vanishing point?
A vanishing point is where parallel lines appear to converge on the horizon line. It anchors the entire perspective system. One-point perspective has one vanishing point, two-point has two, and three-point adds a vertical convergence point.
What is the difference between linear and atmospheric perspective?
Linear perspective relies on geometry, orthogonal lines, and vanishing points. Atmospheric perspective uses color and contrast changes to show distance. Leonardo da Vinci combined both in paintings like the Mona Lisa.
Why is perspective important in painting?
Perspective creates believable spatial relationships on a flat surface. Without it, objects float and scenes look disjointed. It’s foundational to composition, figure placement, and creating depth in everything from landscapes to portraits.
What is foreshortening in perspective?
Foreshortening occurs when an object points toward or away from the viewer, making parts appear compressed. Andrea Mantegna’s Lamentation of Christ is a famous example. It requires strong understanding of how forms behave in three-dimensional space.
Can you use perspective in abstract art?
Yes. Even abstract work deals with spatial relationships on a picture plane. Some abstract artists deliberately reject perspective, while others use subtle depth cues. Cubism, for instance, shows multiple viewpoints simultaneously within one composition.
What is curvilinear perspective?
Curvilinear (or five-point) perspective curves all straight lines to mimic how the human eye actually perceives space. It was codified in 1968 by Barre and Flocon. Urban sketchers and concept artists use it for wide-angle compositions.
How do I practice perspective drawing?
Start by drawing boxes in one-point perspective. Progress to two-point room interiors and street scenes. Use photo references to identify vanishing points in real settings. Scott Robertson’s How to Draw and Drawabox.com are solid starting resources.
Conclusion
Understanding what is perspective in art goes beyond memorizing vanishing points and horizon lines. It’s about training your eye to see how three-dimensional space translates onto a flat picture plane, whether you’re sketching a street scene or painting a landscape in oil.
From Brunelleschi’s geometric breakthrough to the atmospheric depth of Chinese shan shui painting, perspective has always been shaped by culture, purpose, and observation. No single system is “correct.” Each one serves different goals.
The practical side matters just as much. Draw boxes. Analyze photographs. Study how foreshortening and scale reduction create spatial illusion. Use digital tools like Blender or Clip Studio Paint to test what you’ve learned on paper.
Perspective is a skill built through repetition. The more you practice, the less you think about the rules and the more naturally depth shows up in your work.