Watch a master painter work, and you’ll notice something. Their colors flow into each other like liquid silk.
Learning how to blend acrylic paint separates amateur work from professional results. Most beginners struggle with harsh edges and muddy color mixing because acrylics dry faster than oil painting mediums.
This guide reveals the exact techniques professional artists use for smooth color transitions. You’ll master wet-on-wet blending, glazing methods, and paint consistency control.
By the end, you’ll create seamless gradients that rival any gallery piece. No more frustrating streaks or choppy transitions.
Essential Tools and Materials for Professional Blending

Brush Selection and Care
Synthetic brushes work better than natural bristles for acrylic painting. They hold up against the harsh nature of acrylic mediums.
Flat brushes create the smoothest gradients. Their straight edges help you control paint flow across the canvas surface.
Fan brushes add subtle texture to blended areas. Use them for atmospheric effects and soft cloud formations.
Round brushes handle detail work within larger blended sections. Keep several sizes on hand for different scale projects.
Palette Setup and Preparation
Sta-Wet palettes extend your working time significantly. The moisture keeps paint workable for hours instead of minutes.
Glass palettes clean up easily but don’t retain moisture. They work well for quick studies and color mixing experiments.
Disposable paper palettes save cleanup time. Professional artists often prefer them for plein air work and travel painting.
Blending Mediums and Additives
Liquitex Professional slow-drying medium changes everything. It gives you the open time needed for complex gradations.
Glazing mediums increase transparency without thinning paint consistency. Mix them with colors to create luminous layers.
Water versus medium ratios matter more than most beginners realize. Too much water breaks down the acrylic binder.
Golden Heavy Body Acrylics maintain their consistency better when mixed with proper mediums. Avoid over-thinning with water alone.
Texture gels add dimensional qualities to blended areas. They create surface interest while maintaining smooth color transitions.
Core Blending Techniques

Wet-on-Wet Blending
Fresh paint layers blend naturally when applied quickly. Work fast because acrylics dry faster than oil painting mediums.
Color mixing happens directly on the canvas surface. This creates more natural transitions than pre-mixing on the palette.
Temperature and humidity affect your available blending time. Hot, dry conditions cut your working window to just minutes.
Wet-on-Dry Blending
Glazing over dried layers builds color depth gradually. Each transparent layer modifies what’s underneath.
This method prevents muddy color mixing. You maintain clean, vibrant results through careful layer control.
Opacity control becomes important here. Mix transparent and opaque pigments strategically for maximum impact.
Dry Brush Blending
Remove most paint from your brush before making contact. This technique requires patience but creates incredibly soft edges.
Feathering works best with minimal paint on the brush. Build up coverage through multiple light passes.
Texture blending happens naturally with this approach. The canvas tooth catches just enough pigment to create subtle effects.
Color Theory Applications in Blending

Primary and Secondary Color Mixing
Primary colors form the foundation of all mixing. Red, blue, and yellow create every other hue possible.
Secondary colors emerge from primary combinations. Orange, green, and purple offer rich blending opportunities.
Clean secondary colors require the right primary combinations. Mixing warm and cool primaries creates muddy results.
Avoid brown and muddy mixes by understanding color temperature relationships. Warm reds mix differently than cool reds.
Temperature Blending
Warm to cool transitions create atmospheric depth. Think about how colors shift from foreground to background in nature.
Atmospheric perspective relies on temperature changes. Distant objects appear cooler and less saturated.
Balancing color temperature across your composition creates visual harmony. Too many warm or cool areas feel unnatural.
Value Gradations
Light to dark progressions require careful paint consistency. Thick paint creates texture while thin paint flows smoothly.
Tinting and shading techniques use white and dark colors systematically. Tints lighten while shades darken base colors.
Maintaining color intensity across different values challenges most painters. Add pure color back into mixed tints and shades.
Complementary colors create vibrant contrasts when placed side by side. They also neutralize each other when mixed directly.
Color harmony emerges through careful value relationships. Plan your value structure before adding complex color variations.
The color wheel guides successful blending decisions. Understanding color relationships prevents mixing mistakes.
Advanced Blending Methods
Scumbling Techniques

Scumbling creates broken color effects across the canvas surface. Load your brush lightly and work in circular motions.
This technique builds texture while maintaining color separation. Each stroke catches the canvas tooth differently.
Optical mixing happens when viewers see the colors from a distance. The eye blends separate color notes into unified tones.
Complex surface textures emerge through multiple scumbling layers. Vary your brush pressure and paint consistency between passes.
Glazing for Depth
Transparent layers modify underlying colors without completely covering them. Mix your paint with glazing medium for proper consistency.
Color modification through overlays creates effects impossible with direct mixing. A yellow glaze over blue creates vibrant greens.
Luminous color effects come from light bouncing through transparent layers. This technique mimics how watercolor painting achieves its glow.
Build layers slowly for maximum control. Each glaze should dry completely before adding the next.
Impasto Blending
Thick paint applications hold brush marks and palette knife textures. The paint stays workable longer in heavy applications.
Knife blending techniques create unique surface qualities. Drag colors into each other while the paint remains thick and sculptural.
Dimensional color transitions happen when thick paint catches light differently. The physical texture becomes part of the color experience.
Heavy body acrylics work best for impasto methods. Golden Heavy Body and Liquitex Professional maintain consistency in thick applications.
Subject-Specific Blending Applications

Sky and Cloud Rendering
Atmospheric gradients require smooth value transitions from light to dark. Work quickly before the paint sets up.
Cloud edge softening needs different approaches than hard-edged subjects. Use a clean, damp brush to feather harsh transitions.
Sunset and sunrise color transitions challenge even experienced painters. Plan your color sequence before starting the blend.
Temperature shifts create convincing atmospheric effects. Cool blues transition to warm oranges through neutral purples.
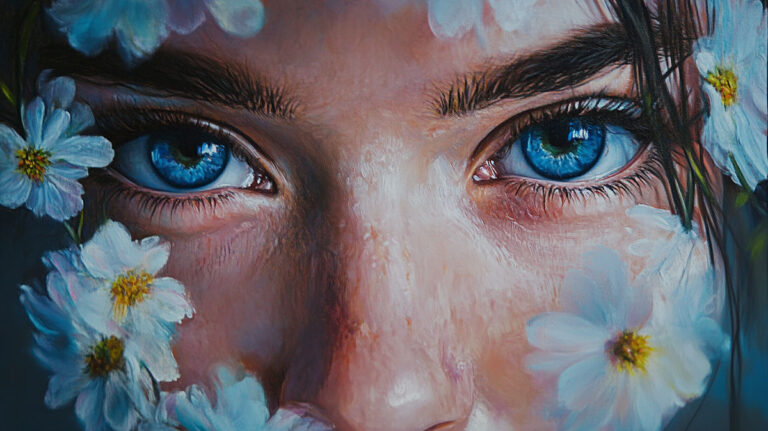
Skin Tone Blending
Flesh tone color mixing starts with understanding undertones. Every skin type has warm or cool base colors.
Shadow and highlight transitions require subtle value changes. Avoid stark contrasts in facial modeling.
Different skin tones need different base color mixtures:
- Light skin: Raw umber, cadmium red light, yellow ochre
- Medium skin: Burnt sienna, cadmium red medium, raw umber
- Dark skin: Burnt umber, alizarin crimson, ultramarine blue
Blend these transitions while the paint stays wet. Skin looks most natural with soft value changes.
Landscape Elements
Water surface reflections need vertical brushstrokes for convincing effects. The paint consistency should be slightly thinned.
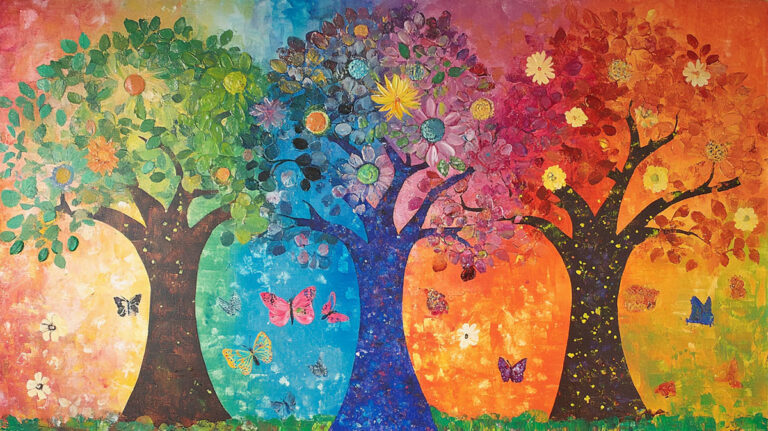
Foliage color variations prevent flat, monotonous tree masses. Mix several greens before starting your blending work.
Rock and mountain formations require both warm and cool color notes. Distance affects color temperature in landscape painting.
Linear perspective principles apply to color blending too. Distant objects need cooler, lighter color mixtures.
Troubleshooting Common Blending Problems
Preventing Muddy Colors
Color mixing order changes your final results completely. Add dark colors to light ones, never the reverse.
Cleaning brushes between colors prevents contamination. Even small amounts of unwanted color create muddy mixes.
Working with complementary colors requires extra care. They neutralize each other quickly when over-mixed.
Keep your palette organized with separate areas for warm and cool colors. This prevents accidental contamination during mixing sessions.
Managing Paint Drying Speed
Misting techniques extend working time in dry conditions. Use a spray bottle to add humidity around your painting area.
Working in sections prevents frustration with fast-drying paint. Complete one area before moving to adjacent sections.
Retarding mediums slow the drying process effectively. Mix them into your paint before starting complex blends.
Studio temperature affects drying speed more than most painters realize. Cooler rooms give you more blending time.
Fixing Blending Mistakes
Lifting wet paint works when you catch mistakes early. Use a clean, damp brush to remove unwanted color.
Overpainting dried areas requires proper surface preparation. Lightly sand glossy areas for better paint adhesion.
Reworking surfaces becomes necessary when blends fail completely. Accept that some paintings need major corrections.
Color matching becomes tricky when fixing dried passages. Keep detailed notes about your original color mixtures.
Contrast problems often result from poor value planning. Check your value relationships before adding complex color work.
Most blending issues trace back to improper paint consistency or timing. Practice with simple color studies before attempting complex subjects.
Professional Tips and Best Practices

Studio Setup for Blending Work
Lighting considerations affect color perception dramatically. North-facing windows provide consistent, cool light throughout the day.
Workspace organization keeps tools within arm’s reach. Set up your palette, water, and mediums before starting any blend.
Paint storage and accessibility matter during long painting sessions. Squeeze out enough paint for the entire section you’re blending.
Canvas preparation affects blending quality. Smooth surfaces work better for fine gradations than heavily textured grounds.
Color Matching and Consistency
Creating color notes and swatches saves time during painting sessions. Test mixtures on scrap canvas first.
Maintaining consistent mixtures across multiple painting sessions requires detailed records. Write down exact color ratios.
Working with limited color palettes forces better blending skills. Try using only three colors plus white for practice studies.
Masterson Palette stay-wet systems keep mixed colors fresh between sessions. Cover unused paint with wet paper towels.
Practice Exercises and Skill Development
Daily Blending Studies
Color gradient charts build muscle memory for smooth transitions. Practice value scales in different colors weekly.
Subject matter practice routines should include:
- Simple sphere studies for form understanding
- Cloud formation sketches for soft edge work
- Skin tone variations using different lighting
- Water reflection studies for vertical blending
Advanced Skill Building
Professional artists spend years perfecting their blending abilities. Don’t expect immediate mastery.
Art instruction videos supplement hands-on practice. Watch how experienced painters hold their brushes during blending.
Painting workshop techniques vary between instructors. Find teachers whose blending style matches your artistic goals.
Art education resources include books, online courses, and community college classes. Structured learning accelerates skill development.
Common Practice Mistakes
Rushing through practice sessions limits improvement. Slow, deliberate movements build better blending control.
Skipping fundamental exercises creates gaps in technique. Color mixing charts aren’t exciting but they’re necessary.
Using poor quality materials during practice creates bad habits. Invest in decent brushes and paint from the beginning.
Working only on finished paintings prevents experimentation. Keep practice canvases for testing new blending methods.
Unity in your painting develops through consistent blending approaches. Don’t mix too many different techniques in single works.
FAQ on How To Blend Acrylic Paint
What’s the best brush for acrylic blending?
Flat brushes create the smoothest gradients. Use synthetic bristles with Golden Heavy Body or Liquitex Professional acrylics.
Princeton Art Brush Co makes excellent blending brushes. Fan brushes work well for atmospheric effects and soft edges.
How do I prevent acrylic paint from drying too fast?
Use slow-drying mediums and work in small sections. Retarding medium extends open time significantly.
Keep your palette moist with a Sta-Wet or Masterson system. Spray the air around your easel, not directly on paint.
Why do my blended colors look muddy?
You’re probably mixing complementary colors too thoroughly. Clean your brushes between different hues.
Color mixing order matters. Always add dark pigments to light ones gradually for cleaner results.
Can I blend acrylic paint like oil paint?
Acrylics blend differently than oil painting mediums. They dry much faster, requiring quicker techniques.
Wet-on-wet blending works, but you need glazing mediums and proper paint consistency for extended working time.
What’s the difference between wet and dry brush blending?
Wet blending uses moist paint for smooth transitions. Dry brush blending uses minimal paint for subtle texture effects.
Dry brushing creates softer edges and atmospheric perspective. Both techniques require different paint consistency and timing.
How thick should my paint be for blending?
Paint consistency affects blending quality significantly. Too thick creates texture, too thin loses opacity.
Heavy body acrylics maintain proper consistency better. Add glazing medium instead of water for transparency while blending.
What colors blend together best?
Analogous colors blend naturally without muddying. Think blues to purples to reds on the color wheel.
Temperature blending creates atmospheric depth. Warm colors advance while cool colors recede in landscape painting.
How do I fix blending mistakes?
Lift wet paint immediately with clean, damp brushes. Overpainting dried sections requires light sanding first.
Accept that major blending failures need complete reworking. Keep detailed notes about successful color mixtures for future reference.
What surface works best for blending?
Smooth canvas surfaces work better than heavily textured grounds. Canvas preparation with proper gesso creates ideal blending surfaces.
Stretched canvas provides better support than canvas boards. The slight give helps with smooth brush movements during blending.
How long does it take to master acrylic blending?
Professional-level blending takes years of consistent practice. Start with simple color theory exercises and value studies.
Daily practice sessions build muscle memory faster. Work on gradient charts and basic form studies before complex subjects.
Conclusion
Mastering how to blend acrylic paint transforms your artistic abilities completely. These techniques separate professional work from amateur attempts.
Your success depends on consistent practice with proper tools. Invest in quality brushes for acrylic painting and reliable mediums like those from Winsor & Newton.
Temperature control and paint consistency matter more than expensive supplies. Work quickly but deliberately with your color transitions.
Remember that scumbling, glazing, and wet-on-wet methods each serve different purposes. Choose your technique based on the specific effect you want.
Practice gradation exercises daily. Simple value studies build the foundation for complex atmospheric perspective work.
Don’t rush the learning process. Even experienced artists continue refining their blending approaches throughout their careers.
Your paintings will show immediate improvement once you apply these professional methods consistently.