Preserving white paper in watercolor is harder than it looks. Once paint touches those areas, there is no painting white back over a dark wash and getting the same result.
Watercolor masking techniques solve this problem directly. Liquid frisket, masking tape, wax resist, and frisket film all protect specific areas of paper while you apply washes freely around them.
This guide covers every major masking method, from correct masking fluid application and removal to precision tools, negative painting, and how to fix the mistakes that catch most painters off guard.
By the end, you will know which resist technique fits which situation, and how to use each one without damaging your paper.
What is Watercolor Masking
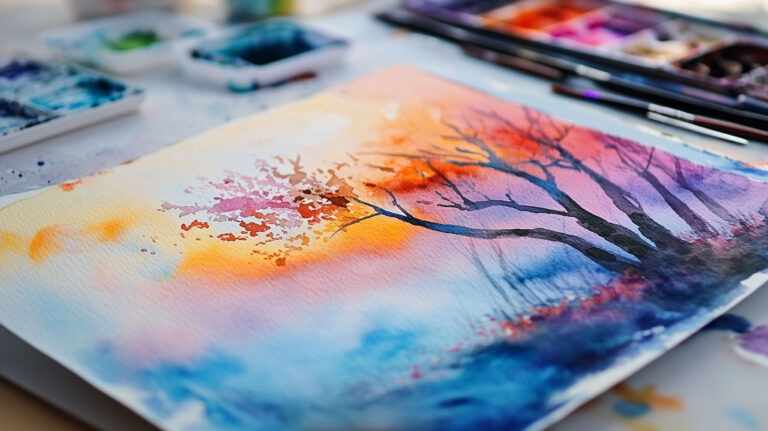
Watercolor painting relies entirely on the white of the paper for its luminosity. Masking is the process of protecting specific areas of that paper from paint so they stay untouched through every wash you apply on top.
It sounds simple. But the difference between a painting with crisp, glowing highlights and one that looks muddy often comes down to whether the artist planned their white areas before picking up a brush.
How Masking Works in Watercolor

Core function: A masking material sits on the paper surface and physically blocks pigment from reaching the fibers beneath it.
Once your washes dry, you remove the masking. What’s left is untouched paper. Clean, white, exactly the shape you laid down.
This matters because watercolor is transparent by nature. Unlike oil or acrylic, you cannot paint white back over a dark wash and get the same result. The paper’s whiteness is your only true light source.
Masking as a Planning Tool vs. a Corrective Tool
Planning tool: Applied before any paint goes down. You map out every highlight, light edge, and reserved white area at the drawing stage.
Corrective tool: Applied mid-painting to lock in areas you’ve already established before adding a darker wash over them. This is less common but just as valid.
Most artists use it for planning. Taken me a while to appreciate that using it mid-painting is actually a pretty smart move for complex layered work.
The Relationship Between Masking and Transparency
Watercolor’s tonal range runs from pure white paper down to your darkest pigment. Every wash you add pushes values darker. There’s no going back without a fight.
Masking lets you build dark, bold washes freely without losing the lights you planned. It protects the paper’s transparency by keeping certain zones completely out of the painting process until you decide to reveal them.
That’s what separates masking from just “painting carefully.” The freedom it gives you to be loose with your washes is the actual point.
Types of Masking Materials

Not all masking materials behave the same way. The right choice depends on the edge quality you need, whether the effect is permanent or removable, and how much detail you’re working with.
The global watercolor market was valued at USD 231.8 million in 2024 (Global Market Insights), growing at 8.5% annually through 2034. That growth is partly driven by hobbyists and students picking up these techniques for the first time, which explains why masking fluid brands have expanded their product lines significantly over the last few years.
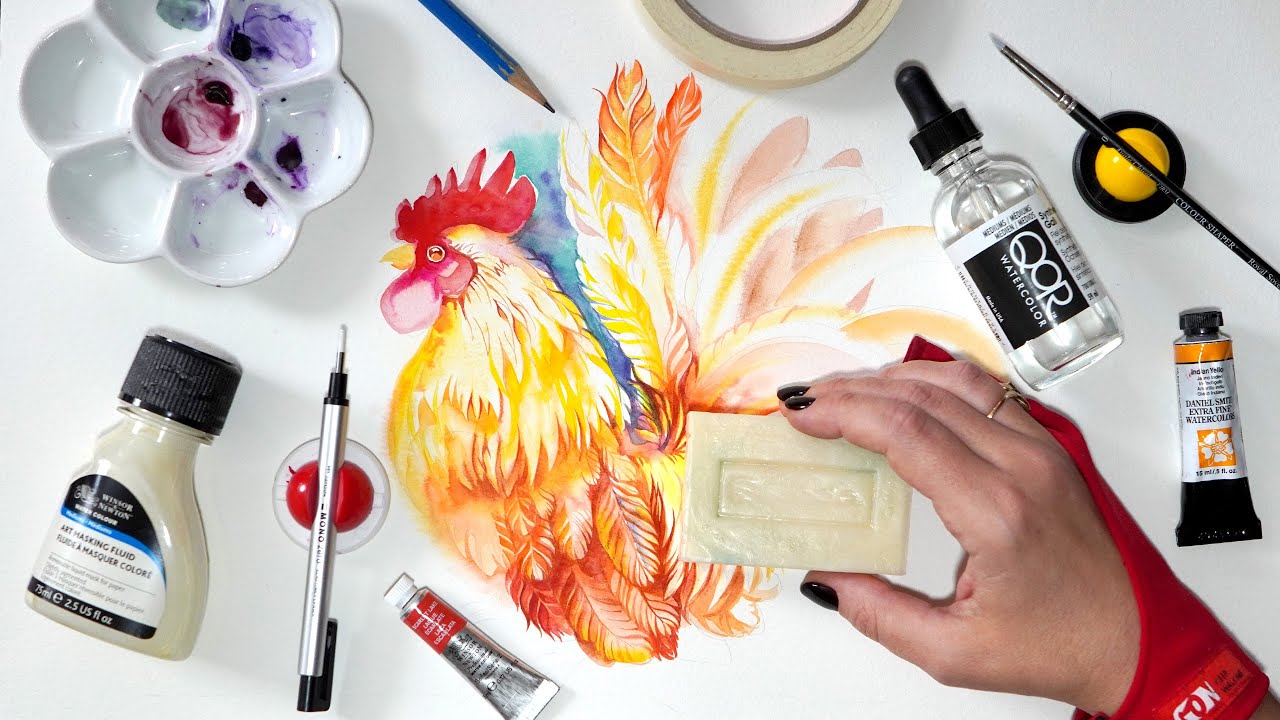
Masking Fluid (Liquid Frisket)
The most widely used option. Masking fluid is a latex or rubber-based liquid applied to paper before painting. It dries into a flexible film that blocks pigment, then peels off cleanly once everything is dry.
Top brands used by most watercolorists:
- Winsor & Newton Art Masking Fluid – industry standard, consistent flow
- Pebeo Drawing Gum – slightly thicker, good for detailed work
- Daniel Smith, Schmincke, and Grumbacher also produce reliable versions
Winsor & Newton’s masking fluid remains the go-to for most professional watercolorists, largely because the consistency is predictable across batches.
Masking Tape and Artist Tape
Best for: straight edges, geometric shapes, clean borders.
Low-tack options like Scotch Blue Painter’s Tape and Canson masking tape work well on most watercolor papers. The key difference from masking fluid is that tape creates hard straight lines only. No curves, no organic shapes.
Works especially well for horizon lines in landscapes, architectural edges, and clean page borders.
Frisket Film
A transparent, low-tack adhesive film. Originally developed for airbrush work, but it has solid applications in watercolor too.
You place it over the paper, cut your shape with a craft knife, peel back the area you want to paint, and apply your wash. More precise than masking fluid for geometric or complex cut shapes. It just takes more prep time.
Wax-Based Resists
Paraffin candles, white wax crayons, and colored wax crayons all repel watercolor wash. Unlike fluid masking, wax is permanent. You cannot remove it after the fact.
That permanence is actually what makes it useful. The wax stays in the paper and creates subtle texture effects in foliage, water surfaces, and sky areas. The resist quality varies a lot depending on paper surface, which is covered in the wax resist section below.
Masking Fluid vs. Masking Tape
| Factor | Masking Fluid (Liquid Frisket) | Masking Tape (Drafting/Painter’s) |
|---|---|---|
| Edge Type | Organic & Fluid: Can follow any contour-from the curve of a petal to the splatter of sea foam. | Linear & Geometric: Ideal for sharp, architectural edges and perfectly straight horizons. |
| Detail Level | Surgical: With a ruling pen or fine brush, you can save dots as small as a pinhead. | Structural: Best for blocking out large rectangular zones or “masking off” the sky from a building. |
| Paper Risk | Staining/Bonding: Can “soak” into the fibers of cellulose paper or bond permanently if left too long. | Mechanical Tearing: The adhesive can lift the paper’s “sizing” if removed too quickly or at the wrong angle. |
| Best For | Botanicals, sparkling water, fine animal whiskers, and complex organic silhouettes. | Clean borders, modern architecture, perspective lines, and flat horizon planes. |
Wax Resist vs. Removable Masking
Removable masking (fluid, tape, film): Temporary. Reveals clean white paper. You control what happens to those areas after removal.
Wax resist: Permanent. The wax stays. The paper beneath it may not stay pure white if the wash is applied over previously painted areas.
The decision comes down to intent. If you need the option to paint over revealed areas later, use removable masking. If you want texture baked into the painting permanently, wax works better.
How to Apply Masking Fluid Correctly
Most masking fluid problems come from application errors, not the fluid itself. Wrong paper prep, wrong tools, wrong timing. All fixable once you know what to watch for.
According to APA polling from 2023, 46% of Americans use creative activities to relieve stress. Watercolor is one of the most accessible of those activities, and masking fluid application is where a lot of beginners hit their first wall and give up.
Paper Preparation and Surface Considerations
Masking fluid must go onto dry paper. Full stop.
Surface texture affects results more than most beginners expect:
- Cold press paper – textured surface, most common choice, accepts masking fluid well
- Hot press paper – smooth surface, fluid goes on more evenly but can stain more easily
- Rough paper – the fluid sits on peaks and skips valleys, creating broken, textured mask edges
High-quality 100% cotton paper handles masking fluid significantly better than wood pulp student papers. On cheap paper, the latex can bond too firmly and tear the surface on removal.
Application Tools
There are more options here than most tutorials cover.
Old or cheap brush: The default recommendation. Coat bristles with soap or liquid detergent first. This creates a barrier that stops the latex from bonding permanently to the bristles. Wash immediately after use, or the brush is finished.
Ruling pen: Probably the best tool for fine lines. A drafting instrument that holds a small reservoir of fluid. Gives you clean, adjustable line width with no brush cleanup issues.
Silicone brush tip: Masking fluid doesn’t bond to silicone. Easier cleanup, reusable, holds a reasonable amount of fluid for medium-sized areas.
Masking fluid pens: Winsor & Newton and Molotow both make markers pre-filled with masking fluid. Best for fine detail work and lettering. More on these in a later section.
Toothbrush or splatter: Load a toothbrush and flick. Creates random spatter patterns. Used for textured areas like foliage, starfields, or bird plumage.
Drying Time and Application Errors
Always let masking fluid dry fully before painting over it. This usually takes 5 to 15 minutes depending on humidity and how thickly it was applied. Some brands take up to 30 minutes.
Common mistakes that cause problems:
- Applying too thick – creates lumpy edges and uneven removal
- Painting over wet fluid – smears the mask and bleeds paint under it
- Shaking the bottle – introduces air bubbles that break the fluid film
- Using old fluid – masking fluid degrades over time and won’t peel cleanly
Stir the bottle gently. Never shake it.
How to Remove Masking Without Damaging the Paper
Removal is where the real risk lives. Get this wrong and you tear the paper surface, or you leave staining that affects how the paint absorbs in those areas.
The fine art watercolor paints market was estimated at USD 3.67 billion in 2024, growing at 6.9% annually (Proficient Market Insights). That’s a lot of paintings, and a meaningful percentage of them get damaged at the removal stage because nobody told the artist to wait long enough.
When to Remove
The wash must be fully dry. Not just dry to the touch. Fully, completely dry.
Removing masking fluid over damp paper drags fibers, lifts paint from adjacent areas, and often tears. If you’re not sure, wait longer. An extra 10 minutes costs nothing.
Temperature and humidity affect drying time more than most artists plan for. In humid conditions, drying takes significantly longer.
Removal Methods
| Method | Mechanical Best For | Risk Level | Professional Protocol |
|---|---|---|---|
| Fingertip Rubbing | Small, isolated highlights or “detail spots.” | Moderate: High risk of transferring skin oils (sebum) to the paper, which creates “oil resists” in future glazes. | Only use on the very last layer of the painting when no further washes are required. |
| Rubber Cement Pick-up | Large, complex areas and consistent, even removal. | Very Low: The “crepe rubber” is designed to grab latex without abrading the delicate paper fibers. | The Industry Standard: Use long, sweeping motions. The block stays clean and doesn’t leave chemical residues. |
| Putty Eraser | Medium areas requiring a “gentle lift.” | Low: Effective for thinner applications of fluid, though it can become “clogged” with latex quickly. | “Dab” rather than scrub. This is ideal for sensitive 90 lb paper where friction must be minimized. |
| Masking Tape Roll | Quick removal of large “blocked out” zones. | High: The adhesive on the tape can be stronger than the paper’s “sizing,” leading to surface tearing. | Stick a piece of tape to the dried fluid and pull up vertically. Use only on 140 lb+ professional cotton rag. |
A rubber cement pick-up tool is probably the safest method. Rolls across the surface without applying the kind of lateral pressure that fingertip rubbing does.
Paper Quality and Removal Outcome
Paper quality is the single biggest variable in whether removal goes smoothly.
Cotton papers (Arches, Fabriano Artistico, Canson Heritage) handle removal consistently well. The cotton fibers are strong enough to resist tearing under the rubber film.
Wood pulp papers are far more prone to surface damage. The fibers are weaker. Even gentle removal can leave fuzzy, abraded patches. If you’re working on student-grade paper, test masking fluid on a scrap corner first.
When Masking Fluid Stains or Tears
Staining happens when masking fluid is left on the paper too long, especially in warm conditions where the latex continues to bond over time. Most manufacturers recommend removing within 24 to 48 hours of application.
If the removed area shows yellow tinting or a visible residue line, the fluid sat too long. A soft damp brush can sometimes soften the edge, but the stain itself rarely disappears entirely.
Torn paper is harder to fix. Light tearing can be pressed down with a bone folder and a small amount of PVA adhesive. Significant surface damage usually means that area needs to be painted over rather than left as a revealed white.
Watercolor Tape Masking for Hard Edges
Tape masking does one thing well: it creates edges that masking fluid physically can’t match. Perfectly straight lines, clean geometric shapes, crisp borders.
J.M.W. Turner, arguably the most studied watercolorist in art history, built his architectural studies on precise edge control. The tools available to him were primitive compared to low-tack artist tape, but the underlying need for clean structure in a composition hasn’t changed.
Choosing the Right Tape
Low-tack is non-negotiable. Standard masking tape or packaging tape will tear most watercolor papers on removal.
Reliable options:
- Scotch Blue Painter’s Tape – widely available, genuine low tack, affordable
- Canson Watercolor Masking Tape – made specifically for watercolor paper, slightly more flexible
- Liquitex Professional Masking Tape – higher price, very consistent adhesion
Always test a small piece on the paper you’re using before committing to a full layout.
Applying Tape Without Paint Bleed
Paint bleeding under tape edges is the most common failure point. It happens when the tape edge isn’t fully bonded to the paper surface.
Fix this with burnishing. After placing the tape, run a bone folder or your fingernail firmly along the edge that will be the paint boundary. This presses the tape into the paper texture and closes the gap.
On textured cold press paper, burnishing is especially important. The peaks of the paper create tiny gaps under tape that paint will seep through without that extra pressure.
Tape for Borders and Structural Lines
Page borders: Frame the entire painting area with tape before starting. Remove at the end for a clean white border that looks professional without any extra work.
Horizon lines: Place tape along the horizon in a landscape. Paint the sky freely, let it dry, remove tape, then paint the ground plane. No painting-around required.
Architectural elements: Buildings, windows, bridges. Anywhere straight edges matter. Tape is faster and more accurate than masking fluid for these subjects.
Removing Tape Without Lifting Paint
Remove tape at a low angle, pulling back on itself rather than lifting straight up. Peeling at a steep angle creates more surface tension and increases the chance of lifting paint or paper.
Remove while the painting is fully dry. Removing over damp paint pulls color from adjacent areas.
If paint has bled slightly under the edge during painting, removing the tape will reveal a soft imprecise edge. That’s a burnishing failure. Not a tape failure. Go back and burnish more firmly next time.
Wax Resist Techniques
Wax resist works differently from every other masking method. The wax doesn’t peel off. It stays in the paper permanently and creates texture effects that no other technique produces.
This permanence is both the strength and the limitation of the technique. Once the wax is down, it’s down. Plan accordingly.
How Wax Interacts with Watercolor Paper
Surface texture changes the effect dramatically.
| Paper Type | Wax Resist Effect | Mechanical Best Use |
|---|---|---|
| Rough Press | “Broken” Texture: The wax only hits the high “peaks” of the paper, leaving the deep “valleys” open to absorb pigment. | Atmospheric Effects: Sparkling sunlight on water, “craggy” stone textures, and shimmering night skies. |
| Cold Press | Organic Grain: A balanced resist that skips across the medium “tooth” of the paper, creating a natural, pebbled look. | Environmental Renders: General landscapes, weathered wood, and foliage where a “varied” texture is desired. |
| Hot Press | Saturated Barrier: Because the surface is perfectly flat, the wax creates a solid, even coat with no gaps. | Graphic Precision: Controlled geometric patterns, sharp highlights on smooth product surfaces, and crisp “white-out” text. |
On cold press vs hot press watercolor paper, the wax behavior is completely different. Rough paper creates wonderful sparkling effects that are nearly impossible to reproduce any other way.
White Candle Wax for Subtle Texture
A plain household candle is the most accessible wax resist tool. The colorless paraffin is nearly invisible on white paper when applied, which is tricky at first. You’re drawing without being able to see exactly what you’re drawing.
This works in your favor for loose, expressive effects. Foliage clusters, water glimmer, fabric texture, bark on trees. The slight randomness produced by painting blind adds authenticity you can’t fake with deliberate brushwork.
One practical note: paraffin wax can yellow over time when exposed to UV light. For work meant to last, artist-grade paraffin or specific wax resist products are more stable than household candles.
Wax Crayons for Colored Resist Layers
Wax crayons add color beneath the wash, not just texture. A yellow crayon under a green wash reads differently than the green alone. The yellow wax partially resists the wash and the two interact.
This layering effect is what makes wax crayons interesting for more expressive, loosely abstract watercolor work. The resist quality of crayons varies depending on wax content. Harder crayons skim the surface and create finer texture. Softer crayons cover more area but with less precision.
Limitations vs. Removable Masking
Wax resist stays forever. You cannot remove it, paint over the waxed areas with full coverage, or change your mind about those zones.
This means wax resist belongs in the planning stage, not the correction stage. It also means it’s not appropriate for areas where you want clean revealed paper. The resist is never 100% solid. Some pigment always settles in the wax texture.
For work where you need true white highlights or clean revealed areas, masking fluid is the right choice. Wax resist is for integrated texture effects, not precision preservation.
Masking for Negative Painting
Negative painting is where masking fluid really earns its place. You’re not painting the subject. You’re painting the space around it, using dark washes to define light shapes by surrounding them.
Masking fluid makes this possible at scale. Without it, every branch, petal edge, or white flower head requires you to paint around it freehand. With it, you mask the light shapes first, then paint freely over the whole area.
What Negative Painting Actually Requires
Sequence matters more than anything else here.
You establish light shapes by masking them. Then you apply a wash over the entire area. Let it dry completely. Then remove the masking to reveal the original tone beneath the wash.
Each layer must be bone dry before the next one goes down. Start painting the next layer too soon and you lose your outlines entirely, as the wet washes bleed together. Placing a palm flat on the paper is an old watercolorist’s test: if it feels cold, it’s still damp.
Layered Masking Across Multiple Wash Stages
This is where negative painting gets genuinely interesting.
Layer 1: Mask the lightest elements. Apply a light wash over everything.
Layer 2: After layer 1 dries, remove the first mask. Apply a second mask to elements you want at the mid-value. Paint a darker wash over the unmasked areas.
Layer 3: Repeat with your darkest wash. Remove all masking. Each revealed layer sits at a different tonal level, creating real depth without any overpainting.
Botanical watercolorists use this exact approach for foliage clusters, where dozens of leaf shapes need to read as separate planes receding into shadow.
When to Use Masking vs. Lifting
| Situation | Use Masking (Fluid/Tape) | Use Lifting (Scrubbing/Blotting) | Mechanical Outcome |
|---|---|---|---|
| Complex Light Shapes | Yes: Best for preserving hundreds of tiny “shimmers” or fine whiskers simultaneously. | Possible but Slow: Very difficult to maintain precision over many small, disconnected areas. | Efficiency: Masking allows you to paint “through” the object, ensuring background continuity. |
| Soft Edges Needed | No: Liquid latex creates a “dam” that results in a sharp, clinical edge once removed. | Yes: A damp brush “re-activates” the edge, allowing for a gentle, hazy transition. | Atmospherics: Lifting is the “gold standard” for soft clouds, mist, or out-of-focus highlights. |
| Multiple Wash Layers | Yes: Ideal for protecting the white paper through 5+ glazes of dark pigment. | Risky: Scrubbing an area often “churns” the bottom layers, leading to muddy or “grey” patches. | Structural Integrity: Masking protects the paper’s “sizing,” whereas lifting physically abrades it. |
| Non-Staining Pigments | Either Works: Masking is safer, but lifting is highly effective for these “sedimentary” colors. | Works Well: Pigments like Ultramarine or Cerulean sit on the surface and “lift” back to white easily. | Versatility: For staining colors (Phthalos/Quins), masking is the only way to get back to pure white. |
Staining pigments like Phthalo Blue or Quinacridone Magenta are nearly impossible to lift cleanly. Masking before applying them is the only reliable way to protect light areas when working with these colors.
Masking Fluid Pens and Precision Tools
Standard brush application limits you to shapes and areas. When the work requires lettering, thin branches, hair highlights, or architectural line detail, you need tools built for precision.
The difference is not subtle. A ruling pen loaded with masking fluid can produce a line 0.3mm wide with complete consistency. A brush, even a good liner brush, cannot match that reliably.
Masking Fluid Pens
Winsor & Newton Masking Fluid Pen and the Molotow Grafx Masking Fluid Marker are the two most commonly used options. Both come pre-filled with masking fluid and have fine applicator tips.
The Molotow has a 2mm tip and works well for medium detail. Clogging is a known issue with this product, especially if left uncapped between sessions. The Winsor & Newton pen offers finer tips and better consistency across most users’ experience.
For lettering specifically, the pen format is far faster than a brush. Artists working on illustrated botanical prints or hand-lettered watercolor cards rely on these almost exclusively for text masking.
The Ruling Pen
Probably the most underused precision masking tool. A ruling pen is a traditional drafting instrument with an adjustable nib that holds a small reservoir of fluid.
Load it with masking fluid (not ink consistency, slightly thicker works better), set the nib width with the screw adjustment, and draw lines that no brush can replicate. The line width is fully adjustable and the pen cleans instantly in water since masking fluid doesn’t bond to metal the way it bonds to brush bristles.
Artist and author Leslie Redhead specifically recommends the ruling pen as the best tool for masking fluid application, noting that fine-line control and cleanup make it far more practical for detailed work than any brush option.
Nib Sizes and Flow Considerations
Fine nibs (under 0.5mm): Architectural line work, lettering baselines, single-strand highlights in hair or fur.
Medium nibs (0.5-1mm): Thin branches, grass blades, wire textures, botanical stems.
Wide nibs (1mm+): Faster coverage of narrow shapes, rigging on boats, fence lines, feather shafts.
Flow consistency depends on fluid viscosity. If it’s too thick, thin slightly with a drop of water. Too thin and the fluid film won’t cover reliably, leaving gaps in the mask.
Wet-on-Wet Masking Considerations
The wet-on-wet technique in watercolor and masking fluid have a tricky relationship. Used together correctly, you get soft atmospheric backgrounds with precise preserved whites. Used carelessly, you get torn paper and stained masks.
The core rule is simple. Masking fluid must be completely dry before any wet-on-wet work begins. Not just surface-dry. Fully cured. Even slightly tacky fluid will lift, smear, and contaminate the wet wash above it.
Soft Edges Near Masked Areas
Masking fluid always produces a hard edge when removed. That’s a structural fact about how latex-based resists work.
Wet-on-wet painting around masked areas can soften the transition slightly, but only in the wash itself, not at the mask boundary. The edge where the mask ends will still be crisp once removed.
To get a softer-looking edge after removal, use a slightly damp brush immediately after peeling to drag the paint at the boundary inward. This works best with non-staining pigments and needs to happen before the adjacent wash has fully cured.
Managing Blooms and Backruns Near Masked Edges
Blooms occur when wet paint is dropped into a wash that has started to dry. The wetter fluid pushes pigment to its edges, creating the characteristic feathery bloom shape.
Near masked edges, this is a particular risk. The mask edge creates a hard boundary where a wet wash can pool. If the wash is drying and you add more wet paint near the edge, a backrun can form right at the mask line, leaving a dark feathered border exactly where you wanted a clean transition.
Prevention: work quickly in that area, keep the wash consistently wet from mask edge to the rest of the paper, and avoid going back into the wash once it has started to set.
Removing Masking Before or After Final Washes
This depends entirely on what you want to do with the revealed area afterward.
Remove before final washes if you plan to paint into the revealed area with additional detail, glazing, or tonal adjustments.
Remove after all washes if the revealed area is meant to stay white and you want to see the full tonal context before making any decisions about it.
Most artists remove after final washes. Removing earlier risks getting paint into the now-exposed paper accidentally during subsequent wet-on-wet passes.
Fixing Masking Mistakes
Masking fluid problems fall into a few predictable categories. Most are fixable. Some aren’t. Knowing which is which saves a lot of wasted effort.
The most common cause of serious damage isn’t the wrong masking technique. It’s cheap paper. Cotton paper handles masking fluid consistently. Wood pulp student papers are genuinely fragile under the latex, and many painters blame the fluid when the paper was the real issue.
Masking Fluid That Won’t Remove Cleanly
Two causes. Either the fluid was left on too long, or heat was applied during drying (a hair dryer too close bonds the latex much more aggressively to the fibers).
Old masking fluid behaves the same way. Masking fluid has a shelf life. Once it starts to thicken and develop a skin in the bottle, the latex chemistry has changed. That 2023 bottle sitting in your supply drawer may be the problem, not your technique.
Options when it won’t budge cleanly:
- Try a slightly damp rubber cement pick-up tool rather than dry fingertips
- Very gentle heat from a hair dryer on low, held far away, can occasionally soften stubborn spots
- Accept partial staining and adjust the painting to incorporate it
Paint Bled Under Tape or Fluid
Under tape: Insufficient burnishing. The edge wasn’t pressed firmly enough into the paper texture, leaving microscopic gaps. No real fix after the fact. Sand the edge area gently with a fine eraser once fully dry, or incorporate it into the composition.
Under fluid: The fluid was applied too thinly, or there were pinholes in the application (common with aerated fluid from shaking). If the bleed is slight, a fine brush with the background color can clean it up after removal. If it’s significant, the area likely needs to be painted over.
Masked Areas Too Stark After Removal
Clean white revealed areas next to dark washes can look jarring. The contrast reads as unnatural, especially in organic subjects like flowers or foliage where you’d expect some tonal variation in the light areas.
Fixes that actually work:
- Glaze a very dilute wash of the adjacent color over the revealed area to integrate it
- Soften the edges with a damp brush, pulling paint inward from the boundary
- Add a second, lighter wash of a warm or cool tone to give the white area some depth
White gouache is a last resort for areas where the paper has been damaged or the reveal looks wrong and can’t be glazed. It’s opaque, so it sits differently from watercolor, but for small corrections it handles well over watercolor washes.
Softening Hard Masked Edges
Hard edges are the unavoidable consequence of latex masking. They’re not always wrong, but in loose, atmospheric work they can stick out.
The damp brush method remains the most reliable fix. Immediately after removal, use a clean, barely-damp brush to pull the paint at the edge inward by 1-2mm. The pigment hasn’t fully bonded yet and will move slightly. Work quickly. Once the surrounding wash is fully cured, this technique stops working.
For paintings where soft edges throughout are the goal, consider whether masking fluid was the right tool to begin with. The lifting technique preserves lights with naturally soft edges and no masking required, though it’s far more limited in how much white it can recover.
FAQ on Watercolor Masking Techniques
What is masking fluid used for in watercolor?
Masking fluid protects areas of watercolor paper from paint. You apply liquid frisket to zones you want to keep white or light, paint freely over it, then peel it off once dry to reveal clean, untouched paper beneath.
Can masking fluid damage watercolor paper?
Yes, if used incorrectly. Cheap wood pulp paper tears easily on removal. Always use 100% cotton paper like Arches or Fabriano Artistico, apply fluid thinly, and never leave it on longer than 24 to 48 hours.
How long does masking fluid take to dry?
Most brands dry in 5 to 15 minutes under normal conditions. Humidity slows this down significantly. Never paint over fluid that feels even slightly tacky. When in doubt, wait longer.
What is the best tool for applying masking fluid?
It depends on the detail level needed. A ruling pen handles fine lines best. Silicone brush tips work for mid-sized areas. Masking fluid pens like Winsor & Newton or Molotow suit lettering and precision detail work.
What is the difference between masking fluid and wax resist?
Masking fluid is removable. Wax resist is permanent. Liquid frisket peels off cleanly, revealing white paper. Wax resist stays in the paper forever, creating integrated texture rather than clean preserved whites.
How do I remove masking fluid without tearing the paper?
Make sure the paint is fully dry, not just surface-dry. Use a rubber cement pick-up tool or gentle fingertip rubbing. Avoid lateral dragging. On fragile paper, a putty eraser is safer than direct finger pressure.
Can I use masking fluid for negative painting?
Yes. It’s one of the best uses for it. Mask your light shapes first, apply a wash over everything, let it dry completely, then remove the mask. Repeat across multiple layers to build depth and tonal range.
Why does masking fluid stain my paper yellow?
Staining happens when fluid is left on too long or applied over low-quality paper. Old masking fluid also stains more. Use fresh fluid, work on quality watercolor paper, and remove within 24 hours of finishing your washes.
How do I soften hard edges left by masking fluid?
Immediately after removal, drag a barely damp brush along the edge to pull paint inward by 1 to 2 millimeters. Work quickly. Once the surrounding wash cures fully, the pigment will no longer move.
What is the best masking fluid brand for watercolor?
Winsor & Newton Art Masking Fluid is the most consistent option for most artists. Pebeo Drawing Gum works well for detailed work. Both peel cleanly on cotton paper. Avoid unknown brands, as consistency varies widely between batches.
Conclusion
This article on watercolor masking techniques covers every method worth knowing, from liquid frisket and frisket film to wax resist and precision ruling pen work.
Each tool has a specific role. Masking fluid application suits complex organic shapes and negative painting. Tape handles hard geometric edges. Wax resist builds permanent texture into backgrounds and foliage.
Getting the most out of these methods comes down to paper quality, timing, and the right removal technique.
Start with one approach, such as masking fluid on cold press paper, and work through the process from application to final wash before adding more tools to your practice.
Preserve your whites intentionally. That decision, made before the first brushstroke, is what separates controlled watercolor work from guesswork.