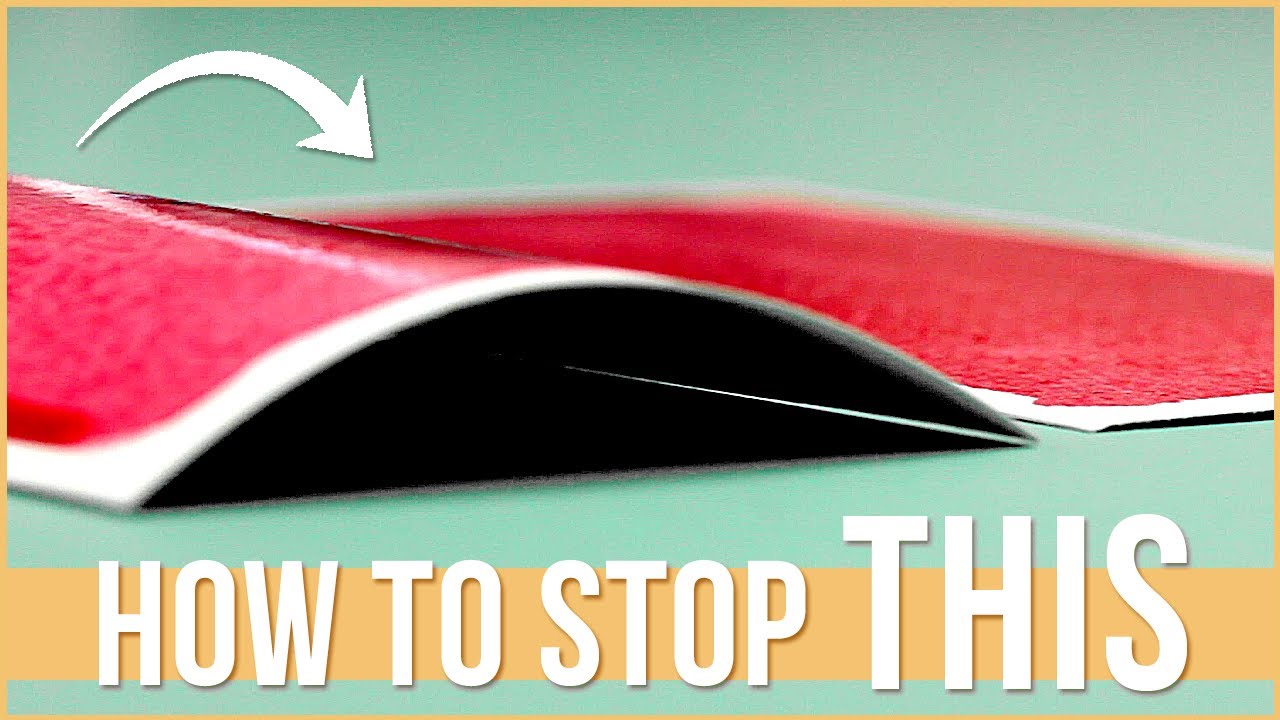
You finish a painting, step back, and the paper looks like a relief map. That buckled, cockled surface is one of the most common frustrations in watercolour painting, and it happens to everyone.
Paper warping occurs when fibres absorb moisture unevenly, causing the surface to expand and pull out of shape. The good news: most cases are fixable, and nearly all of them are preventable.
This guide covers how to fix watercolour paper warping at every stage, from flattening a finished piece without damaging the paint, to stretching and taping methods that stop buckling before it starts.
You will also learn which paper weights and cotton vs. cellulose choices make the biggest difference long-term.
What Is Watercolour Paper Warping
Watercolour paper warping is what happens when paper fibres absorb moisture unevenly. The top surface swells as water soaks in, while the underside stays dry and rigid.
That difference in expansion pulls the sheet into an arch. Once it dries in that position, the paper stays buckled.
Why it matters: warped paper causes paint and water to pool in the grooves. Colours dry unevenly, edges go hard where they shouldn’t, and the finished piece won’t sit flat in a frame.
Light Warping vs. Severe Cockling
Not all warping is the same. A gentle bow in the paper after a wet wash is light warping. It often flattens on its own as the sheet dries under tension.
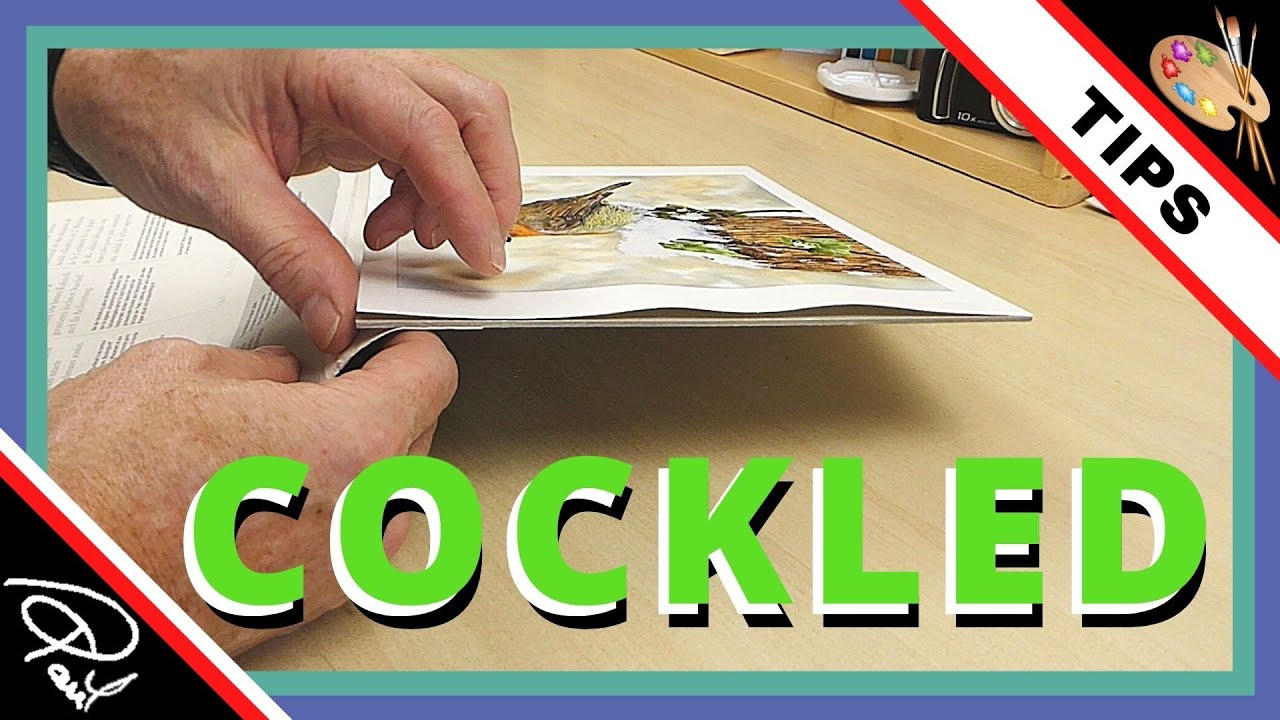
Cockling is a different problem. That’s the deep, irregular rippling you get after flooding large areas with water, especially on unsecured paper. Cockled sheets don’t self-correct.
- Light warping: shallow arch, recovers with weight or re-wetting
- Cockling: raised ridges and valleys across the surface, needs active flattening
How Paper Weight Affects Warp Severity
Paper weight is measured in grams per square metre (gsm) or pounds per ream (lb). Heavier sheets contain more fibre, which gives them greater stability when wet.
Edinburgh Art Workshop notes that paper at 300gsm (140lb) and above is significantly less likely to buckle or warp during heavy washes.
| Weight | Warp Risk | Stretching Needed? |
|---|---|---|
| 190gsm (90lb) | Critical: The paper will “cockle” or wave almost immediately upon contact with moisture. | Yes, Always: Without stretching (soaking and taping), large washes will pool in valleys, ruining the consistency of the render. |
| 300gsm (140lb) | Standard: The industry workhorse. It handles light washes well but will buckle under heavy “wet-on-wet” techniques. | Recommended: For professional e-commerce backgrounds or architectural boards, stretching ensures a perfectly flat scan. |
| 425gsm (200lb) | Minimal: A sturdy middle ground. It resists most buckling and maintains its shape under moderate saturation. | Optional: Can be used straight from the pad for most projects; only requires stretching for extreme, “flooded” wash styles. |
| 640gsm (300lb) | Negligible: This is effectively a board. It stays flat even when submerged in water. | Rarely Required: Ideal for high-end commissions where you need to move fast without the 24-hour prep time of stretching. |
Anything lighter than 425gsm will need stretching if you plan on using heavy wet-on-wet technique or large washes, according to experienced watercolourists at Draw Awesome.
Cotton vs. Wood-Pulp Paper and Fibre Behaviour
Cotton rag paper and wood-pulp (cellulose) paper respond to moisture very differently. Cotton fibres are longer and more uniform, so they expand and contract more predictably when wet.
Cellulose paper warps more aggressively under heavy washes. SM-LT Art notes that cellulose paper “may pill or warp with heavy washes” and works best for lighter techniques.
Cotton paper still warps when soaked heavily. But it performs better than wood-based paper and returns closer to flat as it dries. For watercolour painting that involves serious wet work, cotton is the practical choice.
How to Flatten Already-Warped Watercolour Paper
Finished a painting and it’s sitting there buckled? This is fixable. The method you use depends on how badly the paper has warped and whether the painting is complete.
Using Water and Weight
Re-wetting relaxes the fibres back to a neutral state. Pressing flat while they dry locks them there.
- Lay the painting face-down on a clean, flat surface
- Lightly dampen the back with a sponge or spray bottle. Don’t soak it.
- Place a sheet of acid-free paper or clean cotton cloth over the back
- Stack heavy flat boards or books on top, distributing weight evenly
- Leave for 24-48 hours minimum
This works well for light to moderate warping. For sheets that have cockled badly, one round of pressing may not be enough.
Using a Dry Mount Press or Iron
Low heat can speed up the flattening process. The risk is that direct heat damages paint layers, especially pigments that sit on the surface rather than absorbing into the paper.
Iron method: set to low heat, no steam. Place a damp cloth over the back of the paper (never directly on the painted surface). Move the iron slowly in flat passes.
Test on a corner first. Some pigments shift or bloom under heat, which is frustrating after everything else has gone right.
The Bathtub Soak Method
For severely cockled sheets, full submersion works when nothing else does.
Fill a tub or large tray with clean, cool water. Submerge the sheet face-down for two to five minutes. Remove it carefully, let the excess water drip off, then lay it face-down on a clean board.
Stack heavy boards on top immediately and leave overnight. The paper dries flat under continuous pressure. Winsor & Newton recommends soaking times of 5-10 minutes for standard weights when working with fully expanded fibres.
One honest caveat: this method works better on unfinished or lightly painted paper. Heavy pigment layers, especially granulating colours like ultramarine or burnt sienna, can shift slightly when fully submerged.
How to Stretch Watercolour Paper Before Painting

Stretching is the most reliable way to prevent paper buckling. The principle is simple: let the paper expand fully before you paint, then lock it in place so it can’t move during the session.
Jerry’s Artarama describes the process as soaking paper “until the fibres fully expand,” then securing it tightly to a board so that as it dries, it shrinks taut rather than buckling under the brush.
Stapling to a Board
What you need: a sealed wooden board, plywood, or gator board; a heavy-duty staple gun; a tub of clean water.
Soak the paper for 5-20 minutes depending on weight. Heavier papers need longer. Lay it flat on the board, smooth out any air pockets, and staple around all four edges at roughly 2-inch intervals.
Keep staples about half an inch from the edge. Too close and the paper rips as it shrinks. Too far and it pulls loose before drying.
Leave flat to dry overnight. A hairdryer speeds this up but risks uneven drying at the edges, which can cause the tape or staples to pull. Natural drying is slower but more reliable.
Gummed Tape Stretching
Brown gummed tape (the kind you wet to activate) is the standard for this method. Masking tape doesn’t hold. It looks fine when dry but lifts under heavy washes, which defeats the whole point.
Louise De Masi, a practising watercolourist, uses staples through the gummed tape as a backup: “I place the staples through the gummed tape and watercolour paper at about 5cm intervals. The staples are a safeguard in case the gummed tape fails.”
Wet the tape, lay at least one inch over the paper edge and onto the board, smooth it down flat. Don’t over-wet the tape or it loses stickiness before it bonds.
To remove the finished painting, cut around the edges with a sharp craft knife. Trying to peel the tape off risks tearing the paper.
Watercolour Blocks as an Alternative
A watercolour block is a pad glued on all four edges, with a small unglued gap at one corner. The glued edges act as the tension that stretching provides. Jackson’s Art describes how “no paper stretching is required, as the glued edges hold the paper taut while you work.”
Work on the top sheet as normal. Once the painting is fully dry, slide a palette knife along the unglued edge to remove it. Don’t rush that step on wet paper.
Blocks cost more per sheet than loose paper. But they cut prep time significantly, especially for artists painting frequently or working on location where setting up a stretching board isn’t practical.
Arches, Fabriano, and Hahnemuhle all produce blocks in both cold press and hot press. Most contain 20 sheets per block.
Paper Weight and Its Role in Warping
Choosing the right paper weight is the most straightforward way to reduce warping risk before a brush even touches the surface.
Heavier sheets contain more fibre, which distributes moisture absorption more evenly. Less distortion, more predictable drying, fewer surprises mid-session.
The Practical Weight Thresholds
300gsm (140lb) is where most working artists draw the line. It handles standard wet work without stretching, though heavy wash work still benefits from at least taping the edges down.
640gsm (300lb) paper absorbs serious water application with minimal warping. Opus Art Supplies describes it as “designed to handle substantial water application with minimal warping.” Stretching is rarely needed at this weight.
The tradeoff is cost. A 300lb sheet of Arches costs considerably more than a 140lb sheet. For practice or quick studies, that difference adds up.
Cotton vs. Cellulose: Which Warps Less
| Property | Cotton (Rag) | Cellulose (Wood Pulp) |
|---|---|---|
| Warp Behavior | Predictable Expansion: Long, hollow fibers absorb water and expand evenly. It returns to a flat state more reliably once dry. | Aggressive Warping: Short, dense fibers react inconsistently to moisture, leading to sharp “cockling” or waving. |
| Strength When Wet | High Resilience: Can withstand heavy scrubbing, lifting, and scraping without the surface “pilling” or tearing. | Fragile Surface: The fibers are prone to lifting and forming small “pills” if agitated too much while wet. |
| Best For | Professional Excellence: Heavy wet-on-wet techniques, multi-layered glazing, and high-end commercial renders. | Efficiency & Practice: Quick sketches, pen-and-wash, or rapid layout studies where longevity isn’t the priority. |
| Archival Quality | Exceptional: Naturally acid-free and pH neutral. Will not yellow or become brittle over decades. | Variable: Will yellow and degrade over time unless chemically treated to be “acid-free.” |
Watercolor Affair notes that cotton paper is “dimensionally stable” compared to wood-based alternatives, meaning it holds its shape better under wet conditions. Still warps when soaked, but performs meaningfully better.
Brands Known for Dimensional Stability
Arches is the benchmark. 100% cotton, mould-made, available in 185gsm through 640gsm. Artists return to it because the surface behaviour is consistent sheet to sheet.
Fabriano Artistico is close behind. Cotton rag, well-sized, handles lifting and reworking without surface damage. Slightly lower price point than Arches.
Hahnemuhle produces both cotton and cellulose ranges. Their cotton papers (Aquarell series) are respected for dimensional stability under heavy washes.
Saunders Waterford from St Cuthbert’s Mill is another reliable cotton option, widely used in UK and European studios.
Wet-on-Wet Techniques and Warp Control

Wet-on-wet technique floods the paper with water before any pigment goes down. It’s one of the most common triggers for paper buckling, because large areas absorb moisture all at once.
The paper doesn’t warp because you used wet-on-wet. It warps because moisture was applied unevenly, or the paper had nowhere to go while it dried.
Working in Sections to Reduce Buckling
Flooding an entire sheet at once creates large, isolated wet patches that expand unevenly. Working in sections keeps moisture distribution more controlled.
- Wet only the area you’re actively working on
- Let each section partially dry before moving to adjacent areas
- Avoid hard boundaries between wet and bone-dry paper, where tension concentrates
This won’t eliminate warping entirely on light paper, but it reduces the severity. It also gives more control over edges and blooms, which is a bonus.
Tilting the Board to Control Water Pooling
Water pooling in one area accelerates localised warping. Tilting the board slightly (10-15 degrees) keeps water moving rather than sitting.
The tradeoff: tilting affects how pigment flows. Granulating colours like raw umber or cerulean blue will settle differently on a tilted surface. That can be a feature, not a problem, but it needs accounting for.
J.M.W. Turner, known for his atmospheric wet watercolour work, reportedly tilted his boards at various angles to control how washes pooled and dried. The technique gives directional movement to large washes while reducing standing water.
When to Stop Adding Water
Paper has a saturation threshold. Past that point, adding more water doesn’t improve the wash. It just increases the warp.
The surface looks slightly glossy when it’s at full saturation. That sheen is the signal to stop adding water and let the paper begin its recovery. Continuing to add water at this stage is one of the most common reasons sessions end with badly cockled paper.
Taping and Taping Alternatives for Warp Prevention
Not every painting needs full stretching. For smaller formats or quick studies, taping is faster and still effective if done right.
The key word is if. Wrong tape, or tape applied to dry paper, gives a false sense of security.
Which Tape Actually Works
Gummed brown tape is the only reliable option for securing paper through serious wet work. Artists on WetCanvas confirm: “brown gummed tape is the only tape that can be used to stretch watercolour paper.”
Masking tape holds under light washes but lifts when the paper swells aggressively. The adhesive isn’t strong enough once the paper starts pulling.
| Tape Type | Holds Under Heavy Washes? | Notes |
|---|---|---|
| Gummed Brown Tape | Industrial Strength: The adhesive is water-activated, meaning it fuses to the paper and board. It will not budge. | Permanent Bond: You cannot peel it off; you must cut the painting out with a blade once dry. The “gold standard” for stretching paper. |
| Masking Tape | Unreliable: The adhesive is rubber-based and often fails the moment water seeps under the edge. | High Risk: Can leave sticky residue or tear the paper surface if left on for more than 24 hours. Use for quick, dry sketches only. |
| Washi Tape | Poor: Designed for low-tack decorative use. Water causes it to float off the paper almost instantly. | Aesthetic Only: Great for creating clean borders on dry media, but essentially useless for holding paper tension during a wash. |
| Painter’s Tape (Blue/Green) | Moderate: Designed for “clean release.” It holds better than masking tape but will “buckle” if the paper gets too saturated. | The “Daily Driver”: Best for 140lb paper that isn’t being fully submerged. “Detack” it on your sleeve before applying to avoid tearing. |
Taping Two Edges vs. All Four
Taping only two opposite edges leaves the paper free to buckle perpendicular to the taped sides. It still warps, just in a different direction.
All four edges need securing for taping to work as a genuine warp prevention method. Half-measures give half results.
Clip-On Stretcher Frames
Canvas stretcher bars with clips designed for paper are an increasingly popular no-tape option. The paper is soaked, then folded around the stretcher frame and clipped or stapled at the back, similar to stretching a canvas.
This works well for artists who paint frequently and want a reusable system. The paper stays under consistent tension throughout the session. When the painting is dry, it can be removed without cutting through the image area.
These are available from most art supply retailers and are worth considering if you find the gummed tape method messy or fiddly. If you’re still figuring out watercolour materials that suit your workflow, this is one of the more practical upgrades to test early.
Fixing Warping in a Finished Painting Without Damage
A completed painting introduces one problem that earlier sections don’t: the pigment layers. Water that re-wets the back can creep through to the front, especially on lighter paper. Granulating colours shift. Blooms reopen.
The goal is to relax the paper fibres just enough to press flat, without disturbing what’s on the front surface.
Face-Down Humidification
The safest starting point for a finished piece. No direct water contact with the painted surface.
- Let the painting dry completely first. At least 24 hours, longer in humid conditions.
- Lay it face-down on a clean, smooth surface (not textured).
- Hold a lightly damp cloth over the back without touching it, or use a fine-mist spray from roughly 30cm away.
- The back should feel barely damp, not wet.
Proceed straight to pressing. If the paper stays damp without weight on top, it can buckle further or, in a sealed environment, develop mould. Paintloving Art notes that over-humidifying risks exactly this outcome.
Pressing Under Glass Plates
Glass distributes weight evenly across the full surface. Heavy books create pressure points. That matters on paper that has cockled deeply, where uneven weight pushes ridges rather than flattening them.
Process: place the lightly humidified painting face-up between two sheets of acid-free blotting paper. Lay a sheet of clean glass (or a rigid flat board) on top. Leave undisturbed for a minimum of 48 hours. Check at 24 hours. If still buckled, re-mist the back and continue pressing.
According to Golden Materials, the key is “even coverage of dampness (not puddles of water)” and keeping moisture strictly to the back to avoid re-wetting the painted surface.
How Long Flattening Takes
| Warp Severity | Method | Expected Time |
|---|---|---|
| Light Bow | Dry Pressing: Placing the painting under a heavy, flat object (like a stack of books) without adding moisture. | 24–48 hours. Best for minor “curling” caused by humidity changes. |
| Moderate Buckling | Back-Misting: Lightly misting the back of the painting with distilled water, then pressing between clean boards. | 48–72 hours. The fibers need to relax and then “reset” their memory under pressure. |
| Severe Cockling | Cycle Pressing: Multiple rounds of light misting, blotting, and heavy pressing with frequent paper changes. | Up to 1 week. Essential for salvage work where “deep valleys” have formed in the paper. |
Some paper types, particularly lighter cellulose sheets, will re-buckle slightly after removal from the press if the ambient humidity is high. Repeating the process once usually resolves it.
What Not to Do on Finished Paintings
Direct water contact on a finished surface is the main risk. Even 300gsm cotton paper can let moisture bleed through from the back if soaked heavily.
Avoid:
- Running water over the painted side
- Placing the painting face-down on an absorbent surface while damp (the texture transfers)
- Using heat directly on the front surface
- Pressing with plastic film against the paint (sticks to wet pigment)
For museum-quality or high-value work, paper conservators use a formal humidification chamber method. Stephanie Watkins documented this approach in the Book and Paper Group Annual (2002), which is the reference professional conservators still cite. For finished paintings you genuinely care about, that route is worth knowing.
If you want to take things further, understanding how to properly frame watercolour paintings after flattening matters as much as the flattening itself. Acid-free mounting materials and UV glass are what stop the warping problem from returning inside the frame.
Common Mistakes That Make Warping Worse
Most warp-related disasters aren’t caused by the painting itself. They’re caused by shortcuts taken during preparation or fixing attempts. A few of these are so common they’re worth naming directly.
Using Masking Tape Instead of Gummed Tape
Masking tape looks convincing when dry. It fails the moment the paper swells under a heavy wash. Watercolor Affair is blunt about this: “taping the paper with masking tape before soaking defeats the purpose completely.”
Winsor and Newton list it as one of the four most common reasons paper fails to stretch. The adhesive isn’t designed for wet paper under tension. When the sheet pulls against it, masking tape lifts.
Fix it once: buy a roll of brown gummed tape and use it every time. It costs almost nothing and solves the problem permanently.
Applying Heat Directly to the Painted Surface
An iron set on medium-low with a damp cloth on the back is useful. An iron pressed onto the front of a finished painting is not.
Direct heat causes two problems. First, certain pigments (cadmium yellows, some organic reds) shift in hue under sustained heat. Second, the surface texture of cold press paper can flatten under direct heat, changing how light reflects off the painting.
Always iron from the back. Always use a damp cloth as a buffer. Never skip the test patch.
Not Soaking Paper Long Enough Before Stretching
Under-soaked paper looks flat when dry but still cockles when painted on. This is one of the most common frustrations for artists who stretch their paper and still get warping.
Pullingers confirms it in their stretching guide: “The paper has not soaked long enough. It looks flat when dry but still cockles when painted on.” Jerry’s Artarama recommends soaking for 5-10 minutes depending on weight. Heavier paper needs closer to 15-20 minutes.
Storing Finished Paintings Rolled or in Humid Conditions
Rolling causes paper warp. It also creates friction that damages surface fibres and pigment. The fix here costs nothing except a flat drawer or portfolio.
Humidity is the less obvious storage problem. Paper is hygroscopic. It absorbs moisture from the air. A painting stored in a bathroom, a basement, or a sealed plastic sleeve will re-warp as ambient humidity fluctuates.
Best practice, according to Lawrence Art Supplies and Alabama Art Supply, is:
- Store flat and horizontal, never rolled or stood vertically
- Use acid-free glassine sheets between paintings, not plastic
- Keep away from direct sunlight, heat sources, and damp environments
A plan chest is the ideal storage solution. But a flat cardboard box in a cool, dry room works fine for most artists. The medium itself, as explored across watercolour painting techniques, is more forgiving than people assume when the fundamentals of paper handling are right.
Drying the Board Upright Instead of Flat
This one catches beginners out repeatedly. After stretching paper and taping it to a board, standing the board upright to dry causes moisture to run downward. The lower gummed tape gets saturated before it bonds, the upper portion dries under tension, and the paper pulls unevenly.
Winsor and Newton flag this directly: boards or frames “stood upright to dry” cause the water to run to the bottom, pulling the paper away from the top edge.
Always dry flat. No exceptions.
Painting on Paper That Is Still Slightly Damp
Impatience. That’s all this is. And it’s one of the more common reasons stretched paper still warps.
Paper that feels dry to the touch at the surface can still hold residual moisture in the fibre core, especially in humid rooms. Adding water from a wash before those fibres have fully dried and tightened causes the paper to buckle again. The stretching process only works if the paper has dried completely taut before the brush touches it.
Leave it overnight. If the room is humid, leave it longer. If you’re unsure, preventing watercolour paper from warping in the first place is considerably easier than fixing it after the fact. Most of the work happens before you open the paint.
FAQ on How To Fix Watercolour Paper Warping
Why does watercolour paper warp when wet?
Paper fibres absorb moisture unevenly. The wet side expands while the dry underside stays rigid, creating tension that pulls the sheet into a buckled arch. Once dry in that position, the paper cockling becomes fixed.
Can you flatten watercolour paper after it has dried?
Yes. Lightly mist the back with clean water, place face-down between acid-free sheets, and press under heavy flat boards for 24-48 hours. This relaxes the fibres and lets them dry flat under consistent pressure.
Does paper weight affect how much watercolour paper warps?
Significantly. Paper at 300gsm (140lb) or heavier resists buckling far better than lighter sheets. At 640gsm (300lb), warping is minimal even under heavy washes, and pre-stretching is rarely needed.
Is gummed tape better than masking tape for stretching paper?
Yes. Masking tape lifts under wet washes. Brown gummed tape bonds tightly as it dries and holds paper under tension. It must be cut off rather than peeled once the painting is complete.
How long should you soak watercolour paper before stretching?
Standard 300gsm paper needs 5-10 minutes. Heavier sheets, 425gsm and above, need 15-20 minutes. Under-soaking is one of the most common reasons stretched paper still buckles during a painting session.
Do watercolour blocks prevent warping?
They reduce it significantly. The glued edges on all four sides act as built-in tension, similar to stretching. Brands like Arches and Fabriano produce blocks in both cold press and hot press surfaces.
Can you iron warped watercolour paper flat?
Yes, carefully. Use low heat, no steam directly on paint. Place a damp cloth against the back only and move the iron in slow, even passes. Always test on a corner first to check pigment stability.
Does cotton paper warp less than cellulose paper?
Cotton rag paper expands more predictably and returns closer to flat as it dries. Cellulose paper warps more aggressively under heavy washes and is more prone to pilling when reworked.
How do you fix warping in a finished watercolour painting without ruining it?
Mist the back lightly, never the front. Press face-up between blotting paper under glass plates for 48-72 hours. For valuable work, a professional paper conservator uses a formal humidification chamber to avoid any risk to the painted surface.
How should you store watercolour paintings to prevent warping?
Always store flat and horizontal, never rolled or stood vertically. Use acid-free glassine sheets between paintings and keep them in a cool, dry space away from humidity, direct sunlight, and heat sources.
Conclusion
This conclusion is for an article presenting the full range of solutions to watercolour paper warping, from paper selection and stretching to fixing a finished piece without damaging the paint.
The right paper weight makes a real difference. Cotton rag paper at 300gsm or above handles moisture far better than lightweight cellulose, and that choice alone cuts most warping problems before they start.
For prevention, gummed tape stretching and watercolour blocks are the most reliable methods. For fixes, controlled back-humidification and glass-plate pressing work on most severity levels.
Store paintings flat, use acid-free materials, and keep them away from humidity. Good paper handling is a habit, and once it clicks, buckling stops being a recurring problem.