You don’t need thousands of dollars to create a functional art studio at home. Most aspiring artists think they need expensive equipment and perfect spaces before starting their creative practice.
Smart planning beats big budgets every time when you know how to set up a home art studio effectively.
Professional artists work in converted garages, spare bedrooms, and even corner spaces. The key lies in thoughtful organization and strategic supply choices rather than premium materials.
This guide shows you how to build a productive creative workspace without breaking your budget. You’ll discover furniture alternatives, lighting solutions, and storage systems that cost significantly less than commercial art studio setups.
From essential furniture and lighting to safety considerations and organization systems, every section focuses on practical solutions that real artists use daily.
Whether you work with watercolor painting, acrylic painting, or mixed media, these strategies adapt to your chosen artistic medium and available space.
Essential Furniture and Storage Solutions

Work Surfaces That Won’t Break the Bank
Finding the right work table doesn’t require spending hundreds. A simple folding table from the hardware store works great for many painting mediums.
DIY easel alternatives save serious money. Two sawhorses with a piece of plywood create a sturdy work surface for under $40. Adjust the height by choosing different sawhorse sizes.
Smart Easel Solutions
Look for used easels at garage sales and estate sales. Art students often sell their gear when graduating. Check Facebook Marketplace regularly.
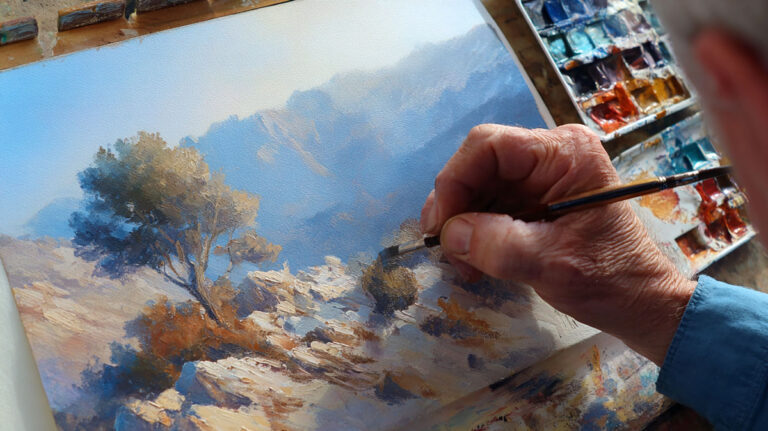
Table easels cost less than standing versions. They work perfectly for smaller canvases and detailed work. Many artists prefer them for watercolor painting and sketching.
Seating That Supports Long Sessions
Your back matters more than your budget. A decent office chair from a thrift store beats an expensive stool that kills your spine.
Adjustable height is key. Look for chairs with good lumbar support. Add cushions if needed.
Storage Systems on a Shoestring
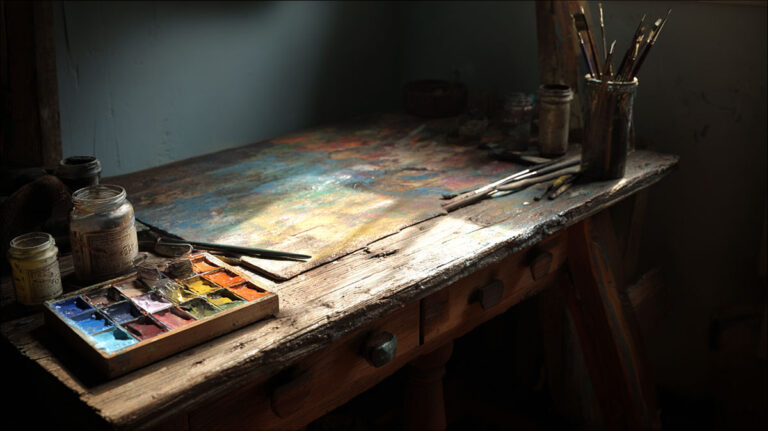
Mason jars organize brushes and small tools perfectly. They’re cheap, stackable, and you can see everything inside.
Pegboard systems transform any wall into organized storage. Buy the board at any home improvement store. Add hooks as needed.
Plastic drawers from discount stores work great for paints and supplies. Label everything so you can find what you need quickly.
Flat File Alternatives
Large portfolios cost too much for most beginners. Build simple flat storage using cardboard portfolio sleeves and a shallow drawer or under-bed storage box.
Pizza boxes (clean ones) actually work for storing smaller paintings and sketches. Art teachers have used this trick for decades.
Vertical Storage Magic
Wall-mounted shelves maximize your space. Install them high enough that you won’t bump your head while working.
Create a drying rack using wooden dowels and a frame. Much cheaper than commercial versions and works just as well.
Lighting Your Studio Affordably

Maximizing Natural Light
Position your workspace near the biggest window available. North-facing light stays consistent throughout the day.
Mirrors redirect sunlight into darker corners. Place them opposite windows to bounce light around the room.
Sheer curtains diffuse harsh afternoon sun. Much better than working in direct sunlight that creates harsh shadows.
Budget Artificial Lighting
LED daylight bulbs make the biggest difference in color accuracy. Replace regular bulbs in existing fixtures first.
Clamp-on shop lights from hardware stores work brilliantly. They’re adjustable, bright, and cost under $20 each.
Multiple Light Sources
One overhead light creates shadows. Three light sources eliminate them. Position lights at different angles around your work area.
Desk lamps with adjustable arms let you direct light exactly where needed. Buy used ones and upgrade the bulbs to daylight LEDs.
Color Temperature Matters
Warm light (3000K) makes colors look yellow. Cool daylight (5000-6500K) shows true color relationships.
Test your lighting by holding up a white piece of paper. It should look white, not yellow or blue.
DIY Light Box
Build a simple light box for photographing artwork. Use a cardboard box, white fabric, and a few LED strips. Total cost under $30.
Good documentation matters for your portfolio. Proper lighting makes amateur photos look professional.
Budget-Friendly Art Supplies and Materials

Starting Smart with Student-Grade Materials
Student-grade paints cost half as much as artist-grade versions. Perfect for learning and experimenting. Upgrade to professional materials as your skills develop.
Focus money on brushes instead of expensive paints. Good brushes last years with proper care. Cheap brushes frustrate beginners.
Essential Supply List
Start with primary colors plus white and black. Primary colors mix into everything else you need.
One good flat brush and one round brush handle 90% of painting tasks. Add specialty brushes as you discover specific needs.
Finding Deals on Art Supplies
End-of-summer sales at craft stores offer huge savings. Stock up on basics when they’re 50-70% off.
Buying in bulk reduces per-unit costs. Split large purchases with other artists in your area.
Teacher supply stores often sell to the public. Their prices beat regular retail stores.
Making Your Own Materials
Mix your own painting mediums instead of buying expensive commercial versions. Basic recipes use common ingredients.
Prime your own canvases with gesso for fraction of pre-primed costs. Canvas rolls cost less than pre-stretched versions.
Smart Shopping Strategies
Generic brands work fine for basic supplies. Save premium purchases for items that directly affect your work quality.
Palette knives last forever with basic care. Invest in one good knife rather than a set of cheap ones.
Canvas and Surface Options
Canvas boards cost less than stretched canvases. Great for practice work and studies.
Paper works for acrylic painting too. Watercolor paper handles multiple mediums surprisingly well.
Scrap wood makes excellent painting surfaces. Sand it smooth and apply gesso. Many famous artists painted on wood panels.
Brush Care Extends Life
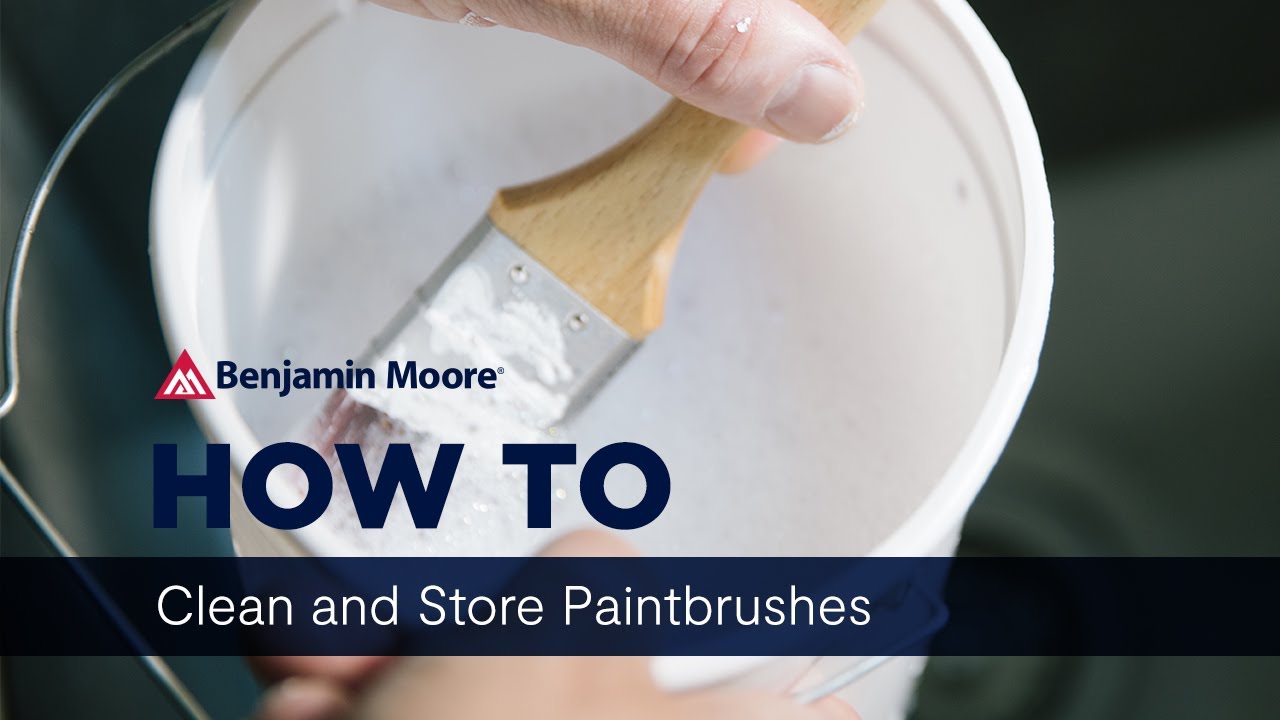
Clean brushes immediately after use. Dried paint ruins bristles permanently.
Brush soap costs little but extends brush life dramatically. Bar soap works in a pinch.
Store brushes with bristles up or flat. Never leave them standing in water.
Thrift Store Treasures
Look for vintage art supplies at estate sales. Old brushes and palettes often outlast modern versions.
Unique containers and organizers show up at thrift stores regularly. Think creatively about storage solutions.
Building Your Collection Gradually
Add one new color each month instead of buying complete sets. Learn each pigment thoroughly.
Quality over quantity applies to every art supply decision. Three good brushes beat twenty cheap ones.
Start small and expand as your interests develop. You’ll waste less money on supplies you never use.
Organization and Workflow Setup

Creating Efficient Work Zones
Separate wet and dry work areas to prevent cross-contamination. Keep watercolor painting supplies away from charcoal and pastels.
Zone your space by activity rather than by supply type. One area for sketching, another for painting, a third for cleanup.
Supply Organization by Frequency
Daily-use items stay within arm’s reach. Weekly supplies go in nearby storage. Monthly items can live further away.
Rolling carts move supplies where you need them. Much better than carrying armloads of materials back and forth.
Setting Up Cleanup Stations
Dedicate one area specifically for washing brushes and tools. Keep it separate from your main work surface.
Old towels and rags need their own container. Paper towels get expensive fast when you’re cleaning constantly.
Drying and Storage Areas
Wet paintings need space to dry safely. Wall-mounted racks work better than floor easels that tip over.
Flat drying systems handle multiple pieces simultaneously. Build simple ones using window screens and wooden frames.
Mobile Organization Solutions
Supply caddies let you work anywhere in your space. Load them with current project materials.
Tackle boxes organize small items perfectly. Artists have borrowed this idea from fishermen for decades.
Reference Material Systems
Inspiration boards keep visual references visible while you work. Pin up photos, sketches, and color samples.
File folders organize reference photos by subject. Label everything clearly so you can find landscapes or portraits quickly.
Project Transition Planning
Clean up completely between projects. Starting fresh prevents muddy colors and confused compositions.
Set timers for cleanup sessions. Fifteen minutes of organization saves hours of searching later.
Safety and Ventilation Considerations

Budget Ventilation Solutions
Open windows create cross-ventilation for free. Position fans to pull fumes away from your breathing space.
Work outdoors when possible, especially with solvents and oil painting mediums. Fresh air beats any indoor ventilation system.
Basic Air Circulation
Box fans in windows move surprising amounts of air. One pulls fresh air in, another exhausts stale air out.
Ceiling fans help circulate air throughout the room. Run them even when working with water-based paints.
Material Safety Basics
Read labels on everything before using. Many art materials contain warnings that beginners ignore.
Ventilation requirements vary by medium. Acrylics need less airflow than oil paints or spray fixatives.
Protective Equipment on a Budget
Disposable gloves protect your hands from staining and chemical absorption. Buy them in bulk for better prices.
Aprons save your clothes and prevent skin contact with paints. Old shirts work fine too.
Safe Storage Practices
Flammable materials need metal containers, not plastic ones. Turpentine and solvents can melt through plastic.
Keep materials cool and dry. Heat accelerates chemical reactions that can create dangerous fumes.
Fire Safety Essentials
Oily rags spontaneously combust if stored improperly. Spread them out to dry or store in water-filled metal containers.
Small fire extinguisher costs less than replacing your entire studio. Mount it where you can reach it quickly.
Chemical Disposal
Never pour solvents down drains. Most communities have hazardous waste collection days for proper disposal.
Used paint water needs special handling too. Let solids settle, then dispose of water and dried paint separately.
Emergency Preparedness
Keep a first aid kit in your studio. Include eye wash solution and burn gel for common art-related injuries.
Phone numbers for poison control should be posted visibly. Some paint ingredients require immediate medical attention.
Technology Integration Without Breaking the Bank

Smartphone Photography Setup
Document your work with your phone camera. Good lighting matters more than expensive equipment.
DIY photo backgrounds use white poster board or fabric. Natural light near windows works better than artificial lighting.
Free Photo Editing Software
GIMP provides professional editing capabilities without the cost. Takes time to learn but handles most needs.
Smartphone apps like Snapseed offer quick corrections. Adjust brightness and color balance easily.
Digital Portfolio Creation
Free websites like Behance showcase your work professionally. Upload high-resolution images for best results.
Social media portfolios reach wider audiences than traditional websites. Instagram works especially well for visual art.
Online Learning Resources
YouTube tutorials teach specific techniques for free. Search for your exact medium and skill level.
Library databases often include art instruction videos. Many libraries offer free access to premium educational content.
Virtual Art Communities
Facebook groups connect you with other artists locally and globally. Share work, ask questions, get feedback.
Online critique groups help improve your work. Constructive feedback accelerates learning more than working in isolation.
Music and Audio Setup
Bluetooth speakers eliminate cord tangles while you work. Battery-powered versions move anywhere in your space.
Podcast listening makes routine tasks more enjoyable. Many art-focused shows offer technique tips and inspiration.
Digital Color Tools
Color picker apps help you match real-world colors in your paintings. Point your phone at any object to get exact color values.
Virtual color wheel apps demonstrate color theory principles interactively. Better than static printed versions.
Inventory Management
Simple spreadsheets track your art supply inventory. Know what you have before shopping for more materials.
Photo your supply storage areas. Visual inventory helps when you’re at the art store wondering what you need.
Time Tracking Tools
Phone timers help you work in focused sessions. Twenty-minute painting sprints build skills faster than marathon sessions.
Progress documentation shows improvement over time. Take photos of work at different stages to see your development.
Basic Lighting Documentation
Natural light changes throughout the day. Note which hours provide the best working conditions in your space.
Different seasons affect your natural light quality. Document these changes to plan your work schedule accordingly.
Personalizing Your Creative Environment

Creating Inspiring Atmosphere
Display your own artwork for daily motivation. Even failed paintings remind you of lessons learned and growth achieved.
Color psychology affects your mood while working. Warm colors energize, cool colors calm your mind during detailed work.
Building Visual Inspiration
Collect images that spark ideas. Magazine clippings, postcards, and printed photos cost nothing but fuel creativity constantly.
Create mood boards for different projects. Pin up color combinations and compositional ideas that match your current artistic goals.
Plant Selection for Studios
Choose plants that thrive in your lighting conditions. Snake plants and pothos handle low light situations well.
Avoid flowering plants near your work area. Pollen settles on wet paint and creates texture problems.
Personal Collections Display
Show objects that inspire your work. Shells, rocks, interesting textures, and found objects provide endless reference material.
Arrange collections where you can see them while working. Visual references spark new ideas mid-painting.
Comfort Zones for Breaks
Set up a reading corner with art books and magazines. Comfortable seating encourages you to study techniques and art history.
Good lighting in your rest area matters too. You’ll spend time looking at reference materials and sketching ideas.
Reflecting Your Style
Let your artistic personality show in your space design. Abstract artists might prefer minimal, clean lines while impressionism fans embrace softer, flowing elements.
Color choices for walls and furniture should support, not compete with your artwork. Neutral backgrounds let your paintings shine.
Memory and Motivation Walls
Create a progress wall showing work from different time periods. Seeing improvement motivates you through difficult learning phases.
Pin up favorite quotes about art and creativity. Words from master artists provide encouragement during frustrating sessions.
Workspace Personality
Add personal touches that make the space uniquely yours. Family photos, travel souvenirs, or meaningful objects create emotional connections.
Your creative space should feel like home, not a sterile workshop. Comfort breeds creativity.
Seasonal Adaptations
Winter Comfort Solutions
Cold spaces kill creativity fast. Space heaters warm small areas efficiently without heating entire rooms.
Warm lighting combats winter blues. Replace cool daylight bulbs with slightly warmer versions during darker months.
Layer clothing instead of cranking heat. Fingerless gloves let you work while keeping hands warm.
Summer Heat Management
Fans prevent paint from drying too quickly in hot weather. Slow drying time allows better blending and color mixing.
Window coverings block harsh summer sun. Work during cooler morning and evening hours when possible.
Spring and Fall Opportunities
Open windows during mild weather. Fresh air improves both your health and your artwork quality.
Outdoor painting setups expand your creative possibilities. Even apartment dwellers can work on balconies or patios.
Adapting Your Lighting
Seasonal light changes affect color perception. Adjust your artificial lighting to compensate for shorter winter days.
Track which times of day provide the best natural light in each season. Plan detailed color work accordingly.
Storage Rotation
Rotate seasonal supplies to keep current materials accessible. Store summer plein air gear during winter months.
Seasonal cleaning prevents dust buildup and keeps your space fresh. Deep clean between major projects or seasons.
Temperature and Humidity Control
Monitor room conditions with simple gauges. Paint behaves differently in various temperatures and humidity levels.
Materials expand and contract with temperature changes. Store canvases and boards flat to prevent warping.
FAQ on How To Set Up A Home Art Studio
What’s the minimum space needed for a home art studio?
You can create a functional art workspace in as little as 4×4 feet. Corner spaces work perfectly for most painting mediums. Focus on vertical storage and mobile supply carts to maximize small areas. Many professional artists started in tiny spaces.
How much money do I need to set up a basic home studio?
A basic home art studio costs between $200-500 for essentials. Budget-friendly alternatives like DIY easels and secondhand furniture reduce costs significantly. Start with student-grade supplies and upgrade gradually as your skills develop.
What’s the most important piece of furniture for an art studio?
A sturdy work table matters more than an expensive easel. Adjustable height surfaces accommodate different projects and mediums. Folding tables with sawhorses provide flexibility and storage underneath when not in use.
How do I get proper lighting without spending a fortune?
Position your workspace near north-facing windows for consistent natural light. LED daylight bulbs in clamp-on fixtures provide affordable artificial lighting. Multiple light sources eliminate shadows better than one expensive studio light.
What art supplies should I buy first on a tight budget?
Start with primary colors plus white and black paint. One flat brush and one round brush handle most painting tasks. Student-grade materials work fine for learning. Add supplies gradually as you identify specific needs.
How do I organize art supplies in a small space?
Use vertical wall storage with pegboards and shelves. Mason jars and plastic drawers organize small supplies affordably. Mobile carts move supplies where needed. Label everything so you can find materials quickly during creative sessions.
What about ventilation when working with paints and solvents?
Open windows and use fans to create cross-ventilation for free. Work outdoors when using oil painting solvents. Box fans positioned strategically move surprising amounts of air. Avoid working with strong chemicals in closed spaces.
How do I photograph my artwork without expensive equipment?
Use natural light near windows for best results. Smartphone cameras capture artwork adequately with proper lighting. White poster board creates clean backgrounds. Avoid direct sunlight which creates harsh shadows and color distortion.
Can I convert a garage or basement into an art studio?
Garages and basements work well with proper preparation. Insulation and heating make them comfortable year-round. Address humidity issues to protect supplies. Ensure adequate lighting and ventilation before setting up your creative workspace.
What safety equipment do I need for a home art studio?
Keep a small fire extinguisher nearby for oil painting and solvent use. Disposable gloves protect hands from paint absorption. Store flammable materials in metal containers. Have a first aid kit accessible for minor cuts and burns.
Conclusion
Learning how to set up a home art studio doesn’t require perfect conditions or unlimited funds. Smart planning beats expensive equipment every time when creating your creative workspace.
Your artistic journey starts with taking action, not waiting for ideal circumstances. Transform any available space into a functional studio using the strategies outlined above.
Remember that famous artists like Vincent van Gogh and Georgia O’Keeffe created masterpieces in simple spaces. Your studio setup matters less than consistent practice and creative dedication.
Start small and expand gradually as your skills develop. Focus money on quality brushes rather than expensive easels. Good organization systems save more time than premium storage furniture.
Safety and proper ventilation protect both your health and artwork quality. Document your progress through smartphone photography and build connections with other artists online.
Most importantly, make your creative space reflect your personality. Whether you work in abstract or realism, your environment should inspire daily practice and artistic growth.