Most painters jump straight to canvas without proper preparation, then wonder why their finished works lack strong composition and convincing proportions. Learning how to sketch before painting solves these fundamental problems before expensive materials get wasted.
Preliminary drawing techniques separate struggling artists from confident painters. Masters like Leonardo da Vinci and Rembrandt van Rijn built their masterpieces on solid sketching foundations.
Proper sketching methods prevent costly mistakes while building essential visual problem solving skills. You’ll discover specific materials, proven techniques, and composition planning strategies that transform rough ideas into successful paintings.
This guide covers everything from basic gesture drawing practice to advanced value studies, plus common mistakes that sabotage otherwise promising artwork.
Essential Sketching Materials for Painters

Traditional Sketching Tools That Work Best
Graphite pencils remain the foundation of preliminary drawing techniques. Different grades serve specific purposes in your artistic workflow improvement.
Hard pencils (2H-4H) create light, precise marks for initial composition planning. Soft grades (2B-6B) build darker values and shadow mapping exercises.
Charcoal excels at rapid value studies and gesture drawing practice. It forces you to think in masses rather than lines, which translates beautifully to painting.
Colored pencils help with basic color placement studies. They’re particularly useful when planning complementary colors or testing analogous color schemes.
Ink pens build confidence through their unforgiving nature. Once that mark hits paper, you commit. This confidence carries over to brush handling.
Paper Choices That Support Your Painting Goals
Newsprint works perfectly for quick gesture studies. Its rough texture catches charcoal beautifully and won’t break the bank during those 30-second sketching sessions.
Bristol board handles detailed preliminary work without warping. The smooth surface allows for precise contour drawing exercises and measurement techniques.
Toned paper speeds up value studies. You start with a middle tone and work both lighter and darker. Gray paper particularly helps when planning chiaroscuro effects.
Canvas paper provides texture similar to your final painting surface. This helps you understand how marks will behave when you switch to actual oil painting or acrylic painting surfaces.
Digital Sketching Options for Modern Painters
Tablets offer unlimited experimentation without material costs. You can test dozens of composition ideas without wasting expensive paper.
Layer systems let you separate different elements. Try your focal point on one layer, background on another. This helps understand how elements interact in pictorial space.
Color picker tools help plan your color harmony before you mix expensive pigments. Test different color temperature relationships digitally first.
Software that mimics traditional media bridges the gap between digital planning and physical painting. Some programs even simulate how different painting mediums behave.
Basic Sketching Techniques Every Painter Should Master
Gesture Drawing for Capturing Movement and Energy
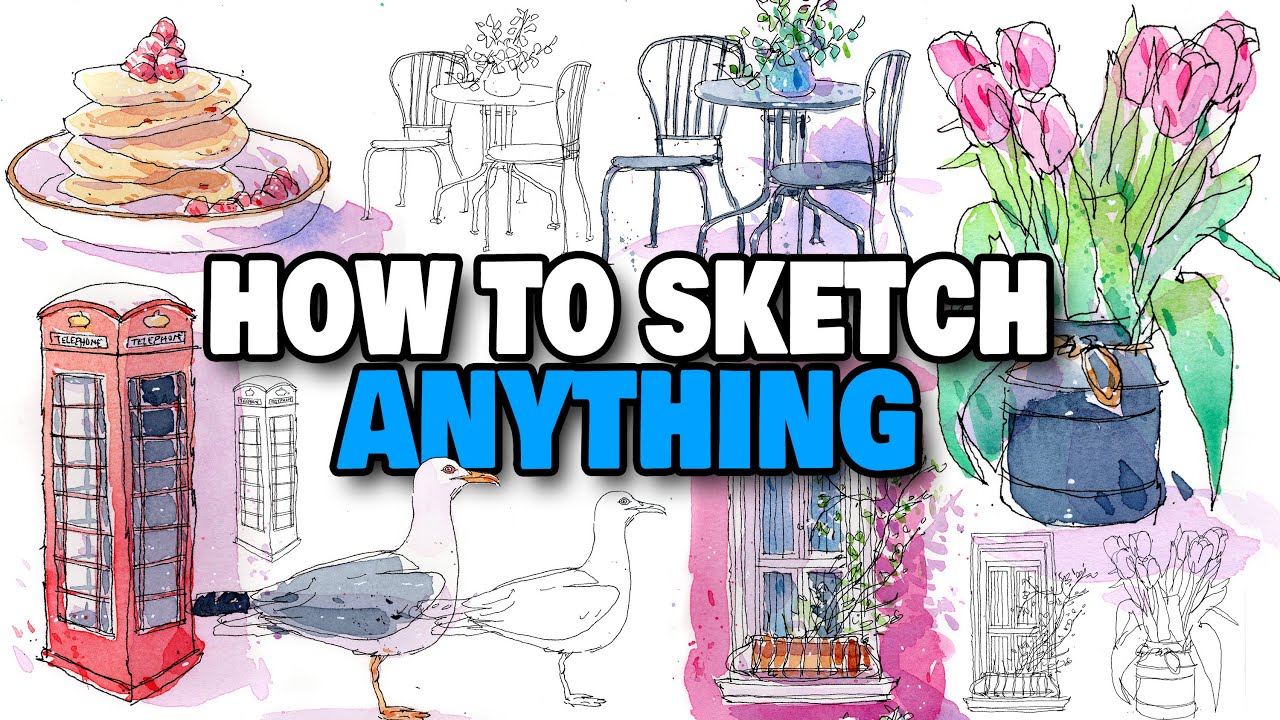
30-second sketches force you to capture only what matters most. No time for details. Just the essential gesture drawing that gives life to your subject.
The line of action runs through your entire subject. Find it first. Everything else builds around this central energy.
Basic shapes form the foundation. See your subject as cylinders, spheres, and cubes initially. Details come later in the painting process.
Rapid mark-making builds confidence with your tools. Whether pencil or brush, the hand needs practice making decisive marks.
Contour Drawing for Accurate Shape Recognition
Blind contour exercises disconnect your analytical mind. Draw what you see, not what you think you know. This hand-eye coordination translates directly to brush control.
Modified contour drawing balances accuracy with speed. You can glance at your paper occasionally while maintaining focus on observation.
Cross-contour lines describe form in space. These lines follow the surface of your subject, helping you understand volume before you paint it.
Negative space awareness prevents common proportion errors. Sometimes drawing the spaces between objects proves more accurate than drawing the objects themselves.
Value Studies for Light and Shadow Planning
Three-value thumbnail sketches simplify complex lighting. Light, medium, dark. That’s it. This forces you to make clear decisions about your value scale.
Five-value studies add nuance while maintaining clarity. Too many values create mud in both sketches and paintings.
Squinting eliminates details and reveals the underlying value structure. Half-closed eyes show you what really matters for your composition.
Light source identification comes first. Every shadow, every highlight depends on understanding where your light originates and how it travels.
Proportion and Measurement Methods
Sight-size measuring with pencil or brush creates accurate proportions. Hold your tool at arm’s length and compare relative sizes.
Grid systems help with complex subjects. Divide your reference and drawing surface into equal sections. This method has been used since the Renaissance period.
Basic figure proportions follow the traditional 8-head method. Even if you’re not painting figures, understanding these relationships improves all your observational skills.
Perspective basics prevent common spatial errors. One-point and two-point perspective create believable space in visual art.
Planning Your Composition Through Sketching

Thumbnail Sketches for Composition Exploration
Multiple small sketches (2×3 inch format) let you explore options quickly. Try at least six different approaches before committing to your painting.
Rule of thirds application in thumbnails creates more dynamic arrangements. Avoid centering everything.
Focal point placement experiments help you understand where the eye naturally lands. Test different positions for your main subject.
Format decisions happen at the thumbnail stage. Horizontal versus vertical orientation dramatically changes how viewers experience your work.
Value Pattern Development
Light, medium, dark distribution creates the foundation of strong compositions. Aim for one dominant value with the other two supporting it.
Strong value contrast at your focal point draws attention immediately. Plan this relationship in your sketches first.
Connecting similar values across your composition creates unity and flow. Your eye moves smoothly from one area to another.
Spotty value patterns destroy compositional strength. Cluster your darks and lights rather than sprinkling them randomly.
Leading Lines and Movement Flow
S-curves create natural movement through your painting. Rivers, paths, and fabric folds often follow these graceful paths.
Diagonal lines add dynamic energy. They create tension and excitement compared to stable horizontal and vertical elements.
Directional lines guide the viewer’s eye through your composition. Plan these carefully in your preliminary sketches.
Eye path planning ensures viewers see your painting in the order you intend. Test this with your thumbnail studies.
Negative Space Consideration
Shapes between objects matter as much as the objects themselves. These negative shapes can make or break your composition.
Background integration with foreground creates cohesive designs. Avoid treating backgrounds as afterthoughts.
Large empty areas need visual interest or purposeful simplification. Plan how you’ll handle these spaces before you start painting.
Balance often depends more on negative space distribution than positive shapes. Sketch these relationships first.
Master painters like Leonardo da Vinci and Michelangelo Buonarroti relied heavily on preliminary drawings. Their sketches reveal the thinking process behind masterpieces.
Modern artists working in different painting styles still benefit from this foundation. Whether you’re pursuing realism or abstract work, strong preliminary sketches improve your results.
The observational drawing practice strengthens visual perception exercises. This foundation supports whatever artistic skill development path you choose.
Creative planning strategies through sketching prevent costly mistakes with expensive materials. A few minutes with pencil and paper saves hours of painting frustration.
Subject-Specific Sketching Approaches

Portrait and Figure Sketching Preparation
Basic head construction starts with simple geometric shapes. Oval for the skull, rectangle for the jaw area.
Feature placement guidelines follow consistent proportions. Eyes sit halfway down the head, not higher where most beginners place them.
Body gesture and proportion require understanding basic anatomy. The 8-head figure measurement system provides reliable framework for proportional accuracy.
Clothing fold patterns simplify into basic cylindrical forms. Think of fabric wrapping around underlying body structures rather than random wrinkles.
Master portraitists like Johannes Vermeer and Diego Velázquez built their paintings on solid drawing foundations. Their preliminary studies reveal careful attention to proportional relationships.
Landscape and Nature Study Techniques
Horizon line placement dramatically affects your composition’s mood. High horizons create intimate ground views, low horizons emphasize sky drama.
Tree and foliage simplification requires seeing masses before details. Block in overall shapes first, add branch structure later.
Water surface and reflection basics follow simple rules. Reflections appear directly below their sources, slightly darker than the reflected objects.
Cloud formation patterns follow atmospheric perspective principles. Distant clouds appear smaller, lighter, and less defined than foreground formations.
Artists working en plein air like Claude Monet relied on quick gesture studies to capture changing light conditions. Their sketches served as memory aids for studio work.
Still Life Arrangement and Study
Object relationship planning happens before you set up your actual arrangement. Quick thumbnail sketches test different groupings and scale relationships.
Light setup sketching helps you understand how illumination affects form and creates dramatic interest.
Fabric and texture indication requires understanding surface characteristics. Smooth objects reflect light differently than rough surfaces.
Background integration choices prevent your objects from floating in space. Plan how backgrounds support rather than compete with your main subjects.
Paul Cézanne revolutionized still life through careful structural analysis. His preliminary drawings show objects reduced to basic geometric forms.
Abstract and Non-Representational Planning
Shape relationship exploration becomes crucial when realistic reference disappears. Test how different forms interact and create visual tension.
Color interaction studies reveal how hues affect each other across your canvas surface.
Texture and pattern development requires planning repetition and variation elements. Too much similarity creates boredom, too much variety creates chaos.
Balance without realistic subjects depends on visual weight distribution. Dark areas feel heavier than light ones, warm colors advance while cool colors recede.
Artists like Wassily Kandinsky and Piet Mondrian used extensive preparatory studies even for non-representational works.
Transferring Your Sketch to Canvas
Direct Transfer Methods
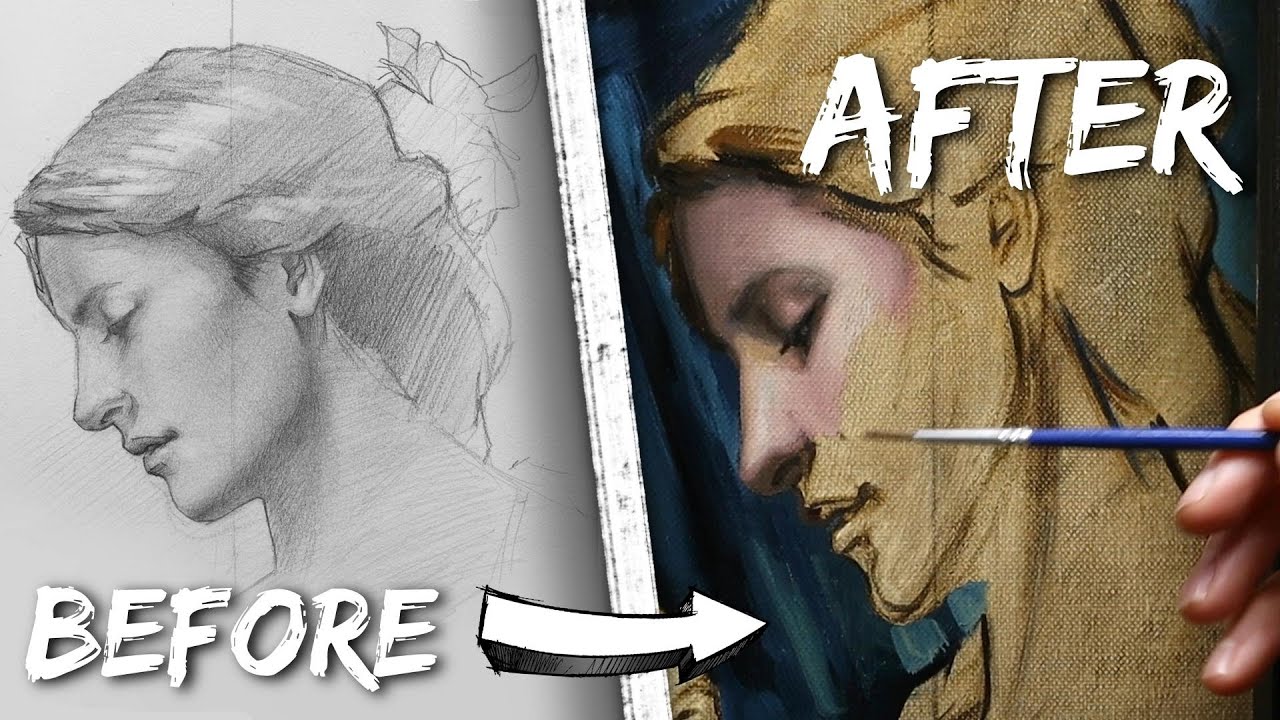
Grid transfer systems ensure accurate scaling from small sketches to large canvases. Divide both surfaces into equal proportions.
Projection techniques work well for very large works. Digital projectors eliminate the need for complex mechanical systems.
Carbon paper transfer preserves your original sketch while creating clean canvas guidelines.
Pouncing methods suit repeated elements or pattern work. Perforate your sketch along key lines, then dust charcoal powder through the holes.
Freehand Translation Techniques
Using sketches as general guides often produces more lively results than exact copies. Your painting can evolve beyond your initial concept.
Maintaining gesture while adjusting details keeps the energy alive. Don’t get bogged down copying every sketch line.
Scale adjustment considerations become important when moving from small thumbnails to full-size works. Some elements need emphasis changes.
Proportional measuring on larger surfaces requires longer measuring tools or stepping back frequently to check relationships.
Renaissance masters like Raphael Sanzio often enlarged their preparatory drawings using grid systems and proportional dividers.
Sketch Integration with Underpainting
Keeping sketch lines visible through initial paint layers provides ongoing reference throughout your painting process.
Value sketches guide your underpainting decisions. Establish major light and dark relationships before adding local colors.
Color temperature mapping from sketches helps plan warm and cool area distribution.
Preserving important sketch information requires strategic planning. Mark critical measurement points and key relationship lines more heavily.
Common Sketching Mistakes That Hurt Your Paintings

Over-Detailing in Preliminary Sketches
Getting lost in unnecessary details wastes time and energy better spent on painting. Sketches should solve problems, not become finished drawings.
Time management in the sketch phase prevents procrastination. Set specific time limits for different sketch types.
Maintaining focus on big picture elements keeps you thinking like a painter rather than a draftsman.
Knowing when sketches provide enough information comes with experience. Stop when you understand your subject’s essential characteristics.
Ignoring Value Relationships
Focusing only on lines without considering light patterns creates flat, unconvincing paintings. Value relationships create depth and drama.
Equal value distribution problems result in spotty, chaotic compositions. Plan dominant value areas in your sketches.
Lack of contrast planning leads to muddy paintings. Test your value patterns with quick thumbnail studies.
Inconsistent light source direction destroys believability. Establish your primary light direction early and stick with it throughout your painting.
Composition Problems That Carry Over
Centered subject placement creates static, boring arrangements. Test off-center positions in thumbnail sketches first.
Tangent problems occur when shapes barely touch or intersect awkwardly. Plan clear overlaps or definite separations.
Size relationship errors make paintings feel unnatural. Use your sketches to test different scale relationships.
Format choice mistakes can doom otherwise good paintings. Horizontal subjects often work better in horizontal formats, though creative exceptions exist.
Scale and Proportion Errors
Head size problems in figure work create immediately obvious issues. Too large or too small heads destroy believability.
Perspective inconsistencies confuse viewers about spatial relationships. Plan your horizon line and vanishing points in preliminary sketches.
Object size relationships require careful observation and measurement. Use your pencil or brush as a measuring tool.
Foreshortening challenges increase dramatically in painted work. Practice these difficult views extensively in sketches first.
Artists throughout history have used preliminary drawings to avoid these common pitfalls. Leonardo da Vinci‘s notebooks contain thousands of preparatory studies, each solving specific visual problems.
Modern painters working in styles from impressionism to photorealism still benefit from careful preliminary planning. Strong sketching skills support any artistic direction you choose to pursue.
The visual problem solving techniques learned through sketching practice translate directly to painting confidence. Each drawing session strengthens your observational skills and hand-eye coordination training.
Building Your Sketching Practice Routine
Daily Sketch Habits That Improve Painting
15-minute morning sessions build consistency without overwhelming your schedule. Quick gesture studies prepare your hand and eye for longer painting sessions.
Value study practice should happen 3-4 times weekly. Start with simple objects under single light sources.
Subject variety planning prevents artistic stagnation. Rotate between portraits, landscapes, and still life arrangements weekly.
Sketch journals document your progress and creative development. Date each entry to track improvement over time.
Combining Sketching with Painting Sessions
Warm-up sketches before painting improve brush control and observation skills. Spend 10 minutes drawing your subject before applying paint.
Problem-solving sketches during painting breaks help when you get stuck. Step away from your easel and work through issues on paper.
Reference sketches for detail work save time during painting sessions. Draw intricate areas separately when your main canvas gets too wet.
Next painting planning sketches happen while cleaning brushes. Test composition ideas for tomorrow’s work.
Learning from Master Painter Sketches
Study preparatory drawings by Rembrandt van Rijn and Edgar Degas. Their sketches reveal thinking processes behind finished works.
Copying master sketches teaches technique through direct experience. Don’t just look at these drawings, recreate them with your own hand.
Analyzing composition choices in famous works shows how masters solved visual problems.
Different artists’ sketch approaches reveal various paths to strong paintings. Vincent van Gogh‘s energetic studies differ dramatically from Jean-Auguste-Dominique Ingres‘ precise preparations.
Progressive Skill Building Exercises
Week 1-2: Foundation Building
Basic shape construction forms the cornerstone of all drawing skills. Practice breaking complex subjects into simple geometric forms.
Proportional measuring exercises using pencil-arm’s-length method. Measure one element against another consistently.
Line quality variation practice builds expressive mark-making abilities.
Week 3-4: Value Development
Three-value thumbnail studies simplify complex lighting into manageable relationships. Light, medium, dark arrangement planning.
Contrast exercises using single light sources help understand shadow patterns and form modeling.
Squinting technique practice reveals major value relationships while eliminating distracting details.
Week 5-6: Advanced Composition
Rule of thirds application creates more dynamic arrangements than centered compositions.
Focal point placement experiments using different contrast levels and positioning.
Leading line practice guides viewers through your compositions systematically.
Negative space awareness exercises improve overall design strength.
Week 7-8: Subject Mastery
Portrait proportion studies using the classical 8-head measurement system.
Landscape atmospheric perspective practice shows distance through value and detail changes.
Still life arrangement planning for optimal light patterns and object relationships.
Figure gesture studies capture movement and energy in quick 1-5 minute drawings.
Creating Consistency in Practice
Set specific goals for each sketching session. Today: proportions. Tomorrow: value relationships. This focused approach accelerates learning.
Track time spent on different sketch types. Balance gesture work with detailed studies.
Regular self-assessment using older sketches shows concrete progress. Compare month-old work with current efforts.
Environment setup affects practice quality. Good lighting and comfortable seating prevent physical strain during longer sessions.
Building Observational Skills
Drawing from life beats photo references for developing spatial awareness. Three-dimensional subjects teach you about form in two-dimensional art.
Blind contour exercises disconnect analytical thinking from hand movement. This improves intuitive mark-making abilities.
Memory drawing tests what you actually observed versus what you think you saw. Draw subjects after looking, then compare with reality.
Tone studies in single colors help separate value from hue considerations.
Integrating Different Drawing Approaches
Gesture and contour combination creates drawings with both energy and accuracy. Start with gesture, refine with contour work.
Value and line integration shows form through multiple visual elements simultaneously.
Quick studies followed by detailed analysis deepens understanding of complex subjects.
Cross-training between subjects prevents visual habits from becoming limitations. Portrait artists benefit from landscape practice and vice versa.
Measuring Progress Over Time
Monthly sketch challenges with consistent subjects reveal improvement patterns. Draw the same still life setup monthly to track growth.
Technique rotation prevents plateau periods. Switch between different drawing approaches weekly.
Reference photo comparison studies test observational accuracy against photographic reality.
Portfolio development through consistent practice creates a body of work showing your artistic journey and skill progression.
Masters like Francisco Goya and Eugène Delacroix maintained sketch practices throughout their careers. Their drawing abilities supported bold innovations in painting techniques.
Contemporary artists working in various painting styles from expressionism to minimalism rely on strong foundational drawing skills.
The visual communication skills developed through regular sketching practice support any artistic direction you choose to pursue.
FAQ on How To Sketch Before Painting
What materials do I need to start sketching before painting?
Basic graphite pencils (2H to 4B range), charcoal sticks, and newsprint paper get you started. Add Bristol board for detailed contour work and toned paper for value studies. These materials cost under $20 total.
How long should I spend sketching before starting to paint?
15-30 minutes for simple subjects, up to 2 hours for complex compositions. Quick gesture studies take 2-5 minutes each. The goal is solving visual problems, not creating finished drawings.
Should I sketch directly on my canvas or use separate paper?
Use separate paper first for planning and problem-solving. Light preliminary sketches directly on canvas work for simple subjects. Complex paintings benefit from detailed paper studies before touching the canvas with paint.
What’s the difference between gesture drawing and contour drawing for painters?
Gesture drawing captures energy and movement in quick studies. Contour drawing focuses on accurate shapes and proportions. Painters need both skills for different stages of their artistic workflow improvement process.
How do I transfer my sketch to canvas without losing the energy?
Grid transfer preserves accuracy for complex works. Freehand translation keeps spontaneity but requires confident drawing skills. Use your sketch as a guide, not a rigid template to copy exactly.
What are value studies and why do painters need them?
Value studies simplify subjects into light, medium, and dark patterns. They prevent muddy paintings by establishing strong contrast relationships before adding color. Think like Rembrandt van Rijn planned his dramatic lighting effects.
Can I sketch digitally before traditional painting?
Digital sketching offers unlimited experimentation without material costs. Layer systems help test different composition arrangements. Many contemporary artists use tablets for preliminary planning before switching to traditional painting mediums.
How detailed should my preliminary sketches be?
Focus on big shapes and major relationships, not small details. Thumbnail sketches solve composition problems. Detailed sketches handle specific challenges like difficult foreshortening or complex shadow patterns. Stop when you understand your subject.
What’s the biggest sketching mistake that ruins paintings?
Ignoring value relationships while focusing only on lines. Painters need to think in masses of light and shadow, not just outlines. Equal value distribution creates spotty, weak compositions that no amount of color can fix.
Do professional painters still sketch before every painting?
Most professionals use some form of preliminary planning. Pablo Picasso created hundreds of studies for major works. Even impressionist painters like Claude Monet made quick outdoor sketches before studio paintings.
Conclusion
Mastering how to sketch before painting transforms good artists into confident painters who solve problems before they appear on canvas. These preliminary drawing techniques prevent wasted materials and frustrating artistic failures.
Consistent sketching practice builds the observational skills and hand-eye coordination training that separate amateur work from professional results. Daily gesture studies and value planning create the foundation for successful paintings.
Artists like Paul Gauguin and Georges Seurat relied on extensive preparatory work to achieve their groundbreaking visual innovations. Their sketch journals reveal the thinking process behind masterpieces.
Whether you’re pursuing abstract exploration or photorealism precision, strong sketching fundamentals support every artistic direction. The spatial awareness and proportional measurement skills learned through drawing practice translate directly to painting confidence.
Start with 15-minute daily sessions using basic materials. Your paintings will improve immediately as visual problem solving becomes second nature through consistent preliminary sketching habits.