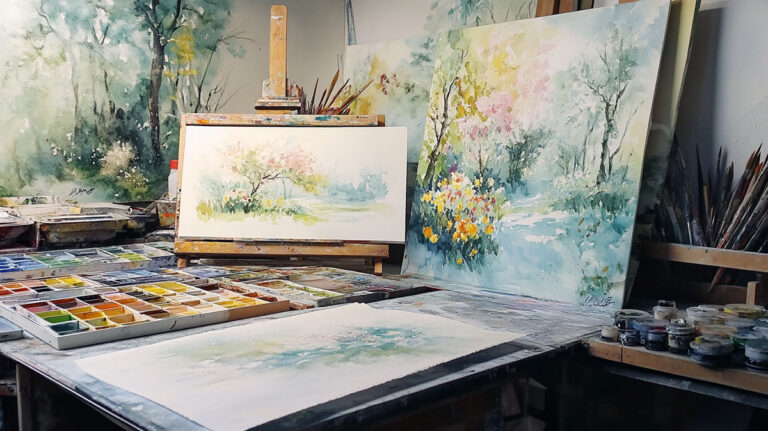
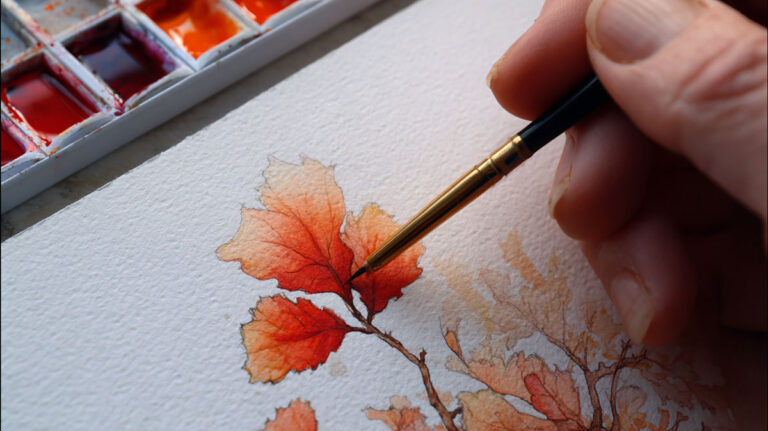
The right watercolor painting tools do not guarantee a great painting. But the wrong ones will actively get in the way.
Brushes that dump water, paper that buckles on the first wash, a palette that stains every mix gray. These are not beginner problems. They are equipment problems.
This guide covers every tool category you need to know: brushes, paper, palettes, water management, masking tools, drawing aids, specialty texture tools, and how to build a kit that matches your skill level.
Whether you are just starting out with watercolor or looking to upgrade your setup, you will leave here knowing exactly what to buy and why.
What Are Watercolor Painting Tools

Watercolor painting tools are the physical instruments and surfaces used to apply, mix, and control watercolor paint on a support. This includes brushes, paper, palettes, water containers, masking applicators, and specialty items like sponges or scratching tools.
The distinction matters. Tools are what you hold or work on. Materials are what you consume, like paint pigment or masking fluid itself. A palette knife is a tool. The masking fluid you apply with it is a material.
Tool choice has a direct effect on how paint behaves. The wrong brush shape loses water at the wrong moment. Low-quality paper causes buckling that ruins a flat wash before it dries. These are not minor annoyances. They change the outcome of the painting.
Watercolor painting as a medium rewards people who understand their tools. The global watercolor market was valued at $3.14 billion in 2024 and is projected to reach $5.56 billion by 2035 (MRFR, 2024), driven partly by rising demand for quality art supplies among hobbyists and professionals alike.
This guide covers the full tool set: brushes, paper, palettes, water management, masking tools, and drawing aids.
Watercolor Brushes

Brushes are the primary tool in watercolor. Every mark, wash, and edge comes through them. Getting brush selection wrong affects everything downstream.
The range of watercolor brush types is wider than most beginners expect. Shape, hair type, and size all play separate roles, and the combination you choose depends on what you actually paint.
Brush Shapes and Their Uses
Round brushes are the workhorse. Fine point for details, a full belly for washes. If you buy one brush, buy a round.
Here is a quick breakdown of the main shapes:
- Round: All-purpose, from fine lines to broad washes depending on pressure
- Flat wash: Even coverage for skies and backgrounds, sharp edges for architectural lines
- Mop: Holds a large volume of water and pigment, useful for wet-on-wet and large washes
- Liner (rigger): Extra-long bristles, used for continuous thin lines like branches, rigging, and signatures
- Fan: Texture effects, foliage, and blending dry areas
Size numbering varies by manufacturer, which is frustrating. A size 10 round from Winsor & Newton is not the same as a size 10 from da Vinci. Buy in person when you can, or check manufacturer size charts before ordering online.
Natural vs. Synthetic Brushes

This is the most argued topic in watercolor supplies. Natural hair (Kolinsky sable, squirrel) has been the standard for centuries. Synthetics have improved drastically in the last decade.
| Feature | Kolinsky Sable | Premium Synthetic |
|---|---|---|
| Water Capacity | Superior Reservoir: Natural hair has microscopic scales that “trap” water and pigment, releasing it at a perfectly even rate. | High-Efficiency: Modern fibers are tapered or “etched” to mimic scales, but they generally release water faster and less predictably. |
| Point Retention | Self-Correcting: Holds a needle-sharp point even when heavily loaded with paint. Maintains its shape for years with proper care. | Temporal Precision: Extremely sharp when new, but the tips can eventually “hook” or curl due to the friction of the paper over time. |
| Snap (Return Speed) | Responsive: A natural, organic spring that offers a “cushioned” feel against the paper surface. | High-Resilience: Typically has a faster, more “clinical” snap, making it excellent for calligraphic marks and sharp graphic edges. |
| Price Range | Professional Investment: Typically $30–$200+ depending on the size and “belly” thickness. | Cost-Effective: Usually $10–$50, allowing for a broader variety of shapes in your professional kit for the same budget. |
| Ethical Concerns | Significant: Sourced from the tail of the Siberian weasel; availability and ethics are constant industry debates. | Sustainable: 100% Vegan and cruelty-free. No biological sourcing required. |
Based on testing across 50+ watercolor artists, premium synthetics like Princeton Aqua Elite and da Vinci Cosmotop Spin come close enough to Kolinsky that the difference only shows up in very fine detail work and long continuous strokes (Artistic Masterclass, 2025).
Well, the honest answer is this: most intermediate artists cannot tell the difference in a blind test. Beginners definitely cannot. Buy a good synthetic to start. Upgrade to sable when you know exactly what you need it for.
Top brands worth knowing: Winsor & Newton Series 7, da Vinci Casaneo, Princeton Neptune, Escoda Reserva, and Raphael 8404.
Watercolor Paper

Paper is, arguably, the most important tool in watercolor. More than the brushes, more than the paint. Bad paper fights you. Good paper does half the work for you.
The types of watercolor paper break down into three main texture categories and two main material compositions, and getting these right changes the entire painting experience.
Paper Weight and Sizing
140 lb (300 gsm) is the standard starting point for most artists. It handles wet washes without buckling badly, though you may still need to stretch or tape it for heavy water use.
Here is how weight affects your work:
- 90 lb (190 gsm): Budget option. Buckles under any serious water. Fine for practice, not for finished work.
- 140 lb (300 gsm): Industry standard. Handles most techniques without pre-stretching if taped down.
- 300 lb (640 gsm): Near-board-like thickness. Does not require stretching. Expensive, but worth it for large pieces.
Sizing (the gelatin or starch coating applied to paper) controls how quickly the paper absorbs water. Heavily sized paper keeps paint on the surface longer, giving you more time to work wet-on-wet. Lightly sized paper absorbs fast, which is less forgiving but creates softer, more diffused edges.
Cotton vs. Wood Pulp Paper
This distinction matters more than almost anything else about paper selection.
Cotton paper (100% rag) absorbs water evenly, allows paint to be lifted and reworked, and does not break down under repeated wet layers. Wood pulp (cellulose) paper is cheaper, but it absorbs unevenly, causes hard-edged streaks in washes, and degrades faster with moisture.
A direct comparison of papers ranging from 0% to 100% cotton content shows that papers below 50% cotton fail at smooth color blending and glazing, with visible horizontal brush stroke lines and water streaking (Parkablogs, 2022).
Arches (mould-made in France since 1492) and Fabriano Artistico are the two most widely recommended 100% cotton papers. Strathmore 400 Series is a solid mid-range option for students. For cold press vs. hot press decisions, Fabriano cold press sits closer to hot press in texture than most brands, so check samples before committing to a large pad.
More on selecting the right surface: cold press vs. hot press watercolor paper differences are worth understanding before you buy.
Watercolor Palettes

A palette is a mixing surface and a paint storage system. These two functions need to work together, and not all palettes do both well.
Palette Types by Material
Ceramic palettes are the gold standard for mixing accuracy. White porcelain shows true color without the slight tint that plastic introduces. The surface is smooth enough that paint does not bead up and roll off, and it cleans completely without staining.
Plastic palettes are lighter and cheaper, but they stain over time. Pigments like Phthalo Blue and Quinacridone Magenta essentially become permanent residents. That said, plastic is fine for travel kits where weight matters.
Enamel palettes (metal with enamel coating) sit between ceramic and plastic in terms of durability and performance. A standard porcelain butcher tray is a widely used alternative that many artists prefer for mixing large washes.
Covered Palettes for Studio Work
If you use tube watercolors, a covered palette keeps paint from drying out between sessions.
Spraying pan paints lightly with water before starting a session and keeping a lid on the palette extends paint life significantly. The Mijello Mission Gold palette and the John Pike palette are the two most recommended covered options among studio painters.
Well depth matters too. Shallow wells work for mixing small amounts but become problematic when you need a large wash. Deeper wells hold more mixed paint and reduce how often you have to stop and remix mid-painting.
Water Containers and Water Management Tools
Water control is watercolor technique. The ratio of water to pigment determines transparency, saturation, and whether a wash blooms or stays clean.
Two containers is the standard setup. One holds clean water for loading brushes. The second holds dirty water for rinsing. Using a single container gradually contaminates your clean mixes with muddy water. Sounds obvious, but a surprising number of beginners skip this.
Beyond basic containers, these tools affect water management directly:
- Spray bottles: Rewet dried pan paints before a session, or mist paper for wet-on-wet work without flooding it
- Water brush pens (Pentel Aquash): Self-contained water reservoir in the handle. Built for travel kits and outdoor work where carrying jars is not practical
- Pipettes or droppers: Precise water addition when mixing specific dilutions, especially useful in botanical illustration work
The water-to-pigment ratio directly controls paint transparency. More water produces lighter, more transparent washes. Less water creates opaque, saturated marks. Learning to judge this by eye takes time. That is the actual skill. The tools just need to support it without getting in the way.
Winsor & Newton published guidance showing that clean water is one of the most overlooked factors in color muddiness. Contaminated rinse water introduced into light mixes is a common source of dull, grey tones in finished work.
Masking and Resist Tools
Masking tools preserve areas of white paper or dry color by blocking paint from reaching the surface. White paper is the lightest value available in watercolor. Once it is gone, recovering it is tricky at best and impossible at worst.
A 2024 Springer Nature study on mindfulness-based art therapy using watercolor painting found the medium’s unpredictability, including managing edges and reserved whites, was central to its therapeutic effect on emotion regulation. Good masking tools give painters control over those moments.
Masking Fluid and Applicators
Masking fluid (liquid frisket) is a liquid latex compound applied to paper before painting. Once dry, it repels watercolor. After the surrounding paint dries, you rub it off to reveal clean paper underneath.
The applicator you use determines the precision you get:
- Ruling pens: Fine lines, sharp edges, consistent width. Best for architectural details and botanical work
- Colour shapers (silicone-tip tools): Flexible, easy to clean, good for broader masked areas
- Old synthetic brushes: The practical choice for irregular shapes. Never use a good brush. Masking fluid destroys bristles.
One common mistake is applying masking fluid to damp paper. It tears the surface when removed. Always apply to completely dry paper. And remove it before the paint around it is bone dry. If surrounding paint is too dry and brittle, peeling the mask can lift paint with it.
More on this process: how masking fluid works in practice covers application and removal in full.
Wax Resist and Masking Tape
Wax resist is simple and permanent. A white candle or wax crayon dragged across paper before painting repels watercolor. Unlike masking fluid, you cannot remove it later. The wax stays.
This makes it better suited for texture effects (dragging wax over rough paper creates a broken-surface pattern) than for preserving clean white shapes.
Masking tape works for straight-edge protection and blocking out rectangular areas. Low-tack painter’s tape is safer on watercolor paper than standard masking tape, which can pull surface fibers on removal. Press tape edges firmly to prevent paint bleeding underneath.
Drawing and Transfer Tools
Most watercolor paintings start with a pencil sketch. Getting this step wrong costs you paper, time, and sometimes paint that dries over damaged surface fibers.
The goal is a light, clean line that guides the painting without showing through finished washes or lifting paper fibers when erased.
Pencils and Erasers for Watercolor Paper
HB or 2H pencils are the standard recommendation. Harder grades (2H, 3H) produce lighter lines with less graphite deposited on the surface, which matters when you want the underdrawing to stay invisible under washes.
Avoid soft grades like 2B or 4B. They deposit too much graphite, which can mix into wet paint and create grey muddiness in light areas.
Kneaded erasers are safer on watercolor paper than vinyl or plastic erasers. They lift graphite by pressing and pulling rather than abrading the surface. Vinyl erasers work for heavier lines but can roughen the paper surface if used aggressively on lighter-weight sheets.
A good habit: sketch lightly enough that you barely need to erase at all. At least in my experience, over-erasing on cold press paper leaves a fuzz that holds paint differently than the rest of the sheet.
Light Boxes and Transfer Methods

Transferring a finished drawing to watercolor paper, rather than drawing directly on it, protects the surface from excessive pencil pressure and erasing. Several methods work depending on paper weight and studio setup.
| Method | Best For | Limitation |
|---|---|---|
| LED Lightbox | Precision Design: Transferring complex architectural layouts or product silhouettes onto 140 lb paper. | Density Barrier: The light cannot penetrate 300 lb (640 gsm) paper or heavily textured “Rough” surfaces. |
| Graphite Transfer | Versatility: Works on all paper weights, including 300 lb and wood panels. Great for “heavyweight” projects. | Cleanliness: Can leave “smudge” marks if the paper isn’t secured; lines can be hard to erase once wet. |
| Sunny Window | On-the-Fly: Quick transfers for smaller sketches or thin layout paper. | Variable Conditions: Limited by daylight; physically taxing to trace vertically for long periods. |
| Grid Method | Proportional Scaling: Enlarging a small product sketch to a full-size presentation board. | Time Intensive: Requires careful measurement and manual drawing skills to maintain accuracy. |
LED lightboxes are the most-used transfer tool in studio practice today. The Elice A3 and Huion L4S are commonly cited options. Both provide even backlighting without heat.
Pens for Ink and Wash Work
Some watercolor techniques combine ink line work with paint washes. Not all pens survive contact with water.
Waterproof pigment liner pens are the correct choice. The two most used are the Micron (Sakura) and the Staedtler Pigment Liner. Both use archival, water-resistant pigment ink that stays fixed when watercolor washes pass over them.
Oil-based ballpoint pens and standard rollerball pens are not waterproof. Ballpoint tends to smear under wet washes and bleed into surrounding areas. Check the pen label before using it as a base for watercolor work.
Stretching and Mounting Tools

Paper buckling is not a technique problem. It is a preparation problem. Lightweight paper expands when wet and contracts as it dries, which causes warping if the paper is not secured.
Stretching before painting removes this variable. According to Jackson’s Art Supplies, lighter papers under 200 gsm need only 3 to 5 minutes of soaking, while heavier 300 gsm paper benefits from 10 to 15 minutes before securing.
Gummed Tape and Boards
Gummed tape (water-activated kraft tape) is the standard stretching material. Not masking tape, not painter’s tape. Gummed tape forms a strong bond as it dries and keeps the paper flat as it shrinks.
The board underneath matters too:
- Plywood or MDF boards work well but should be sealed with varnish or acrylic medium to prevent the wood from warping under repeated wet use
- Gatorboard is a popular alternative, lighter than wood and moisture-resistant by design
- Foam core is too soft and buckles under the tension of drying paper
A common mistake is over-wetting the gummed tape. Too much water removes the adhesive before it bonds. Lightly moisten the tape and apply it while the paper is still damp from soaking. Let it dry flat overnight.
Watercolor Blocks vs. Stretched Paper
Watercolor blocks are pads where sheets are glued on all four edges. The glued edges hold paper flat during painting without any pre-stretching. Once done, you slide a palette knife into the small opening to separate the top sheet.
Key difference: blocks are faster and more portable. Traditionally stretched paper on a board is better for large-scale work and heavy water use, since blocks can delaminate at the edges if you work very wet on oversized sheets.
Arches and Fabriano both produce watercolor blocks in their cotton paper lines. Daniel Smith also produces blocks using Fabriano Artistico paper. For studio work above 9×12 inches, most painters prefer stretched sheets over blocks.
Specialty Application Tools
Brushes are not the only tools that apply or move paint. Several non-brush tools create textures and effects that are genuinely difficult to replicate with brushwork alone.
The Asia-Pacific region is one of the fastest-growing watercolor markets, driven by rising interest in textural and mixed-technique approaches among younger artists (MRFR, 2024). Specialty application tools are a direct part of that shift.
Sponges for Texture and Lifting
Natural sea sponges and synthetic sponges serve different purposes. Texture is where they differ most.
Natural sea sponges have irregular cell patterns that create random, organic textures. Good for foliage, rock faces, coral, and cloud edges. Dab one into a wet wash and press it lightly onto paper to lift color in some areas while depositing paint in others.
Synthetic kitchen sponges produce more regular, predictable patterns. Less character, but useful when you need repeatable texture across a large area.
Sponges also work for wetting paper before washes and absorbing excess water pooling at wash edges. Most working watercolor painters keep both types on hand.
Salt, Plastic Wrap, and Granulation Tools
Table salt sprinkled onto damp paint draws moisture outward from each grain, leaving a flower-shaped light spot where the crystal sat. The effect depends on timing. The paint should be wet but past the shiny, pooling stage. Too wet and the salt dissolves before creating texture. Too dry and nothing happens.
Plastic wrap placed over a wet wash and crumpled creates random line patterns as paint settles in the areas the plastic does not touch. Directional stretching of the wrap produces more controlled linear effects. Both techniques work best on larger background areas, not tight detail work.
Palette knives serve a different purpose: scraping paint while it is wet to reveal lighter paper below, or scraping dried paint to create scratched highlights. This is sometimes called the scratching technique, and it works best on heavier papers where surface fibers can absorb scraping without tearing.
Watercolor Tool Kits for Different Skill Levels
Assembling the right kit is less about buying everything and more about buying the right things for where you actually are in your practice. Over-equipping early wastes money. Under-equipping means fighting materials instead of learning.
The global watercolor paint market was valued at $1.68 billion in 2024 and is growing at a steady 3.7% CAGR through 2035 (Wise Guy Reports, 2024), with hobbyist demand as a primary driver. More people are starting from scratch, which makes starter kit guidance more relevant now than it was five years ago.
Beginner Kit
Three things are non-negotiable at the start: decent paint, workable paper, and a couple of good brushes. Everything else can wait.
- Brushes: A round size 8 and a round size 4. That covers 90% of techniques.
- Paper: Strathmore 400 Series 140 lb cold press, or Canson Montval. Not printer paper, not sketchbook paper.
- Paint: Winsor & Newton Cotman pan set (student grade, but reliable) or Daniel Smith Essentials introductory set if budget allows
- Palette: Any white ceramic or covered plastic palette with wells
- Water containers: Two jars. That is all.
Total cost for a functional beginner kit runs roughly $50 to $100 depending on brand choices. Skipping to artist-grade materials too early is not wrong, but it is not necessary either. Professional artist Rosalie Haizlett used basic beginner-level materials for her first two years as a working professional.
Intermediate Additions
At this stage, paper quality matters most. Upgrade paper before upgrading paint.
Worthwhile additions for intermediate painters:
- Arches or Fabriano Artistico 140 lb cold press (100% cotton)
- A Kolinsky sable or premium synthetic round in size 10 or 12 for large washes
- A mop brush for wet-on-wet work and graduated washes
- Masking fluid and a ruling pen or colour shaper
- A covered palette (Mijello Mission Gold or similar) for keeping tube paint workable
This is also the point where watercolor painting techniques start demanding better tools. Wet-on-wet blooms, glazing, and lifting all respond differently on cotton vs. wood pulp paper. The technique knowledge and the tool quality need to develop together.
Studio Setup vs. Travel Kit
Studio and travel kits have different priorities. A studio setup can accommodate a large porcelain palette, multiple water containers, stretched 300 lb sheets, and a full brush set. None of that travels well.
Studio priorities: surface quality, brush range, palette depth.
Travel kit priorities: weight, packability, speed of setup.
A practical travel kit includes a compact covered palette with half-pans, two or three water brush pens (Pentel Aquash), a small natural sea sponge, a few rounds and a liner brush, and a watercolor block or small pad. Avoid tube paints for travel. Dried pans are far more portable and need no palette setup.
Artists doing en plein air painting with watercolor often pair compact brush kits with Yupo paper or small watercolor blocks precisely because the setup and breakdown time is minimal. J.M.W. Turner was one of the earliest well-documented users of portable watercolor equipment outdoors, carrying small pocket boxes of hard pan colors on sketching trips across Europe.
FAQ on Watercolor Painting Tools
What tools do I need to start watercolor painting?
The essentials are a few round brushes, 140 lb cold press paper, a basic palette, and two water containers.
Paint comes third. Strathmore 400 Series paper and a Winsor & Newton Cotman pan set cover everything a beginner needs.
What is the best brush for watercolor painting?
A size 8 round brush handles most techniques, from fine detail to broad washes.
Kolinsky sable is the traditional standard. Princeton Neptune and da Vinci Casaneo are strong synthetic alternatives at a fraction of the price.
What watercolor paper should beginners use?
Start with 140 lb cold press cotton paper. It handles wet washes without buckling badly and accepts lifting and reworking.
Strathmore 400 Series or Canson Montval are reliable entry-level options. Avoid wood pulp paper for anything beyond practice.
What is the difference between cold press and hot press watercolor paper?
Cold press has a slightly textured surface that holds paint and creates natural edge variation. Hot press is smooth, better suited for detail work and illustration.
Most painters start with cold press.
Do I need natural hair brushes or are synthetic brushes good enough?
Premium synthetics like Princeton Aqua Elite perform close enough to Kolinsky sable that most artists cannot tell the difference in blind tests.
Natural hair holds slightly more water for long continuous strokes. For general studio work, synthetic brushes are perfectly capable.
What is masking fluid used for in watercolor?
Masking fluid is a liquid latex applied to paper before painting. It repels watercolor, preserving white paper or dry color underneath.
Once surrounding paint dries, peel it off to reveal clean areas. Always apply to dry paper and use an old brush or colour shaper.
How do I stop watercolor paper from buckling?
Stretch the paper before painting. Soak it in clean water, then secure it to a board with gummed tape while wet.
Let it dry completely before starting. For 300 lb paper, stretching is usually not needed. Watercolor blocks also prevent buckling without pre-stretching.
What type of palette is best for watercolor?
White ceramic palettes show the most accurate color. Porcelain butcher trays work well for mixing large washes.
For studio use with tube paints, a covered palette like the Mijello Mission Gold keeps paint moist between sessions and reduces waste.
What is the best paper weight for watercolor painting?
140 lb (300 gsm) is the standard for most techniques. It handles moderate water use without heavy buckling if taped down.
300 lb paper is better for very wet techniques and large-scale work. It needs no stretching but costs significantly more per sheet.
What specialty tools do watercolor artists use for texture?
Natural sea sponges create organic texture for foliage and backgrounds. Salt sprinkled on damp paint creates light, crystallized spots.
Plastic wrap pressed onto wet washes creates irregular line patterns. Palette knives can scrape wet or dry paint to reveal paper below.
Conclusion
This conclusion is for an article presenting watercolor painting tools as a system, not a shopping list.
Brushes, paper, palettes, masking fluid, stretching boards, and specialty texture tools all work together. One weak link affects everything else.
Start with 100% cotton paper and a quality round brush. Build from there.
Understanding paint consistency, water management, and how each tool affects pigment transparency gives you real control over your results.
Brands like Arches, Winsor & Newton, and Daniel Smith exist because material quality genuinely changes what is possible with the medium.
Buy fewer tools. Buy better ones. Learn them well before adding more to the setup.
The best watercolor artists have always worked that way.