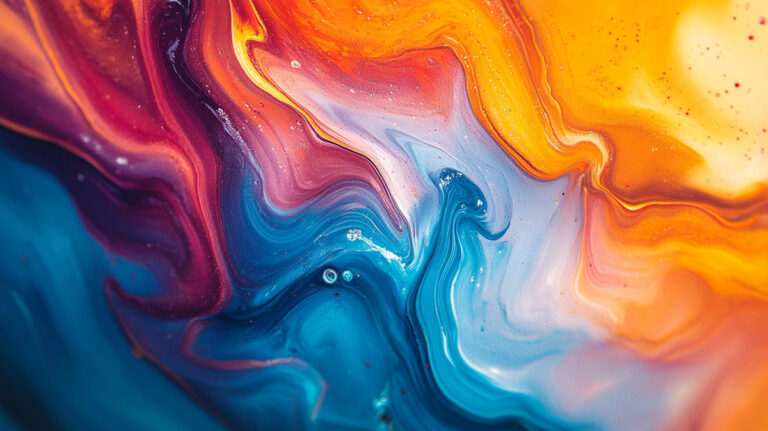
Flat paint sits on the surface. Glazed paint glows from within.
Glazing in acrylic painting is a technique where thin, transparent layers of paint are applied over a completely dry base, allowing light to pass through, reflect back, and create color depth that direct painting simply cannot produce.
It’s the method behind the luminous skin tones of the Old Masters – and it works just as well in acrylics, with the added advantage of drying in minutes rather than days.
This article covers what glazing is, how optical color mixing makes it work, which pigments and mediums to use, and how it differs from washing and scumbling.
What Is Glazing in Acrylic Painting

Glazing in acrylic painting is the application of a thin, transparent layer of paint over a completely dry layer beneath it. The glaze does not mix physically with the paint below. Instead, light passes through the glaze, reflects off the underlying layer, and travels back through the transparent film – creating color depth and luminosity that flat, direct painting simply cannot reproduce.
This is sometimes called indirect painting. The acrylic medium used in the glaze keeps the paint transparent while maintaining adhesion to the surface.
Glazing is not the same as thinning paint with water. Water-only thinning breaks down the acrylic binder and can cause the paint to flake over time. A proper glaze requires a dedicated acrylic medium – one that keeps the film stable while reducing opacity.
| Property | Glaze | Opaque Layer |
|---|---|---|
| Light behavior | Passes through, reflects back | Blocked at surface |
| Color mixing | Optical (visual) | Physical (on palette) |
| Depth effect | Produces luminosity and layered depth | Flat, one-dimensional |
| Required dry time | Full dry before each layer | Variable |
Acrylic glazing has a specific advantage over oil glazing: acrylics dry in minutes rather than days, so multiple glaze passes can be applied within a single painting session. Acrylic paint’s fast drying time makes it the more accessible medium for building up complex layered effects.
How Glazing Works Optically

The physics behind a glaze are straightforward. Light enters the transparent paint layer, scatters through the pigment particles, and bounces off the opaque surface underneath. It then travels back out through the glaze again before reaching the eye. That double pass through pigment is what creates the visual depth – the sensation that color is coming from inside the painting rather than sitting on top of it.
This is optical color mixing, not physical mixing. A glaze of Phthalo Blue over a dried yellow underpainting will appear green – but the resulting green carries a saturation and depth that mixing green directly on the palette cannot match. The two colors exist on separate layers and mix only in the viewer’s perception.
Liquitex describes this effect as a “jewel-like” quality, citing that the transparent layers interact with light similarly to stained glass. Each successive glaze layer builds complexity because each pass changes how the previous layers read visually.
Key optical effects glazing produces:
- Increased color saturation without muddying
- Subtle shifts in hue across a large area
- Controlled tonal darkening without losing detail
- A sense of internal glow rather than surface color
The effect depends entirely on transparency. Opaque pigments block light at the surface level. They prevent the double-pass interaction and produce a flat result regardless of how thinly they’re applied. This is why color in painting behaves so differently when glazed versus mixed – the medium changes the physics, not just the appearance.
Transparent vs. Opaque Pigments in Glazing

Not every paint color glazes well. The transparency rating on a paint tube is not a minor detail – it’s the single most important factor in whether a glaze will work.
Transparent pigments let light through. They allow the underpainting to show, create optical mixing, and produce glowing color. Opaque pigments block light. Using an opaque color in a glaze effectively turns it into a tinted veil that dulls whatever is underneath.
Pigments that work well for glazing
These are naturally transparent and well-suited to thin acrylic layers:
- Phthalo Blue (Green Shade) – intense, cool, high tinting strength
- Quinacridone Magenta – clean, vivid, works well for skin tone glazes
- Transparent Yellow Iron Oxide – warm, earthy, excellent for skin and landscape
- Permanent Alizarin Crimson – deep red glaze, naturally transparent
- Quinacridone Red – bright, clean, good for warming passages
Pigments to avoid
| Pigment | Problem | Use Instead |
|---|---|---|
| Titanium White | Completely opaque – kills transparency | Skip it in glazes entirely |
| Cadmium Yellow | Opaque, blocks light | Hansa Yellow (transparent) |
| Cerulean Blue | Semi-opaque, granulates unevenly | Phthalo Blue for glazing |
The transparency rating (usually marked T, ST, SO, or O on tube labels) is the fastest way to check. When in doubt, brush a thin line of the undiluted paint over a black stripe on paper. If the black shows through, it glazes. If it covers the black, it won’t.
Glazing Mediums and How to Choose One

A glazing medium does three things: it increases paint transparency, maintains adhesion to the dried layer beneath, and controls how the glaze flows and settles. Water can thin acrylic paint, but water alone dilutes the binder – and past about 30% water, the paint film starts to break down and may not adhere properly.
The medium carries the glaze. The paint just colors it.
Common acrylic glazing mediums

Glazing Liquid (Gloss): The most common choice. Produces clear, transparent layers with a glossy finish. Liquitex and Golden both make dedicated glazing liquids. Ratio: roughly 1 part paint to 10 parts medium, though this varies by desired transparency.
Matte Medium: Creates a transparent layer with a flat finish. Useful when you don’t want sheen to build up across multiple passes. Contains matting agents that cause slight cloudiness – less optical clarity than gloss versions.
Fluid Gel Medium: Thicker than glazing liquid but still transparent when dry. Good for glazes that need to hold on a textured surface without running. Gloss gels give the clearest result.
Water (partial): Can be combined with a medium, but not used alone. Golden recommends no more than 20–25% water in any acrylic mixture to maintain film integrity.
The finish of the medium matters across multiple layers. Gloss mediums stack clearly. Matte mediums can become increasingly cloudy with each pass, especially beyond three or four layers. If you want to end with a matte surface, use gloss for all the glazing layers and apply a final matte varnish when the painting is complete. Sealing the painting correctly at the end preserves the glaze layers underneath.
How to Apply a Glaze Step by Step
Glazing is one of the more forgiving techniques in
Acrylic Paint

ing – once you understand the rules. The process breaks down into preparation, mixing, application, and waiting.
Wet-on-Dry Requirement
The layer underneath must be completely dry before a glaze goes on. This is non-negotiable. If the underpainting is still wet, the glaze will physically mix with it instead of sitting on top – and the optical layering effect disappears entirely.
Acrylic paint is dry to the touch within 20–40 minutes depending on thickness and humidity. But “dry to the touch” is not the same as “ready for glazing.” Thin layers need at least 30 minutes. Thick or heavily textured areas may need longer. When in doubt, wait.
Mixing and Application
Step 1: Mix a small amount of transparent paint with glazing medium. Start at roughly 1 part paint to 8–10 parts medium. Add a few drops of water if the mixture feels too thick to flow freely.
Step 2: Test the glaze on a scrap piece of paper or a corner of the painting surface. The glaze should be visibly transparent when applied – you should see the surface beneath clearly through the wet film.
Step 3: Apply with a soft flat or mop brush. A single pass, moving in one consistent direction. Avoid going back over wet glaze – the brush will lift the medium and leave streaks.
Step 4: Let the layer dry fully before evaluating the color shift. Acrylic glazes lighten slightly as they dry. The final effect won’t be visible until the layer has cured.
Step 5: Repeat. Most glazing effects build across 3–6 layers. Layering in acrylic painting works best when each pass is subtle – several thin passes beat one heavy application every time.
Correcting a Glaze Gone Wrong
If a glaze is still wet and looks too dark or too saturated, a damp cloth can lift most of it off without damaging the layer beneath. Work quickly – acrylics set fast.
Once the glaze has dried, it’s permanent. The correction is to paint back over the area with a semi-opaque layer of a lighter color, let it dry, and then re-glaze more carefully. Fixing painting mistakes in acrylic glazing generally means adding layers, not removing them.
Glazing for Skin Tones and Realism

This is where glazing really earns its place in a painter’s process. Skin is not one color – it’s a stack of translucent layers of tissue, each reflecting and absorbing light differently. A flat mix of pink and brown from a palette will always look flat. Glazing lets you reproduce the optical structure of skin more accurately.
Realist and portrait painters across centuries have used this approach. The Old Masters – including Rembrandt and Vermeer – built skin tones through successive transparent oil glazes, separating the color from the value structure established in the underpainting. The same principle works in acrylics, and the faster drying time actually makes it easier to iterate.
Building skin tones with glazes
Start with a monochromatic underpainting in Raw Umber or Burnt Sienna – this establishes all the lights and darks before any color is introduced. Let it dry fully.
Then build color through glazing passes:
- Warm glaze (Quinacridone Red or Yellow Ochre): Establishes the overall warm tone of the skin
- Cool shadow glaze (Transparent Red Oxide or Dioxazine Purple, heavily diluted): Pushes shadow areas deeper without muddying them
- Warm highlight glaze (Transparent Yellow Iron Oxide): Adds the golden quality seen in lit areas of skin
The sequence matters. Warm under cool usually reads more naturally than the reverse. Portrait painting techniques built on this glazing structure produce a sense of depth and translucency in the skin that direct painting rarely matches.
One thing worth knowing: Phthalo-family pigments are very powerful. A single thin glaze of Phthalo Blue over a fleshtone will shift it dramatically. Use these carefully in skin work – reserve them for cooling shadows, not broad passes.
Glazing for Backgrounds and Atmospheric Effects
Glazing is one of the most practical tools for painting backgrounds that read as convincing space rather than flat color. A single transparent pass over a finished sky can deepen the upper atmosphere without touching the clouds. Multiple cool glazes over distant hills push them back visually, mimicking the way particles in air actually scatter light.
This is sometimes called atmospheric perspective in painting. Glazing is the direct technical method for producing it in acrylics.
Unifying a composition with a full-painting glaze
Color harmony through glazing is simpler than most painters expect. When a painting feels disjointed – too many competing colors – a single thin glaze of one color over the entire surface can pull it together without overpainting anything.
Common unifying glazes:
- Phthalo Blue: cools a painting, reads as evening or overcast light
- Quinacridone Gold: warms the whole surface, suggests golden-hour light
- Transparent Red Oxide: adds warmth and age to a painting that looks too clean
The key is staying dilute. A unifying glaze should barely be visible when wet and only register as a subtle color shift once dry.
Atmospheric haze in landscape glazing
Cool blues and violets glaze well over distant landscape areas to push them back. Warm oranges and yellows over foreground elements pull them forward. Together, this creates spatial depth through color temperature – no perspective drawing required.
Acrylic painters working in landscape painting often apply a light glaze of Cobalt Blue or Ultramarine mixed with glazing medium over the most distant areas of a painting as a final pass. This alone can transform a flat background into a receding space.
For paintings with mist or fog, a diluted Titanium White mixed into glazing liquid – applied over dry paint – creates a soft veil. Note: this is one case where a semi-opaque pigment works intentionally. The slight opacity of the white is what produces the haze effect.
Glazing for color harmony in abstract painting
Abstract painters use glazing differently. Rather than depicting space, they use transparent layers to build visual complexity within areas of flat color.
David Hockney, known for his acrylic work, has spoken about using layered color to create surface richness that single-coat painting can’t replicate. The abstract painting techniques built on layered transparent washes share the same optical principle as figurative glazing – light passes through, colors interact, depth results.
Used in abstract work, glazing lets painters:
- Warm or cool areas selectively without adding new opaque shapes
- Create tonal transitions across large flat areas
- Build surface depth that rewards close looking
Common Glazing Mistakes
Most glazing failures come down to four things. Not the color choice, not the pigment selection – just four repeated process errors that are all completely avoidable.
| Mistake | What Happens | Fix |
|---|---|---|
| Water-Only Thinning | Binder Breakdown: The “glue” (polymer) is over-diluted, causing the paint to lose its bond and flake off or “lift” when the next layer is applied. | Use a Glazing Medium. It maintains the chemical integrity of the paint while increasing transparency. |
| Glazing Over Wet Paint | Muddying: The layers mix physically on the canvas, destroying the optical “stained glass” effect. | The Touch Test: Wait for the layer to be fully cured (not just “tacky”) before glazing over it. |
| Opaque Pigments in Glaze | Light Blocking: Using pigments like Cadmium Red or Titanium White blocks the background, leading to a cloudy or muddy result. | Check the Transparency Rating on the tube (usually a square icon: empty = transparent, filled = opaque). |
| Glaze Applied Too Thick | Solid Color: The layer behaves like a standard paint coat, hiding the detail you spent time building underneath. | Ratio Adjustment: Aim for a 90% medium to 10% paint ratio. Build intensity through multiple thin layers rather than one thick one. |
The water problem
This is the most common. And it makes sense – acrylics are water-based, so thinning with water feels logical.
Golden (the paint manufacturer) recommends no more than 20–25% water in any acrylic mixture to maintain film integrity. Past that point, the polymer emulsion starts to break down. The paint film becomes weak, matte, and prone to lifting when the next layer goes over it.
If the underpainting lifts when a glaze is applied, water is almost always the culprit. Switching to a dedicated acrylic glazing liquid solves this completely – the medium is designed to thin without breaking the binder.
Overworking a wet glaze
Acrylics set fast. Going back over a glaze that’s already started to dry will drag the surface and leave visible streaks or lifted patches.
Apply in a single direction. One pass. If the result isn’t right, let it dry fully and correct with another glaze rather than reworking the wet layer. This is where blending in acrylic painting differs from glazing – blending requires wet paint, glazing requires dry.
Choosing the wrong pigments
Titanium White in a glaze kills transparency. Cadmium Yellow does the same. These are not “slightly less transparent” – they’re fully opaque and will not allow light to pass through regardless of how much they’re thinned with medium.
The transparency rating on a paint tube is accurate and worth checking. Transparent (T) and semi-transparent (ST) pigments glaze. Semi-opaque (SO) and opaque (O) ones do not – at least not for the optical effects glazing is designed to produce.
Took me longer than I’d like to admit to stop second-guessing this and just read the label. It’s actually that simple.
Glazing vs. Washing vs. Scumbling

These three techniques get confused constantly. They all involve thin paint over a dried layer. But they’re used at different stages, produce different effects, and rely on opposite principles in two cases.
| Technique | Paint Type | Applied When | Primary Effect |
|---|---|---|---|
| Wash | Transparent, thinned with water or fluid medium. | Early Stages: Often used as the very first layer on a white canvas. | Base Tone: Establishes a broad color field or initial “mood” without covering textures. |
| Glaze | Transparent, extended with glazing medium (not water). | Mid-to-Late Stages: Applied over completely dry layers. | Luminosity: Changes the color of underlying layers while allowing light to “glow” through. |
| Scumble | Opaque or semi-opaque; used “dry” (very little moisture). | Mid-to-Late Stages: Dragged over the surface of dried paint. | Softening: Adds a hazy, atmospheric effect; creates “broken color” as it catches on the canvas texture. |
What is a wash in painting
Washes come first. A wash is a diluted, transparent layer applied early to establish overall tone or color temperature before the painting develops detail. Water-thinned is fine at this stage because the wash soaks into the surface and no future layer is going over it immediately.
The difference from glazing is timing and purpose. A wash sets up the painting. A glaze refines it. Confusing the two leads to applying water-heavy layers late in a painting where they’ll lift what’s below.
You can read more about washing in acrylic painting as a standalone technique – it has its own applications beyond just laying in tone.
What is scumbling in painting

Scumbling is the opposite of glazing in one specific way: it uses light over dark, not dark over light.
A scumble is a thin, semi-opaque or opaque layer of lighter paint dragged over a darker dry surface. No medium needed – the dry-brush action of scrubbing it out makes it thin enough to let the layer beneath show through in patches. The result is a broken, textured optical mix rather than the smooth luminosity of a glaze.
Where glazing deepens and enriches, scumbling softens and lightens. J.M.W. Turner used scumbling extensively to create the haze and atmospheric shimmer his work is known for. In acrylics, scumbling is particularly useful for clouds, mist, and softening hard edges in backgrounds.
Using all three in one painting
Most strong acrylic paintings use all three at different stages. The sequence:
- Wash first, to set overall tone and color temperature
- Glaze mid-to-late, to add depth, shift color, unify areas
- Scumble where you need to lighten, soften, or add atmospheric texture
Glazes and scumbles can also be applied in alternating layers. A dark glaze followed by a light scumble followed by another glaze is a classic realist approach for building complex surface effects – particularly in skin and fabric – that neither technique achieves alone.
This layered approach connects directly to how layering and scumbling work together as a broader painting system, beyond just the individual techniques.
FAQ on What Is Glazing In Acrylic Painting
What is glazing in acrylic painting?
Glazing is applying a thin, transparent paint layer over a completely dry surface. Light passes through the glaze, reflects off the layer beneath, and travels back out – creating color depth and luminosity that flat, direct painting cannot replicate.
How is glazing different from a wash?
A wash is water-thinned paint applied early to establish initial tone. A glaze uses a dedicated acrylic glazing medium and is applied mid-to-late in the painting process to deepen color, shift hue, or add luminosity to finished areas.
Can you glaze with any acrylic color?
No. Only transparent pigments work properly. Phthalo Blue, Quinacridone Magenta, and Transparent Yellow Iron Oxide glaze well. Titanium White and Cadmium Yellow are opaque – they block light and kill the effect entirely.
Do you need a special medium for acrylic glazing?
Yes. Water alone breaks down the acrylic binder past about 25%, causing the paint film to weaken and lift. A dedicated glazing liquid – from brands like Liquitex or Golden – keeps the film stable while increasing transparency.
How long should you wait between glaze layers?
The layer beneath must be completely dry before glazing. Thin acrylic layers are touch-dry in 20–40 minutes. Thicker passages take longer. Glazing over wet paint causes physical mixing, destroying the transparent layering effect entirely.
How many glaze layers can you apply?
There is no strict limit. Most painters build 3–6 passes to achieve the desired depth. Each layer adds complexity through optical color mixing. Beyond a certain point, successive glazes produce diminishing returns as color saturation reaches a ceiling.
What is the correct glaze consistency?
Start at roughly 1 part transparent paint to 10 parts glazing medium. The mixture should flow freely and appear visibly transparent when applied wet. If you can’t see the surface beneath the wet glaze, add more medium.
Can glazing fix a painting that looks flat or dull?
Yes – this is one of glazing’s most practical uses. A thin transparent pass of a warm or cool color can add depth to flat areas. A single unifying glaze over the entire surface can pull together a disjointed color palette.
What is the difference between glazing and scumbling?
They work in opposite directions. Glazing applies dark transparent paint over lighter areas to deepen color. Scumbling drags light, semi-opaque paint over darker areas to soften and lighten. Both require a dry layer beneath before application.
Is glazing suitable for beginners?
Yes, with one caveat: patience. The technique itself is simple – mix, apply, dry, repeat. The tricky part is waiting fully between layers and using the right medium. Skipping either step is where most beginners run into problems.
Conclusion
This conclusion is for an article presenting what is glazing in acrylic painting – a technique built on patience, transparent pigments, and the right medium.
The core principle stays the same whether you’re building skin tone depth in a portrait or pushing distant hills back in a landscape: thin layers, full dry time, and gloss medium over water.
Choose transparent pigments like Quinacridone Red or Phthalo Blue. Skip Titanium White in your glaze mix.
Understand how glazing relates to scumbling and color wash technique, and you have three distinct tools that cover most of what acrylic paint layering needs to achieve.
Start with one layer. See what it does. Build from there.