Most painters assume blending is the only way to build depth. Stippling proves otherwise.
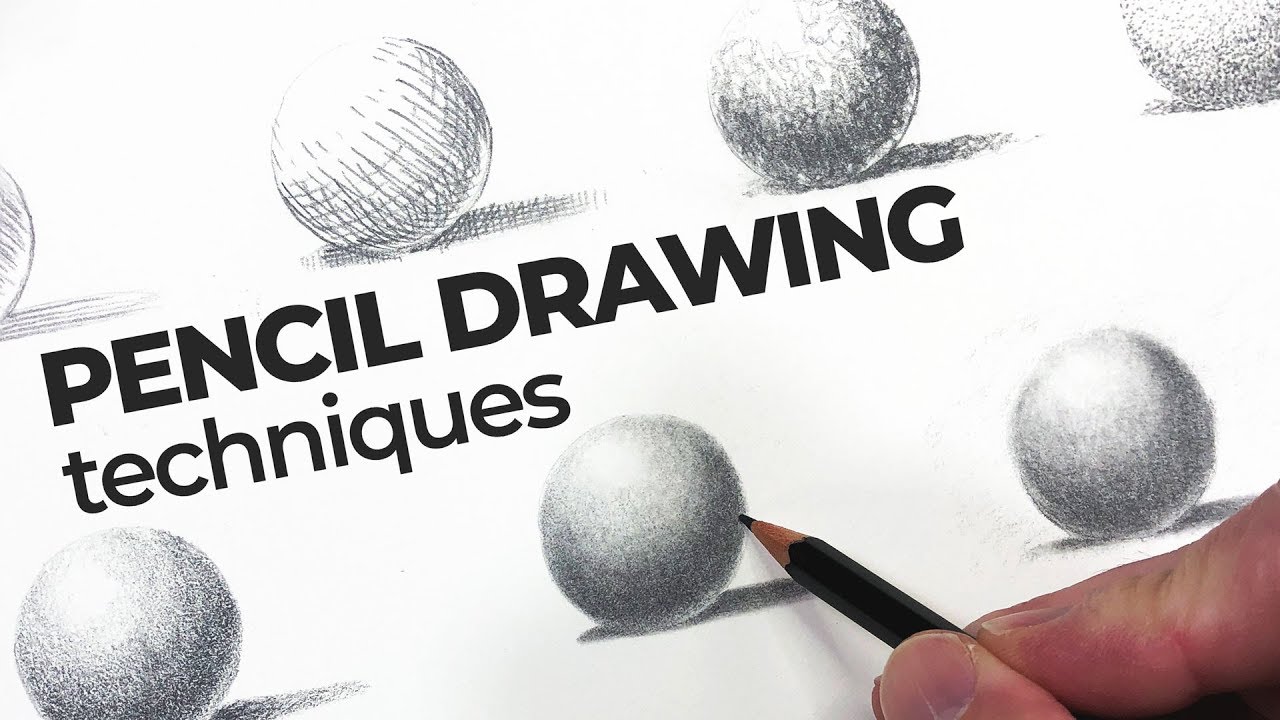
Stippling in acrylic painting is a dot-based technique that builds tone, texture, and form through accumulated marks rather than brushstrokes. No blending required.
Acrylics are particularly well-suited to it. Fast drying time, flexible paint viscosity, and compatibility with surfaces from stretched canvas to Gessobord make the medium ideal for dot layering and optical color mixing.
This article covers everything you need to know: how stippling works with acrylics, the right tools, techniques for different effects, common mistakes, and where the method fits across painting styles from photorealism to mixed media.
What is Stippling in Acrylic Painting

Stippling is a painting technique where small, deliberate dots of paint are applied to a surface to build tone, texture, depth, and form. Instead of blending or stroking paint across the canvas, you place individual dots, letting density do the work.
The denser the dots, the darker the area. Sparse dots create lighter tones. Simple concept, but the results can be surprisingly complex.
Acrylics are particularly well-suited for stippling. The fast drying time means each dot holds its shape, and you can layer without smearing earlier work. That’s harder to pull off cleanly with oils or watercolors.
Stippling is often grouped with pointillism, and while they share DNA, they’re not the same thing. Pointillism uses dots of different colors placed side by side so the eye mixes them optically. Stippling traditionally relies on a single color, using dot density alone to suggest shade and form. When you apply stippling within acrylic painting, you often blend both ideas, layering colored dots AND varying density, which gives you a lot of creative range.
Nearly 49% of U.S. adults participate in arts and crafts activities including painting (Amra & Elma, 2025), and acrylic paint accounts for roughly 32% of global art paint unit volumes in 2024 (Industry Research Biz). Stippling sits right in the middle of this growing wave of hobbyist and professional acrylic work.
How Stippling Works With Acrylics
The mechanics are straightforward, but paint behavior matters more than most beginners expect.
Acrylic Viscosity and Dot Consistency

Heavy body acrylics hold dot shape best. They’re thick enough to sit on the surface without spreading, which means your dots stay crisp and defined. Fluid acrylics flow more, so dots tend to flatten and spread, giving a softer, less precise edge.
That said, fluid acrylics work well when you want soft texture, like skin or distant foliage, where hard-edged dots would look mechanical.
Heavy body acrylics are projected to hold a 54.2% market share of the acrylic paint segment in 2025 (Future Market Insights). That dominance makes sense for techniques like stippling that depend on paint consistency.
Wet vs. Dry Surface Application
Dry surface: dots stay sharp and defined, edges hold.
Wet surface: dots bleed slightly into the surrounding area, creating a softer blend. This can work for specific atmospheric effects, but most stippling work relies on a dry surface.
The practical rule is this: wait for each layer to dry before adding the next. Acrylics dry fast, so this usually takes a few minutes. Rushing it muddles the dot structure and flattens the texture.
Layering Direction: Light to Dark or Dark to Light
Most painters work light to dark. Start with the base tone, then build density gradually by adding darker dots on top. This gives you more control over the final value range.
Working dark to light is also possible, especially when painting on a tinted ground. You can stipple lighter dots over a darker base to suggest highlights. I’ve done this for fur textures and it works well once you get the pressure consistent.
| Approach | Best For | Main Challenge |
|---|---|---|
| Light to dark | Most subjects, gradients, realism | Easy to go too dark too fast |
| Dark to light | Fur, hair, highlights on dark grounds | Requires opaque paint for lighter dots |
| Wet into wet | Soft atmospheric textures | Harder to control dot edges |
Tools Used for Stippling

The brush you pick directly changes what your stippling looks like. There’s no universal “correct” tool. It depends on the scale and texture you’re after.
Stippling Brushes and Stiff-Bristle Rounds

A dedicated stippling brush has a flat, stiff end and is used by dabbing straight down onto the surface. The bristles distribute paint into small clustered marks rather than a single clean dot. Good for rough textures like stone, bark, or grass.
Standard round brushes with a fine tip give more precise, individual dots. Better for detail work, skin texture, or photorealistic stippling where dot size and placement really matter.
Sponges, Palette Knives, and Unconventional Tools
Sponges create irregular, organic stippling effects. Torn sponge edges are especially useful for foliage and ground textures.
Palette knives aren’t typical stippling tools, but the tip can be used to place small paint deposits for a chunkier dot effect. Works well in mixed media or abstract acrylic work where texture is the goal rather than precision.
Some painters also use fingertips, old toothbrushes, or the eraser end of a pencil. Each gives a distinct dot character. Honestly, experimenting here is half the fun.
Brush Size and Dot Scale
Small brush (size 0-2): fine dots, high detail, slow process.
Medium brush (size 4-6): medium dots, faster coverage, general texture work.
Large or fan brush: broad clusters, quick coverage, less precise.
One practical note: acrylics dry fast on bristles. Rinse stippling brushes frequently or the paint hardens in the ferrule and ruins the brush shape.
Stippling Techniques for Different Effects

Building Tone and Value
Tonal value in stippling comes from dot density, not from mixing paint to different shades. Pack dots tightly in shadow areas. Open them up in midtones. Leave the surface nearly bare in highlights.
The mistake most beginners make is going too dense too early. Start lighter than you think you need to. You can always add more dots. Removing them is much harder.
Pressure consistency also matters. Lighter pressure means smaller dots and less paint per mark. Inconsistent pressure creates uneven texture that reads as sloppy rather than intentional. This is worth practicing separately before applying it to a real painting.
Texture Simulation
Stippling is one of the better acrylic painting techniques for simulating organic surface textures.
Fur and hair: use fine round brushes, varying dot size slightly as you move from root to tip.
Bark and rough stone: stippling brushes with stiff bristles, irregular pressure, mid-range dot density.
Grass and foliage: torn sponge or fan brush, loose stippling, multiple greens layered.
Skin: fine dots with fluid acrylics, very light pressure, gradual value transitions.
Combining stippling with dry brushing or glazing gives you more control over the final surface. Stipple the texture first, then glaze over it to unify the color.
Color Mixing Through Dots
This is where stippling gets closest to classical pointillism examples. Instead of blending two colors on the palette, you place dots of each color side by side and let the eye do the mixing at a distance.
Red and yellow dots next to each other read as orange from a few feet away. Blue and yellow read as green. The colors stay optically cleaner than physically mixed paint because you’re not muddying them together.
Mixed media acrylic work has grown by 25% between 2022 and 2023, with online tutorials increasing by 50 million additional views in the same period (360 Research Reports). Color layering through dot application is a big part of what drives that interest.
Stippling vs. Similar Acrylic Techniques

Worth getting clear on this because the confusion is real, especially around pointillism and dabbing.
| Technique | Tool Motion | Goal | Key Difference from Stippling |
|---|---|---|---|
| Stippling | Straight down, lifted | Texture, tone via dot density | Base technique |
| Pointillism | Straight down, lifted | Color mixing through dots | Multi-color dots, optical blending focus |
| Dry brushing | Dragged across surface | Surface texture, highlights | Stroke-based, not dot-based |
| Dabbing | Irregular press and lift | Organic, loose texture | Less controlled, larger marks |
| Scumbling | Scrubbed across surface | Broken color layer | Layered over existing paint, directional |
The line between stippling and dabbing is mostly about intent and control. Dabbing is looser and faster. Stippling is deliberate, dot by dot. When you’re after realistic texture, that distinction matters a lot.
Scumbling is often paired with stippling. Scumble a thin layer of color over a stippled area and it unifies the texture without filling it in completely, which keeps the surface looking dimensional rather than flat.
The main thing to understand about dry brushing vs. stippling: dry brushing catches the raised texture of a canvas, while stippling builds its own texture through accumulated dots. Both create surface interest, but through opposite mechanisms.
Common Mistakes in Acrylic Stippling
Most of these are things you only figure out after ruining a painting at least once.
Too Much Paint Per Dot
Overloading the brush is the most common issue. Too much paint and dots spread, merge, and lose definition. The result looks more like a smear than a dot pattern.
The fix is simple: blot the brush on a paper towel before applying it to the canvas. You want the brush barely loaded. It feels like you’re not putting enough paint on, but that’s usually the right amount.
Working on a Wet Layer
Placing dots on a wet layer blurs the edges and pushes the previous color around. This is especially problematic when building up multiple color layers.
Acrylics typically dry to the touch in 10-20 minutes under normal conditions, though this varies with paint thickness, humidity, and ventilation. Waiting that time between layers is worth it. If you need more time and keep forgetting, look into acrylic layering practices, specifically how drying time affects layer adhesion.
Wrong Brush for the Scale
Using a large brush for fine detail stippling or a tiny brush for large-area texture work slows everything down and produces inconsistent results.
Match brush size to the area you’re working on. For detailed facial features or fur, go small. For backgrounds, foliage, or rough stone textures, a medium stippling brush or torn sponge is faster and more appropriate.
The best brushes for acrylic painting in general are also the ones that hold up to the repetitive dabbing motion of stippling. Cheap brushes lose their shape quickly and the bristles splay out, which changes how your dots land.
Inconsistent Pressure
This one is subtle but visible in the finished painting. Pressure variation affects both dot size and paint density per mark.
If some dots are heavy and some are light with no intentional pattern to it, the texture reads as accidental rather than controlled. Practice a consistent dabbing pressure before you commit it to a real piece. Your wrist needs to learn the motion, not just your eye.
Surfaces and Supports for Stippling

Surface choice affects dot sharpness, paint absorption, and how well built-up layers hold over time.
Not all surfaces behave the same under a stippling brush. Some spread your dots. Some sharpen them. Getting this wrong wastes a lot of work.
Canvas Texture and Dot Application
Canvas tooth directly breaks up dot edges. A coarser weave creates irregular dot margins, which works well for rough organic textures like bark or stone. Fine weave canvas keeps dots more uniform, which is better for skin or smooth gradients.
Most artists use stretched canvas for stippling. It’s the default, and it works. The main downside is flex. A canvas that gives under pressure makes consistent dot application harder, especially when you’re working quickly or using a stiff brush.
Smooth Boards for Fine Detail Stippling
Ampersand Gessobord is worth knowing about here. It’s a rigid, pre-gessoed hardboard panel with a slight, consistent tooth that gives excellent brush control for detailed work. Photorealist painters often prefer it over canvas for exactly this reason.
The firm surface doesn’t flex, so pressure translates directly into consistent dot size. Illustration board works similarly. Both are good choices when stippling precision matters more than large-scale coverage.
| Surface | Dot Edge Quality | Best For |
|---|---|---|
| Stretched canvas (fine weave) | Slightly soft edges | General stippling, portraits |
| Stretched canvas (coarse weave) | Irregular, broken edges | Rough textures, landscapes |
| Gessobord / illustration board | Sharp, consistent edges | Photorealism, fine detail |
| Heavy acrylic paper (300gsm+) | Soft, slightly absorbent | Studies, practice work |
Paper for Acrylic Stippling
Paper works for stippling studies and exploratory work. But paper weight and sizing matter.
Anything under 200gsm will buckle under repeated wet dot application. 300gsm or heavier is the practical minimum for multi-layer stippling in acrylics. Sizing (the surface treatment that reduces absorbency) also affects how paint sits. Heavily sized paper keeps dots crisper. Unsized paper absorbs paint too fast and dots lose definition before you can adjust them.
Learning how texture works in art more broadly helps you make smarter surface choices. The relationship between surface, tool, and paint behavior is the same regardless of technique.
How Surface Texture Affects Dot Sharpness
This is something I’ve seen people ignore until it ruins a piece. A heavily textured surface breaks up dots into irregular marks, even with a fine round brush.
If your reference requires precise dot placement, like stippling fur on a portrait or fine-grain skin texture, start with a smooth or lightly textured surface. Rough surfaces add their own visual noise that competes with your stippling pattern.
The reverse is also true. If you want rich surface texture in the finished painting, a canvas with strong weave gives you that for free, and your stippled dots integrate into the canvas texture rather than sitting on top of it.
Stippling in Different Acrylic Painting Styles
Stippling doesn’t belong to one style. The technique fits into realistic, illustrative, and abstract acrylic work in different ways, and it combines naturally with ink, watercolor, and collage in mixed media contexts.
Photorealism: Fine Stippling for Detail

Photorealist painters use stippling for skin texture, fabric weave, fur, and material surfaces where blended paint alone looks too smooth to be convincing.
Don Eddy, one of the early photorealist painters who has continued working into the 2020s, builds his acrylic panels in 20-30 transparent layers beginning with small circles of color, building up intricate surface detail through dot-based mark-making. His 2023 exhibition at Nancy Hoffman Gallery showed exactly this process at scale.
For photorealism to work in acrylics, stippling is usually combined with glazing. Stipple the texture, then glaze transparent color over it. The glaze unifies the dots while keeping the surface dimensionality.
Illustration and Concept Art: Stylized Texture
In illustration, stippling creates a graphic quality that blending can’t replicate. Dots remain visible as dots at close range, which gives a tactile, handmade feel that works well for editorial work, book covers, and concept art pieces.
SA Classic Painting noted in their 2024 trend report that stippling techniques were back in strong demand, driven partly by DIY tutorials trending on platforms like TikTok making the method more accessible to a wider audience.
Illustration applications:
- Character skin and hair texture with fine round brushes
- Environment backgrounds using coarser stippling for depth
- Color field effects through layered dot colors (pointillist-style)
Mixed Media: Stippling With Ink, Watercolor, and Collage
Stippling is one of the most adaptable techniques in mixed media work. It layers cleanly over collage elements, works under and over ink washes, and combines with watercolor underpainting in ways that traditional brushstrokes don’t.
A common approach: lay down a watercolor or ink wash as an underpainting for color and atmosphere, then stipple acrylic dots on top to build texture and definition. Because acrylics are water-resistant once dry, they sit on top of the watercolor layer without reactivating it.
The global art paint market reached roughly USD 4 billion in 2024, with mixed media techniques among the strongest growth areas (360 Research Reports). Online sales of hobby and craft supplies in the U.S. exceeded $22.2 billion in 2024 (Amra & Elma), reflecting how much demand there is for multi-technique practice that includes methods like stippling.
For anyone working in acrylic mediums, it helps to know which mediums keep dots workable longer. Slow-drying mediums (sometimes called “open” mediums) extend the working time of each dot, which matters when you’re placing precise marks slowly. Golden Artist Colors makes an open acrylic medium specifically for this purpose.
Abstract Acrylic: Stippling for Optical Effect
Abstract work uses stippling differently. Dot density and color become the composition itself rather than a tool for representing something else.
Optical effects through stippled color can produce vibration, depth illusions, and tonal gradients across large canvas areas. Artists working in this space often use stippling in combination with blending and pouring to contrast controlled dot placement against more fluid passages.
The relationship between stippling and Op Art is worth noting here. Op Art artists like Victor Vasarely built optical illusions through systematic mark repetition. Stippling in abstract acrylics borrows from that same principle, using dot pattern density and color contrast to create perceived movement or depth on a flat surface. Artists like Victor Vasarely demonstrated how systematic dot-based marks could generate powerful optical tension at scale.
In 2024, 71% of U.S. adults engaged in a craft project, and 86% of Gen Z identified as crafters (Amra & Elma). The appetite for hands-on techniques like stippling, which offer both meditative repetition and visible results, fits squarely into that broader shift toward creative practice as a hobby and stress outlet.
FAQ on What Is Stippling In Acrylic Painting
What is stippling in acrylic painting?
Stippling is a technique where small dots of paint are applied to a surface to build texture, tone, and depth. Dot density controls light and shadow. Acrylics work well because they dry fast, keeping each dot sharp and defined without smearing.
How is stippling different from pointillism?
Pointillism uses dots of different colors placed side by side for optical color mixing. Stippling traditionally uses a single color, relying on dot density alone to create shade and form. In acrylic work, the two approaches often overlap.
What brushes work best for stippling with acrylics?
Stiff-bristle stippling brushes, fine round brushes, and fan brushes each produce different dot effects. Brush size determines dot scale. Sponges and torn foam also work for looser, organic stippling textures like foliage or rough stone.
Can you stipple with fluid acrylics or only heavy body?
Both work, but differently. Heavy body acrylics hold dot shape better because of their thickness. Fluid acrylics spread more, giving softer dot edges. Use fluid acrylics when you want subtle texture, like skin or atmospheric backgrounds.
How do you build tone with stippling?
Pack dots tightly in shadow areas. Open them up gradually toward midtones. Leave the surface nearly bare in highlights. Start lighter than you think you need to. Adding more dots is easy. Removing them is not.
What surfaces are best for acrylic stippling?
Smooth surfaces like Ampersand Gessobord give sharp, controlled dots. Coarse canvas adds irregular edges, useful for rough textures. Heavy acrylic paper (300gsm minimum) works for studies. Surface texture directly affects dot sharpness and paint absorption.
Is stippling good for beginners?
Yes. The technique requires no blending skill, just consistent pressure and patience. Beginners can produce convincing texture results early on. The main challenge is pressure control. Practice on scrap paper before applying it to a real painting.
How does stippling work in photorealistic acrylic painting?
Fine stippling builds skin texture, fur, fabric weave, and material surfaces where blended paint looks too smooth. It’s often combined with acrylic glazing layers. Stipple the texture first, then glaze transparent color over it to unify the surface.
Can stippling be used in mixed media acrylic work?
Yes. Stippling layers cleanly over collage, ink washes, and watercolor underpaintings. A common approach is a watercolor base for color and atmosphere, then acrylic dots on top for texture. Acrylics are water-resistant once dry, so they don’t reactivate lower layers.
What are the most common stippling mistakes in acrylics?
Overloading the brush causes dots to spread and merge. Working on a wet layer blurs edges. Using the wrong brush size for the scale of detail creates inconsistent results. Inconsistent pressure makes texture look accidental rather than intentional.
Conclusion
Stippling in acrylic painting is a technique worth adding to your practice, whether you’re working on realistic texture, illustration, or mixed media.
The fundamentals are straightforward: control dot density, match your brush to the task, and let each layer dry before building the next.
Surface choice shapes your results more than most painters expect. Smooth boards sharpen dots. Coarse canvas breaks them up. Both have their place depending on what you’re painting.
Beyond texture, stippling gives you a way to handle optical color mixing, tonal gradients, and mark making without ever blending a stroke.
Start small. Practice pressure consistency on scrap paper. Then bring it into your next piece, even just for one section of fur, foliage, or skin.