No single tube of paint will ever give you a convincing skin tone. That is the first thing worth knowing before you mix a single drop.
Realistic skin color comes from understanding pigment ratios, undertones, and how light shifts across a face. It is a skill, not a formula.
This guide covers exactly how to make skin color with paint across every medium, from acrylic and oil to watercolor. You will learn the core pigments that matter, how to mix light, medium, and dark skin tones, and how to fix the most common mistakes before they ruin a portrait.
What Skin Color Actually Is in Paint Mixing
Skin color is not a single fixed hue. It is a range of overlapping tones, undertones, and reflected colors that shift depending on light, shadow, and the individual in front of you.
No tube of “flesh” paint will ever fully cut it. Those pre-mixed options are a shortcut that almost always reads as flat or artificial once it hits the canvas.
The science backs this up. According to a 2023 review published in Healthcare (San Gallicano Dermatological Institute, Rome), melanin is the primary driver of skin color variation, but its type and concentration produce an enormous spectrum of pigmentation shades across all human populations.
All humans have the same number of melanocytes. What differs is how much melanin they produce, and that alone accounts for the full range of skin tones you will ever need to paint.
Why “Flesh Color” Tubes Fail
Pre-mixed flesh paint is calibrated for one narrow tonal range, typically a pale pink-beige.
- It ignores warm, cool, and olive undertones entirely
- It produces chalky, unnatural results when lightened
- It has no flexibility for shadow or highlight mixing
Mixing from scratch using a core set of pigments gives you control over every variable. That is what makes a portrait look alive rather than printed.
Undertones: The Foundation of Accurate Skin Color
Every skin tone sits within one of three undertone categories. Getting this wrong early means fighting the mix for the rest of the painting.
| Undertone | Visual Bias | Common Pigment Cues |
|---|---|---|
| Warm | Yellow, golden, peachy | Yellow Ochre dominant, more red |
| Cool | Pink, rosy, bluish | More red, touch of Ultramarine Blue |
| Olive | Yellow-green, muted | Yellow Ochre plus trace of Sap Green |
Skin tones also reflect surrounding color. A subject near a red wall will pick up warmth. A subject under cool fluorescent light will read slightly blue-grey in the shadows. Your mix needs to account for both.
Paints and Tools You Need Before You Start
The global art supplies market was valued at $13.6 billion in 2023 (Dataintelo), with paint products making up a major portion of that spend. With so many options on shelves, knowing exactly what you need for skin tone mixing saves time and money.
You do not need twenty colors. A limited palette works better, and most experienced portrait painters will tell you the same thing.
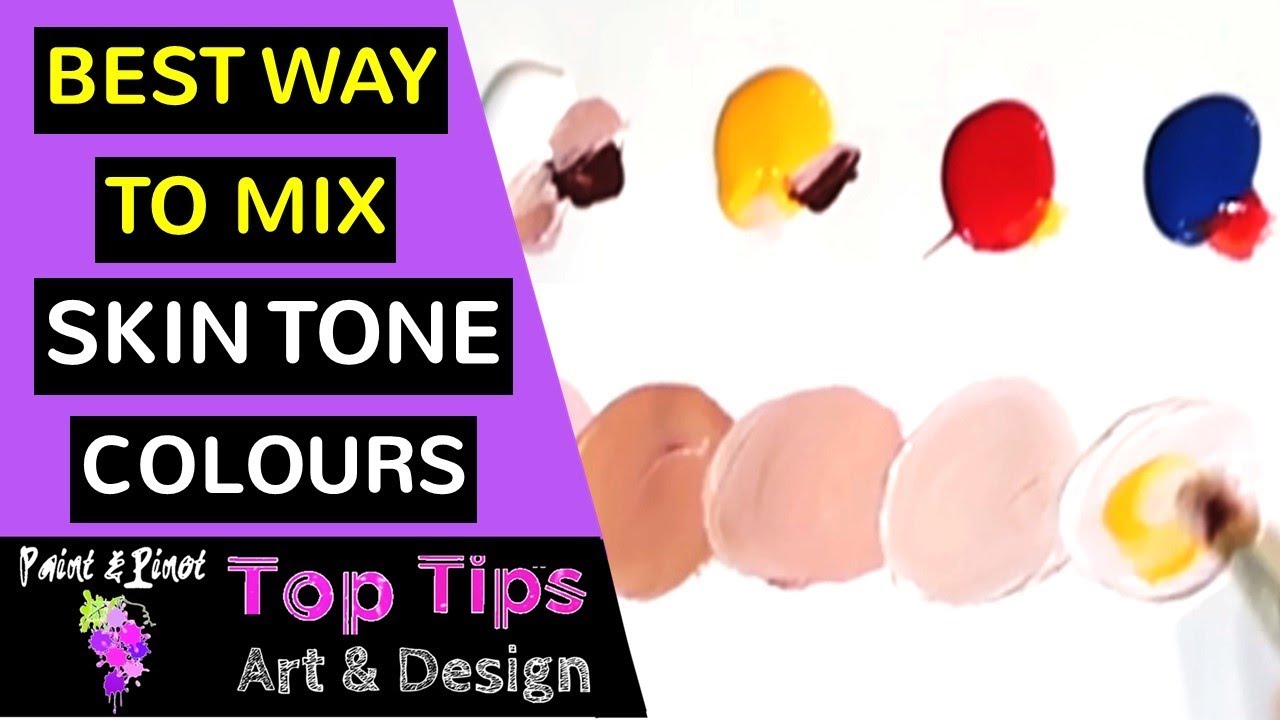
The Core Pigment Set
Six pigments cover nearly every skin tone range you will encounter:
- Titanium White – base for all light skin mixes; adds opacity
- Yellow Ochre – the most useful earth tone for warm skin; avoids the orange trap
- Burnt Sienna – shifts any mix toward a natural, sun-warmed tone fast
- Cadmium Red or Naphthol Red – adds warmth and flush; use sparingly
- Burnt Umber or Raw Umber – deepens without deadening; better than black for dark tones
- Ultramarine Blue – cools shadows; used in tiny amounts
Adding Sap Green or Dioxazine Purple expands the range for olive tones and deep shadow mixing. But start with the six above.
Paint Type Affects Your Starting Palette
The medium you choose changes how skin tones behave on the surface. This matters before you mix a single drop.
Oil paint stays workable for hours or days, depending on thickness. That makes it the preferred choice for portrait artists who need to blend transitions slowly and cleanly.
Acrylic paint dries in minutes, which is tricky for skin tone blending. Wet-on-wet techniques require a stay-wet palette or slow-dry medium to extend working time.
Watercolor builds tone through transparent washes rather than opaque mixing. Skin color in watercolor is about layering, not mixing a single opaque value.
Palette and Brush Setup
A clean mixing surface matters more than most beginners realize. Contaminated color from a dirty painting palette is one of the fastest ways to muddy a skin tone mix.
Use a palette with enough separate wells or zones to keep base mixes isolated. Mix skin tones in large batches upfront. Running out mid-painting and remixing a new batch that does not quite match is a frustrating and common problem.
For brushes, a filbert brush is the go-to for portrait painters. The rounded tip blends edges naturally without creating hard lines.
The Base Formula for Mixing Skin Color
There is a starting point that works for the majority of light to medium skin tones. It is not a fixed recipe, but it gives you a reliable base to adjust from.
Start with Titanium White as the dominant color. Add a small amount of Cadmium Red, then an even smaller amount of Yellow Ochre. That gives you a pink-beige foundation. Then add Burnt Sienna in a small amount to shift it toward a more natural, realistic tone.
A classic mistake at this stage: the mix looks too pink. Reduce the red and add more Yellow Ochre. Still too pink? A tiny touch of Ultramarine Blue will neutralize it without making the skin look grey.
Adjusting for Light Skin Tones
Light skin mixes need more white, but not as much as beginners assume. Hold a white piece of paper next to your own skin. The difference in tone is larger than most people expect.
- Keep Titanium White as the dominant pigment (roughly 60-70% of the mix)
- Add Yellow Ochre before adding red to avoid a too-pink result
- A trace of Burnt Sienna warms the whole mix and prevents a chalky, artificial look
Common error: adding too much white makes the skin look grey or washed out under any shadow tone. Mix lighter than your target, but not pale.
Adjusting for Medium Skin Tones
Medium skin tones use less white and more of the earth pigments. Burnt Sienna or Raw Sienna can become the starting base rather than an addition.
Start with a Burnt Sienna and white mix. Then add Yellow Ochre for warmth and a small amount of red to push toward the natural flush present in most skin. The ratio shifts: earth tones now dominate, and white becomes a modifier rather than the base.
Artist and educator Susan Patton (Oil Painters of America, 2024) recommends building a quick color chart using different base pigments mixed with white to identify the right foundation before starting any portrait. It is one of those steps that saves a lot of backtracking later.
How to Mix Dark and Deep Skin Tones

Dark and deep skin tones require a fundamentally different approach. The logic that drives light skin mixing does not transfer directly. Starting from white is the wrong move entirely.
Begin instead with Burnt Sienna or Raw Umber as the dominant color. These earth tones carry the warmth and depth that deep skin needs at its core.
The Role of Ultramarine Blue in Deep Tones
Ultramarine Blue is what makes dark skin mixes look rich and alive rather than flat and brown. Add it in very small amounts to deepen the mix.
Key difference: Ivory Black or lamp black kills warmth immediately. The result looks dull and lifeless. Ultramarine Blue darkens the mix while keeping it visually complex.
For very deep complexions:
- Start with Raw Umber or Burnt Umber as the base
- Add small amounts of Cadmium Red and Yellow Ochre for warmth
- Use Ultramarine Blue (not black) to deepen tone
- Titanium White in tiny amounts lifts highlights without washing out the base
Mixing Brown and Deep Brown Complexions
A mix of Burnt Sienna, Raw Umber, and a small amount of Cadmium Red gets you into the warm brown range. Shifting it cooler means adding Ultramarine Blue. Shifting it warmer means adding Yellow Ochre.
The ratio guide:
| Tone Range | Dominant Pigment | Supporting Pigments | Avoid |
|---|---|---|---|
| Medium brown | Burnt Sienna | Yellow Ochre, Cad Red, touch of white | Ivory Black |
| Deep brown | Burnt Umber | Cad Red, Yellow Ochre, Ultramarine Blue | Ivory Black |
| Very deep | Raw Umber | Ultramarine Blue, trace Cad Red | Any black pigment |
Artist Kehinde Wiley, known for his large-scale portrait work featuring subjects of African descent, demonstrates how rich, multi-layered skin tones require building through transparent glazes rather than a single opaque mix. That approach, while more time-intensive, produces depth that flat mixing cannot replicate.
Warm vs. Cool Undertones and How to Nail Them
Getting the undertone wrong is usually why a portrait ends up looking off even when the value and lightness seem correct. The mix can be the right brightness and still read as the wrong person.
Undertone is the bias sitting underneath the surface tone. It does not change with light or shadow the way the top color does. It stays consistent across the face.
Shifting a Mix Toward Warm
Warm undertones lean yellow, golden, or peachy. The pigment logic is straightforward.
To push a base mix warmer:
- Increase Yellow Ochre relative to red
- Add small amounts of Raw Sienna for a deeper golden shift
- Reduce or remove any blue in the mix
Warm undertones are common across East Asian, South Asian, Latin American, and many African skin tones. Yellow Ochre is probably the single most useful pigment when working across a wide range of warm skin tones.
Shifting a Mix Toward Cool
Cool undertones lean pink, rosy, or faintly bluish. They show up most clearly in lighter skin and in highly saturated flush areas like cheeks or the bridge of the nose.
To shift the base mix cooler: add a very small amount of Ultramarine Blue or Dioxazine Purple. A tiny trace, literally the tip of a palette knife, is often enough.
Increase red relative to yellow. Reduce or remove Yellow Ochre from the mix.
Olive Undertones
Olive is arguably the trickiest undertone to nail. It sits between warm and cool, with a yellow-green bias that many artists miss entirely.
Add a trace of Sap Green to a Yellow Ochre-dominant mix. The result is a muted, complex tone that reads naturally olive. Too much green and the skin looks sick. The amount should be barely perceptible in the mix itself.
Artists like Malcolm T. Liepke consistently demonstrate this kind of tonal complexity across a range of skin tones in his portrait work, building up color through multiple thin applications rather than trying to nail the undertone in a single heavy pass.
Mixing Skin Tones for Shadows and Highlights

Shadow and highlight mixing is where most beginners either add pure black or pure white and immediately kill the life in the skin tone. Both are wrong moves. Both are fixable.
Understanding value in painting is what separates a flat portrait from a convincing one. Value shifts, not just color shifts, are what create the illusion of three-dimensional form on a flat surface.
Mixing Shadow Colors for Skin
Shadows on skin pull cooler in most lighting situations. The darkest shadow is almost never just a darker version of the mid-tone.
Shadow mixing rules:
- Never add pure black to the skin tone base
- Add Burnt Umber or Raw Umber to deepen the value
- Add a small amount of Ultramarine Blue to shift the shadow cool
- Mix a separate “cool shadow” pile on the palette, do not try to adjust mid-tone on the fly
The technique known as chiaroscuro relies entirely on this principle: light and shadow are not the same color at different brightness levels. They shift in temperature. Shadows cool, highlights warm (generally).
Mixing Highlight Colors for Skin
A common mistake: adding straight Titanium White to the base tone for highlights. The result is chalky and cold.
Better approach:
- Add a warm white (a white tinted slightly with Yellow Ochre or Naples Yellow)
- In oil painting, a very small amount of Cadmium Yellow can be added to white for a warm highlight
- For very bright highlights on darker skin, Titanium White mixed with a trace of Burnt Sienna stays in the same warm family as the base tone
Mix a large batch of your mid-tone skin color upfront. From that single batch, pull off portions to mix your shadow color and your highlight color. This keeps all three values in the same tonal family, which is what makes a portrait read as coherent.
Secondary Shadows and Reflected Light
Reflected light on skin, the warm bounce coming up from a surface below the chin or from a nearby colored object, is where portrait painting gets genuinely interesting.
These secondary tones are often warmer than the main shadow because they carry the color of whatever surface is reflecting into them. A subject sitting near a warm wooden table will have an orange-tinged reflected light on the underside of the jaw.
Using color theory as a guide here is useful. Complementary colors placed in shadow areas create visual vibration and depth that matching-tone shadows simply cannot achieve. Rembrandt van Rijn built entire portrait systems around this idea, using warm-toned grounds and cool-shifted shadow passages to give his figures a sense of depth that still holds up after 400 years.
Skin Color Mixing by Paint Type
Nearly 49% of U.S. adults participate in painting and other arts and crafts activities (Amra & Elma, 2024). Most of them hit the same wall early: skin tones that look wrong and no clear reason why.
Often, the medium is part of the problem. Acrylic, oil, and watercolor painting each handle skin tone mixing in genuinely different ways. Treating them the same is a reliable path to frustration.
Acrylic Paint and Skin Tones
The drying shift is the main trap. Acrylic paint dries noticeably darker than it looks wet, which catches beginners off guard when mixing skin tones.
- Mix your skin tone slightly lighter than your target value
- Use a stay-wet palette to keep mixes workable longer
- Add a slow-dry medium if you need blending time for transitions
- Test swatches on a scrap piece before committing to the canvas
Winsor & Newton’s Professional Acrylic range and Golden’s Open Acrylics both extend working time specifically to help with blending, which makes them more forgiving for portrait work than standard fast-dry formulas.
Oil Paint and Skin Tones
Oil paint is preferred by portrait artists for one reason: blending time. You can work wet-into-wet for hours, which makes soft skin tone transitions far easier to achieve.
Drying time by layer thickness:
| Application | Approx. Dry Time | Suitable For |
|---|---|---|
| Thin glaze | 1-3 days | Transparent shadow layers |
| Mid-body stroke | 3-7 days | Main skin tone passages |
| Heavy impasto | Weeks to months | Thick highlight accents |
The classical technique known as sfumato, developed by Leonardo da Vinci, relies entirely on oil paint’s long open time to build imperceptibly soft skin tone gradations across multiple sessions.
Watercolor and Skin Tones

Watercolor skin tone mixing works on an entirely different logic. Transparency replaces opacity. You never mix a light skin tone by adding white. You dilute with water instead, letting the paper do the work.
Build skin color in thin, transparent washes layered one over the other. Each layer adds depth without muddying the tone underneath, as long as each one dries fully before the next goes on.
Start with a warm, heavily diluted wash of Yellow Ochre and a trace of Alizarin Crimson. Let it dry. Add a second, slightly more pigmented wash to build depth in shadow areas. Cool the shadows with a diluted Ultramarine Blue wash on a third pass.
This layering approach, sometimes called glazing technique in watercolor, is what gives watercolor portraits their luminous, translucent quality. Opaque pigments, even heavily diluted, flatten the effect.
Gouache as a Middle Ground
Gouache sits between watercolor and acrylic in terms of handling. It is opaque but rewettable, which gives beginners more room to correct errors.
Gouache skin tone behavior: colors dry lighter rather than darker (opposite of acrylic). Mix slightly deeper than your target value. It works well for flat, graphic portraits rather than blended, realistic flesh.
Common Skin Tone Mixing Mistakes and How to Fix Them

Skin tone mixing problems almost always fall into one of a handful of categories. The fix is usually simple once you know what went wrong.
Kraft Geek’s 2025 guide on beginner painting mistakes confirms that color problems are the most common issue reported by new artists, with muddy, lifeless mixes being the top complaint. Most of it comes down to using too many pigments at once or skipping basic color theory principles.
Mix Came Out Too Pink
Too much red relative to yellow is almost always the cause.
Fix: add Yellow Ochre in small increments until the pink bias shifts. Do not add green to cancel the pink. It muddies the mix immediately.
If the whole mix is already on the palette and too large to easily adjust, pull a small amount aside and work the correction on that portion first. Correcting a large pile of paint is harder to control.
Skin Tone Looks Chalky or Flat
Cause: too much Titanium White. This is the most common beginner error in light skin tone mixing.
White desaturates color fast. A small amount goes a long way, and adding it too aggressively kills the warmth and vitality of the mix. Add Burnt Sienna in a small amount to pull warmth back in. If the mix is salvageable, a trace of Yellow Ochre also helps.
Understanding the difference between tinting and simply lightening a color matters here. A tint adds white while ideally maintaining hue character. Pushing too much white in loses the hue entirely.
Mix Looks Grey or Muddy
Muddy skin tones come from one of two places: too many pigments mixed together, or contamination from a dirty palette.
Artists Network recommends stopping at two to three pigments per mix and quitting as soon as the target color appears. Every additional pigment added after that point increases the risk of muddiness.
Start fresh. Do not try to rescue a muddy mix by adding more paint. Clean the palette section, and rebuild from two pigments only.
Skin Tone Looks Too Orange
Orange skin almost always means the red and yellow are in balance, but both are too saturated relative to the overall mix.
- Add a very small amount of Ultramarine Blue to neutralize
- Or pull back the cadmium red and replace with a smaller amount of Burnt Sienna
- Yellow Ochre is naturally more muted than Cadmium Yellow, so swapping in Ochre also helps
Burnt Sienna already has a built-in earthy quality that sits closer to realistic skin than a raw cadmium red-yellow mix. Switching to it as the warm component often solves the orange problem without needing a neutralizer.
Matching a Reference Photo vs. Painting from Life
Reference photos shift skin tone color in ways that are tricky to account for. Camera white balance, artificial lighting, and JPEG compression all affect how skin reads on screen.
Key difference: photos often exaggerate contrast and shift skin toward orange or magenta depending on the light source. Painting from life gives you the real color, unfiltered.
When working from a photo, treat the reference as a guide for value and form rather than a literal color map. Mix what looks right in context, not what the screen shows. Color saturation in photos is usually higher than reality, so mixing slightly more muted versions of what you see typically reads more accurately on canvas.
Painter Norman Rockwell famously worked from photographs while deliberately adjusting skin tone warmth and saturation beyond what his reference showed, specifically because he knew photography skewed the color and that painted skin needed different treatment to read as believable.
FAQ on How To Make Skin Color With Paint
What colors do you mix to make skin color?
Start with Titanium White, add a small amount of Cadmium Red, then a smaller amount of Yellow Ochre. A touch of Burnt Sienna shifts the mix toward a natural, realistic tone. These four pigments cover most light to medium skin tones reliably.
What primary colors make skin tone?
Red, yellow, and a very small amount of blue combine to produce a basic skin tone. In practice, earth pigments like Yellow Ochre and Burnt Sienna work better than pure primaries. They produce warmer, more natural results with less risk of an overly bright or orange mix.
How do you make dark skin tone with paint?
Start with Burnt Sienna or Raw Umber as the base instead of white. Add Cadmium Red and Yellow Ochre for warmth. Use Ultramarine Blue to deepen the tone. Avoid Ivory Black entirely as it kills warmth and makes the mix look flat.
How do you fix a skin tone that looks too pink?
Add Yellow Ochre in small increments until the pink bias fades. Do not add green to cancel it as this muddies the mix immediately. Pull a small portion of the mix aside and correct that first before adjusting the whole batch.
What is the difference between warm and cool skin tones in paint?
Warm undertones lean yellow or golden. Increase Yellow Ochre and reduce blue to push there. Cool undertones lean pink or rosy. Add a trace of Ultramarine Blue or Dioxazine Purple to shift the base mix cooler. Olive tones need a trace of Sap Green.
How do you mix skin tones in watercolor?
Watercolor uses transparency instead of opacity. Dilute your mix with water to lighten it rather than adding white. Build skin color in thin, layered washes, starting warm and adding cooler shadow passes after each layer dries fully.
Can you mix skin tone with acrylic paint?
Yes, but acrylic paint dries darker than it looks wet. Mix your skin tone slightly lighter than your target. Use a stay-wet palette to keep the mix workable. A slow-dry medium extends blending time for smoother skin tone transitions.
Why does my skin tone look muddy?
Too many pigments mixed together is almost always the cause. Stick to two or three colors per mix and stop as soon as the target color appears. A contaminated palette also causes muddy skin tones. Start fresh rather than trying to rescue the mix.
Should you use black paint to darken skin tones?
No. Black deadens skin color immediately and makes the result look grey or unnatural. Use Burnt Umber or Ultramarine Blue to deepen skin tone values instead. These pigments darken the mix while keeping the warmth and visual complexity that makes painted skin look convincing.
What is the best paint for mixing realistic skin tones?
Oil paint gives the longest blending time, which makes smooth skin tone transitions easier. Acrylics work well with a slow-dry medium added. Watercolor builds skin tone through transparent layering rather than opaque mixing. Each medium works. The acrylic painting approach suits beginners best for learning pigment ratios quickly.
Conclusion
This conclusion is for an article presenting how to make skin color with paint, and the core takeaway is simple: start with a limited palette and build from there.
A handful of pigments, Yellow Ochre, Burnt Sienna, Titanium White, and Ultramarine Blue, cover nearly every skin tone formula you will need across light, medium, and dark complexions.
Undertone is what separates a convincing portrait from a flat one. Warm, cool, and olive tones each require a different mixing approach.
Avoid black for shadow mixing. Keep your palette clean. And stop adding pigments the moment the mix looks right.
Whether you work in oil painting or acrylics, realistic skin color comes down to observation, restraint, and practice.