
Your favorite detail brush just splayed beyond recognition after months of faithful service. Don’t toss it yet.
Learning how to reshape paintbrush bristles transforms damaged tools back into precision instruments. Professional artists have used these restoration techniques for centuries to save expensive brushes for oil painting and maintain their creative workflow.
Bent bristles, crushed ferrules, and dried paint buildup don’t mean permanent retirement. Natural hog bristles and synthetic filaments both respond to specific reshaping methods when applied correctly.
This guide covers proven techniques for:
- Heat-based restoration using steam and hot water
- Chemical softening with household and professional products
- Cold forming methods that preserve delicate bristle structures
- Maintenance routines that prevent future damage
Whether you’re salvaging student-grade brushes or restoring professional watercolor painting tools, these methods work reliably when matched to your specific bristle type and damage level.
Preparation and Safety Considerations

Cleaning Bristles Before Reshaping
Paint removal must happen first. Period.
Dried paint residue prevents proper bristle conditioning. Natural hog bristles need different solvents than synthetic filaments.
Solvent Selection for Different Paint Types
For acrylic painting brushes, warm soapy water works initially. Stubborn buildup requires specialized brush cleaning solutions.
Oil painting brushes demand mineral spirits or turpentine. Never use water alone on oil-based residue.
Watercolor painting tools clean easiest. Lukewarm water dissolves most pigment deposits without harsh chemicals.
Proper Cleaning Technique to Avoid Damage
Work from the ferrule outward. Pushing paint deeper into the brush head causes permanent damage.
Gentle circular motions in your palm remove stubborn paint. Aggressive scrubbing splits delicate bristle tips.
Complete Paint Removal Verification
Run clear water through the bristles. Any colored runoff means more cleaning is needed.
Check between individual bristles for hidden paint deposits. These spots will stiffen during reshaping if missed.
Work Area Setup
Ventilation Requirements
Heat reshaping releases fumes from residual paint and bristle materials. Open windows aren’t enough.
Cross-ventilation prevents chemical buildup. Position yourself between fresh air sources and exhaust points.
Steam methods need less ventilation than solvent-based techniques. Still, proper airflow keeps you comfortable during longer sessions.
Protective Equipment Needed
Heat-resistant gloves protect against steam burns and hot tool contact. Regular kitchen gloves melt under high temperatures.
Safety glasses prevent splashing during cleaning phases. Bristle fibers can flick unpredictably when wet.
Aprons or old clothes handle inevitable drips. Professional brush care gets messy fast.
Tool and Material Organization
Gather everything before starting. Hot tools don’t wait while you search for supplies.
Small containers hold different cleaning solutions. Label each to prevent dangerous mixing.
Clean towels should be within arm’s reach. Paper towels disintegrate when wet and leave residue.
Safety Precautions with Heat and Chemicals
Burn Prevention with Heated Tools
Hot water above 140°F damages synthetic bristles. Test temperature on your wrist first.
Hair dryers generate concentrated heat. Keep moving to prevent localized overheating.
Steam can cause severe burns despite looking harmless. Direct contact with steam sources causes instant injury.
Chemical Exposure Risks
Prolonged solvent contact irritates skin. Wear gloves during extended cleaning sessions.
Never mix different chemical cleaners. Unknown reactions create dangerous fumes.
Dispose of contaminated materials properly. Paint-soaked rags can spontaneously combust.
First Aid Considerations
Keep burn gel nearby during heat-based methods. Cool running water provides immediate relief for minor burns.
Eye wash stations or clean water bottles handle chemical splashes. Don’t rely on bathroom sinks during emergencies.
Heat-Based Reshaping Methods
Hot Water Technique
Optimal Water Temperature Ranges
Natural bristles tolerate higher temperatures than synthetic alternatives. Hog bristles handle up to 160°F comfortably.
Synthetic filaments soften around 120°F. Temperatures above 140°F cause permanent curling or melting.
Nylon brushes need the coolest water. Polyester blends fall somewhere between natural and nylon tolerances.
Soaking Duration for Different Bristle Types
Professional hog bristle brushes need 10-15 minutes of soaking. Cheap natural bristles may require less time.
Synthetic brush repair happens faster. Five minutes usually softens most artificial fibers enough for reshaping.
Mixed bristle brushes complicate timing. Start with shorter soaking periods and extend as needed.
Step-by-Step Process and Hand Positioning
Fill a shallow container with properly heated water. Deep containers waste water and make brush handling awkward.
Hold the brush by its handle, not the ferrule. Metal expands with heat and can burn fingers.
Submerge only the bristle portion. Water entering the ferrule loosens the glue holding bristles in place.
Gently swirl the brush to ensure even heat distribution. Avoid aggressive agitation that damages bristle tips.
Steam Reshaping Process
Steam Generation Methods
Kettles provide controlled steam flow. Adjust the spout angle to direct steam precisely where needed.
Garment steamers offer consistent temperature and pressure. Professional brush restoration often uses these tools.
Stovetop methods work but require constant attention. Boiling water creates unpredictable steam bursts.
Controlled Exposure Techniques
Hold brushes at safe distances from steam sources. Start at 6 inches and move closer gradually.
Bristle flexibility recovery happens within seconds of proper steam exposure. Overexposure causes damage instead of repair.
Rotate the brush slowly to expose all bristle surfaces. Uneven heating creates irregular shapes.
Timing for Best Results
Natural bristles respond to steam in 15-30 seconds. Watch for visible softening rather than counting time.
Synthetic materials need even less exposure. Five to ten seconds often suffices for most reshaping needs.
Stop immediately when bristles begin moving freely. Additional steam exposure provides no benefits.
Hair Dryer Method
Temperature and Distance Settings
Medium heat settings work best for most brush types. High heat damages bristles faster than it helps.
Maintain 4-6 inches between the dryer and brush head. Closer distances concentrate too much heat in small areas.
Cool shot features help set the new bristle shape. Alternate between warming and cooling cycles.
Movement Patterns to Avoid Overheating
Constant motion prevents hot spots that damage bristles permanently. Think of it like spray painting – steady, overlapping passes.
Focus airflow from ferrule toward tips. This direction follows natural bristle alignment and prevents splaying.
Circular motions around the brush head ensure even heating. Back-and-forth patterns create uneven temperature zones.
Cooling and Setting the New Shape
Shape bristles while still warm and pliable. Once cooled, the new form becomes semi-permanent.
Use your fingers to guide bristles into proper alignment. Work quickly before heat dissipates.
Hold the desired shape for 30 seconds while bristles cool. This sets the memory into the fibers.
Allow complete cooling before testing flexibility. Warm bristles feel softer than their final state.
Cold Reshaping Techniques

Wet Forming with Conditioner
Hair Conditioner Selection and Application
Hair conditioner works because it’s designed to soften protein fibers. Natural hog bristles respond like human hair to these treatments.
Regular drugstore conditioners work fine. Expensive salon products don’t provide better results for brush restoration.
Apply conditioner directly to damp bristles. Work it through with your fingers like you’re conditioning actual hair.
Manual Shaping While Damp
Shape bristles immediately after conditioner application. The conditioning agents need time to penetrate fiber structures.
Use gentle pressure to guide bristles into proper alignment. Heavy-handed manipulation breaks individual fibers.
Work from the ferrule outward toward tips. This follows natural bristle growth patterns and prevents damage.
Drying and Setting Process
Wrap shaped bristles in tissue paper to maintain position. Rubber bands compress too tightly and create permanent creases.
Air drying takes 4-6 hours depending on bristle density and room humidity. Don’t rush this process with heat.
Check periodically during drying. Adjust bristle positions if they start shifting out of alignment.
Glycerin Treatment Method
Mixing Ratios and Application
Mix one part glycerin with three parts distilled water. Tap water contains minerals that interfere with bristle softening.
Glycerin attracts moisture from the air, keeping bristles flexible longer than water alone. This extended working time helps with difficult reshaping jobs.
Soak bristles for 15-20 minutes in the glycerin solution. Longer soaking doesn’t improve results significantly.
Working Time Before Setting
Glycerin-treated bristles stay workable for up to an hour after removal from solution. This extended window allows for multiple adjustments.
Shape carefully during this period. The glycerin makes bristles slippery and harder to control precisely.
Professional brush restorers prefer this method for valuable brushes for oil painting because of the gentle action.
Removal and Final Cleaning
Rinse thoroughly with lukewarm water to remove all glycerin residue. Sticky residue attracts dirt and paint particles.
Soap removal requires multiple rinses. Glycerin bonds strongly to natural bristle surfaces.
Final rinse with distilled water prevents mineral deposits on clean bristles. Hard water leaves white film that affects paint application.
Mechanical Shaping Tools
Brush Combs and Their Proper Use
Metal brush combs work best on natural bristles. Plastic versions lack the precision needed for fine detail work.
Start combing from the ferrule and work outward. Never comb backward toward the handle.
Use light pressure and short strokes. Aggressive combing pulls bristles loose from the ferrule permanently.
Ferrule Adjustment Techniques
Gently squeeze oval ferrules back to round shapes using needle-nose pliers. Pad the jaws with tape to prevent scratches.
Crushed ferrules often cause bristle splaying problems. Reshaping the metal container fixes many bristle alignment issues.
Work slowly and check frequently. Over-correction requires starting the entire process over again.
Gentle Pressure Application Methods
Apply pressure gradually over several sessions rather than forcing dramatic changes immediately. Bristles have memory and resist sudden alterations.
Finger pressure works better than tools for final adjustments. You can feel when bristles reach their flexibility limits.
Support the brush handle against a solid surface. This prevents transferring pressure to the ferrule connection.
Chemical Softening Approaches
Fabric Softener Solutions
Dilution Ratios for Different Bristle Types
Natural bristles handle stronger fabric softener concentrations than synthetic alternatives. Start with 1:4 ratios (softener to water).
Synthetic brush conditioning requires gentler treatment. Use 1:8 ratios to prevent fiber damage or excessive softening.
Different types of paintbrushes need customized approaches based on their construction and intended use.
Application and Working Methods
Submerge only the bristle portion in softener solution. Fabric softener dissolves ferrule adhesives if allowed to penetrate.
Gentle agitation helps solution penetrate between tightly packed bristles. Avoid vigorous stirring that damages bristle tips.
Soaking time varies from 10-30 minutes depending on bristle stiffness and damage severity.
Neutralization and Cleanup
Multiple rinses remove all softener residue completely. Leftover chemicals interfere with paint adhesion during use.
Final rinse with white vinegar neutralizes alkaline fabric softener residues. This step prevents long-term bristle degradation.
Thorough drying prevents mold growth in damp bristles. Hang brushes bristle-down for proper air circulation.
Specialized Brush Conditioners
Commercial Product Selection
Artist supply stores carry brush conditioners formulated specifically for painting tools. These products outperform household alternatives consistently.
Look for conditioners that specify your bristle type. Natural and synthetic fibers need different chemical formulations.
Professional-grade conditioners cost more but provide better results for valuable brushes for watercolor painting.
Application Techniques
Follow manufacturer instructions exactly. Over-application wastes product and can over-soften bristles.
Brush conditioning works best on completely clean brushes. Paint residue blocks conditioner penetration.
Work conditioner through bristles with gentle massage motions. Focus on the areas showing the most damage.
Expected Results and Limitations
Commercial conditioners restore flexibility to stiff bristles but can’t repair split tips or missing bristles. Set realistic expectations.
Results appear within hours of application, not immediately. Allow overnight conditioning for best outcomes.
Some brush damage is permanent. Conditioners improve flexibility but don’t perform miracles on severely damaged tools.
DIY Conditioning Mixtures
Safe Ingredient Combinations
Olive oil and vinegar mixtures work for natural bristle conditioning. Use 2:1 ratios for gentle softening action.
Avoid mixing chemicals you don’t understand. Incompatible ingredients create dangerous reactions or ineffective solutions.
Document successful mixtures for future use. Effective homemade conditioners are worth remembering and repeating.
Mixing and Storage Guidelines
Mix small batches for immediate use. Homemade conditioners lack preservatives and spoil quickly at room temperature.
Glass containers prevent chemical reactions with storage vessels. Plastic containers can leach chemicals into mixtures.
Label all mixtures clearly with ingredients and mixing dates. Unlabeled chemicals become safety hazards.
Effectiveness Comparison to Commercial Options
DIY solutions work adequately for basic brush maintenance but lack the precision of commercial formulations.
Commercial products undergo testing for effectiveness and safety. Homemade mixtures rely on trial and error approaches.
Professional artists typically prefer commercial conditioners for their valuable brushes for acrylic painting despite higher costs.
Cost savings from homemade conditioners often don’t justify the time spent experimenting with formulations.
Step-by-Step Reshaping Process

Assessment and Planning
Damage Evaluation Checklist
Bristle damage falls into predictable categories. Splayed tips, bent shafts, and crushed ferrules each need different approaches.
Check individual bristles under good lighting. Missing bristles can’t be replaced, but bent ones often respond to treatment.
Document the brush’s original shape if possible. Photos help track progress during longer restoration projects.
Method Selection Criteria
Natural bristles tolerate heat better than synthetic alternatives. Choose methods based on bristle composition first.
Severe damage requires aggressive techniques like steam or chemical softening. Minor issues respond to gentle wet forming.
Consider the brush’s value before investing time. Expensive brushes for oil painting justify more effort than cheap alternatives.
Expected Outcome Setting
Realistic expectations prevent disappointment. Split bristle tips won’t magically heal, but bent shafts often straighten completely.
Professional brush restoration achieves 70-80% improvement in most cases. Perfect results happen rarely with damaged tools.
Set specific goals before starting. “Usable for detail work” differs from “good as new” significantly.
Execution Techniques
Proper Hand Positioning and Grip
Hold the brush handle firmly but not tightly. Excessive grip pressure transfers through your hand to the bristles.
Support the ferrule with your non-dominant hand. This prevents stress on the connection point during manipulation.
Keep your workspace at elbow height. Awkward angles lead to poor control and hand fatigue.
Working from Ferrule to Tip
Start reshaping at the ferrule base where bristles are strongest. Work outward toward the more delicate tips.
This direction follows natural bristle alignment patterns. Fighting against the bristle’s memory makes reshaping harder.
Use progressive pressure increases. Begin gently and add force only when bristles resist reasonable guidance.
Gradual Adjustment Approach
Make small changes over multiple sessions rather than forcing dramatic alterations immediately. Bristle memory resists sudden changes.
Allow bristles to rest between reshaping sessions. This prevents over-stressing individual fibers.
Professional restorers often spread complex reshaping work across several days for optimal results.
Setting and Drying Methods
Shape Retention During Drying
Tissue paper wrapping maintains bristle position without excessive compression. Avoid rubber bands or tight clips.
Position brushes bristle-down during drying when possible. Gravity helps maintain proper tip alignment.
Monitor drying progress regularly. Adjust positions if bristles start shifting out of alignment.
Support Systems and Positioning
Create custom drying racks using foam blocks with holes. This supports brushes at proper angles.
Commercial brush holders work well but aren’t necessary for occasional reshaping projects. Improvised solutions often suffice.
Avoid laying brushes flat during drying. This can create permanent flat spots on round brush tips.
Time Requirements for Permanent Setting
Natural bristle setting takes 4-8 hours depending on humidity and bristle density. Synthetic materials dry faster.
Complete drying is crucial for permanent results. Damp bristles continue changing shape after apparent drying.
Test flexibility gently before declaring the process complete. Properly set bristles feel firm but not brittle.
Maintaining Reshaped Bristles
Proper Storage Techniques
Brush Cap and Cover Options
Original brush caps provide the best protection if available. Generic caps work but may not fit perfectly.
Makeshift caps from aluminum foil protect tips temporarily. Form them carefully to avoid creating pressure points.
Professional artists often store valuable brushes in custom-made protective cases. Storing paintbrushes properly extends their working life significantly.
Hanging vs Laying Flat Considerations
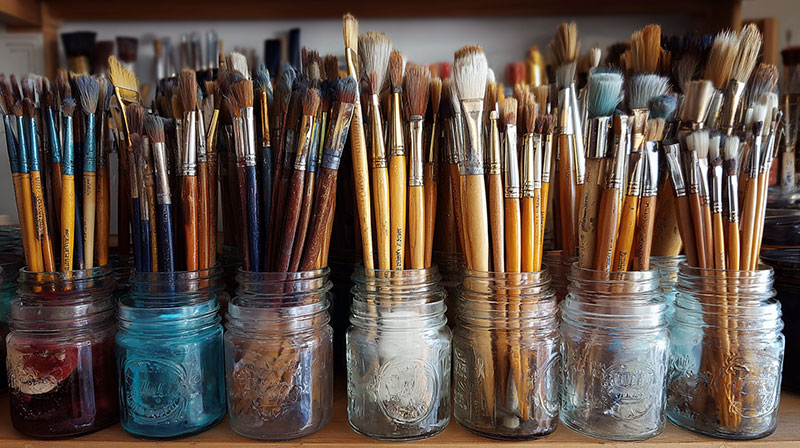
Hanging storage keeps bristles straight and prevents deformation from gravity or contact pressure. This works best for most brush types.
Lay flat only when hanging isn’t practical. Choose this option for travel storage or limited space situations.
Avoid storing brushes bristle-up in containers. This position allows debris to fall into the ferrule area.
Climate Control Factors
Extreme humidity swings cause bristles to expand and contract repeatedly. Stable conditions preserve brush shape better.
Air conditioning helps in humid climates. Dehumidifiers provide more targeted moisture control for art studios.
Avoid storage near heating vents or windows. Temperature fluctuations stress both bristles and ferrule connections.
Regular Maintenance Routine
Post-Use Cleaning Protocols
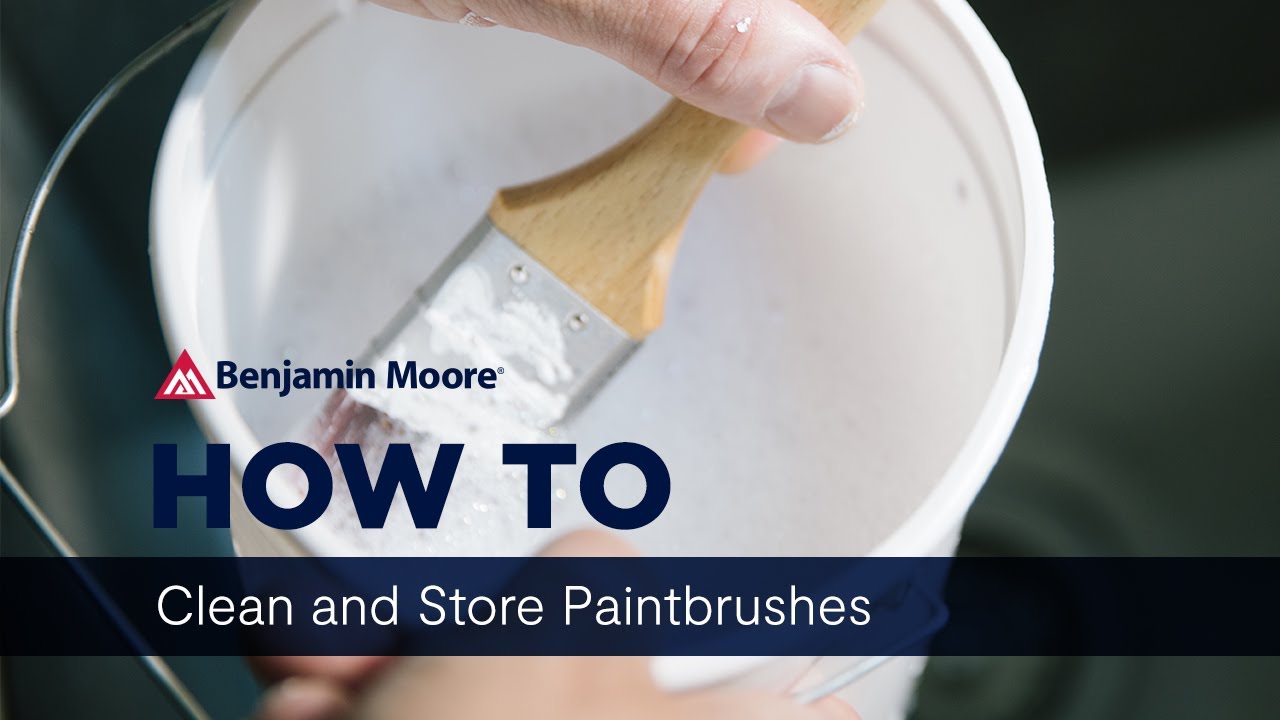
Immediate cleaning after each painting session prevents paint from hardening in bristles. This simple step prevents most reshaping needs.
Different painting mediums require specific cleaning approaches. Oil paints need solvents while acrylics clean with water.
Never leave brushes soaking indefinitely. Extended water exposure loosens ferrule connections and damages handles.
Periodic Conditioning Schedules
Monthly conditioning treatments maintain bristle flexibility between heavy use periods. This prevents gradual stiffening over time.
Professional studios often condition brushes weekly during active painting seasons. Home artists can extend this to monthly treatments.
Document conditioning dates in a brush maintenance log. Consistent schedules produce better long-term results than sporadic treatments.
Early Problem Detection
Weekly inspections catch developing problems before they become serious. Look for early signs of splaying or stiffening.
Check ferrule tightness regularly. Loose connections worsen quickly under normal use stress.
Address minor issues immediately rather than waiting for major problems. Early intervention saves time and improves success rates.
Extending Brush Lifespan
Rotation Strategies for Multiple Brushes
Brush rotation prevents overuse of favorite tools. Rotate between similar brushes to distribute wear evenly.
Professional artists maintain multiple sets of identical brushes. This allows proper drying time between uses.
Label brushes with purchase dates to track age and performance. Older brushes often need more frequent maintenance.
Usage Techniques That Prevent Damage
Proper loading techniques prevent bristle splaying during paint application. Roll brushes in paint rather than pressing hard.
Avoid using brushes for mixing paint on palettes. Palette knife or brush decisions impact tool longevity significantly.
Clean paint from brush sides regularly during use. Dried paint creates stress points that lead to bristle breakage.
Environmental Factors to Control
Temperature extremes damage both natural and synthetic bristles over time. Maintain moderate studio temperatures when possible.
Direct sunlight degrades brush materials gradually. Store brushes away from windows and bright lights.
Chemical fumes from other art supplies can affect bristle integrity. Proper ventilation protects both artist health and tool longevity.
Paint fumes contain solvents that can interact with bristle treatments. Adequate airflow prevents accumulation of harmful vapors.
Studio cleanliness reduces contamination that damages bristles. Regular cleaning of work surfaces and storage areas helps significantly.
Troubleshooting Common Brush Reshaping Issues
Incomplete Reshaping Results
Identifying Resistant Bristle Problems
Permanent damage differs from temporary stiffness. Split tips and missing bristles won’t respond to any treatment.
Age-hardened natural bristles resist reshaping more than fresh ones. Old hog bristles develop crystalline structures that block conditioning agents.
Some synthetic bristles have manufacturing defects that prevent proper shaping. These fibers maintain irregular curves regardless of treatment method.
Alternative Method Selection
Heat methods fail when chemical approaches succeed. Steam treatment works where hot water soaking doesn’t penetrate dense bristle packs.
Try glycerin solutions after fabric softener disappointments. Different chemical formulations affect various bristle types differently.
Professional brush conditioners often succeed where household products fail. The specialized formulations target specific fiber problems.
When to Accept Partial Success
Functional improvement matters more than perfect appearance. Brushes that hold paint properly serve their purpose despite cosmetic flaws.
Expensive brushes justify multiple treatment attempts. Cheap brushes with partial results might work fine for practice sessions.
Document what worked for future reference. Partially successful techniques provide starting points for similar problems later.
Bristle Breakage During Process
Prevention Strategies
Excessive force causes most bristle breakage during reshaping attempts. Natural bristles snap when bent beyond their flexibility limits.
Test bristle strength before applying reshaping pressure. Gently bend individual bristles to gauge their breaking point.
Work with damp bristles whenever possible. Dry bristles break more easily than properly moistened ones.
Damage Control Measures
Stop immediately when bristles start breaking. Additional pressure only creates more damage without improving outcomes.
Remove any loose bristle fragments from the brush head. These pieces interfere with paint application and cause streaking.
Assess remaining bristle density before continuing. Sparse bristles may not justify further restoration efforts.
Salvaging Remaining Bristles
Trim broken bristles to match surrounding lengths when possible. Uneven tips create painting problems but intact bristles still function.
Consider converting damaged detail brushes into broader application tools. Flat brush uses work better than liner brush precision with reduced bristle counts.
Repurpose severely damaged brushes for mixing colors or applying mediums. They can’t create fine line work but handle rough tasks adequately.
Shape Reversion Problems
Causes of Shape Loss
Bristle memory pulls fibers back toward their original bent positions over time. This natural tendency fights against reshaping efforts.
Inadequate drying time prevents permanent shape setting. Bristles continue moving during extended drying periods.
Temperature changes after reshaping cause expansion and contraction cycles. These movements gradually return bristles to previous shapes.
Reinforcement Techniques
Repeated treatments overcome strong bristle memory more effectively than single intensive sessions. Plan multiple gentle corrections.
Use setting sprays designed for natural fibers. These products help lock bristle positions during the critical drying phase.
Mechanical supports during drying maintain desired shapes longer. Custom-formed guards prevent unwanted movement.
Permanent Setting Methods
Chemical setting agents create stronger bonds than physical shaping alone. Artist supply stores carry specialized bristle stabilizers.
Heat setting works best on natural bristles. Controlled temperature exposure after shaping creates more permanent results.
Professional restoration services use industrial methods unavailable to home users. Consider this option for valuable brush collections.
Some bristles never hold new shapes permanently. Accept realistic limitations rather than fighting impossible situations.
Common Chemical Reactions
Identifying Adverse Reactions
Color changes in bristles indicate chemical damage. Natural bristles may yellow or darken with certain treatments.
Unusual brittleness after treatment suggests over-processing. Bristles should feel softer, not harder, after conditioning.
Strong chemical odors that persist after rinsing indicate incomplete cleaning. Residual chemicals continue affecting bristle integrity.
Neutralization Procedures
Vinegar rinses neutralize alkaline fabric softener residues. Use white vinegar diluted 1:10 with distilled water.
Baking soda solutions counteract acidic reactions. Mix one tablespoon per cup of water for gentle neutralization.
Multiple clear water rinses remove most chemical residues. Continue until runoff water shows no foam or discoloration.
Recovery Protocols
Allow affected brushes to dry completely before assessing damage. Wet bristles feel different than their final dried state.
Re-condition with mild treatments after neutralization. Start with gentle approaches regardless of previous method intensity.
Document problem combinations to avoid repeating mistakes. Failed experiments provide valuable learning experiences.
Tool-Related Issues
Equipment Malfunction Problems
Hair dryers overheat without warning signs. Test on scrap materials before applying to valuable brushes.
Steam generators produce inconsistent output as water levels drop. Monitor pressure and temperature throughout treatment sessions.
Makeshift tools often fail under normal use stress. Invest in proper equipment for regular brush maintenance work.
Workspace Contamination
Chemical mixing creates unexpected reactions. Clean all surfaces between different treatment methods thoroughly.
Cross-contamination between brush types spreads problems. Use separate containers for natural and synthetic bristle treatments.
Poor ventilation allows fume buildup that affects both artist health and brush conditioning results.
Supply Quality Variations
Generic cleaning products vary significantly between manufacturers. Brand consistency improves predictable results.
Expired chemicals lose effectiveness and may develop harmful breakdown products. Check dates on all treatment supplies.
Water quality affects all brush treatments. Hard water minerals interfere with cleaning and conditioning processes.
FAQ on How To Reshape Paintbrush Bristles
Can you fix splayed brush bristles?
Yes, splayed bristles respond well to heat treatment and conditioning methods. Steam reshaping works best for natural hog bristles, while synthetic bristles need gentler approaches.
Success depends on bristle type and damage severity. Complete restoration isn’t always possible, but functional improvement occurs in most cases.
What causes paintbrush bristles to lose their shape?
Paint buildup, improper storage, and aggressive cleaning damage bristle structure over time. Leaving brushes in water loosens ferrule connections. Temperature extremes affect both natural and synthetic fibers. Poor brush storage techniques create permanent deformation through pressure and gravity.
How long does bristle reshaping take?
Simple repairs complete in 30 minutes, while severe damage requires multiple sessions over several days. Drying time adds 4-8 hours depending on bristle density and humidity. Professional restoration projects often span a week for optimal results and proper setting.
Which brushes are worth reshaping?
Quality brushes for oil painting and professional watercolor tools justify restoration efforts.
Expensive natural bristle brushes respond better than cheap synthetic alternatives. Consider replacement cost versus time investment. Student-grade brushes under $10 rarely warrant extensive restoration work.
Can synthetic bristles be reshaped like natural ones?
Synthetic bristles need lower temperatures and gentler chemical treatments than natural alternatives. Nylon and polyester respond differently to conditioning agents.
Heat damage occurs faster with artificial fibers. Steam and chemical softening work, but require modified techniques for synthetic brush repair.
What household items work for brush conditioning?
Hair conditioner, fabric softener, and glycerin solutions restore bristle flexibility effectively. White vinegar neutralizes chemical residues.
Olive oil conditions natural bristles gently. Avoid mixing different chemicals, and always rinse thoroughly after treatment to prevent paint adhesion problems.
How do you prevent bristle damage during painting?
Proper loading techniques prevent splaying during paint application. Clean brushes immediately after use, never leave soaking indefinitely.
Store brushes properly with protective caps. Rotate between similar brushes to distribute wear. Use appropriate brush sizes for painting techniques to minimize stress.
When should you replace instead of reshape?
Replace brushes with missing bristles, split tips, or loose ferrules. Severe chemical damage that causes brittleness can’t be reversed. When reshaping costs exceed replacement value, buy new tools. Professional artists often replace detail brushes annually regardless of apparent condition.
Can you reshape different brush types the same way?
Different types of paintbrushes need customized approaches. Fan brushes require special handling to maintain spread patterns.
Round brushes and flat brushes use similar techniques. Liner brushes need gentler treatment due to delicate construction and fine bristle diameter.
How often should brushes be conditioned?
Monthly conditioning maintains bristle flexibility during regular use. Weekly treatments help during intensive painting periods.
Professional studios condition valuable brushes after every major project. Neglected brushes may need multiple conditioning sessions initially, then regular maintenance prevents future problems.
Conclusion
Mastering how to reshape paintbrush bristles transforms damaged tools into functional instruments again. These restoration techniques work across all brush types, from professional brushes for watercolor painting to synthetic alternatives used in acrylic painting applications.
Success depends on matching the right method to your specific bristle damage.
Heat reshaping works best for natural fibers, while chemical conditioning suits both synthetic and natural materials. Steam treatment offers precision control for delicate restoration work.
Professional brush care extends tool lifespan significantly. Regular maintenance prevents most reshaping needs entirely.
Proper storage techniques and immediate post-use cleaning preserve bristle integrity better than any restoration method.
Remember that some damage remains permanent. Split tips and missing bristles can’t be fixed, only worked around.
Focus restoration efforts on valuable brushes where the time investment makes financial sense. Student-grade tools often cost less to replace than restore.