The difference between a good acrylic painting and a great one often comes down to a few precise marks made with a very small brush.
Detailing with small brushes in acrylic painting is the practice of applying controlled, fine-tip brushwork to add elements that broad strokes cannot: sharp edges, facial features, vein lines, fur strands, and catchlights.
It is one of the most skill-dependent parts of the painting process, and one of the least covered in beginner resources.
This article covers everything you need to know: the right brush types and sizes, how paint consistency affects fine line work, brush control techniques, surface preparation, common applications, and how to fix detail mistakes without repainting the whole area.
What is Detailing with Small Brushes in Acrylic Painting

Detailing with small brushes in acrylic painting is the practice of applying precise, controlled marks using fine-tipped brushes to add elements that broad strokes simply cannot produce: sharp outlines, facial features, fur strands, vein lines, lettering, catchlights, and micro-level texture.
It is not a standalone technique so much as a finishing discipline. Most painters reach for small brushes in the later stages of a piece, once the foundational layers are dry and the composition is locked in.
What makes acrylics particularly suited to this kind of work is their fast drying time and water-based cleanup. You can lay a fine detail line, wait two minutes, and paint directly over it without disturbing the layer underneath. That kind of control is harder to get with oils, which stay workable (and smearable) for hours.
Why it matters: Detail work is where a painting either convinces the viewer or loses them. A well-executed catchlight in an eye or a clean edge on a feather can carry the entire piece.
Acrylic paints currently account for 32% of global art paint unit volume (Industry Research Biz, 2024), and the broader acrylic paint market is projected to grow from USD 144.6 million in 2025 to USD 218.2 million by 2035 (Future Market Insights). That growth is partly driven by the sheer range of techniques acrylics support, fine detail work included.
For a broader look at what painting actually involves across mediums and history, the pieces on what painting is and the history of painting give useful context.
Brush Types Used for Detailing

Not every small brush is built for the same job. The shape of the tip, the length of the bristles, and the stiffness of the hair all change what the brush can do.
Here is a breakdown of the main types used in acrylic detail work:
| Brush Type | Key Feature | Best Used For |
|---|---|---|
| Round (000-2) | Point Retention: Designed to spring back to a sharp point even after pressure is applied. | General detailing, small dots, and lines that vary in width based on your hand pressure. |
| Liner / Rigger | Paint Reservoir: Extra-long bristles hold a large amount of thinned paint for long, uninterrupted strokes. | Continuous thin lines, blades of grass, electrical wires, and nautical rigging. |
| Spotter | Precision Control: Very short, stiff bristles that do not bend or “belly” out, offering maximum resistance. | Tiny, isolated marks like the iris of an eye, microscopic highlights (catchlights), or pinpoint textures. |
| Script | Flexibility: Similar to a liner but often with a more tapered, flexible tip for fluid movement. | Calligraphic lettering, elegant scrollwork, delicate vines, and signature flourishes. |
Among professional painters, Winsor and Newton Series 7, Princeton Neptune, and Da Vinci Maestro are the most consistently recommended for fine detail in acrylics. The brushes segment of the global painting tools market was valued at USD 3.1 billion in 2023 and is projected to reach USD 4.6 billion by 2032 (Global Market Insights).
How Brush Size Numbering Works
The numbers go backwards from what you might expect. A size 0 is smaller than a size 2. A 00 is smaller than a 0. A 000 (triple zero) is the finest commonly available.
The catch: sizing is not standardized across brands. A size 0 from Winsor and Newton will not be identical in tip diameter to a size 0 from Princeton. This matters when you are buying replacements or comparing recommendations online.
For most detail work in acrylics, sizes 000 through 2 cover nearly everything. Below 000, the brushes become tricky to control and tend to hold almost no paint.
How Acrylic Paint Consistency Affects Detail Work

Paint that is too thick will drag, blob, or refuse to flow off the brush tip cleanly. Paint that is too thin loses opacity and bleeds at the edges. Getting consistency right is probably the single most common problem in fine detail work.
Heavy body acrylics dominate the overall market, holding a 54.2% share of the acrylic paint category (Future Market Insights, 2025). But for small brush detail work, heavy body is rarely the right choice straight from the tube.
Paint Types and Their Fit for Detail Work
Fluid acrylics are the most natural fit. They carry the same pigment concentration as heavy body but in a thinner, more flowable form. Fine lines come off the brush cleanly without thinning.
Soft body acrylics sit in the middle. More workable than heavy body for detail, still slightly more viscous than fluid. Good for portraits and botanical work where you want some body but need smooth edges.
Heavy body acrylics can work for detail if you add a medium or water to thin them down. The risk: adding too much water weakens the binder and reduces color strength. The standard advice is to mix roughly equal parts water and acrylic medium when thinning heavily.
For liner brush work specifically, many painters aim for what is often called the “skim milk” consistency. Thin enough to flow in a continuous line, thick enough to hold its color.
Common Consistency Problems
Blobbing at the start of a stroke: Too much paint loaded on the brush tip.
Feathering along the edge: Paint too thin, or surface too absorbent.
Broken, skipping lines: Paint too thick, or brush tip drying out mid-stroke.
Faded color after drying: Over-diluted with water alone, not enough binder left in the mix.
Brush Control Techniques for Fine Detail
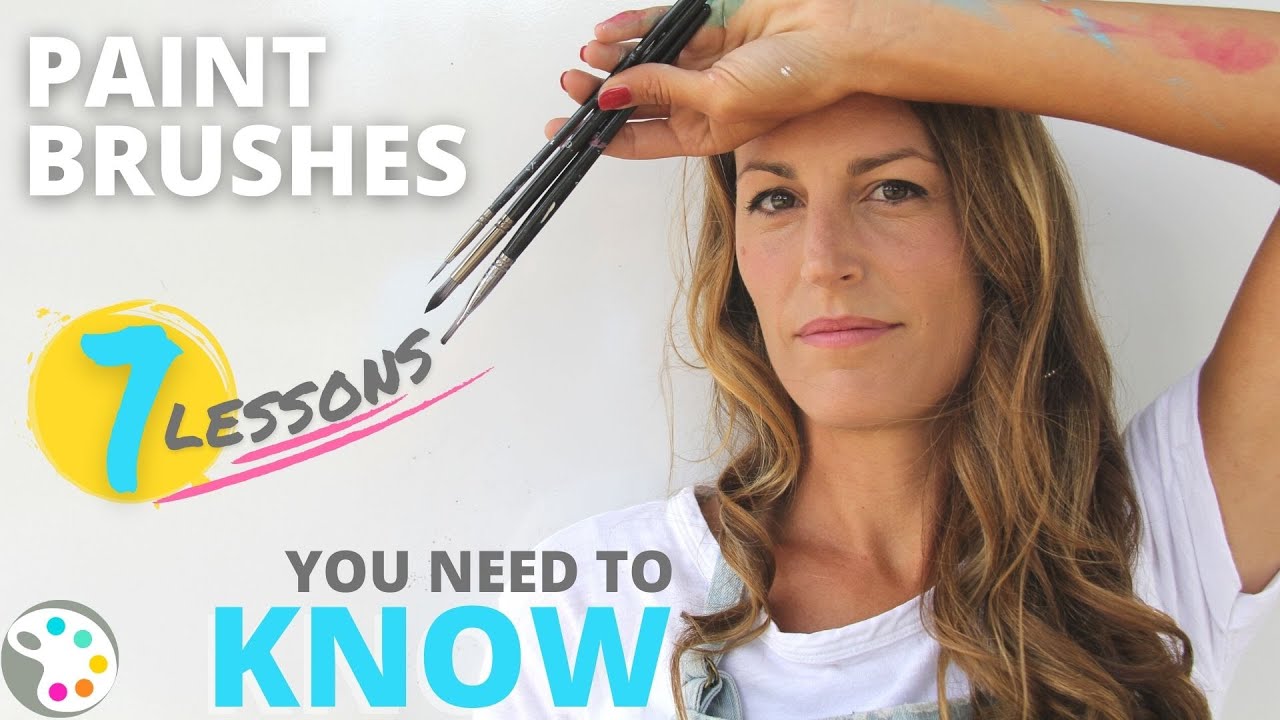
A size 000 brush in an unsteady hand produces nothing useful. Physical control is a skill, and it is trainable.
The painting tools market sits at USD 10.8 billion globally (Global Market Insights, 2023), reflecting how much investment goes into equipment. But no brush fixes a shaky hand. That part is on the painter.
Hand Stabilization Methods
Pinky anchor: Rest your small finger on the painting surface and use it as a pivot point. This limits the range of motion to your wrist and fingers, which is exactly what you want for fine lines.
Mahl stick: A rod rested across the canvas, used as a bridge for your painting hand. Standard practice in photorealism and hyperrealist work. You can use a mahl stick or make one from a dowel wrapped in cloth at the tip.
Double anchor: Both the heel of the hand and the pinky finger contact the surface. Maximizes stability for the smallest marks.
Loading and Stroke Mechanics
Overloading the brush is the most frequent mistake. You want paint filling roughly the lower third of the bristle length, not soaked up to the ferrule.
Pulling a stroke (moving the brush away from your body) gives cleaner, more consistent lines than pushing. For very tight curves, rotating the canvas so you are always pulling is worth the extra effort.
Speed matters too. A slow, deliberate stroke on slightly too-wet paint will drag. Moving with moderate confidence gives cleaner edges, especially on liner brush work.
Surface Preparation and Its Role in Detailing
You can have perfect brush control and ideal paint consistency and still get poor results if the surface is wrong. Tooth, absorbency, and smoothness all change how fine lines behave.
Surface Types Compared

| Surface | Texture | Detail Suitability | Notes |
|---|---|---|---|
| Standard Canvas | Medium Tooth | Moderate | Fine lines and “micro-details” often catch on the weave, causing jagged edges. |
| Sanded Gesso Canvas | Smooth | Good | Achieved by applying 3+ coats of gesso and sanding with 220+ grit between each. |
| Wood Panel | Very Smooth | Excellent | Near-zero tooth; the rigid surface prevents the “bounce” that blurs fine marks. |
| Illustration Board | Smooth | Excellent | Extremely stiff and non-absorbent; holds ink-like acrylics without spreading. |
Gesso is the standard prep layer for most acrylic surfaces. For detail work, apply two or three coats and sand lightly between each with 220-grit or finer. The goal is a surface that feels almost like a smooth card stock when you run your finger across it.
Working over a completely dry layer is non-negotiable for fine detail. Even slightly tacky paint underneath will pull the brush and distort your marks. Acrylic dries fast, so this usually means waiting only minutes, but on thick impasto areas it can take longer.
For a closer look at how surface choice plays into the broader acrylic painting techniques toolkit, it is worth reading about how different approaches interact with texture and ground.
Gesso Application for Detail-Ready Surfaces
Coat 1: Apply thinned gesso with a wide flat brush. Let dry completely.
Sand lightly with 220-grit paper. Wipe clean.
Coat 2: Apply gesso at full consistency, perpendicular brush direction to coat 1.
Repeat sanding and coat 3 for portrait or miniature-level detail work.
Common Detailing Applications in Acrylic Painting
Small brush technique shows up across nearly every subject category. The specifics of what you are painting change the demands, but the core precision work is the same.
Portraiture and Figure Work
This is where most painters first feel the pressure of small brush detail. Eyes are the obvious focus point. A single dot of opaque white placed correctly as a catchlight can make a painted eye look alive. Placed wrong, it looks like a mistake.
Other portrait details that rely on fine brushwork:
- Individual eyelashes (liner brush, single strokes)
- Lip edge definition where skin meets color
- Subtle highlight on the nose tip
- Hairline strands around the face perimeter
For deeper context on portrait painting techniques, the approach to layering and edge control applies directly to how detail work integrates with the broader piece.
Wildlife and Botanical Subjects
Individual fur strands, feather separation, petal veins, and stamen detail all require the same toolkit: small rounds and liner brushes, correct paint consistency, and a stable hand.
Wildlife painters like to work fur in directional strokes, following the growth pattern. Liner brushes with a good belly hold enough paint to complete a long stroke without reloading mid-stroke, which keeps lines consistent.
Botanical work tends to demand thinner, more precise lines. Vein lines on a leaf, for example, are often finer than anything you would paint in a portrait.
Architectural and Urban Detail
Window grids, brick mortar lines, signage lettering, and railings all involve long, straight, consistent lines. This is where script brushes earn their place. A well-loaded script brush can carry a continuous thin line for several inches before needing paint.
For painters working in realism or hyperrealism, architectural detail is often where the piece succeeds or fails. Wobbly window grids will undermine an otherwise strong painting.
Miniature Painting
Miniature figure painting uses the same brushes but at an even more compressed scale. Eyes on a 28mm figure are roughly 1mm across. At that scale, a size 000 spotter is the tool, and the “paint” often needs to be almost ink-thin to sit in such a small area without obscuring the sculpt.
Games Workshop’s Citadel range and Vallejo Game Color are two brands specifically formulated for this scale, with pigment grind and viscosity tuned for miniature detail work.
Brush Care and Maintenance for Detail Brushes

A quality detail brush costs more than a broad brush and wears out faster. That math makes brush care non-negotiable for anyone doing serious fine line painting.
A 2023 Paint Quality Institute study found that proper maintenance extends brush lifespan by up to 25%, pushing a well-cared-for brush from 50 hours toward 100 hours of usable life.
The specific risk with acrylics is speed. Acrylic paint begins hardening in minutes and transforms into a flexible plastic polymer once cured. Paint that cures inside the ferrule pushes the bristles apart permanently, destroying the fine point you need for detail work.
Cleaning After Each Session
The rule: never let acrylic dry on the brush. Not even for a few minutes.
Between strokes, keep the brush moist. At the end of a session, clean with water and a dedicated brush soap. The Masters Brush Cleaner and Preserver is the most recommended product among acrylic painters for small brushes. General Pencil’s brush cleaner is a solid alternative.
The cleaning method matters. Pounding brushes into the bottom of a water jar splays the bristles and can push paint into the ferrule. Instead, swirl the bristles gently in the cup of your hand under running water.
When thinning paint with water during a session, keep the ratio below 30% water to 70% paint. Above that, the binder weakens and paint can cure differently, leaving residue that is harder to clean out fully.
Reshaping and Drying

After cleaning: reshape the tip with wet fingers, then lay the brush flat to dry.
Never store brushes tip-down in a container. Water that runs into the ferrule causes rust and loosens the glue holding the bristles. Even short exposure, a few minutes, can start bending the tip permanently.
Brush shaper products like Winsor and Newton Brush Shaper or The Masters conditioner help restore tips on brushes that have slightly lost their point. They will not fix a brush that has dried acrylic baked into the ferrule.
When to Replace a Detail Brush
Three signs a brush is done:
- The tip no longer forms a consistent point when wet
- Bristles splay outward even after reshaping
- Paint application becomes inconsistent on the same stroke
Trying to salvage a brush past this point wastes time. Detail work with a compromised brush is frustrating and produces poor results. Replace it.
For storage, protective tubes (most quality brushes come with them) or a roll-up brush case keeps tips safe between sessions. Laying brushes flat in a drawer without protection will bend the tips over time.
Mistakes That Ruin Detail Work and How to Fix Them
Most detail errors fall into a small number of repeatable patterns. Recognizing them early makes correction straightforward.
Acrylics are forgiving as a medium. The fast drying time that creates problems in blending is actually an asset for correction, since you can overpaint cleanly within minutes.
Overworking Wet Paint
Going back into a wet detail stroke is the most common way to destroy it. The brush picks up the paint that is already down, blurring the edge and mixing the colors into mud.
Fix: step back, let it dry, then correct with a fresh opaque layer.
The impulse to fix a wet mistake immediately is strong. Resist it. A two-minute wait usually costs less time than repainting an entire area.
Lifting Underlying Layers
Too much water on the brush softens the layer underneath, and the detail brush can pull that layer off the surface. This creates patchy, uneven areas that are hard to correct cleanly.
Two causes:
- Excessive water thinning, beyond the 30/70 water-to-paint ratio
- Working over a layer that has not fully cured
When correcting lifted areas, apply a thin coat of titanium white first. It is opaque enough to cover any residual color, and once dry, gives you a clean base to repaint from.
Hard Edges and Broken Lines
Hard, unexpected edges happen when paint starts drying mid-stroke. Broken lines happen when the brush runs out of paint before the stroke finishes.
Load the brush correctly: enough paint to complete the intended stroke, but not so much that it blobs at the start. For liner brush work, test on a scrap piece before committing to the painting.
Princeton Brush Company recommends that when thinning paint for line work, replacing some of the water with acrylic medium keeps the paint fluid while maintaining bond strength on the surface.
When to Fix vs. When to Accept
Not every imperfection needs correction. Some detail errors are invisible at viewing distance.
The test: step back to a normal viewing distance, around arm’s length or further for larger pieces. If the error is not visible there, leave it. Overworking a correction creates more problems than the original mistake.
When correction is needed, glazing is often the cleanest approach for blending a repainted area into the surrounding paint. A transparent layer over the corrected spot softens the transition without covering the surrounding brushwork.
For deeper errors, layering thin opaque passes is more reliable than one thick cover-up. Multiple thin layers give better color accuracy and avoid texture buildup that reveals the correction.
Tools That Support Small Brush Detailing
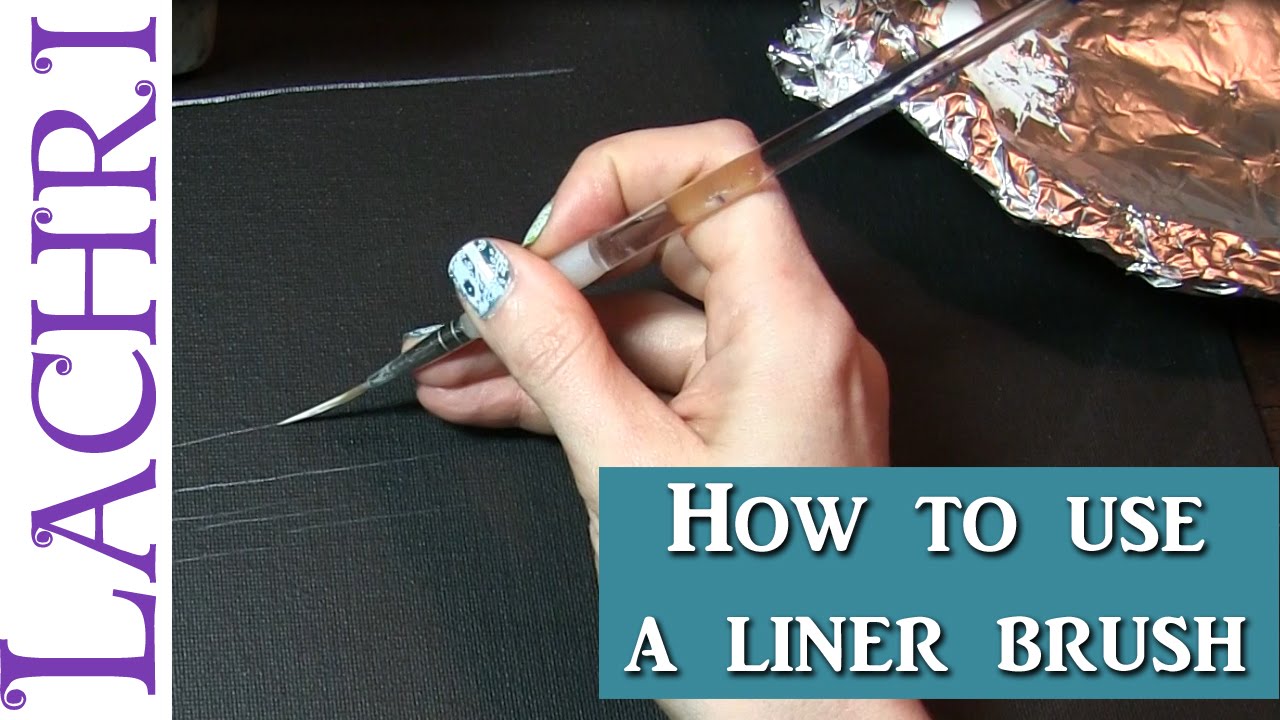
The brush does the work, but the surrounding setup determines how well you can use it. Good support tools reduce fatigue, improve accuracy, and make long detail sessions physically manageable.
Hand Support and Stability Tools

Best options for physical stability:
- Mahl stick: a padded rod rested across the canvas, supporting the painting hand. Standard in portrait and hyperrealist work. Can be bought or made from a dowel with a cloth-wrapped tip.
- Hand bridge: a wooden or acrylic bridge placed over the canvas surface. Useful when a mahl stick is too large for the working area.
- Pinky anchor: no extra equipment needed, just the little finger resting directly on the dry canvas surface.
The mahl stick has been standard in fine detail painting since at least the Renaissance. Artists like Jan van Eyck and later Rembrandt used them for exactly the kind of controlled fine line work that defines detail painting.
Magnification

Eye fatigue is real in long detail sessions. Most painters who work at miniature scale or on small-format pieces eventually add magnification to their setup.
The Donegan OptiVISOR is the most recommended headband magnifier for this kind of work. It uses glass prismatic lenses (not plastic) at 1.5x to 3.75x magnification, with a focal length of roughly 8 to 10 inches at 2.5x. That working distance is comfortable enough for normal brush movement without cramping the hand.
Clip-on loupes and magnifying lamps work too, but they tend to reduce depth perception, making it harder to judge exactly how far the brush is from the surface. The headband format keeps both hands free and maintains binocular vision.
For most acrylic detail work on standard canvas, magnification is optional. For faces smaller than a few inches, miniature figures, or fine lettering, it starts to feel necessary rather than nice.
Palette and Paint Management

Paint drying on the palette mid-session is a constant problem for acrylic detail work. Small amounts of paint dry out quickly, and you end up mixing fresh batches repeatedly, which introduces color consistency issues.
A wet palette solves this. The setup: an airtight container with a damp sponge layer and a sheet of palette paper on top. Paint stays workable for hours instead of minutes. For detail work where you need consistent color across multiple small marks, it is one of the more useful investments in the whole kit.
| Tool | Purpose | Best For |
|---|---|---|
| Mahl Stick | Hand Stabilization: Provides a steady resting point for your hand without touching the wet canvas. | Long architectural lines, steady portrait glazes, and signing your work. |
| Donegan OptiVISOR | Visual Clarity: Head-mounted magnification that keeps both hands free while reducing eye strain. | Miniature painting, hyper-realistic iris details, and intricate jewelry rendering. |
| Wet Palette | Moisture Management: Prevents the tiny amounts of paint used for detail from drying out instantly. | Any high-detail session over 30 minutes where color matching is critical. |
| Lightbox / Transfer Paper | Precision Layout: Allows for the perfect placement of complex guides before painting begins. | Logos, calligraphic lettering, and technical architectural schematics. |
Techniques like underpainting set up the tonal structure that detail work later refines, while dry brushing and stippling offer alternatives for texture that small round brushes cannot produce on their own.
The best brushes for acrylic painting in a general kit differ from what you reach for in detail work. A solid general set typically includes filberts and flats for coverage work, with small rounds and liners added specifically for fine detail. Knowing which brush does what, and why, is the foundation the whole practice sits on.
FAQ on What Is Detailing With Small Brushes In Acrylic Painting
What is detailing with small brushes in acrylic painting?
Detailing with small brushes in acrylic painting is the use of fine-tipped brushes to apply precise marks: sharp edges, facial features, fur strands, vein lines, and catchlights. It typically happens in the final stages, once foundational layers are dry.
What brush size is best for detail work in acrylics?
Sizes 000 through 2 cover most fine detail needs. A size 0 round brush handles the majority of detail work. Drop to 00 or 000 for the smallest marks, like eye catchlights or individual eyelashes.
What type of brush is used for fine lines in acrylic painting?
Liner and rigger brushes are the standard choice for long, continuous thin lines. Their extended bristles hold enough paint to complete a full stroke without reloading. Script brushes work well for lettering and curved strokes.
How do you thin acrylic paint for detail work?
Aim for a fluid, “skim milk” consistency. Thin with a mix of water and acrylic medium rather than water alone. Exceeding 30% water weakens the binder, which reduces adhesion and color strength.
Why does my fine line bleed or feather at the edges?
Paint that is too thin, or a surface that is too absorbent, causes feathering. Sand the surface with multiple gesso coats between layers for better edge control. Check paint consistency before starting each detail session.
What surface is best for acrylic detail work?
Wood panels and illustration board give the smoothest surface for fine detail. Standard canvas tooth catches fine lines. Apply two to three coats of gesso, sanding between each, to tighten any surface for precision brushwork.
How do you keep your hand steady when painting fine details?
Rest your little finger on the dry canvas surface as a pivot point. For longer strokes, use a mahl stick rested across the canvas. Both methods limit movement to the wrist and fingers, where control is highest.
What is the difference between a spotter and a liner brush for detail painting?
A spotter brush has short bristles and high resistance, ideal for isolated tiny marks like eyes or catchlights. A liner brush has long bristles suited for continuous thin lines like grasses, wires, or architectural edges.
How do you fix a mistake in acrylic detail work?
Wait for the area to dry completely, then overpaint with a thin opaque layer. Titanium white covers most colors cleanly in two thin coats. Avoid reworking wet detail strokes, as the brush will lift and blur the paint below.
How do you care for small detail brushes used with acrylics?
Clean immediately after each session. Never let acrylic dry on the bristles. Use a dedicated brush soap like The Masters Brush Cleaner, reshape the tip while wet, and lay flat to dry. Avoid storing brushes tip-down.
Conclusion
Detailing with small brushes in acrylic painting comes down to three things: the right brush for the job, paint at the correct consistency, and a stable hand.
Brush type matters more than most painters expect. A liner brush and a spotter brush are not interchangeable, and using the wrong one for fine line work costs time and clean edges.
Surface preparation is just as important. A sanded, multi-coat gesso ground gives brush control that standard canvas simply cannot match.
Take care of your detail brushes. Clean them immediately, reshape the tip while wet, and store them flat.
Get those fundamentals right, and the precision work, the catchlights, the fur strands, the vein lines, starts to feel less like a struggle and more like the natural final step it should be.