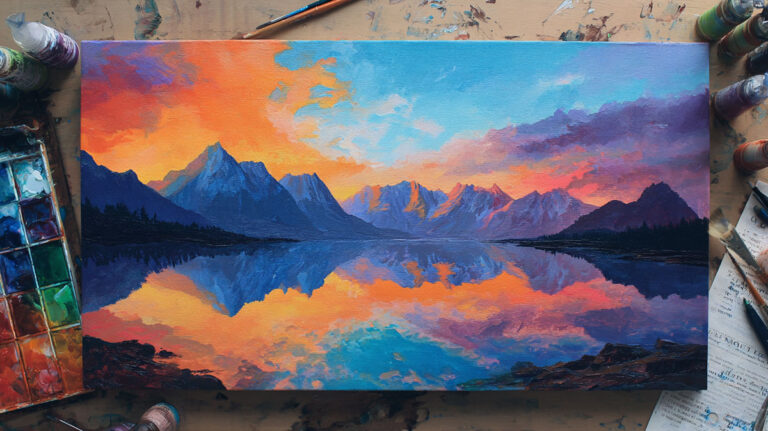
Not every mark in a painting needs to be controlled. Sometimes the best texture comes from letting paint fly.
Splattering in acrylic painting is a technique where paint is flicked, thrown, or sprayed onto a surface to create random drops, streaks, and dot patterns. It’s one of the most accessible acrylic painting materials techniques out there, but getting consistent results takes more than just waving a loaded brush around.
This guide covers everything from paint consistency and tool choice to layering, surface prep, and finishing. By the end, you’ll know exactly how to use the splatter technique to add genuine texture and movement to your work.
What is Splattering in Acrylic Painting

Splattering is the intentional flicking, throwing, or spraying of paint onto a surface to create random marks, dots, and streaks.
It’s a mark making technique that produces results no brush stroke can replicate. The paint lands where physics decides, not where your hand guides it. That unpredictability is the whole point.
Unlike acrylic pouring, which relies on gravity and flow, splattering uses force. You’re actively launching paint at the canvas. The difference shows in the results: pouring creates smooth, organic trails, while splattering creates sharp, high-energy marks with defined edges.
Acrylic paint is the go-to choice for this technique. It’s fast-drying, water-soluble while wet, and flexible once dry. Those properties make it ideal for building up splatter layers without the lower ones reactivating. The global artist-grade acrylic paints market was valued at USD 0.47 billion in 2024, with heavy body and fluid acrylics both seeing strong demand from artists using texture-based techniques (Business Research Insights, 2024).
Splattering sits within the broader family of acrylic painting techniques alongside dry brushing, stippling, and impasto. But compared to most of those, it has the lowest barrier to entry. You don’t need expensive tools or years of practice to get interesting results.
What you do need is an understanding of how paint consistency, tool choice, and distance from the canvas affect the outcome. Those three variables control everything.
Tools Used for Splattering

The tool you pick determines the character of your splatter. More than paint color or canvas size, this choice shapes the whole result.
| Tool | Splatter Type | Best For |
|---|---|---|
| Toothbrush | Fine, dense dots | Stars, sand, snow, mist effects |
| Stiff bristle brush | Mid-size irregular drops | General texture, backgrounds |
| Fan brush | Wide spread, varied drop sizes | Rain, grass texture, foliage |
| Palette knife | Large, heavy blobs | Bold abstract marks, thick texture |
| Spray bottle | Fine mist, soft coverage | Background wash, atmospheric effects |
Brushes
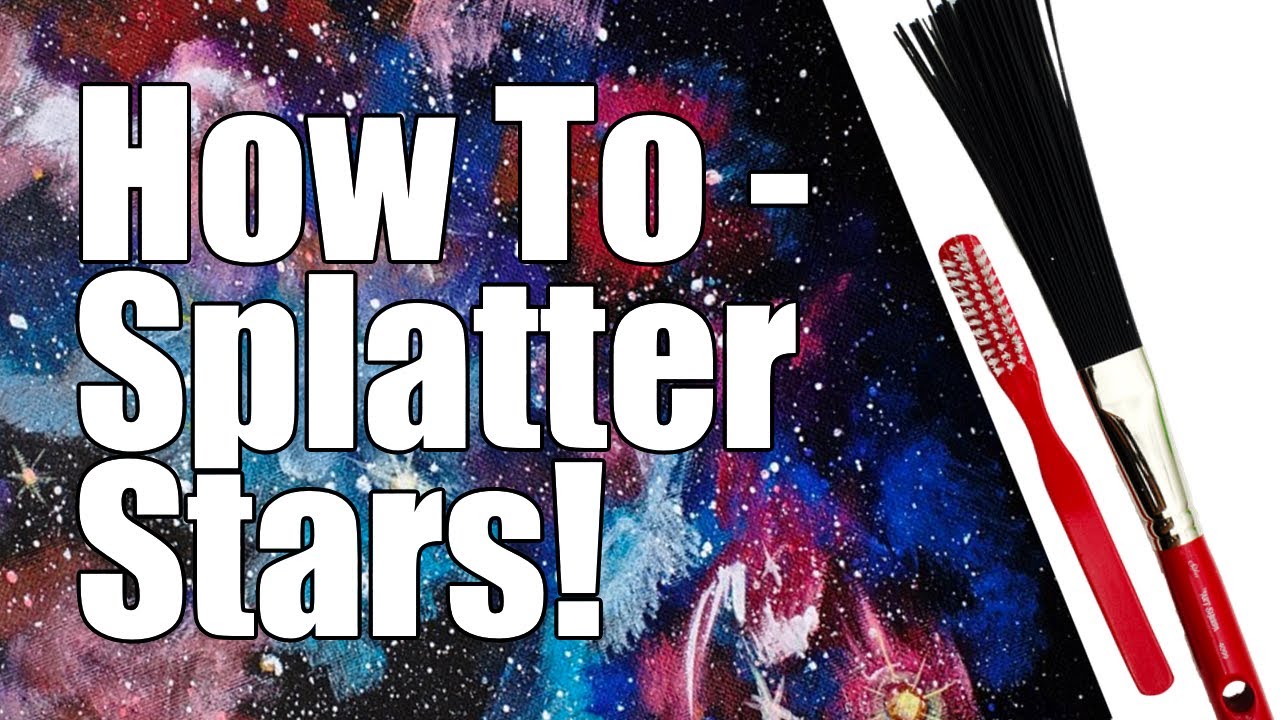
Toothbrush splattering is the most controlled method available. Load the bristles, hold it face-down over the canvas, and drag your thumb across the tips. The bristles spring back and launch tiny droplets.
Distance matters a lot here. Hold it 6 inches away and you get tight, focused dots. Pull back to 18 inches and the dots scatter wider and get smaller.
Stiff-bristled paintbrushes work differently. You load the brush, then either tap it against another brush or flick your wrist. This produces larger, less uniform drops than a toothbrush. Hog hair brushes work especially well because the stiff natural fibers hold paint and release it with enough force to carry across the canvas.
Fan brushes are worth trying if you want wide coverage fast. A single flick spreads paint across a large area in one motion.
Non-Brush Tools
A palette knife can be loaded like a brush and snapped forward to launch heavy drops. The result is dramatic and messy. Good for abstract work. Not great for subtle texture.
Spray bottles filled with diluted acrylic produce a soft, even mist rather than distinct drops. The paint needs to be very thin, around the consistency of ink, or the nozzle clogs. This works well for layered color effects or background haze.
Drinking straws, mesh screens, and even old combs can produce splatter variations. These work better than most people expect, and they cost nothing.
Paint Consistency for Splattering
This is where most beginners go wrong. The paint-to-water ratio controls everything about how the splatter lands, spreads, and dries.
Too thick: paint clumps on the brush and drops in heavy globs. The splatter has no energy.
Too thin: paint loses pigment strength and bleeds on landing. Drops spread and merge.
Right consistency: paint flows off the brush with momentum, holds its shape when it lands, and dries without color shift.
Water-to-Paint Ratios
These aren’t strict rules, but they give you a starting point:
- Fine dot splattering (toothbrush): roughly 1 part water to 3-4 parts paint
- Mid-size flick splattering: roughly 1 part water to 2 parts paint
- Large throw splattering: paint at near full consistency, maybe a small dash of water
- Spray bottle misting: 3-4 parts water to 1 part paint, sometimes more
Always test on scrap paper first. This takes 30 seconds and saves a finished painting.
Fluid vs. Heavy Body Acrylics
Fluid acrylics are pre-thinned and close to the right consistency for splattering straight from the bottle. They hold pigment strength even when slightly diluted further.
Heavy body acrylics need more water to reach splatter-ready consistency, but they build up more texture when they land. Both work. It depends on whether you want flat dot marks or raised paint texture in the final piece.
One real issue with over-thinning student-grade paints: the pigment loading is lower to begin with, so adding too much water produces near-transparent marks. Golden and Liquitex fluid acrylics handle dilution better because the pigment concentration is higher from the start.
How to Splatter Acrylic Paint

Surface Preparation
Mask everything you want to keep clean before you start. This sounds obvious. Most beginners skip it anyway and regret it.
Use painter’s tape along canvas edges. Lay newspaper or plastic sheeting under and around the canvas. Splatter travels farther than expected, especially with thinner paint.
If you’re working indoors, wear old clothes. The paint dries fast and doesn’t wash out easily from fabric once set.
Applying the Splatter
Body position and distance from the canvas are the two main variables you’re controlling in real time.
Closer to the canvas (6-12 inches): larger drops, more defined marks, less scatter.
Further from the canvas (24-36 inches): smaller drops, wider scatter pattern, more atmospheric result.
Wrist flicking creates tight directional splatter. Full arm motion creates broader, more random coverage. Both have their uses, and combining them in one painting adds visual interest.
One thing worth knowing: you can tilt the canvas to direct where splatter lands. Angle it away from you and the paint hits the upper portion. Tilt it toward you and it clusters near the bottom. This gives more compositional control than most people realize.
Layering
Always let each splatter layer dry before adding the next. Splattering over wet paint causes the colors to mix where they land, which can muddy the result.
Layering dry over dry keeps colors distinct and builds up depth. Three or four splatter passes in different colors produce far more interesting results than one heavy pass in a single color.
The layering technique in acrylic painting applies directly here. Thin layers that build gradually produce more controlled, refined results than trying to achieve everything in one application.
Surfaces Compatible with Splattering
Not all surfaces behave the same way when paint lands on them. The absorbency, texture, and coating of the surface change how splatter marks look and how well they hold.
| Surface | Behavior | Notes |
|---|---|---|
| Stretched canvas | Good absorption, slight give | Standard choice, works with all splatter types |
| Canvas board | Firmer, less bounce | Better for fine detail splattering |
| Mixed media paper | Moderate absorption | Good for testing, affordable |
| Watercolor paper | High absorption | Drops spread more, softer edges |
| Wood panel | Hard, low absorption | Drops bead slightly, very sharp edges |
| Fabric/textile | High absorption | Paint soaks in, no raised texture |
Primed canvas is the most forgiving surface. The gesso layer controls absorption and gives paint something to grip without soaking in too fast.
Unprimed canvas absorbs paint unevenly and can cause splatter marks to look dull or patchy. It’s worth the extra step to apply at least one layer of gesso first. The role of gesso in painting is underappreciated, especially for texture techniques.
Smooth surfaces like sealed wood or glass cause thin splatter to bead and shift before it dries. This can create interesting effects deliberately, but it’s frustrating if you’re trying to place marks accurately.
Paper is fine for practice and works well for finished splatter pieces too. Heavier watercolor paper (at least 140 lb / 300 gsm) handles multiple wet layers without buckling badly. Lighter paper warps quickly when hit with even a small amount of liquid.
Splattering Techniques and Variations

Splattering isn’t one single method. There are several distinct approaches, each producing different results and suited to different parts of a painting.
Toothbrush Splattering
The go-to method for fine, controlled marks. Used by illustrators and fine artists alike, not just beginners.
Load the bristles with thinned paint, hold the brush face-down at a consistent angle, and drag your thumb or a palette knife across the tips. The spring in the bristles does the work.
Common uses: night sky stars, sand texture, snow, scattered light effects, and fine background grain. The marks are small enough to read as texture rather than individual drops, which is why this method works so well for atmospheric landscape painting techniques.
Brush-Flicking

Larger drops. More energy. Less precision.
Load a stiff brush fully, then either snap it forward with your wrist or tap the handle against your other hand. Both methods launch paint across the canvas in a single gesture. The marks are bigger and more irregular than toothbrush splattering.
This is closer to what most people picture when they think of splatter art. It’s expressive and fast. Works best as a finishing layer rather than a background base, since the marks are large enough to compete visually with painted elements beneath them.
Spray Bottle Splattering
Completely different character from brush-based methods. Instead of distinct drops, you get a soft mist or a fine speckle depending on the nozzle setting and paint dilution.
Thin the paint significantly, more than you think is necessary, then test the spray on paper first. Most standard spray bottle nozzles work fine with paint thinned to near-ink consistency.
This technique is useful for creating a color atmosphere over a large area quickly. Abstract art painters use it frequently to add soft color fields that don’t have hard edges.
Stencil-Masked Splattering
Masking tape or cut stencils placed on the canvas before splattering let you control exactly where paint lands. Peel the mask after the splatter dries and you get a clean negative space with hard edges surrounded by splatter texture.
This technique produces results that look very intentional and designed, which sits in interesting contrast with the random nature of the splatter itself.
Emphasis in art composition often comes from contrast, and the hard edge of a masked shape against scattered splatter creates exactly that kind of visual tension. It’s one of the more underused combinations in acrylic work.
When to Use Splattering in a Painting
Splattering works best when it serves a specific purpose in the composition rather than being added as an afterthought.
The placement in your process matters as much as the technique itself. Done early, it creates background texture. Done late, it adds detail or energy on top of finished work. Both are valid. But mixing up the timing without intention usually creates visual confusion.
As a Background Texture Layer
Apply splatter before the main subject work.
A dry-brushed or lightly spattered background gives subsequent layers something to react against visually. It adds depth even when covered by other paint, because texture shows through thin glazes and washes.
This approach works particularly well in abstract painting techniques where the background itself is part of the composition rather than a neutral base.
As a Finishing Detail
Splatter added at the end of a painting should be deliberate. Stars, rain, dust, scattered light, moss on stone. All of these read as realistic details when the splatter scale and color are right.
Scale matching matters here. Stars on a night sky need very fine spatter, close to the canvas, from a loaded toothbrush. Mud splashed on a boot needs larger, heavier drops with more variation in size.
Taken to an extreme, this logic is what made Jackson Pollock’s drip paintings so distinctive. His entire surface was the “finishing detail,” applied with the whole body moving around a horizontal canvas. He used sticks, hardened brushes, and basting syringes to direct paint rather than relying on standard brush flicking.
In Abstract Work as Primary Mark-Making
Some painters use splattering not as a texture tool but as the dominant visual language of the entire piece.
This is closer to the expressionism art tradition than to technical illustration. The paint marks themselves carry meaning and energy. The randomness is intentional.
Jean-Michel Basquiat incorporated splatter into his neo-expressionist paintings, often to convey raw energy alongside his direct mark making. The splatter contributed to the visual density and movement that defined his surfaces.
Combining Splatter with Other Techniques

Dry brushing + splatter: dry brushing creates directional texture, splatter adds random punctuation across it.
Glazing + splatter: a transparent glaze layer over dried splatter partially unifies the marks while preserving the underlying texture. The result looks more integrated than bare splatter on a plain background.
Wet-on-wet + splatter: splattering into wet paint causes the drops to spread and feather at the edges. Useful for soft, atmospheric effects. Not useful if you want clean, defined marks.
The glazing technique in acrylic painting pairs especially well with splatter work because it lets you visually adjust the intensity of splatter marks after the fact without removing them.
Common Mistakes When Splattering with Acrylics
Most splatter problems trace back to two things: wrong paint consistency or skipping surface preparation. That’s it.
Everything else, the distance, the tool, the angle, is easier to fix mid-session. Consistency and prep errors lock in the problem from the start.
Paint Consistency Errors
Too thick: clumps on the bristles, falls as blobs rather than droplets. The splatter has no energy or scatter.
Too thin: pigment weakens, marks bleed on landing. Over-thinning student-grade acrylics like cheap craft store brands produces near-transparent marks that look washed out after drying. Artist-grade fluids like Liquitex or Golden handle dilution much better.
The fix is testing. A quick pass on scrap paper before touching the actual canvas shows exactly what the paint will do at current consistency.
Surface and Masking Errors
Splattering onto an unprimed or poorly primed surface causes paint to absorb unevenly.
The more common version of this error: forgetting to mask surrounding areas before starting. Splatter carries further than expected, especially thin paint flicked with force. A painting that took three hours can pick up unwanted marks in thirty seconds.
- Use painter’s tape along edges
- Cover adjacent areas with paper or plastic sheeting
- Move items off nearby surfaces before starting
Timing and Layering Errors
Splattering over wet paint is probably the single most common mistake. The splatter drops land and then merge with the wet layer beneath, losing their edges and dragging color with them.
Wait for each layer to be fully dry to the touch. Acrylics dry fast, usually within 15-30 minutes for thin layers depending on conditions, so this rarely requires a long wait.
The reverse error is also tricky: splattering so early in the painting process that later brushwork destroys the marks. If splatter is intended as a finished surface element, it should go on after the structural painting work is complete.
Tool and Distance Errors
Holding the brush too close to the canvas while flicking creates only large blobs. Nothing wrong with large blobs if that’s the goal, but beginners often end up with them when aiming for fine dots.
Pull back further, load less paint, use a stiffer brush, or switch to a toothbrush. Any one of those changes shifts the mark size significantly. Usually it takes a combination of two.
Not testing on scrap material first means the canvas itself becomes the test. That’s a bad trade.
Cleaning Up and Protecting Splatter Work
Acrylic splatter dries fast. Faster than most people account for when they stop to assess the work mid-session.
On brushes and tools, wet acrylic is easy to rinse out with water. Dried acrylic is not. A brush left paint-loaded for 20 minutes in a warm room can have permanently stiffened bristles by the time you get back to it. Keep a water container nearby and rinse tools between colors or whenever you pause for more than a few minutes.
Removing Unwanted Splatter
Wet splatter on canvas can be lifted with a damp cloth, quickly and cleanly, as long as the underlying layers are fully dry. This is a reliable fix when a drop lands somewhere it shouldn’t.
Dried splatter is a different problem. Acrylic forms a flexible plastic film once cured, and scraping it off risks pulling the layers beneath with it. The better approach is to paint over the unwanted mark with the background color, matching opacity carefully.
Thin, transparent splatter marks that landed in the wrong place can sometimes be covered with a single opaque pass. Thick raised drops are harder to conceal without leaving a visible ridge.
Varnishing Over Splatter Texture
Splatter creates texture. Varnish interacts with that texture differently depending on the finish chosen.
| Varnish Type | Effect on Splatter Texture | Best For |
|---|---|---|
| Gloss | Deepens color, shows texture clearly | Bold abstract splatter, high contrast work |
| Satin | Balanced sheen, texture visible | Mixed technique pieces, general use |
| Matte | Softens contrast, slight color muting | Subtle texture effects, fine dot splattering |
Gloss varnish deepens color and increases visible contrast between the splatter marks and the background. Matte varnish softens that contrast and can slightly mute dark colors. Neither is wrong, but the choice changes how the final texture reads from a distance.
Liquitex recommends waiting up to two weeks for acrylic paint to fully dry before applying varnish, especially on thicker textured surfaces. Applying too early, when the paint is still curing beneath the surface skin, can trap moisture and cause cloudiness.
Brush varnish on with a wide, soft brush using horizontal and vertical strokes in separate coats. Apply thin coats rather than one heavy coat to avoid pooling in the recesses of raised splatter marks, which can dry cloudy or uneven.
For sealing an acrylic painting that has significant texture depth, a spray varnish can reach into surface crevices more evenly than a brush, particularly around raised splatter drops where a flat brush tends to skip over the edges.
An isolation coat (a layer of gloss medium applied before varnishing) protects the paint layer and allows the varnish to be removed later for cleaning without risking damage to the artwork. For any painting intended for long-term display or sale, this extra step is worth the effort.
FAQ on What Is Splattering In Acrylic Painting
What is splattering in acrylic painting?
Splattering is a paint application technique where acrylic paint is flicked, thrown, or sprayed onto a surface to create random drops and marks.
It produces texture and movement that standard brushwork cannot replicate. The results range from fine mist-like dots to large, energetic drops depending on tool and paint consistency.
What tools do you need for acrylic paint splattering?
A toothbrush, stiff bristle brush, fan brush, palette knife, or spray bottle all work.
Each produces different mark sizes and scatter patterns. Toothbrushes give fine, controlled dots. Fan brushes cover larger areas. Spray bottles produce a soft mist rather than distinct drops.
How do you get the right paint consistency for splattering?
Thin the paint enough that it flows off the brush with momentum but still holds pigment strength on landing.
A rough guide: 1 part water to 3-4 parts paint for fine splattering. Always test on scrap paper first. Over-thinning weakens color and causes marks to bleed.
Is splattering the same as drip painting?
No. Drip painting uses gravity to move paint down a surface. Splattering uses force, flicking or throwing paint actively at the canvas.
Acrylic pouring is gravity-driven and produces smooth trails. Splatter produces sharp, high-energy marks with defined edges.
Can you splatter paint on any surface?
Most surfaces work, but primed canvas and mixed media paper give the most consistent results.
Smooth sealed surfaces cause thin paint to bead and shift before drying. Unprimed canvas absorbs unevenly. Heavy watercolor paper handles multiple wet layers without buckling badly.
How do you control where splatter lands?
Use masking tape and paper to cover areas you want to protect. Tilt the canvas to direct where drops fall.
Distance from the surface also matters. Closer means larger drops with less scatter. Further back produces finer, wider-spread marks. Stencil masking creates clean negative space designs.
When in the painting process should you add splatter?
It depends on the purpose. Background texture splatter goes on early, before the main subject work.
Finishing detail splatter, such as stars or rain, goes on last. Always let each layer dry completely before adding splatter on top to avoid muddy color mixing.
What is the difference between fluid acrylics and heavy body acrylics for splattering?
Fluid acrylics are pre-thinned and close to splatter-ready consistency straight from the bottle.
Heavy body acrylics need more water added but build up more physical texture when they land. Brands like Golden and Liquitex handle dilution better than student-grade paints due to higher pigment concentration.
How do you varnish a painting with splatter texture?
Apply varnish in thin coats using a wide soft brush or spray varnish, which reaches into surface crevices more evenly than a flat brush.
Gloss varnish deepens color contrast in splatter marks. Matte varnish softens it. Wait up to two weeks before varnishing heavily textured acrylic surfaces, per Liquitex guidance.
What famous artists used splattering techniques?
Jackson Pollock is the most recognized, using drip and splatter methods to define abstract expressionism.
Jean-Michel Basquiat incorporated splatter into neo-expressionist work for raw energy. Sam Francis used large-scale splatter compositions to express vibrant color contrast across monumental canvases.
Conclusion
This conclusion is for an article presenting splattering as one of the most versatile acrylic painting techniques available to artists at any skill level.
From toothbrush dot patterns to bold brush-flicking, the splatter effect is controlled by three things: paint viscosity, tool selection, and distance from the canvas.
Get those right and the results are repeatable. Get them wrong and even a finished piece can pick up unwanted marks in seconds.
Whether you’re building background canvas texture, adding finishing detail like stars or rain, or working in a fully abstract mark making style, splattering earns its place in the process.
Test on scrap paper first. Mask what needs protecting. Let each layer dry before adding the next. That’s really all it takes.