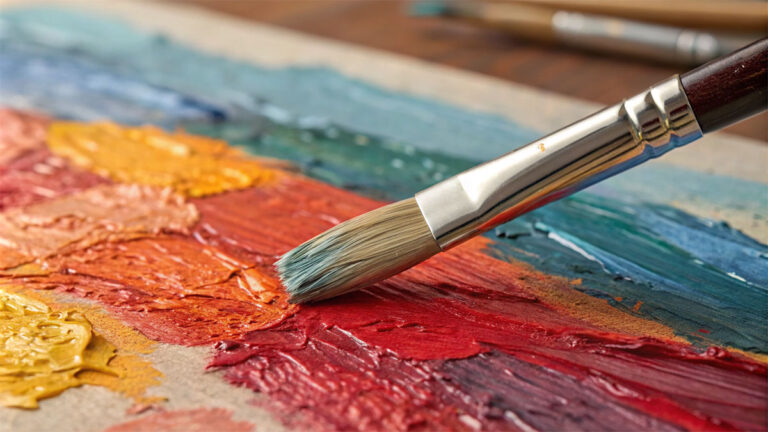
The right acrylic painting materials don’t make you a better artist overnight, but the wrong ones will slow you down from the start.
Acrylics are one of the most flexible painting mediums available. Fast-drying, water-based, and compatible with nearly any surface, they work for beginners and professionals alike. But the range of paints, brushes, surfaces, and mediums on the market is genuinely wide, and not all of it is worth your money.
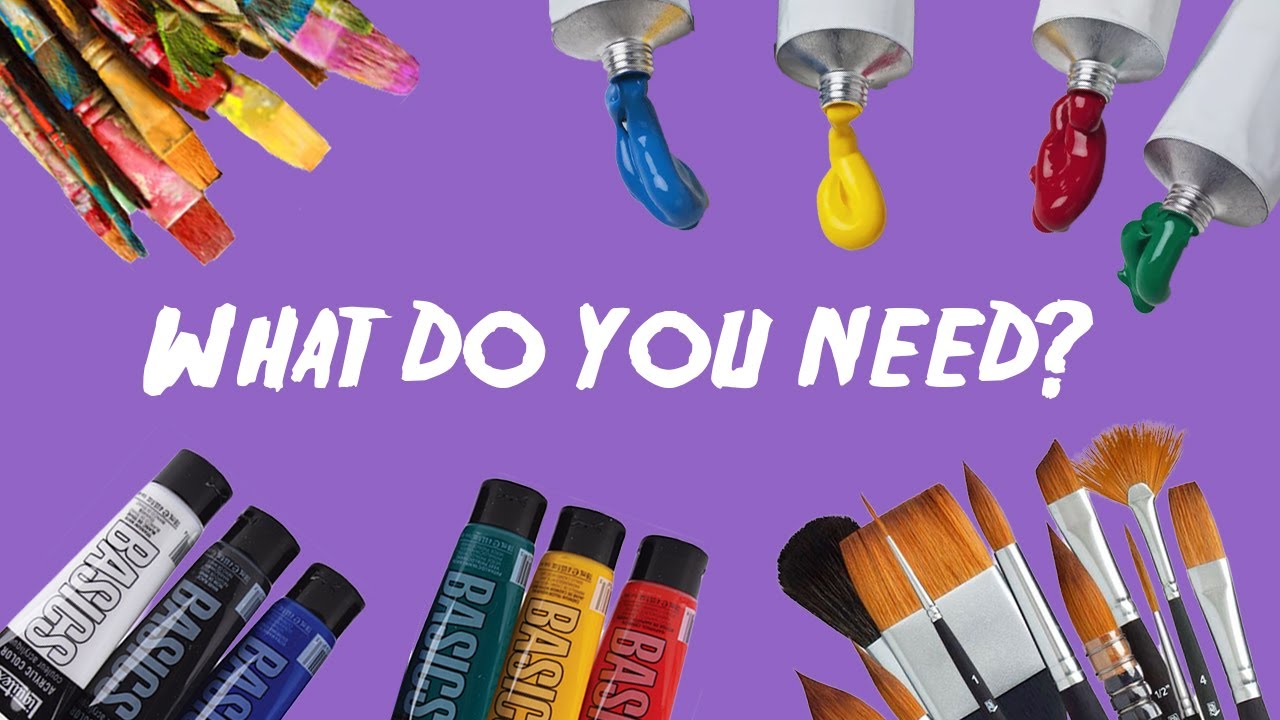
This guide covers everything you need, from paint grades and brush types to surfaces, mediums, palettes, varnishes, and the tools that round out a complete studio setup. You will also find a clear breakdown of what beginners actually need versus what experienced painters typically upgrade to over time.
What Are Acrylic Painting Materials
Acrylic painting materials are the tools, surfaces, paints, and mediums used specifically with water-based acrylic paint. The category covers everything from the paint itself to the brushes, canvases, palettes, mediums, and finishing varnishes that make a complete painting workflow.
This matters more than it sounds. The materials you pick shape what acrylic painting techniques are even possible. Choose the wrong surface or skip the gesso, and you’re already fighting your materials before you’ve made a single mark.
The global art supplies market hit $12.2 billion in 2023 and is projected to reach $20 billion by 2035 (Allied Market Research). Acrylic paint specifically accounted for over 1.2 billion liters sold worldwide that same year.
Acrylic materials break into five main categories:
- Paint: the acrylic itself, in various grades and consistencies
- Brushes: synthetic or natural, in multiple shapes
- Surfaces: canvas, wood, paper, and other supports
- Mediums: gels, retarders, pouring mediums, glazing solutions
- Tools and finishing: palette knives, palettes, varnish
One thing worth knowing upfront: unlike oil painting, acrylics don’t require solvents, special ventilation, or complicated surface prep for most applications. That makes them accessible for beginners, fast for professionals, and flexible across almost every painting style.
Heavy body acrylics currently hold a 54.2% market share among acrylic paint types (Future Market Insights, 2025), which tells you most painters working with acrylics lean toward the thicker, more textured formulations.
How Acrylic Materials Differ from Other Painting Mediums
Knowing what sets acrylics apart helps you choose the right materials from the start.
| Feature | Acrylics | Oil Paint | Watercolor |
|---|---|---|---|
| Drying Time | Minutes to hours: High speed; ideal for layering and rapid completion. | Days to weeks: Slow; allows for extended blending and “open” work time. | Minutes: Fast; however, “puddles” take longer and dry layers can be reactivated. |
| Cleanup | Water Only: Easy cleanup with soap and water while the paint is still wet. | Solvents Required: Needs turpentine or mineral spirits to clean brushes and thin paint. | Water Only: Extremely easy; brushes can be cleaned even after paint has dried. |
| Surface Flexibility | Very High: Sticks to almost anything (canvas, wood, plastic, fabric, metal). | Moderate: Best on primed surfaces; oil can rot raw canvas or paper over time. | Paper Preferred: Restricted mainly to specialized absorbent watercolor paper. |
| Toxicity | Low: Water-based; generally safe for home use without heavy ventilation. | Medium: The paint itself varies, but the required solvents often emit fumes. | Very Low: The most portable and non-toxic option for indoor or travel use. |
Different painting mediums each have material demands that go with them. With acrylics, the material list is relatively simple and the surfaces are broad, which is a big part of why over 40% of U.S. adults who engage in creative activities use them (Global Growth Insights).
Acrylic Paints
Not all acrylic paint is the same. Consistency, pigment load, and formulation vary significantly across product lines and grades, and those differences affect every part of the painting process.
Heavy body acrylics dominate professional use for good reason. Their thick, buttery consistency holds brush marks and palette knife textures. Golden Heavy Body is the benchmark most professional artists measure others against.
Acrylic Paint Consistency Types
Fluid acrylics are projected to grow rapidly in coming years, driven partly by the acrylic pouring trend (Persistence Market Research, 2024). Each consistency type suits different techniques.
| Type | Consistency | Best For | Example Brand |
|---|---|---|---|
| Heavy Body | Thick, buttery, and paste-like. | Texture: Holding sharp peaks, impasto, and visible brush or knife marks. | Golden Heavy Body |
| Soft Body | Creamy and smooth; levels out more than Heavy Body. | Blending: Smooth transitions, fine detail work, and underpainting. | Golden Soft Body |
| Fluid | Thin and pourable; similar to the consistency of heavy cream. | Flow: Large washes, acrylic pouring, staining, and airbrushing. | Liquitex Professional Fluid |
| Open Acrylic | Creamy, but formulated with “retarders” to stay wet longer. | Time: Traditional wet-on-wet blending and working outdoors (plein air). | Golden OPEN Acrylics |
Golden OPEN Acrylics were specifically designed to address the number one complaint artists have about acrylics: they dry too fast. Standard acrylics can skin over in minutes on a palette, which is tricky when you need to blend or rework a passage.
Paint Grades and What They Actually Affect
Student grade paint contains less pigment, more filler, and tends toward transparency even where you want opacity.
Artist grade has higher pigment concentration, better lightfastness, and more consistent color mixing behavior. The cost per tube is higher, but you use less paint to get coverage.
Liquitex BASICS is the most commonly recommended student-grade line. Winsor & Newton Galeria sits in a mid-range position that many intermediate painters find hits the right price-to-quality balance. For professional work, Golden and Liquitex Professional are the go-to choices.
One real-world note: pigment load affects color mixing more than most beginners realize. A cheap cadmium-hue in student grade can take three times as much paint to achieve the same saturation as its artist-grade counterpart. That erodes the cost saving quickly.
Brushes for Acrylic Painting
Brushes are where painters often overspend on the wrong things and underspend on the ones that matter. Acrylic paint is harder on brushes than watercolor and slightly more forgiving than oil, but it will destroy brushes fast if they dry with paint inside the ferrule.
The best brushes for acrylic painting are almost always synthetic. Natural hair brushes, particularly sable, are expensive and absorb water unevenly with the water-heavy acrylics workflow. Good synthetic brushes from Princeton or Da Vinci hold their shape, spring back well, and cost far less to replace when they eventually wear out.
Brush Shapes and Their Uses
Most painters rely on three or four shapes for the majority of their work. The rest are specialty tools.
- Flat brush: broad strokes, sharp edges, blocking in large areas
- Round brush: versatile, controls fine detail and thicker strokes depending on pressure
- Filbert: oval tip, good for blending and soft-edged strokes
- Fan brush: texture effects, foliage, soft blending
- Liner/rigger: very fine lines, detail work, lettering
The filbert brush is underrated among beginners. It does almost everything a flat and round can do, just with softer edges. I’ve seen a lot of painters get more mileage from a single filbert set than from buying every shape available.
Check the best brush shapes for acrylics to understand which profiles work for specific techniques before investing in a full set.
How to Clean Acrylic Brushes

Dried acrylic paint inside the ferrule permanently splays bristles. There’s no fixing it once it happens.
The basic rule: never let brushes sit dry in paint, not even for ten minutes.
Keep a wide-mouth water container nearby and rinse brushes before the paint starts to congeal. After a session, wash brushes with mild soap, reshape the bristles, and store them upright or flat, never bristle-down in a jar.
For dried paint already in the ferrule, a brush cleaner like The Masters Brush Cleaner can sometimes soften and remove it. But honestly, the best approach is just not letting it happen in the first place. Full guidance on how to clean paintbrushes covers every scenario in detail.
Painting Surfaces and Supports
Acrylics bond to almost any non-greasy, porous surface. That flexibility is one of the medium’s real advantages over oil, which needs proper priming to avoid long-term canvas degradation.
Painting supplies are the largest category in the U.S. art market, accounting for 65% of market share in 2024 (PS Market Research). Surface choice is the decision that most determines how that paint behaves.
Canvas Types for Acrylics
Stretched canvas is the default for most painters. It’s light, comes pre-primed in most cases, and works at any scale.
Cotton canvas is cheaper and has a tighter weave. Linen canvas is more durable, has a distinctive texture, and is preferred by many professional painters for large-format work. The cotton vs. linen canvas decision mostly comes down to budget and texture preference.
Canvas boards and canvas panels are better for studies and smaller work. They’re cheaper, easier to store, and don’t need to be stretched. Differences in canvas textures affect how paint sits on the surface, especially with dry brushing or impasto techniques.
Gesso and Surface Preparation
Gesso is an acrylic-based primer that seals porous surfaces and gives the paint something to grip.
Most pre-stretched canvases come with a single layer of gesso already applied. That’s usually enough for basic work. For more control over absorbency and texture, adding one or two extra coats makes a real difference.
- More gesso coats = less absorbent surface, paint sits on top
- Fewer coats = more absorbent, paint soaks in faster
- Sanded gesso = smoother surface for detail-heavy work
- Unsanded, textured gesso = adds tooth for expressive brushwork
For non-canvas surfaces like wood panels or MDF, gesso is not optional. Raw wood will absorb paint unevenly and can cause adhesion failures over time. Full detail on what gesso does and how to prime a canvas covers the full process step by step.
Acrylic Mediums

Mediums are additives mixed directly into acrylic paint to change how it handles, dries, or looks. This is where acrylics get genuinely interesting, and where most beginners leave a lot of potential on the table.
The full range of acrylic mediums is wide. But in practice, most painters regularly use three or four at most.
Texture Mediums and Gels

Gel mediums are probably the most versatile category. They extend paint volume without sacrificing pigment density the way water does.
Regular gel: same consistency as heavy body paint, good for extending paint and building moderate texture.
Heavy gel: thicker, holds sharp peaks and deep brush marks. Often used for impasto technique in acrylic painting.
Modeling paste: opaque, very stiff, used to build three-dimensional texture before or during painting. Dries hard enough to sand.
Golden makes the most complete range of gel mediums on the market. Liquitex’s gel mediums are slightly more available in general art stores and work well for most applications.
Pouring Mediums
Acrylic pouring exploded in popularity around 2018 and has stayed consistently popular since, driving a specific category of dedicated products.
Pouring medium thins paint to a pourable consistency while maintaining adhesion and preventing cracking as the layer dries. Without it, heavily water-thinned paint can crack or delaminate.
- Liquitex Pouring Medium: reliable, widely available, produces good cell formation
- Floetrol: a paint conditioner originally designed for house painting, adopted by acrylic pourers for its affordability and consistent results
- GAC 800: Golden’s dedicated pouring medium, professional grade, excellent leveling
Understanding what pouring in acrylic painting actually involves helps set expectations before buying a dedicated medium. The fluid acrylics segment is expected to grow at a rapid pace partly due to this trend (Dataintelo, 2024).
Palettes for Acrylic Paint
The palette problem is real with acrylics. Standard plastic or wooden palettes let paint dry out within minutes, especially in a warm or dry studio. This wastes paint and forces constant remixing.
Most experienced acrylic painters eventually land on a stay-wet palette. It’s not a preference, it’s a practical solution to a material limitation.
Stay-Wet Palettes
A stay-wet palette uses a reservoir layer of water beneath a membrane sheet to keep paint moist for hours, sometimes days.
Masterson Sta-Wet Palette is the most commonly used commercial option. It works well and is cheap to replace. Many painters also make DIY versions with a shallow plastic container, a wet sponge, and wax paper or parchment.
Key advantage: mixed colors stay workable across a full session, or even the next day if sealed properly. That matters a lot for color mixing consistency, especially when painting large areas that need matched tones.
Glass and Disposable Palettes
Glass palettes are preferred by painters who mix large batches of color and want a non-absorbent, easy-to-clean surface. Dried paint peels right off with a blade. No waste from absorbed paint.
Disposable palette pads are coated paper sheets. Quick to set up, no cleaning required, just tear off the used sheet. The downside is ongoing cost and the fact that paint still dries at a normal pace.
The purpose of a painting palette and the wooden vs. plastic palette comparison are worth reading before making a purchase, especially if you’re setting up a studio workspace for the first time.
Varnishes and Finishes
Varnish is the last material most painters think about and the one that does the most long-term work. It seals and protects the dried paint film, unifies surface sheen, and makes the painting easier to clean decades later.
Skipping it is a common mistake. Acrylic paint dries with an uneven finish, some patches matte, some glossy, depending on paint thickness and medium used. A varnish coat levels all of that out.
Finish types and what they change:
- Gloss varnish: saturates colors, makes them appear deeper and richer
- Matte varnish: reduces reflections, gives a flat, gallery-style look
- Satin varnish: sits between the two, a subtle sheen without full gloss
Liquitex Varnish and Golden MSA Varnish are the two most commonly used professional-grade options. Golden MSA is solvent-based and removable, which is useful if the painting ever needs professional conservation work.
Isolation Coat Before Varnishing
Apply an isolation coat before varnishing. This is a thin, permanent layer of gloss medium that seals the paint surface and prevents varnish from bonding directly to the paint film.
Why this matters: removable varnishes need a barrier between themselves and the paint so they can actually be removed without damaging the work underneath.
Without an isolation coat, removing a varnish later pulls up paint. With one, the varnish sits cleanly on top of a sealed surface.
Golden’s soft gel (gloss) diluted with water makes a reliable isolation coat. Apply one thin coat, let it dry fully, at least 24 hours before varnishing. Full detail on how to seal an acrylic painting covers both isolation and varnish application step by step.
Spray vs. Brush-On Varnish
Spray varnish is faster and avoids brush strokes in the finish. Winsor & Newton’s spray varnish and Liquitex’s spray options are both widely used.
Brush-on varnish gives more control over coverage thickness and works better for large paintings where spray coverage can get uneven.
| Method | Best For | Main Risk |
|---|---|---|
| Spray Varnish | Texture: Ideal for impasto, 3D elements, or fragile surfaces where a brush might disturb the paint. | Uneven Coverage: Can be difficult to get a consistent sheen on very large canvases; requires a ventilated space. |
| Brush-on Varnish | Uniformity: Perfect for large, flat formats where a deep, consistent protective layer is needed. | Physical Marks: Risk of visible brush strokes, bubbles, or accidentally “pulling” paint if not fully dry. |
Acrylic varnish should only go on completely dry paintings. That means waiting at least two to three weeks after finishing, even if the paint feels dry to the touch. Paint can still be curing internally for weeks after the surface has set.
Additional Tools and Accessories
These are the materials that don’t fit neatly into any other category but that show up in every studio. Some are optional at first. Most become part of a regular workflow.
The U.S. art supplies market was valued at $3.7 billion in 2024, with painting supplies holding a 65% market share (PS Market Research). Tools and accessories represent a meaningful slice of that, particularly as artists scale up their practice.
Palette Knives
Palette knives do two different jobs, and most painters need at least one of each type.
Mixing knives have a straight, flat blade and are designed for blending paint on a palette or glass surface. They keep colors cleaner than using a brush for mixing.
Painting knives have a cranked, offset blade that lifts the hand away from the canvas surface. They’re what most people picture when they think of palette knife painting.
Artists like comparing palette knife vs. brush for specific techniques. For impasto work and texture effects, the knife produces results that brushes simply can’t replicate. Detailed guidance on how to use a palette knife is worth reading before investing in a set.
Water Containers and Studio Setup
Two containers, not one. Keep one for rinsing brushes (changes regularly) and one with cleaner water for diluting paint. This is a small thing that makes a real difference to color cleanliness.
Double-compartment containers solve this problem with a single item. Bob Ross’s studio workflow, as documented in how he set up his workspace, always included separate water sources for cleaning vs. mixing.
A spray bottle filled with water keeps palette paint moist throughout a session. Mist the palette every 20-30 minutes in a warm studio. It costs almost nothing and dramatically reduces wasted paint.
Easels
Tabletop easels work for small canvases and beginners. Floor-standing studio easels are better for anything above 16×20 inches.
For acrylic painters specifically, the main requirements are:
- Vertical position support (acrylics don’t need to tilt flat like watercolors)
- Stable canvas grip that doesn’t wobble during active brushwork
- Adjustable height to work standing or seated
A-frame easels fold flat and suit most home studios. H-frame easels are rigid, hold larger canvases, and are the standard choice for serious studio work. The full breakdown of types of painting easels covers every format in detail.
Masking Tape and Transfer Tools
Low-tack painter’s tape creates clean edges for geometric work and protects areas you want to keep white or a specific color. Regular masking tape is too aggressive for most canvas surfaces and can pull up paint or gesso.
For painters who sketch before painting: learning how to transfer a drawing to canvas accurately saves a lot of time compared to freehand construction.
A graphite transfer sheet or lightbox both work well. The method depends on the complexity of the composition and whether you’re working from a photo reference or an original sketch.
Acrylic Painting Materials for Beginners vs. Advanced Painters

The gap between a beginner kit and a professional setup is mostly about paint grade, surface quality, and mediums. The core tools, brushes, palette, canvas, are the same at every level.
Professional artists are the largest consumer category in the U.S. art market at 40% market share in 2024, but the household and hobbyist segment is the fastest-growing, at a 4.9% CAGR (PS Market Research). More people are starting with acrylics at home than ever before.
What Beginners Actually Need
Most beginner supply lists are too long. Here’s the actual minimum.
Paint: student-grade works for learning. Liquitex BASICS or Winsor & Newton Galeria covers most needs at a fair price. Limit to 8-10 colors maximum to force color mixing practice.
Brushes: three shapes to start. A flat (size 10-12), a round (size 6), and a filbert (size 8). That handles most painting tasks without confusion about which brush to reach for.
Surface: canvas boards or canvas panels over stretched canvas. Cheaper, easier to store, and less frustrating if early work doesn’t go as planned.
Palette: a stay-wet palette from the start. The small cost saves a lot of wasted paint.
When to Upgrade Materials
Upgrade paint grade first. Student-grade paint limits color mixing in ways that slow learning. Once color mixing and basic technique feel manageable, switching to artist-grade paints makes a noticeable difference.
The artist-grade acrylic paints market was valued at $0.47 billion in 2024 and is projected to grow at 4.6% CAGR through 2033 (Business Research Insights). Demand for professional-grade materials is rising as more hobbyists invest seriously in their practice.
Brushes are next. Good synthetic brushes from Princeton or Rosemary & Co hold their shape and last significantly longer than budget sets. The cost difference over time works out in favor of quality brushes.
Mediums come last. Most intermediate painters don’t need a full medium kit. A retarder for blending, a glazing medium for transparent layers, and a pouring medium if that technique appeals, covers the majority of use cases without overcomplicating the process.
| Material | Beginner Choice | Intermediate Upgrade |
|---|---|---|
| Paint | Liquitex BASICS: Affordable student grade with good flow; perfect for learning color theory without “wasting” expensive pigment. | Golden Heavy Body: Artist grade with a much higher pigment load and no fillers. Colors stay vibrant even when mixed. |
| Brushes | Budget Synthetic Set: Basic shapes (Flat, Round, Filbert) that are durable enough for the harsh chemicals in acrylics. | Princeton Catalyst or Rosemary Ivory: Professional synthetics that hold their shape longer and offer a more responsive “snap” for detail. |
| Surface | Canvas Boards or Panels: Sturdy, easy to store, and less expensive than stretched canvas. | Stretched Linen or Wood Panels: Linen offers a smoother, more archival texture; wood provides a rigid surface for heavy impasto or detail. |
| Palette | Masterson Sta-Wet Palette: A literal life-saver for beginners that keeps acrylics from drying out during a session. | Glass Palette: Easy to clean with a razor blade and provides a perfectly smooth surface for sophisticated color mixing. |
| Mediums | None Required: Use water to thin paint while you find your rhythm. | Retarder & Glazing Medium: Tools to slow drying time for blending or to create transparent, luminous layers of color. |
One honest take: the biggest returns in early painting don’t come from better materials. They come from more hours spent painting. Upgrading supplies too early is a distraction. That said, genuinely poor-quality paint, especially paint with almost no pigment, does make learning harder than it needs to be.
Exploring what acrylic painting is as a medium and checking out famous acrylic painters for reference and inspiration is a good parallel track alongside building a materials kit. Seeing what the medium can do at a high level keeps the material decisions in perspective.
FAQ on Acrylic Painting Materials
What acrylic painting materials do beginners need?
Start with a small set of student-grade paints, three brush shapes (flat, round, filbert), canvas boards, and a stay-wet palette. That covers everything needed to learn the basics without overspending on materials you may not use.
What is the difference between student-grade and artist-grade acrylic paint?
Artist-grade paint has higher pigment concentration, better lightfastness, and more consistent color mixing. Student-grade contains more filler and less pigment. Brands like Golden and Liquitex Professional represent artist grade; Liquitex BASICS is a common student option.
What type of brushes work best for acrylic painting?
Synthetic brushes are the standard choice. They handle the water-heavy acrylic workflow better than natural hair, hold their shape longer, and cost less to replace. Princeton and Da Vinci both make reliable synthetic sets for acrylics.
Do I need to prime a canvas before using acrylic paint?
Most pre-stretched canvases come with a single gesso coat already applied. That is usually enough. For wood panels or non-standard surfaces, gesso primer is necessary to seal the surface and give the paint something to grip.
What are acrylic mediums and do I need them?
Acrylic mediums change how paint handles, dries, or looks. Common types include gel medium, retarder, glazing medium, and pouring medium. Beginners don’t need them immediately, but a retarder helps with blending and a glazing medium is useful for transparent layering.
What is the best palette for acrylic paint?
A stay-wet palette is the most practical choice. It keeps paint workable for hours by drawing moisture from a reservoir layer beneath the palette sheet. The Masterson Sta-Wet Palette is the most widely used commercial option among acrylic painters.
Can you use acrylic paint on surfaces other than canvas?
Yes. Acrylics adhere to wood, paper, fabric, metal, plastic, and ceramic as long as the surface is non-greasy and porous. Surface preparation varies, wood panels need gesso, while paper designed for acrylics generally does not require additional priming.
What is the difference between heavy body and fluid acrylics?
Heavy body acrylics are thick and paste-like, retaining brush marks and palette knife textures. Fluid acrylics are thinner, suited to washes, smooth blending, and pouring techniques. Both contain the same pigment load; consistency is the only real difference.
Do acrylic paintings need to be varnished?
Varnishing is strongly recommended. It protects the paint film, unifies surface sheen across matte and glossy patches, and makes the painting easier to clean. Apply an isolation coat first, then use gloss, matte, or satin varnish depending on the finish you want.
What acrylic paint brands do professional artists use?
Golden Artist Colors, Liquitex Professional, and Winsor & Newton are the most commonly used professional-grade brands. Golden Heavy Body is the benchmark for most studio painters. Daler-Rowney and Chroma Atelier are also well-regarded in professional and institutional settings.
Conclusion
This conclusion is for an article presenting acrylic painting materials as a practical system, not just a shopping list.
Every element connects. Paint consistency shapes which techniques are possible. Surface choice affects how paint absorbs and layers. Mediums extend what the paint can do. And finishing with a proper varnish protects everything that came before it.
Brands like Golden, Liquitex, and Winsor & Newton have spent decades refining artist-grade formulations for a reason. Quality materials reduce friction between what you see in your head and what ends up on canvas.
Start with the essentials, learn color mixing and brush control, then upgrade selectively as your practice develops. That approach works at every skill level.