Most artists struggle with how to transfer a drawing to canvas without losing proportions or detail accuracy. This frustrating bottleneck stops many creative projects before they begin.
Canvas transfer techniques bridge the gap between your initial sketch and final artwork. The right transfer method preserves your original drawing’s composition while preparing it for paint application.
You’ll master four proven art transfer techniques that work for any drawing style or canvas size. Grid methods, light box tracing, projection systems, and modern digital approaches each solve different creative challenges.
This guide covers canvas preparation, tool selection, troubleshooting common transfer problems, and finishing techniques that prepare your work for painting mediums.
By the end, you’ll transfer drawings with professional accuracy and confidence.
Preparing Your Original Drawing
Cleaning and Refining Lines
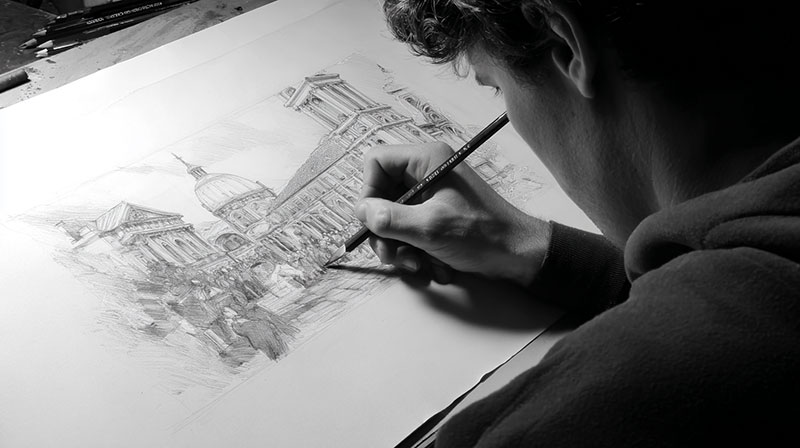
Your original drawing needs clear, definitive lines before any transfer process begins. Dark pencil marks translate better than light sketches.
Go through your artwork with a darker pencil. Strengthen the most important contour lines first.
Erase construction marks and guide lines that won’t be part of the final piece. These confuse the transfer process and muddy your results.
Drawing Enhancement Techniques
Contrast matters when transferring drawings to canvas surfaces. Light lines disappear during the transfer technique.
Use a 2B or 3B pencil for final line work. The graphite transfers more effectively than harder pencils.
Consider the value relationships in your drawing. Strong darks help define the most critical elements during transfer.
Sizing Your Drawing
Measurement accuracy determines transfer success. Calculate your canvas dimensions before making any adjustments.
Use a photocopier to scale drawings up or down to match your canvas size. This saves time compared to redrawing everything.
Digital scanners work well for creating multiple sizes from one original drawing. Print at the exact canvas dimensions you need.
Creating Reference Points
Add small registration marks at key corners of your drawing. These help align everything during the transfer process.
Number complex sections if your drawing has multiple detailed areas. This prevents confusion when working square by square.
Mark the center point of your drawing clearly. Canvas transfer methods rely on proper alignment from the start.
Canvas Preparation Essentials

Surface Preparation
Primed canvas accepts transferred lines better than raw fabric. Check if your canvas needs additional preparation.
Gesso creates the ideal surface for pencil transfer methods. Apply a thin, even layer if needed.
Sand any rough canvas textures lightly with fine sandpaper. Smooth surfaces show transferred lines more clearly.
Canvas Quality Considerations
Cotton canvas works well for most transfer techniques. The texture accepts pencil marks evenly.
Avoid heavily textured canvases for detailed drawings. The weave interferes with fine line transfer.
Stretch your canvas properly before beginning any transfer work. Loose canvas shifts during the process and ruins alignment.
Tool Selection for Transfer
Choose your pencil hardness based on canvas texture and transfer method. 2H pencils work for light guidelines.
Blending stumps help soften transferred lines that appear too harsh on canvas surfaces.
Different types of paintbrushes can dust away eraser debris without damaging transferred lines.
Marking Guidelines
Light pencil grid lines provide the framework for accurate proportional transfer. Use a ruler for precision.
Establish your center point first. All other measurements radiate from this reference point.
Mark border guidelines to define your working area. This prevents drawings from drifting off the intended space.
Grid Transfer Step-by-Step

Creating the Master Grid
Grid transfer remains one of the most accurate drawing transfer methods available. Start with uniform squares on your original.
Use a ruler to draw perfectly straight lines. Crooked grids create distorted final results.
Number each square along the edges. This systematic approach prevents confusion during the transfer process.
Grid Proportions and Scaling
Calculate your scale ratio carefully. Measure your canvas dimensions against your original drawing size.
If your canvas is twice the drawing size, make canvas grid squares twice as large. Maintain these proportional relationships throughout.
Double-check your math before drawing the canvas grid. Errors multiply across every transferred element.
Canvas Grid Setup
Draw your canvas grid with light pressure. These guidelines get erased after the drawing transfer is complete.
Use the same number of squares as your original drawing grid. Count twice to avoid mistakes.
Mark reference numbers along canvas edges that match your original drawing grid system.
Square-by-Square Transfer Technique
Start with the most recognizable shapes in your drawing. Basic forms transfer more easily than fine details.
Work systematically from left to right, top to bottom. This consistent workflow prevents accidentally skipping sections.
Focus on one square at a time. Looking at neighboring squares while working creates proportion errors.
Maintaining Transfer Accuracy
Cross-reference your work frequently. Compare canvas squares to original drawing squares for accuracy.
Use light strokes initially. Build up line weight gradually as you confirm correct placement.
Step back periodically to check overall proportions. Individual squares might be correct while the whole drawing drifts off.
Adding Progressive Detail
Transfer basic contour lines first. Add secondary details only after the main structure is established.
Work from general to specific in each square. This layered approach builds accuracy systematically.
Save the finest details for last. These elements require the most precision and benefit from an established framework.
Grid Cleanup Process
Erase grid lines carefully after completing your transfer. Use a kneaded eraser to avoid damaging drawing lines.
Clean one section at a time. This prevents accidentally erasing important transferred elements.
Check that all construction marks are removed before beginning your painting mediums application.
Tracing Methods and Materials

Graphite Transfer Paper
Graphite transfer paper creates clean, removable lines on canvas surfaces. Position it carefully between your drawing and canvas.
Apply steady pressure while tracing. Too light won’t transfer, too heavy creates messy smudges.
Work systematically across your drawing. Lift corners periodically to check transfer quality without losing alignment.
Carbon Paper Alternatives
Traditional carbon paper works but leaves permanent marks. Graphite sheets offer better control for art transfer applications.
Homemade transfer paper saves money on large projects. Rub pencil graphite heavily on paper, then use as transfer medium.
Wax-free transfer papers work best with acrylic painting applications. Wax resists paint adhesion.
Pressure Control Techniques
Consistent pressure determines line quality during tracing transfer methods. Practice on scrap materials first.
Use a ballpoint pen for smooth, even pressure. Pencils can catch on paper fibers and create irregular lines.
Trace major contour lines first. Add secondary details only after establishing the main structure.
Preventing Transfer Smudging
Secure your setup before beginning any tracing work. Shifting papers ruin alignment and create double lines.
Work from top to bottom if you’re right-handed. This prevents your hand from smudging completed sections.
Place clean paper under your working hand. Natural skin oils can interfere with graphite transfer quality.
Transfer Paper Quality Assessment
Test transfer papers on canvas scraps before committing to your final artwork. Different brands produce varying line weights.
Check how easily transferred lines erase from your canvas surface. Some transfer methods create stubborn marks.
Store transfer papers flat and protected. Wrinkled sheets create inconsistent line quality during tracing.
Light Box and Window Techniques
Natural Light Transfer Setup
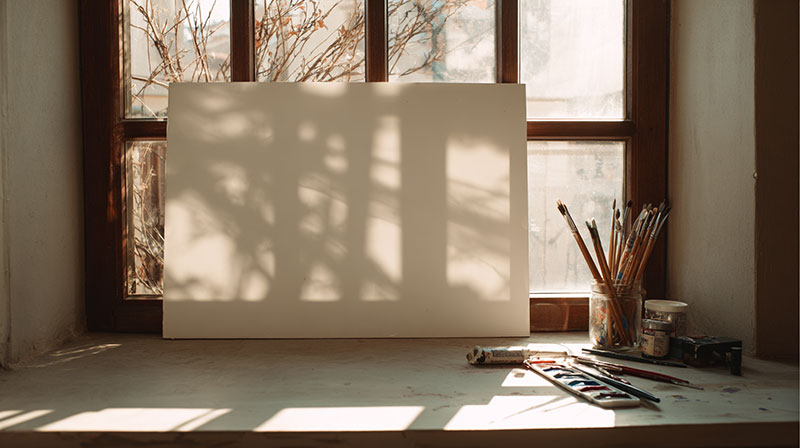
Window tracing provides free, abundant light for transfer projects. Choose times when sunlight illuminates evenly.
Morning light often works best. Harsh afternoon sun creates glare that makes details difficult to see.
Secure both papers to the glass with tape. Any movement during tracing destroys alignment accuracy.
DIY Light Box Construction
Build simple light boxes using cardboard boxes and LED strips. Adjustable brightness improves transfer control.
- Clear glass or acrylic sheet for the top surface
- LED light strips mounted underneath
- Dimmer switch for brightness control
- Ventilation holes to prevent overheating
Commercial light boxes offer consistent illumination but cost more than homemade versions.
Tablet Screen Transfer Method
Digital tablets make excellent modern light boxes. Their bright, even screens work perfectly for tracing.
Adjust screen brightness to maximum for best visibility through multiple paper layers. Use white backgrounds on your device.
Protect screens with thin glass or plastic sheets. Pencil pressure can damage sensitive touchscreen surfaces.
Transfer Process with Backlighting
Position your original drawing against the light source. Place canvas on top, maintaining careful alignment.
Trace major shapes and contour lines first. Build details gradually using this systematic approach.
Work in sections if your drawing is larger than your light source. Mark reference points to maintain continuity.
Managing Light Angles
Direct backlighting works better than angled light sources. Shadows from uneven lighting obscure drawing details.
Avoid working near windows during changing light conditions. Shifting illumination makes consistent tracing difficult.
Use consistent pressure throughout the transfer process. Varying hand weight creates uneven line quality.
Digital and Modern Transfer Methods

Projector Transfer Setup
Digital projectors handle large-scale transfers with impressive accuracy. Set up in a darkened room for best visibility.
Measure the distance carefully to achieve your desired canvas size. Most projectors include zoom controls for fine adjustments.
Focus the image sharply before beginning any tracing work. Blurry projections create inaccurate transferred drawings.
Photo Reference Integration
Take high-quality photos of your original drawings for digital projection. Resolution affects final transfer quality significantly.
Scan drawings at 300 DPI minimum for crisp projection results. Lower resolutions create pixelated, unusable transfers.
Save digital files in formats that preserve image quality. JPEG compression can introduce unwanted artifacts.
Smartphone Projection Techniques
Modern phones work as miniature projectors for small transfer projects. Use flashlight apps with white screens behind your drawing.
Position the phone to create even illumination across your work area. Consistent lighting improves tracing accuracy.
Battery life limits working time with phone-based methods. Keep charging cables handy for extended sessions.
Correcting Digital Distortion
Projectors can introduce perspective distortion if not aligned properly. Check that your canvas sits perpendicular to the projection beam.
Keystone correction features help fix angled projection problems. Adjust these settings before starting your transfer.
Test projection accuracy by measuring key dimensions on your canvas against the original drawing proportions.
Computer-Assisted Transfer Methods
Print enlarged sections of your drawing at actual canvas scale. Transfer these sections using traditional tracing methods.
Grid overlay software helps divide complex drawings into manageable transfer sections. This digital approach works with any traditional transfer technique.
Vector graphics programs can convert drawings to scalable formats. These files project at any size without quality loss.
Modern Tool Combinations
Hybrid approaches often work better than single transfer methods. Combine digital scaling with traditional tracing techniques.
Use projectors to establish major shapes, then refine details with hand-drawing methods. This workflow optimization saves time while maintaining accuracy.
Digital photography helps document transfer progress. Take reference photos to compare accuracy throughout the process.
Troubleshooting Common Transfer Problems
Proportion Issues
Distorted proportions show up immediately when you step back from your work. Check measurements against your original drawing frequently.
Measure key distances with a ruler. Your eye can trick you into accepting incorrect scale relationships.
Use the grid intersection points as checkpoints. These reference marks reveal proportion problems before they spread.
Early Problem Detection
Alignment shifts happen gradually during long transfer sessions. Compare your work to the original every few minutes.
Mark registration points on both drawing and canvas. These reference spots help identify when elements drift out of position.
Take photos of your transfer progress. Digital images reveal proportion errors that close-up work can miss.
Correction Strategies
Fix small proportion errors by adjusting surrounding elements. Redistribute the distortion across multiple areas rather than correcting one dramatic change.
Erase and redraw problem sections completely if distortion is severe. Partial fixes often create new proportion issues.
Use perspective principles to check if your corrections look natural. The eye notices proportion problems instantly.
Line Quality Problems
Wobbly lines result from unstable hand positions or poor tool control. Brace your drawing hand against a solid surface.
Strengthen weak transferred marks with confident strokes. Hesitant line work looks amateur regardless of accuracy.
Clean graphite smudges with kneaded erasers. These specialized tools lift marks without damaging canvas texture.
Tool-Related Issues
Transfer paper quality affects line consistency. Replace worn sheets that no longer produce clean marks.
Dull pencils create inconsistent line weights during hand-tracing methods. Keep several sharpened pencils ready.
Light box bulbs dim over time and reduce visibility. Check illumination levels if tracing becomes difficult.
Surface Problems
Canvas texture variations can interfere with transfer methods. Test your technique on canvas scraps first.
Dust or debris on canvas surfaces creates gaps in transferred lines. Clean your work area thoroughly before beginning.
Humidity affects paper stability during transfer work. Work in climate-controlled spaces when possible.
Finishing Your Transfer

Line Refinement Process
Strengthen important lines immediately after completing your transfer. Fresh graphite marks erase more easily than set lines.
Build line weight variation gradually. Thick and thin lines create visual interest and depth.
Use confident strokes to replace tentative transferred marks. Your final drawing should look deliberate, not traced.
Value Development
Add value relationships to give your transferred drawing more dimension. Light graphite washes work well on canvas surfaces.
Establish your darkest darks first. These anchor points help judge all other value relationships accurately.
Build middle tones gradually between your established light and dark areas. This creates smooth gradation across forms.
Construction Mark Removal
Grid lines need complete removal before painting begins. Use gentle circular motions with a kneaded eraser.
Work systematically across the canvas. Missed grid lines show through transparent paint layers.
Check your progress from different angles. Side lighting reveals leftover construction marks that straight-on viewing misses.
Detail Enhancement
Add final details that couldn’t transfer accurately through your chosen method. Hand-drawn refinements often surpass transferred precision.
Use reference photos to verify detail accuracy. Memory can alter proportions during the finishing process.
Consider the composition balance as you add final elements. Small changes can shift the entire visual weight.
Quality Control Checklist
Compare proportions between your original drawing and canvas transfer systematically. Measure key relationships with a ruler.
- Check head-to-body ratios in figure drawings
- Verify architectural element relationships
- Confirm landscape element positioning
- Assess negative space accuracy
Step away from your work regularly. Fresh perspective reveals problems that extended focus can miss.
Preparing for Paint Application
Clean eraser residue completely from canvas surfaces. Rubber particles interfere with paint adhesion.
Test your transferred lines with your chosen painting medium. Some graphite marks show through thin paint layers.
Document your transfer with photos. Reference images help during the painting process when transferred lines get covered.
Final Assessment
Accurate transfers set the foundation for successful paintings. Don’t rush this critical preparation phase.
Consider how your transferred drawing will work with your intended painting style. Some techniques require different line approaches.
Mark areas that need extra attention during painting. These notes help focus your efforts where accuracy matters most.
FAQ on How To Transfer A Drawing To Canvas
What’s the easiest method for beginners?
Grid transfer method works best for new artists. Draw squares on your original drawing and matching squares on canvas.
Transfer one square at a time to maintain proportion accuracy. This systematic approach prevents overwhelming mistakes.
Can I transfer without special equipment?
Window tracing requires only natural light and basic materials. Tape your drawing and canvas to a bright window.
Use a pencil to trace visible lines. This cost-effective method works for small to medium drawings.
What canvas preparation is needed?
Primed canvas accepts transferred lines better than raw fabric. Check if your surface needs additional gesso application.
Clean any dust or debris first. Smooth surfaces show transferred contour lines more clearly.
How do I avoid proportion problems?
Measure key distances regularly during transfer. Use rulers to verify critical relationships between elements.
Mark reference points on both drawing and canvas. These alignment guides catch proportion drift early.
What pencil works best for transfer?
2H pencils create light guidelines that erase easily. 2B pencils work better for final line refinement.
Match pencil hardness to your canvas texture and intended painting medium. Test on scraps first.
Should I erase grid lines completely?
Remove all construction marks before painting begins. Grid lines show through transparent paint layers.
Use kneaded erasers for gentle removal. Work systematically to avoid missing reference marks.
Can I use my phone as a light source?
Smartphone flashlights work for small transfer projects. Use white screen backgrounds for even illumination.
Battery life limits working time. Keep charging cables ready for extended transfer sessions.
What if my drawing is larger than my canvas?
Scale down using photocopier reduction or digital scanning. Calculate the reduction percentage carefully.
Alternatively, crop your drawing to fit canvas dimensions. Focus on the most important compositional elements.
How do I transfer fine details accurately?
Project major shapes first, then hand-draw fine details. This hybrid approach combines accuracy with precision.
Use magnification tools for intricate areas. Good lighting prevents eye strain during detailed work.
Can transfer lines show through paint?
Heavy graphite marks may show through thin paint applications. Use light pressure during transfer.
Test your chosen painting technique on canvas scraps. Some painting styles cover transfer lines better than others.
Conclusion
Learning how to transfer a drawing to canvas opens unlimited creative possibilities for your artwork. These proven transfer techniques work for any skill level or project size.
Grid methods provide mathematical accuracy for complex drawings. Light box and window techniques offer simplicity without special equipment.
Digital projection handles large-scale transfers efficiently. Modern tools expand traditional art transfer methods significantly.
Canvas surface preparation determines transfer success as much as technique selection. Texture and priming affect how well graphite adheres.
Practice different transfer paper applications on scrap materials first. Each method requires specific pressure and tool control.
Troubleshooting skills prevent common proportion and alignment problems. Regular measurement checks catch errors before they multiply.
Your transferred drawing sets the foundation for successful oil painting, watercolor painting, or any chosen medium.
Master these artistic processes through consistent practice. Each successful transfer builds confidence for more ambitious creative projects.