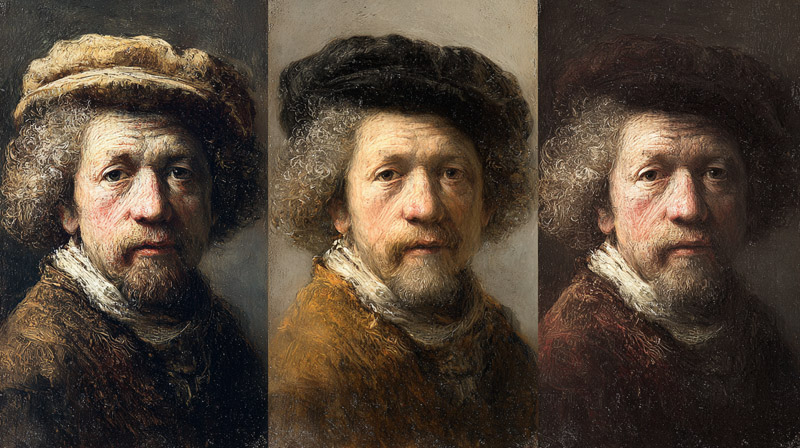

Rembrandt van Rijn didn’t just paint portraits. He built light out of darkness, layer by layer, with a process that still holds up under scientific analysis 400 years later.
Learning how to paint like Rembrandt means understanding a complete technical system: toned grounds, monochromatic underpaintings, transparent oil glazing, and thick impasto highlights applied in strict sequence.
This guide covers every stage of that system, from ground preparation and the dead layer through chiaroscuro light construction, flesh tone mixing, and edge control.
By the end, you’ll have a clear, practical framework for replicating his layered oil painting technique using modern materials, backed by what conservation science has confirmed about how his original works were actually built.
What Is Rembrandt’s Painting Technique?
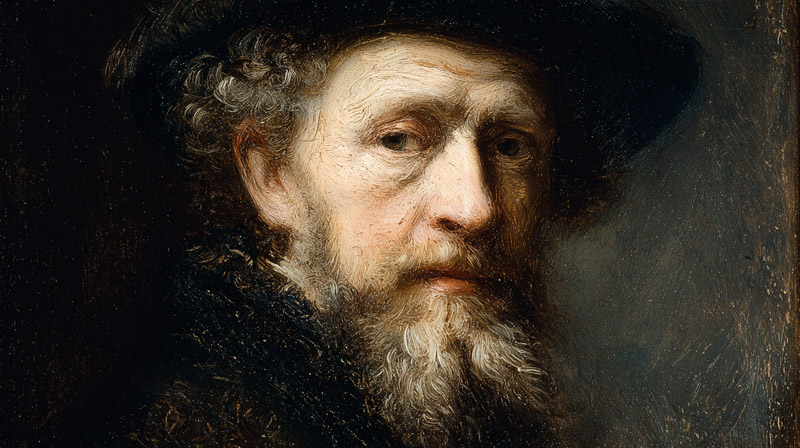
Rembrandt’s technique is a structured layering system built on a dark ground, worked from shadow to light, and finished with thick impasto highlights over transparent glazes. It is not a single trick. It is a complete process with distinct stages, each dependent on the one before it.
The Rembrandt Research Project, active since the 1960s, has catalogued approximately 336 surviving oil paintings attributed to him (Rembrandt Research Project). Scientific analysis across these works confirms a consistent core method, even as individual paintings show variation in surface handling and ground preparation.
His method sits within the broader Baroque painting tradition, where dramatic tonal contrast and psychological depth defined the standard. But Rembrandt pushed those principles further than most of his contemporaries.
The technique rests on 4 sequential stages, documented by his contemporary Gerard de Lairesse:
- Inventing: freehand underdrawing in brown paint directly on the toned ground
- Dead-coloring (doodverf): monochromatic tonal map establishing all light and shadow
- Working-up: glazing layers that build color depth over the dried dead layer
- Retouching: final impasto highlights and edge refinements
Understanding how oil painting works as a medium is worth reviewing before starting. The slow drying time of oil is not a limitation here. It is what makes the entire layering system possible.
What Materials Did Rembrandt Actually Use?
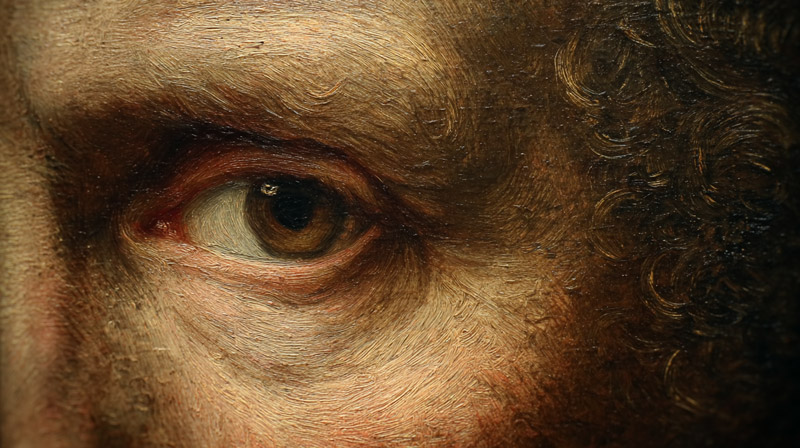
The National Gallery Scientific Department examined Rembrandt’s binding media extensively. Their findings confirm a simpler material base than most people expect: linseed oil and walnut oil, without resins or complex mediums (National Gallery, London). All optical effects come from pigment choice and layer structure, not from exotic additives.
In 2022, researchers from AkzoNobel working with the Rijksmuseum found that Rembrandt mixed raw linseed oil with lead oxide and, unexpectedly, egg yolk in some impasto layers (Science Advances, 2023). The exact role of the egg yolk is still under study.
Pigments Confirmed by Analysis
Core palette confirmed across multiple works via X-ray fluorescence and SEM-EDX analysis (NWO REVISRembrandt project, 2012-2018):
- Lead white (primary highlight pigment)
- Ivory black and charcoal black
- Yellow ochre and red ochre
- Raw umber
- Vermilion (mercury-based red)
- Smalt (cobalt blue glass, used extensively in late works)
A 2017 study published in npj Heritage Science identified artificial orpiment (arsenic-based yellow) as a previously unknown pigment in his palette, found in “The Jewish Bride” (c. 1665, Rijksmuseum). This was discovered through MA-XRF scanning of paint cross-sections.
Supports: Panel vs. Canvas
| Support | Period | Ground Type |
|---|---|---|
| Oak Panel | Early works (pre-1631) | Chalk-glue gesso with brown imprimatura |
| Canvas | Post-1631 onward | Double ground using red ochre beneath a grey lead-white layer |
| Canvas (Late Period) | From c. 1642 onward | Quartz-clay ground associated with Rembrandt and his workshop |
The quartz-clay ground found in “The Night Watch” (1642) and later canvases appears nowhere else in 17th-century Dutch painting. The Rembrandt Database confirms this ground type was unique to his workshop from approximately 1642 onwards.
For modern painters, understanding your oil painting materials at a similar level of depth saves significant time when replicating these historical methods.
How Did Rembrandt Build His Ground Layer?
Ground preparation is where most modern painters immediately go wrong. Starting on a white or near-white canvas produces fundamentally different tonal results. Rembrandt’s ground functions as the mid-tone of the finished painting throughout the entire process.
Analysis of his panels shows a 3-layer preparation sequence: glue-chalk gesso sanded smooth, followed by lead white in linseed oil with a small amount of raw umber to speed drying, finished with a transparent warm-brown imprimatura (Art Renewal Center / Virgil Elliott). For canvases, the double ground replaces the panel sequence.
The Double Ground for Canvas
Layer 1: red-orange ochre bound in oil, applied directly to sized canvas. This fills the weave texture and costs less than lead white.
Layer 2: lead white with chalk, charcoal, and raw umber ground in linseed oil. This creates the warm grey working surface.
During his first decade in Amsterdam, almost every Rembrandt canvas used this double ground structure (Old Masters Academy). The grey top layer reads as a neutral mid-tone, so shadow areas require only thin, transparent paint and lights require only modest opacity to register as bright.
Modern Equivalent
Tone the canvas with a thin wash of burnt umber oil paint, thinned with mineral spirits to near-transparency. Allow 24 hours to dry. This produces a warm mid-tone similar to his imprimatura without the lead content.
The ground color stays visible throughout the painting. That is the point. You are not covering it. You are using it.
If you want to go deeper on how to prepare a canvas for oil painting before starting, that foundation knowledge helps make sense of why the double-ground system works as well as it does.
What Is the Dead Layer and How Is It Applied?
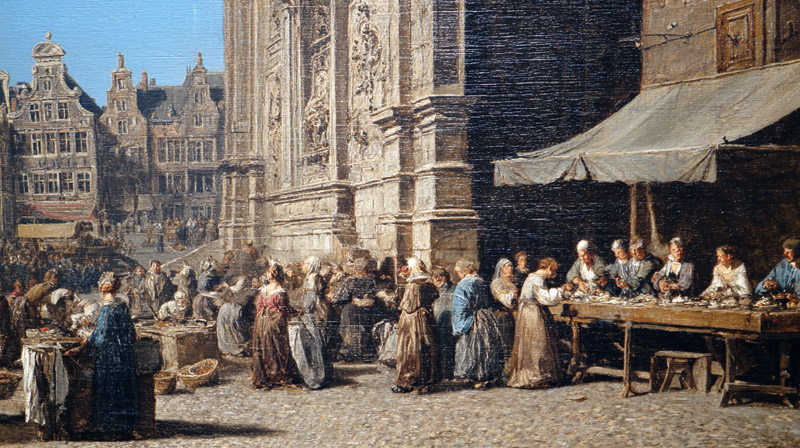
The dead layer (Dutch: doodverf) is a monochromatic underpainting that maps the complete tonal structure of the painting before any color is introduced. “Dead” refers to the flat, colourless appearance of the stage, not to the quality of the work.
Gerard de Lairesse documented this as the second of 4 formal stages in Dutch Golden Age studio practice. Rembrandt’s underdrawings confirm he often skipped preparatory chalk sketches and moved directly to freehand brush drawing in thin brown paint over the imprimatura, then built the dead layer from that (Old Masters Academy).
What Goes Into the Dead Layer
Pigment mix: lead white + ivory black, or lead white + raw umber, depending on the desired warmth of the tonal base.
Application: paint opaquely. Lights are lighter, shadows are darker. The ground color handles the mid-tones, so you paint above and below it rather than covering it.
Consistency: standard oil paint consistency, not thinned. The dead layer needs to be stable enough to glaze over without lifting.
Drying time: minimum 1 to 2 weeks before glazing begins. This is non-negotiable. Glazing over wet or semi-dry dead layer causes the layers to mix, destroying the transparency of the glaze.
What the Dead Layer Actually Does
It pre-solves every tonal problem in the painting. By the time the dead layer is complete, every value decision has been made. Color is added afterwards, not used to establish form.
This is the opposite of how most painters work today. Most modern oil painters build form and color simultaneously. Rembrandt separated them into 2 completely distinct phases, which is why his paintings read with such clarity of structure.
This connects directly to value in painting as a concept. The dead layer is a pure value exercise before anything else.
How Did Rembrandt Use Glazing to Build Color?

Glazing is the application of transparent oil paint over a fully dried opaque layer. The glaze modifies the color of the layer beneath without obscuring it. The result is a depth of color that physically cannot be achieved by mixing opaque paint alone.
National Gallery examination of Rembrandt’s binding media confirms he used linseed oil as his primary glazing medium, sometimes walnut oil, with no evidence of resin additions (National Gallery Scientific Department). The optical effects come entirely from the pigments and the layering sequence.
How Rembrandt Applied Glazes
Warm transparent glazes over lit areas create the skin luminosity his portraits are known for. Raw sienna and transparent red oxide over dried lead white produce the amber warmth of his flesh tones.
Cool, thin glazes of ivory black or dark umber over shadow areas deepen them without creating the chalky, overworked look of mixed shadow paint.
Key rule: fat over lean. Each successive glaze must contain more oil than the layer beneath it. Reversing this causes cracking as layers dry at different rates.
Glazing Medium Ratio
A workable starting point for a glazing medium: 2 parts linseed oil to 1 part mineral spirits. This produces a transparent, workable consistency that dries within a few days.
Each glaze adds a tonal shift of roughly half a value step. Building 3 to 4 glazes over a pale dead layer produces the deep, rich shadow tone visible in his self-portraits. There is no shortcut to this. The layers have to be there physically for the optical effect to work.
Oil painting glazing techniques as a practice is worth studying separately. The underlying principles apply directly to replicating Rembrandt’s color-building method.
How Did Rembrandt Paint Skin Tones?

Rembrandt’s flesh tones are built across 4 to 6 distinct tonal zones, from the brightest highlight to the deepest shadow. His self-portraits, analyzed in detail at the Rijksmuseum and National Gallery London, show this zone structure consistently across his career.
The base flesh mix uses lead white, yellow ochre, vermilion, and a small amount of raw umber. Proportions shift across the tonal zones. More white and ochre in lights, more umber and black in shadows, with vermilion concentrated in the mid-tones where warm blood color reads most strongly.
How to Mix a Rembrandt-Style Flesh Tone with Modern Pigments
Lead white is toxic and no longer practical for most painters. Modern substitutes work well when chosen carefully.
| Rembrandt’s Pigment | Modern Substitute | Notes |
|---|---|---|
| Lead White | Titanium White + 10% Zinc White | Zinc adds some transparency that pure titanium white lacks |
| Vermilion | Cadmium Red Light | Provides a similar warm red tone with lower toxicity |
| Smalt (for cool shadows) | Small amount of Ultramarine Blue | Best used sparingly in shadow areas |
| Raw Umber | Raw Umber (unchanged) | Still commonly available and largely unchanged |
Shadow Construction in Flesh
Shadow paint: raw umber + ivory black, kept thin and transparent. Never opaque in the shadows. The ground and dead layer read through the thin shadow paint, which is what creates the sense of depth rather than flatness.
Highlight paint: applied last, thick and opaque. Lead white (or titanium white substitute) with minimal mixing. The impasto technique in highlights is applied in the final session only, never early in the process.
Transitions: blended wet-into-wet along the edge between light and shadow zones, in a single session. The transition zone is narrow. Rembrandt did not blend broadly. The tonal change from mid-light to shadow happens quickly, which is what creates the characteristic sense of form emerging from darkness.
For a broader look at the color mixing involved, how to mix skin tones covers the foundational color relationships that underpin this approach.
How Did Rembrandt Create Chiaroscuro Light?

Chiaroscuro is the use of strong tonal contrast between light and dark to model form and direct visual attention. Rembrandt did not invent it. But he took it further than his contemporaries by making the darkness active rather than neutral.
Operation Night Watch (Rijksmuseum, 2019 onwards) used reflectance imaging spectroscopy (RIS), MA-XRPD, and MA-XRF across the 1642 painting to map his pigment distribution. Results show he applied light pigments in a systematic, deliberate way, combining them in groups to achieve pictorial unity rather than painting passage by passage (NIH/PMC, 2024).
The Single Light Source Rule
One light source. Positioned at roughly 45 degrees above and to one side of the subject. This is consistent across his portraits and was not accidental.
The background is kept dark and undefined, pushing the lit subject forward optically. Rembrandt applied background paint with large hog bristle brushes in warm browns and blacks, leaving the brushwork visible. He did not refine backgrounds. That roughness is deliberate.
The Rembrandt Lighting Pattern
The specific facial lighting Rembrandt used creates a small triangle of light on the cheek on the shadow side of the face, directly below the eye. This pattern, now called “Rembrandt lighting” in photography and portraiture, results from the angle of the single light source relative to the face.
Shadow edges: soft and lost along the boundary between lit and unlit areas. Rembrandt blended these edges wet-into-wet before the paint dried, pulling the shadow back into the background. Hard edges appear only at the sharpest focal point, typically one eye.
This edge approach connects directly to the broader concepts of contrast in painting and how value relationships control where the viewer looks.
Caravaggio worked with a similar single-source approach but pushed the contrast even harder. If you want to understand how these two methods compare, how to paint like Caravaggio covers the differences in tenebrism versus Rembrandt’s warmer, more graduated chiaroscuro.
What Is Rembrandt’s Impasto Technique?

Rembrandt was using thick, sculptural paint over a hundred years before the word “impasto” was first recorded in writing (Harper, 2013). His impasto is not decorative texture for its own sake. It is a light-control system. The physical ridges in thick paint catch and reflect light differently than a flat surface, extending the effective tonal range of the paint beyond what pigment mixing alone can achieve (Old Masters Academy).
A 2019 study published in Angewandte Chemie, led by Delft University of Technology and the Rijksmuseum, identified plumbonacrite as a previously unknown compound in Rembrandt’s impasto from “Portrait of Marten Soolmans” (1634), “Bathsheba” (1654), and “Susanna” (1636). This rare lead carbonate mineral appears in his impasto mix but not in adjacent paint layers, suggesting a specific recipe for the highlight passages (Delft University / Rijksmuseum, 2019).
Where Impasto Goes (and Where It Doesn’t)
Applied only in: highest light areas. Forehead, bridge of the nose, jewelry catches, fabric highlights, occasionally the whites of eyes.
Never applied in: shadow areas, backgrounds, hair, or transitional mid-tones. Those stay thin and transparent.
The contrast between thick lights and thin shadows is what makes the surface work physically. Remove one, and the other loses its effect.
How He Built Impasto Texture
The impasto white Rembrandt used in his later works was a fast-drying formulation: lead white with minimal binder, likely combined with ground glass and traces of egg protein (Art Renewal Center, Virgil Elliott). Conservation scientists have confirmed egg traces in paint samples from multiple late works.
Application method, based on analysis of the Self Portrait of 1659 (National Gallery, Washington): the brushstrokes in the highlight areas are not related to facial form. They are applied to maximize light reflection, dragged with stiff hog bristle and, in some cases, palette knife. The physical relief of paint, not the drawn form beneath it, creates the sense of dimensional light (De Wetering, 1997).
After the impasto dried, Rembrandt often applied transparent glazes over it, sometimes wiping them back partially with a rag. The glaze settles into the valleys of the texture while the ridges remain light-reflecting. The golden sleeve in “The Jewish Bride” (c. 1665, Rijksmuseum) is the most extreme example of this glaze-over-impasto approach.
To understand how texture in art functions as a visual element, the physical dimension of Rembrandt’s impasto is one of the clearest examples available.
How Did Rembrandt Paint Hair, Fabric, and Backgrounds?

Rembrandt painted backgrounds and non-focal areas deliberately rough. Not because he ran out of patience. Because rough, undefined areas push the eye toward the refined focal point. The visual contrast between a smooth, finished face and a gestural background is itself a compositional tool.
Rembrandt’s working sequence, documented by Old Masters Academy analysis, moved back to front: backgrounds filled first, figures painted into and over them, with overlapping edges along figure outlines. This sequence means the background paint sits beneath the figure paint at every edge.
Hair: Scratch, Don’t Paint
One of the more surprising things you find when studying his early work closely: Rembrandt scratched through wet paint with a sharpened brush handle to create individual hair strands. The sienna-toned imprimatura underneath becomes the “hair color” revealed by the scratching (Art Renewal Center). The drawn strands read as lit hairs against a darker mass.
In later works, hair is handled with a dry, splayed bristle brush dragged over dark underpainting, leaving broken marks that suggest texture without describing it precisely. Up close it looks rough. From viewing distance, the optical mix of light marks over dark reads as convincing hair volume.
Fabric: Follow the Fold Structure
Dark fabric: thin, transparent paint over the dead layer. The tonal structure from the underpainting handles the form. Very little overpainting needed.
Light or patterned fabric: directional impasto strokes following the weave and fold direction. Highlights placed with a loaded bristle brush, pulled in the direction the fabric moves.
The chain and gold fabric in “Self-Portrait with Two Circles” (c. 1665-1669, Kenwood House) shows this in extreme form: thick, encrusted impasto in the gold areas, painted over thin transparent darks, with the glaze-over-impasto technique giving the gold its warmth.
Background Handling
Large hog bristle brush, sometimes palette knife. 2 to 3 earth pigments maximum: browns, warm blacks, occasional burnt umber. No refinement. Rembrandt intentionally left the background paint thin in shadow areas so the dark ground reads through, deepening the shadow beyond what any mixed paint could achieve.
Looking at pictorial space in painting helps explain why undefined backgrounds work so effectively. The eye fills in what isn’t there, and the undefined space recedes naturally.
What Is the Step-by-Step Process for Painting in Rembrandt’s Style?
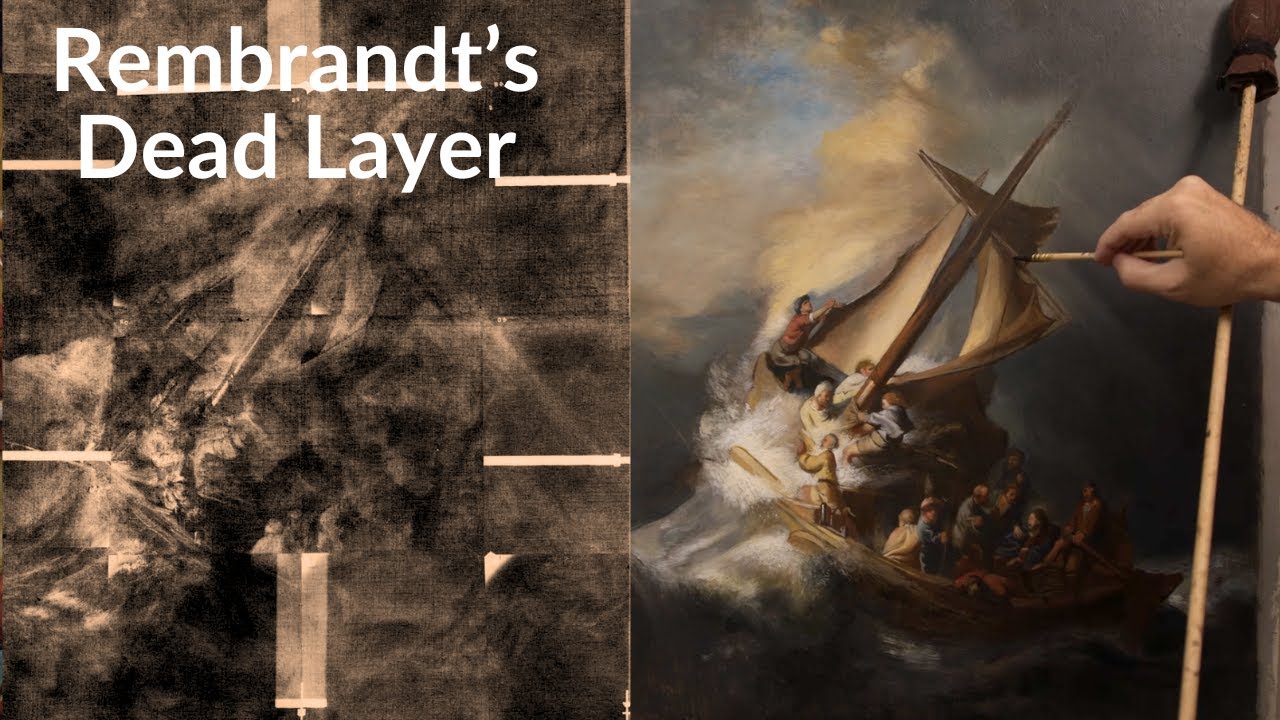
The full sequence runs across multiple sessions separated by drying time. Rushing any stage produces muddy color, lifted glazes, or cracked paint. Rembrandt’s method is slow by design. The drying intervals are part of the technique.
Modern scholarship, including analysis by the Rembrandt Research Project over 47 years, confirms that he painted backgrounds first and moved forward to figures. This back-to-front sequence was consistent across portrait, history, and figure paintings (Old Masters Academy).
| Stage | What Happens | Drying Time Required |
|---|---|---|
| Ground | Toned canvas prepared with a warm brown imprimatura | Minimum 24 hours |
| Underdrawing | Freehand brush sketch using a raw umber wash | 12–24 hours |
| Dead Layer | Complete monochrome tonal structure painted opaquely | 1–2 weeks |
| Working-Up | Color developed through warm glazes over the dead layer | 3–7 days per layer |
| Finishing | Impasto highlights, edge adjustments, and final glazing | Final session |
Stage 1 and 2: Ground and Drawing
Tone the canvas: burnt umber thinned with mineral spirits, applied thinly across the entire surface. Allow 24 hours.
Underdrawing: raw umber thinned to a near-transparent wash. Rembrandt’s pupil Samuel van Hoogstraten advised keeping the underdrawing rough and sketchy to save labor. The drawing establishes placement and proportion only.
Stage 3: The Dead Layer
The most critical stage. Paint the complete tonal structure in monochrome before any color is added.
- Shadows: thin, transparent raw umber + ivory black
- Mid-tones: let the ground show, minimal paint
- Lights: opaque lead white mix, built moderately
Wait a full 1 to 2 weeks before glazing. Seriously. This is where most attempts fail.
Stage 4: Working-Up with Color
Glazes applied in warm-cool sequence. Warm first over mid-lights, cool over deepest shadows. Each glaze fully dry before the next.
Flesh goes on in the sequence Rembrandt’s own process confirms: brown shadows first, mid-tone flesh second, highlights third, final shadow details and features last (Old Masters Academy, analysis of multiple portrait paintings).
Common Mistakes at Each Stage
- White canvas: kills tonal unity from the start. The ground IS the mid-tone
- Glazing too early: wet dead layer + glaze = muddy mix. No exceptions
- Impasto too soon: belongs in the final 20% of the painting only
- Over-blending shadows: Rembrandt’s shadows are thin and transparent, not blended opaque paint
For a deeper look at the broader oil painting process and how Rembrandt’s staged method fits within classical technique, that context is worth reading alongside this sequence.
How Do Rembrandt’s Techniques Differ From Other Dutch Masters?
Rembrandt, Johannes Vermeer, and his contemporaries in the Dutch Golden Age all worked within the same broad tradition of oil painting on prepared grounds. Their technical differences are substantial and deliberate.
Frans Hals held a day-light preference and silvery palette, while Rembrandt built his paintings on warm golden tones and artificial light contrasts in deep shadow (Wikipedia, Frans Hals). These are not just aesthetic choices. They reflect entirely different technical approaches to ground, pigment selection, and layering sequence.
| Painter | Method | Palette | Surface Character |
|---|---|---|---|
| Rembrandt | Multi-layer technique using dead layer, glazing, and impasto | Warm earth tones with a limited palette | Textured highlights with smooth, transparent dark areas |
| Frans Hals | Alla prima (wet-into-wet) completed in a single session | Cooler silvers and a broader color range | Relatively flat surface with consistent brushwork depth |
| Vermeer | Refined multi-layer process, possibly aided by optical tools | Cooler and more chromatic palette | Smooth surface with minimal or no impasto |
Rembrandt vs. Frans Hals
Hals painted with a direct, wet-into-wet approach requiring no drying intervals. A Hals portrait could be completed in a single extended session.
Rembrandt’s process took weeks across multiple sessions. The surfaces are physically different: a Hals dries flat because the paint layers all go down in one session. Rembrandt’s surfaces dry into relief because impasto highlights go down after thin layers, creating a physical height difference.
Key difference: Hals builds form through brushwork confidence. Rembrandt builds form through sequential tonal layering. Both work. They require different skills and different patience.
Rembrandt vs. Vermeer
Vermeer’s surfaces are uniformly smooth, with no impasto. His palette is cooler and more chromatic, with strong ultramarine blues and cool yellows absent from Rembrandt’s core palette.
Vermeer’s figures sit in specific domestic interiors with defined light from a window. Rembrandt’s backgrounds are undefined and psychological rather than architectural. The spatial logic of the 2 painters is almost opposite.
Vermeer likely used some optical device for compositional accuracy (the camera obscura theory is widely discussed but unproven). Rembrandt worked freehand. His underdrawings show corrections and revisions throughout, evidence of direct observation rather than traced optical projection (Art Renewal Center).
Understanding the broader historical painting techniques across the Dutch Golden Age gives useful context for why these differences matter technically, not just stylistically.
You can also look at how Rembrandt’s approach compares when studying the colors Rembrandt used specifically versus Vermeer’s cooler, more chromatic range.
If the Dutch Golden Age period itself is new territory, Baroque artists as a group gives useful context for where Rembrandt sits within the wider movement, and what separated the Dutch approach from Italian and Flemish Baroque painters working at the same time.
FAQ on How To Paint Like Rembrandt
What is the most important technique to master when painting like Rembrandt?
The dead layer (doodverf). This monochromatic underpainting maps every tonal value before any color is added. Get this stage right and the rest follows. Skip it and no amount of glazing or impasto will save the painting.
Do I need to use a toned ground instead of white canvas?
Yes. A warm brown imprimatura is non-negotiable. Rembrandt’s ground acts as the mid-tone throughout the entire painting. White canvas produces flat, uncontrolled tonal relationships that break the chiaroscuro structure from the start.
What oil painting medium did Rembrandt use?
Primarily linseed oil, sometimes walnut oil. No resins. National Gallery Scientific Department confirmed this. All optical depth comes from layered pigments, not exotic mediums. A simple linseed and mineral spirits mix works for glazing.
What pigments should I use to replicate his palette?
Stick to yellow ochre, raw umber, ivory black, burnt sienna, and titanium white as a lead white substitute. Add cadmium red light for vermilion. Keep it to six pigments maximum. Rembrandt’s range was deliberately limited.
How long does each layer need to dry before I continue?
The dead layer needs one to two weeks minimum before glazing over it. Each glaze needs three to seven days. Rushing drying time is the single most common cause of muddy, failed results in layered oil painting.
Where exactly does impasto go in a Rembrandt-style portrait?
Highest light areas only: forehead, nose bridge, jewelry, fabric highlights. Shadows and backgrounds stay thin and transparent. The physical contrast between thick lights and flat darks is what extends the tonal range beyond what mixed paint alone achieves.
How did Rembrandt paint such convincing skin tones?
Through 4 to 6 distinct tonal zones, built in sequence: transparent brown shadows first, opaque flesh mid-tones second, highlights last. Transitions are blended wet-into-wet in a single session. Shadows are never opaque.
What is the Rembrandt lighting pattern and how do I set it up?
One light source at roughly 45 degrees above and to one side of the subject. This creates a small triangle of light on the cheek on the shadow side of the face. Keep the background dark and undefined to push the lit figure forward.
How did Rembrandt paint hair so realistically?
Two methods: scratching through wet paint with a sharpened brush handle to reveal the warm imprimatura beneath, and dry bristle brush dragging over dark underpainting. Neither method paints individual hairs. Both suggest hair mass and texture from a distance.
How does Rembrandt’s technique differ from alla prima painting?
Completely. Alla prima, as Frans Hals used it, means wet-into-wet in a single session with no drying intervals. Rembrandt’s method requires weeks across multiple sessions. The surfaces dry physically different: Rembrandt’s builds relief, alla prima dries flat.
Conclusion
This conclusion is for an article presenting a full technical breakdown of Rembrandt van Rijn’s classical oil painting method, from toned ground to final impasto.
The process is sequential and unforgiving. Skip the doodverf drying time, rush the glaze layers, or start on white canvas, and the tonal unity collapses.
Done correctly, the fat over lean rule, warm earth palette, and controlled chiaroscuro light combine into something no single-session approach can replicate.
Rembrandt’s Dutch Golden Age portrait technique isn’t a style. It’s a system built on pigment science, structured layering, and deliberate patience.
Study his self-portraits at the Rijksmuseum and National Gallery London. The answers are physically in the paint.