

Your fruit bowl painting looks lifeless, floating in space without any real presence. Learning how to paint still life that captivates viewers requires more than copying what you see.
Most beginning artists struggle with flat, unconvincing still life paintings because they focus on individual objects rather than understanding light, shadow, and spatial relationships.
Still life painting teaches fundamental skills that improve every other type of painting you’ll attempt. Masters like Paul Cézanne and Johannes Vermeer built their reputations on still life work.
This guide covers everything from setup and composition to advanced lighting techniques and professional finishing methods. You’ll master color theory, brushwork patterns, and dimensional effects that make objects pop off the canvas.
By the end, you’ll create still life paintings with convincing depth, dramatic lighting, and professional-quality finish.
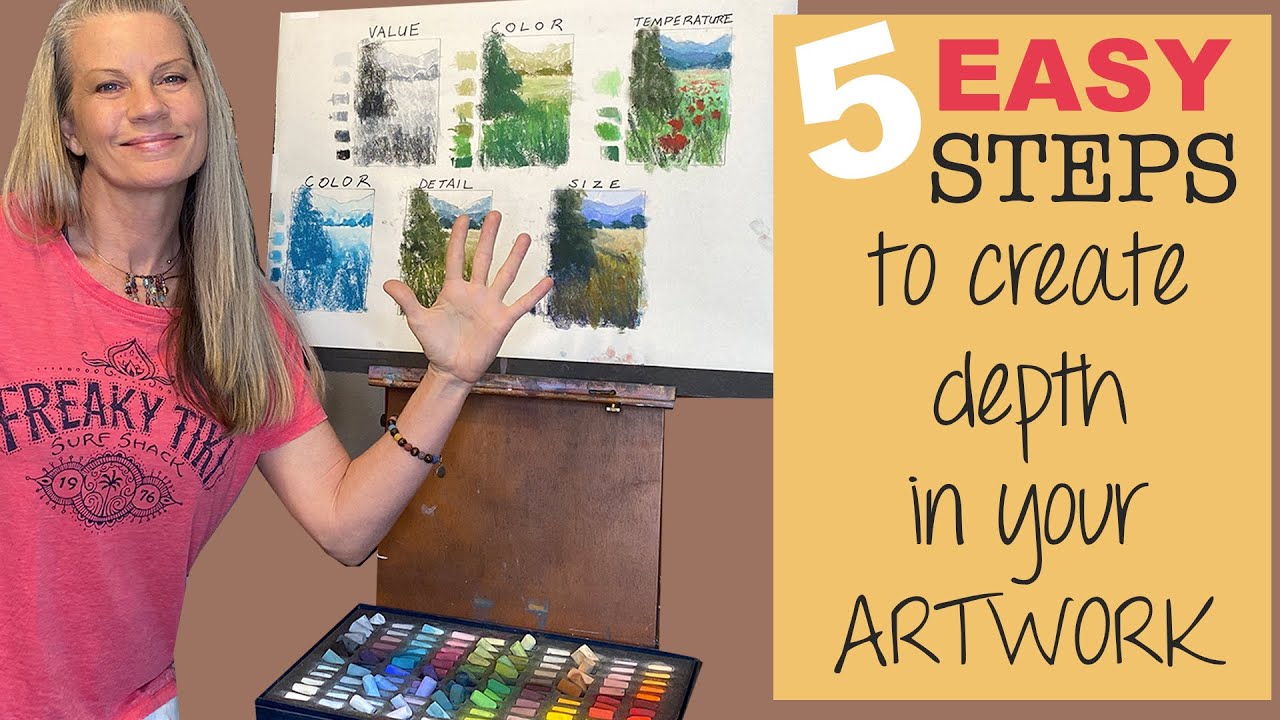
Setting Up Your Still Life for Maximum Impact

Choosing Objects That Work Together
Start with three to five objects maximum. Too many items create visual chaos and confuse your viewer’s eye.
Look for size relationships that create natural hierarchy. One dominant piece should anchor your arrangement while smaller objects provide supporting interest.
Texture combinations add visual punch without overwhelming your composition. Pair smooth ceramics with rough fabric or metallic surfaces with organic materials.
Shape variety keeps things interesting. Round fruits play beautifully against angular books or rectangular boxes.
Consider your objects’ local colors before arranging them. You want enough variety to create visual interest but not so much that colors fight each other.
Lighting Techniques That Add Drama
Single strong light sources create the most dramatic effects. Window light or one lamp positioned at 45 degrees works better than overhead fluorescents.
The direction of your light source determines your entire painting’s mood. Side lighting reveals form through strong shadows and highlights.
Cast shadows are your secret weapon for depth. They anchor objects to surfaces and create spatial relationships between items.
Position objects close enough to cast shadows on each other. These overlapping shadow patterns add complexity and visual interest.
Reflected light brings your shadow areas to life. Light bouncing off nearby surfaces fills in dark areas with subtle color temperature shifts.
Composition Strategies for Dynamic Arrangements
Place your most important object using the rule of thirds. Avoid centering everything perfectly (it looks static and boring).
Create visual pathways through overlapping objects. Your eye should move smoothly from one element to the next without getting stuck.
Negative space around objects is just as important as the objects themselves. Don’t cram everything together.
Vary the heights of objects using books, boxes, or fabric draping. Flat arrangements look lifeless compared to compositions with vertical variety.
Color Theory for Still Life That Commands Attention

Temperature Contrasts That Create Energy
Warm colors advance toward viewers while cool colors recede into the background. Use this principle to control which objects pop forward.
Place warm objects against cooler backgrounds for maximum impact. A red apple against a blue-gray wall practically jumps off the canvas.
Your light source affects color temperature throughout your setup. Warm sunlight makes everything slightly orange. Cool north light pushes colors toward blue.
Don’t make everything the same temperature. Mix warm and cool areas to create visual tension and energy.
Master painters like Paul Cézanne built entire paintings around temperature relationships rather than just local object colors.
Value Structure as Your Foundation
Squint at your setup until you can’t see details, only light and dark masses. This reveals your value structure.
Strong value patterns matter more than perfect colors. A painting with good values but muddy colors succeeds better than one with beautiful colors but weak values.
Plan three main value groups: lights, darks, and middle tones. Most successful paintings use roughly 30% lights, 20% darks, and 50% middle values.
Avoid the middle-value trap where everything sits in the same gray range. Push your lights lighter and darks darker than you think you need.
Saturation Control for Visual Hierarchy
Pure colors grab attention first. Save your most saturated colors for focal point areas.
Muted grays and earth tones provide perfect backgrounds for brighter accent colors. Think of them as supporting actors in your visual story.
Mix natural grays by combining complementary colors rather than using tube grays. These color-grays feel more alive and integrated.
Color mixing directly on canvas creates more vibrant results than over-mixing on your palette. Leave some brush strokes slightly rough and broken.
Johannes Vermeer mastered this principle, using muted backgrounds to make his signature blues absolutely sing.
Drawing and Proportion Fundamentals

Getting Your Proportions Right From the Start
Measure relationships, not absolute sizes. Compare heights, widths, and angles between objects rather than trying to measure exact dimensions.
Hold your brush at arm’s length to compare proportions. Line up the brush tip with one edge and note where the other edge falls along the brush handle.
Start with the largest, most dominant object first. Everything else relates to this anchor piece.
Construction drawing saves hours of frustration later. Block in basic shapes before worrying about details or surface textures.
Draw what you see, not what you know. Your brain thinks all eggs are the same size, but the closer egg always appears larger.
Perspective Principles for Still Life Objects
Everything has a horizon line, even tabletop setups. Your eye level determines how much you see of tops, bottoms, and sides of objects.
Round objects become ellipses in perspective. The degree of ellipse depends on how far above or below eye level the object sits.
Cylindrical forms like bottles and vases follow specific ellipse rules. The ellipse gets rounder as it moves toward eye level.
Foreshortening affects all objects viewed at angles. A book tilted toward you appears shorter than its actual length.
Common mistakes happen when painters ignore perspective in familiar objects. Even fruit bowls follow perspective rules.
Construction Drawing Methods
Break complex objects into basic geometric shapes first. Apples become spheres, books become rectangles, bottles become cylinders.
Find the center line of symmetrical objects. This imaginary line helps you place features accurately on both sides.
Use guidelines to connect objects spatially. Draw light lines showing how objects align with each other vertically and horizontally.
Block in major masses before adding any details. Surface patterns, textures, and decorative elements come last, not first.
The old masters understood this principle. Leonardo da Vinci built complex forms from simple geometric foundations.
Work from general shapes toward specific details. This approach prevents you from getting lost in premature detail work.
Check your proportions constantly by stepping back from your easel. Fresh eyes catch proportion errors that focused work sessions miss.
Light and Shadow Techniques

Understanding Form Through Light
Core shadows occur where light cannot reach the object directly. These areas reveal the true three-dimensional structure of your forms.
Cast shadows fall onto surfaces where objects block light. They anchor your objects to tables and backgrounds, preventing them from floating in space.
Reflected light bounces off nearby surfaces into shadow areas. This subtle illumination prevents shadows from going completely black and adds color temperature shifts.
The terminator line separates light from shadow on rounded forms. This edge can be sharp or soft depending on your light source quality.
Creating Convincing Cast Shadows
Shadow shapes follow perspective rules just like objects do. Distant shadows appear smaller and converge toward vanishing points.
Cast shadows are always darker than the objects creating them. They’re also cooler in temperature compared to areas receiving direct light.
Multiple light sources create overlapping shadow patterns. Keep one light dominant to avoid confusing, contradictory shadows.
Soft light sources create gradual shadow edges. Hard light produces sharp, clearly defined shadow boundaries.
The great Caravaggio mastered dramatic lighting effects using this principle of strong directional light.
Surface Material Representation
Matte surfaces scatter light evenly in all directions. Their shadows have soft edges and gradual tone transitions.
Shiny objects create sharp highlights and clear reflections. The highlight position changes as your viewing angle shifts.
Translucent materials like glass or thin fabric allow some light to pass through. They create complex patterns of transmitted and reflected light.
Different materials require different brushwork approaches. Smooth objects need blended edges while rough textures demand broken, varied brush strokes.
Paint Application Techniques for Dimensional Effects
Brushwork That Builds Form
Follow the form with your brush direction. Curved strokes describe rounded surfaces while straight strokes indicate flat planes.
Vary your brush pressure to create different marks. Light pressure skims the canvas texture while firm pressure deposits solid color coverage.
Sharp edges occur where forms meet the background or where two distinct planes intersect. Soft edges happen within forms where surfaces curve away gradually.
Brushwork patterns can describe surface texture even when painted simply. Vertical strokes suggest wood grain, while broken horizontal marks indicate rough stone.
Layering Strategies for Rich Color
Start with thin underpainting to establish your major value relationships. This foundation guides all subsequent color decisions.
Transparent glazes over opaque underpainting create luminous color effects. Each layer modifies the colors beneath it.
Work from dark to light in oil painting for the richest results. Reserve your brightest highlights for the final stages.
Opaque paint covers previous layers completely while transparent paint allows underlying colors to show through.
Rembrandt van Rijn built his portraits through careful layering, creating depth and richness impossible with single-layer painting.
Texture Creation Methods
Dry brush techniques work perfectly for rough surfaces like tree bark or weathered wood. Load your brush lightly and drag it across the canvas texture.
Smooth blending creates the illusion of polished surfaces like ceramic or metal. Work while paint remains wet to avoid visible brush marks.
Impasto application uses thick paint to create actual physical texture. This works especially well for highlights and areas you want to emphasize.
Palette knife work produces different textures than brush painting. Knives create flatter, more angular marks that suggest crisp edges and clean surfaces.
Advanced Techniques for Professional Results
Atmospheric Effects in Close-Up Work

Subtle color shifts occur even in small still life setups. Objects further back appear slightly cooler and less saturated.
Edge quality variation creates depth without obvious perspective cues. Sharp edges advance while soft edges recede.
Atmospheric perspective affects even tabletop arrangements. Background objects lose contrast and definition compared to foreground items.
Air between objects creates subtle color temperature shifts. Warm objects appear cooler when seen through intervening space.
Reflective Surface Mastery
Mirror surfaces reflect everything in their environment. Paint what you actually see in the reflection, not what you think should be there.
Metallic objects show distorted reflections of surrounding forms. These reflections follow the curved surface of the metal object.
Glass creates both reflections and transparency effects simultaneously. The angle of view determines which effect dominates.
Avoid overworking reflective details. Suggest rather than render every tiny reflection to maintain focus on your main subject.
Complex Lighting Situations
Multiple light sources require careful value control. One light should dominate while others provide fill or accent lighting.
Colored light affects all local colors in your setup. Warm incandescent bulbs push everything toward orange while cool LED lights add blue casts.
Backlighting creates dramatic rim light effects around object edges. This technique separates objects from backgrounds effectively.
Window light changes throughout the day. Morning light is cooler while afternoon light becomes warmer and more golden.
Diego Velázquez demonstrated mastery of complex lighting in his still life passages, showing how multiple light sources can enhance rather than confuse.
Working with Artificial Light Sources
• Incandescent bulbs produce warm, yellow light that flattens cool colors • LED lights provide cooler illumination with blue undertones
• Halogen spots create intense, focused light with sharp shadow edges • Fluorescent tubes give even, cool light that can appear greenish
Choose your artificial lighting based on the mood you want to create. Warm light feels intimate while cool light appears more neutral and analytical.
Problem-Solving Common Issues
When Your Painting Looks Flat
Check your value structure first. Squint at your painting to see if you have strong light, medium, and dark masses.
Weak contrast kills dimensional illusion faster than any other mistake. Push your darks darker and lights lighter than feels comfortable.
Add selective detail only to your focal areas. Too much detail everywhere flattens depth and confuses the viewer’s eye.
Temperature shifts create instant depth. Cool your background colors slightly while warming foreground objects.
Color Problems and Solutions
Muddy colors happen when you overmix complementary colors on your palette. Mix these opposites carefully in small amounts.
When colors don’t match what you see, check your lighting conditions. Artificial light changes how you perceive both your subject and your paint colors.
Color mixing directly on canvas creates cleaner results than overworking paint on your palette. Leave some brushstrokes slightly broken and fresh.
Overly bright areas can be glazed down with transparent darks. Overly dull areas need fresh, clean color applied with confidence.
Henri Matisse understood that color relationships matter more than exact color matching.
Proportion and Drawing Corrections
Small proportion errors can be adjusted by scraping paint while it’s still wet. Use a palette knife to remove problem areas cleanly.
Major drawing mistakes require more drastic action. Scrape down to the canvas and redraw the corrected shapes.
Perspective errors become obvious when you step back from your easel. Fresh eyes catch problems that focused work sessions miss.
Adjust proportions gradually rather than making huge corrections all at once. Small adjustments often solve big problems.
Finishing Touches That Make the Difference

Final Detail Work Strategy
Add sharp details only where you want viewers to look first. Your focal point gets the sharpest edges and most precise work.
Keep secondary areas simplified with softer edges and less definition. These areas support your main subject without competing for attention.
Final highlights go on last and should be used sparingly. Too many bright spots destroy the hierarchy you’ve built.
Work from general areas toward specific details. This prevents you from getting lost in premature surface effects.
Unity and Cohesion Checks
Overall color harmony ties your painting together visually. One dominant color temperature should unify the entire piece.
Check that your value scale covers the full range from near-white to near-black. Paintings using only middle values look weak and gray.
Your dominant focal point should be obvious from across the room. If multiple areas compete for attention, subdue the less important ones.
Visual hierarchy guides the viewer’s eye through your painting in a planned sequence. Lead them from focal point to supporting elements logically.
Knowing When to Stop
Fresh paint has a luminous quality that overworking destroys. Stop while your brushwork still looks confident and decisive.
Most paintings get worse, not better, after the three-quarter completion point. Resist the urge to keep “fixing” things.
Final assessment requires stepping away from your painting for hours or days. Fresh perspective reveals what actually works versus what you think should work.
Signs your painting is finished include: strong value pattern, clear focal point, unified color scheme, and confident brushwork throughout.
Quick Diagnostic Checklist
When something feels wrong but you can’t identify the problem:
• Squint test: Do you see three clear value masses? • Focal point check: Is one area clearly most important? • Color temperature balance: Are warm and cool areas distributed effectively? • Edge quality: Do sharp edges lead to your focal point? • Brushwork confidence: Does the paint application look decisive?
Professional Finishing Standards
Gallery-quality work requires consistent paint application throughout. Avoid areas that look unfinished or overworked compared to the rest.
Surface unity means your brushwork style remains consistent. Don’t mix tight, detailed rendering with loose, impressionistic passages randomly.
Color notes should feel intentional rather than accidental. Every color choice should serve your overall vision.
Paul Cézanne spent months on single paintings, constantly adjusting relationships until every element served the whole.
Professional painters know that finishing a painting means making deliberate choices about what to include and what to leave out.
FAQ on How To Paint Still Life
What supplies do I need for still life painting?
Start with basic acrylic painting supplies: primary colors plus white and black, various brush sizes, canvas boards, and a simple easel. Add painting mediums as you advance.
How do I arrange objects for the best composition?
Use odd numbers of objects with varying heights and sizes. Create overlapping relationships and strong light source direction. Follow basic composition rules like rule of thirds.
What’s the best lighting setup for still life?
Single directional light works best. Window light or one lamp at 45 degrees creates dramatic shadows and highlights. Avoid flat, even lighting that kills dimensional effects.
Should I sketch before painting?
Yes, construction drawing prevents proportion problems later. Block in basic shapes and check relationships before applying paint. This saves time and materials.
How do I make objects look three-dimensional?
Master value relationships through strong light-to-shadow contrast. Use warm colors for lights, cool colors for shadows. Form shadows and cast shadows create depth.
What colors should I mix for realistic still life?
Learn color theory basics: primary colors, secondary colors, and complementary colors. Mix natural grays from opposites rather than using tube grays.
How do I paint reflective surfaces like glass or metal?
Study the actual reflections you see, not what you think should be there. Metallic objects show distorted reflections following their curved surfaces. Keep reflections simple and suggestive.
What’s the difference between oil and acrylic for still life?
Oil painting stays workable longer, allowing blending and glazing techniques. Acrylics dry fast, requiring quick decisive work. Both create excellent still life results with different approaches.
How do I fix muddy colors in my painting?
Stop overmixing complementary colors on your palette. Use clean brushes for each color family. Mix colors directly on canvas when possible for fresher results.
When do I know my still life painting is finished?
Stop when you have strong value patterns, clear focal point, and confident brushwork. Most paintings get worse after three-quarters completion. Fresh paint has luminous quality that overworking destroys.
Conclusion
Mastering how to paint still life transforms your entire approach to observational painting. These fundamental skills transfer directly to portraits, landscapes, and figure work.
Strong unity emerges when you balance all elements properly. Your brushwork should feel confident and decisive throughout the painting process.
Professional results come from understanding chiaroscuro and atmospheric perspective. These techniques create convincing depth in even simple tabletop arrangements.
Practice with different painting mediums to find your preferred approach. Watercolor painting offers immediacy while oils provide extended working time.
Remember that Vincent van Gogh and Giorgio Morandi built legendary careers partly through still life mastery. These classical techniques remain relevant for contemporary artists.
Start simple with three objects and single light source. Build complexity gradually as your observation skills develop.