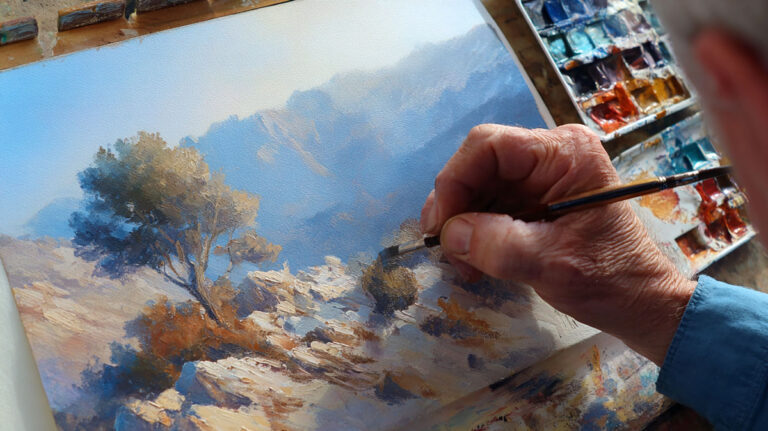
A blank canvas holds endless possibilities, but without proper preparation, even the most brilliant artistic vision can fail. Learning how to prime a canvas for painting determines whether your artwork will last decades or deteriorate within years.
Most painting failures trace back to poor surface preparation rather than technique problems.
Canvas priming creates the foundation that supports every brush stroke, color choice, and artistic decision you’ll make.
This guide covers everything from basic gesso application to advanced primer techniques used by professional artists.
You’ll discover how different painting mediums require specific primer types and application methods.
Whether you’re working with oil painting techniques, acrylic painting methods, or mixed media approaches, proper canvas preparation remains the same critical first step.
By the end, you’ll understand primer selection, application techniques, and quality control methods that separate amateur work from professional results.
Choosing the Right Primer Materials

Understanding Gesso Types
Acrylic gesso remains the most popular choice for modern artists working with various painting mediums. This water-based primer dries quickly and provides excellent adhesion for both acrylic painting and oil painting techniques.
Traditional oil-based primers offer superior flexibility and archival quality. They’re particularly important when working with oil paints, as they prevent the canvas material from absorbing oil and deteriorating over time.
Universal primers work well for mixed media projects. These versatile primer coats accommodate different painting techniques within a single artwork.
Quality Grades Matter
Student-grade gesso contains more filler and less pigment than professional versions. While acceptable for practice work, it may require additional primer layers to achieve proper coverage.
Professional-grade primers offer better consistency and durability. The higher pigment content means fewer coats needed for complete surface preparation.
Brush and Tool Selection
Wide flat brushes provide the most even primer application. A 2-3 inch brush works well for standard canvas sizes, allowing you to maintain consistent brush strokes across the painting surface.
Foam rollers create incredibly smooth finishes without visible brush marks. They’re particularly useful when preparing canvases for detailed work or photorealism techniques.
Palette knives can create interesting texture effects in the primer layer. Some artists intentionally build surface texture during the priming process to support their painting style.
Essential Additional Supplies
Fine-grit sandpaper (220-320 grit) helps smooth imperfections between primer coats. Light sanding creates better adhesion for subsequent layers.
Clean mixing containers prevent contamination of your gesso primer. Avoid metal containers, as they can react with some primer formulations.
Protective equipment includes gloves and proper ventilation. Even water-based primers release fumes during the drying process.
Canvas Preparation Before Priming

Initial Surface Inspection
Check your canvas for holes, loose threads, or manufacturing defects. Small holes can be patched with canvas repair tape before beginning the priming process.
Oil stains or fingerprints will prevent proper primer adhesion. These contaminated areas must be cleaned thoroughly before any surface treatment.
Canvas tension affects how the primer layer will behave. Loose canvas may develop wrinkles or sags during the drying process.
Cleaning and Degreasing
Dust removal starts with a clean, lint-free cloth. Gently wipe the entire canvas surface, paying attention to corners where dust accumulates.
For oily surfaces, use a mild degreasing agent like diluted dish soap. Rinse thoroughly and allow complete drying before proceeding with primer application.
Light sanding helps create tooth for better primer adhesion. Use circular motions with fine sandpaper, avoiding excessive pressure that might damage the canvas weave.
Environmental Setup
Temperature and humidity directly affect primer performance. Ideal conditions are 65-75°F with moderate humidity levels.
Proper ventilation prevents moisture buildup during the drying process. Trapped moisture can cause primer layers to remain tacky or develop surface defects.
A dust-free workspace prevents particles from settling into wet primer. Cover nearby surfaces and avoid activities that create airborne debris.
Good lighting helps identify missed spots or application problems. Natural north light or balanced LED lighting works best for quality inspection.
Pre-Priming Surface Assessment
Test a small area first, especially with unfamiliar canvas materials. Different canvas types may require adjusted primer consistency or additional preparation steps.
Cotton canvas typically accepts primer readily and provides good adhesion. Linen canvas may require slightly diluted primer for initial penetration.
Synthetic canvas materials sometimes need special surface preparation. Check manufacturer recommendations for optimal priming techniques.
Step-by-Step Priming Process

First Coat Application
Mix your gesso primer to proper consistency. Most primers can be used straight from the container, but diluting the first coat by 10-20% helps penetration.
Load your brush evenly, avoiding drips or excessive primer buildup. Start at one corner and work systematically across the canvas surface.
Apply primer in parallel strokes, maintaining consistent pressure. Work quickly while the primer remains workable to avoid lap marks.
Edge attention matters as much as the main surface. Brush primer over canvas edges to prevent exposed areas that could collect moisture.
Managing Application Direction
First coat brush strokes typically run horizontally across the canvas. This establishes the base layer and fills the canvas weave.
Maintain a wet edge as you work. Overlapping wet primer blends seamlessly, while working over partially dry areas creates visible marks.
Work from light to dark pressure as needed. Heavy pressure can push primer through the canvas weave, while too little leaves incomplete coverage.
Between-Coat Procedures
Allow complete drying between applications. Acrylic gesso typically dries within 2-4 hours, depending on thickness and environmental conditions.
Light sanding between coats removes brush marks and creates uniformity. Use fine sandpaper with gentle circular motions.
Dust removal after sanding prevents particles from interfering with subsequent primer layers. Tack cloths work better than regular cleaning cloths.
Inspect coverage carefully in good lighting. Thin spots or missed areas will show through the final painting layers.
Second Coat Technique
Cross-directional brush patterns work well for the second application. If the first coat used horizontal strokes, apply the second coat vertically.
Slightly thicker consistency often works better for second coats. The canvas weave is already sealed, allowing the primer to build surface uniformity.
Build coverage gradually rather than applying one thick coat. Multiple thin layers provide better adhesion and more predictable drying.
Pay attention to corner areas where primer tends to thin out. These areas often need extra attention to match the coverage of central areas.
Final Coat Considerations
The third coat determines your final painting surface quality. This layer should focus on creating the exact texture you want for your artwork.
Smooth finishes require careful brush technique and possibly light sanding after drying. Cross-hatching strokes can eliminate directional brush marks.
Some painting styles benefit from slight texture in the primer layer. Impressionism techniques, for example, can work well with subtle canvas texture showing through.
Quality Control Checks
Visual inspection under good lighting reveals coverage inconsistencies. Hold the canvas at different angles to spot thin areas or brush marks.
The properly primed canvas should have uniform color and consistent surface feel. No canvas weave should show through the primer layer.
Flexibility testing involves gently flexing a corner of the canvas. Properly cured primer should flex without cracking or flaking.
Advanced Priming Techniques

Creating Textured Primer Surfaces
Adding fine sand or pumice to your gesso creates interesting surface texture for specific painting techniques. This approach works particularly well for abstract artworks where surface variation adds visual interest.
Mix texture additives gradually into your primer base. Start with small amounts and test the consistency on a sample piece before committing to your main canvas.
Brush stippling creates organic texture patterns in wet primer. Use an old brush with splayed bristles to dab and lift the primer surface randomly.
Palette knife texturing produces more controlled surface effects. Drag, scrape, or press the knife through wet primer to create deliberate patterns that support your artistic vision.
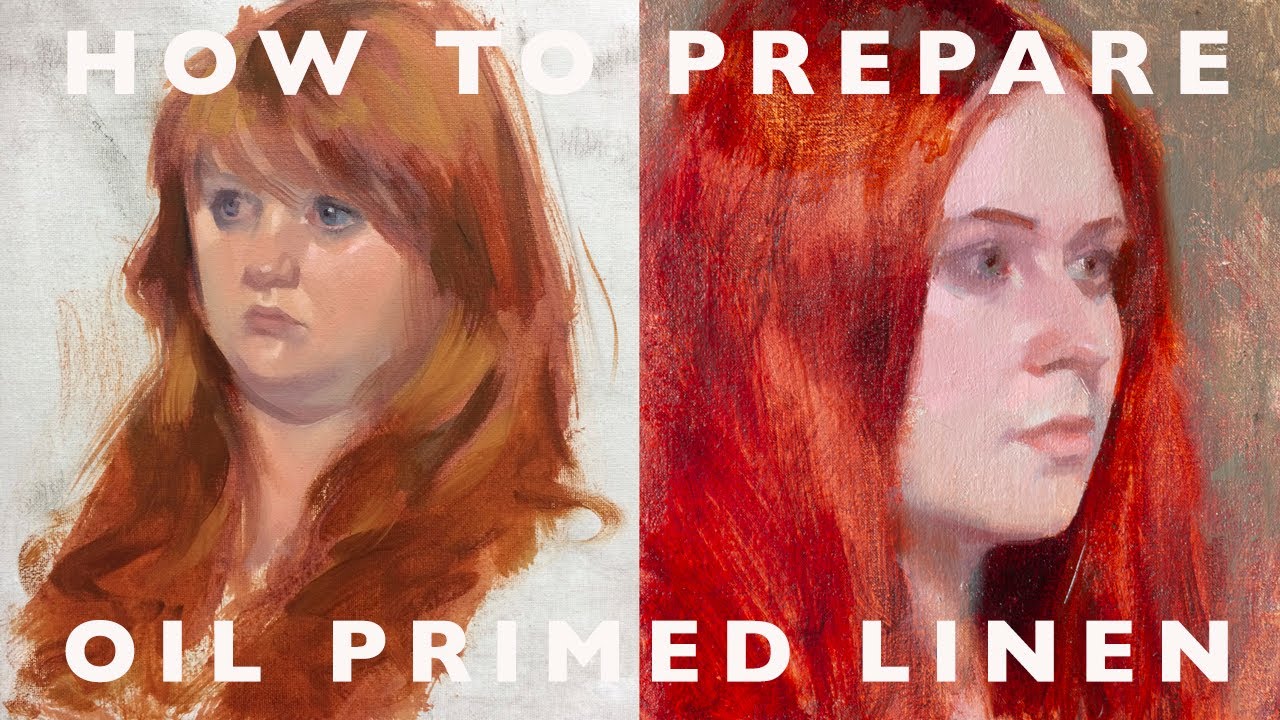
Tinted Primer Applications
Gray-toned primers eliminate the stark white surface that can intimidate beginning artists. This neutral foundation makes it easier to judge value relationships in your painting.
Brown underpainting supports warm color schemes effectively. Many realism painters prefer this approach for portrait work and figure studies.
Color temperature in your primer affects the entire painting’s mood. Cool-toned primers push colors toward blue-green ranges, while warm primers shift everything toward red-orange territories.
Traditional Sizing Methods
Rabbit skin glue sizing represents the classical approach to canvas preparation. This method creates an incredibly strong foundation but requires careful temperature control during application.
Heat the sizing solution gently and apply while warm. Working time is limited, so prepare only what you can use immediately.
Lead white oil primer offers unmatched archival quality for serious oil painters. The preparation process takes several days but produces a luminous painting surface that masters like Leonardo da Vinci would recognize.
Alkyd Resin Innovations
Modern alkyd primers combine traditional oil primer benefits with faster drying times. They bridge the gap between historical methods and contemporary studio needs.
These specialized primers work exceptionally well for painting styles that require multiple glazing layers or extended working periods.
Common Priming Problems and Solutions

Adhesion Failures
Paint peeling typically results from inadequate surface cleaning or rushing the drying process between primer coats. Oil, dust, or moisture contamination prevents proper bonding.
Contaminated canvas problems show up months later as paint film separation. Prevention beats correction every time in canvas preparation.
Temperature shock can cause adhesion problems. Rapid temperature changes during drying create stress in the primer film that leads to eventual failure.
Coverage Issues
Uneven primer application creates problems that multiply throughout the painting process. Thin spots allow paint to soak into the canvas material, while thick areas may remain permanently soft.
Brush marks become increasingly visible as painting layers build up. Cross-hatching during application and light sanding between coats minimize this issue.
Canvas texture showing through primer indicates insufficient coverage. Additional thin coats work better than trying to fix the problem with one thick application.
Drying Complications
Slow drying in humid conditions can trap moisture under the primer surface. This creates a permanently tacky feel that interferes with subsequent paint layers.
Cracking happens when primer dries too quickly or when the layer is applied too thickly. Environmental control and proper application thickness prevent most cracking issues.
Color inconsistency across the primed surface indicates mixing problems or contaminated primer. Fresh primer and thorough mixing solve most color variation problems.
Repair Strategies
Failed priming requires complete removal and restart in most cases. Attempting to primer over failed areas rarely produces satisfactory long-term results.
Spot repairs work only for small defects like dust particles or minor thin spots. Sand the affected area lightly and apply additional primer carefully.
Quality Control and Testing
Visual Inspection Methods
Hold your primed canvas at different angles under good lighting. Even coverage should be apparent from all viewing positions without thin spots or heavy accumulations.
Check edge areas carefully where primer tends to thin out during application. These border zones often need touch-up work before the canvas is ready for painting.
Color consistency across the entire surface indicates proper mixing and application technique. Any variation suggests contamination or inadequate blending during preparation.
Physical Testing Approaches
The scratch test reveals primer adhesion quality. Gently scratch a corner area with your fingernail after complete drying.
Flexibility testing involves carefully bending a canvas corner. Properly cured primer should flex without cracking, flaking, or separating from the canvas material.
Absorption rate evaluation shows primer effectiveness. A drop of water should sit on the surface briefly rather than immediately soaking in.
Ready-to-Paint Indicators
Proper tooth feel indicates the surface is ready for paint application. The primed canvas should have slight grip when you run your hand across it.
Complete drying means no tacky feel remains anywhere on the surface. Acrylic primers usually cure within 24 hours under normal conditions.
Surface smoothness should match your artistic intentions. Impressionism work might benefit from slight texture, while detailed hyperrealism requires perfectly smooth preparation.
Long-term Performance Factors
Archival quality primers resist yellowing and maintain flexibility over decades. This becomes increasingly important for works intended for exhibition or sale.
Professional standards require primers that maintain their properties under varying environmental conditions. Museum-quality preparation follows strict material and process guidelines.
Crack resistance improves with proper primer selection and application technique. Multiple thin coats outperform single thick applications in long-term stability.
Testing Different Paint Compatibility
Oil paint compatibility requires primers that resist oil penetration while maintaining proper adhesion. Traditional oil primers or high-quality acrylic gesso both work well.
Acrylic painting techniques work with standard acrylic gesso preparation. The key is ensuring complete coverage without over-building the primer thickness.
Mixed media applications need universal primers that accommodate different paint types within the same artwork. Test compatibility on sample pieces before committing to large works.
Environmental Stress Testing
Temperature cycling tests primer flexibility under realistic conditions. Well-primed canvases should handle normal studio temperature variations without damage.
Humidity exposure reveals potential adhesion weaknesses. Properly prepared surfaces resist moisture penetration while maintaining their structural integrity.
Different Paint Type Considerations
Priming for Oil Paints
Oil-resistant primers prevent canvas deterioration from oil penetration. Traditional rabbit skin glue sizing followed by oil-based primer offers the most archival approach for serious oil work.
Modern acrylic gesso works fine for oil painting when applied properly. The key is building adequate thickness to block oil absorption completely.
Absorbency Level Preferences
Oil painters often prefer slightly absorbent surfaces that pull excess medium from brush strokes. This creates better paint handling and color saturation in the final artwork.
Lean-to-fat painting principles require primers that support proper layering techniques. The primer absorbency affects how subsequent paint layers interact and adhere.
Traditional canvas sizing creates the perfect foundation for classical oil techniques. Masters like Rembrandt van Rijn relied on carefully prepared surfaces for their luminous effects.
Oil-Specific Application Tips
Apply oil primers in thin, even coats using cross-hatch brush patterns. Multiple thin applications outperform single thick coats for both adhesion and drying.
Allow extended drying time between coats. Oil-based primers need 24-48 hours minimum before additional layers.
Surface texture considerations matter more for oil techniques than other mediums. The primer tooth affects brush control and paint manipulation during the painting process.
Acrylic Paint Priming Needs
Standard acrylic gesso provides ideal preparation for acrylic painting techniques. The chemical compatibility between acrylic primer and paint creates strong bonding.
Quick-drying advantages of acrylic primers let you start painting within hours rather than days. This appeals to artists working on tight schedules or multiple projects.
Flexibility requirements for acrylic work are less demanding than oil painting. Acrylic films remain more flexible throughout their lifespan.
Water Resistance Factors
Properly applied acrylic gesso creates excellent moisture barriers. This protects the canvas material from humidity changes that could cause dimensional instability.
Multiple thin coats build better water resistance than single thick applications. Each layer must cure completely before adding the next.
Surface preparation for acrylics focuses on uniformity rather than specific absorbency levels. Consistent coverage matters more than traditional oil painting considerations.
Acrylic-Specific Techniques
Cross-directional brush strokes work well for acrylic primer application. The fast drying time means you can complete multiple coats in a single session.
Foam roller application produces exceptionally smooth surfaces ideal for detailed acrylic work. This technique works particularly well for photorealism and precision painting styles.
Mixed Media Preparations
Universal primers accommodate combinations of different paint types within single artworks. These specialized formulations bond well with both water-based and oil-based materials.
Watercolor painting over acrylic primer requires proper surface preparation. Light sanding creates tooth that helps watercolor adhere to the non-absorbent surface.
Collage compatibility means choosing primers that accept various adhesives and papers. Standard gesso usually works well for most mixed media applications.
Experimental Medium Support
Contemporary painting mediums often require specialized surface preparation. Research compatibility before committing to unfamiliar material combinations.
Texture compatibility becomes important when incorporating non-traditional materials. The primer must accommodate everything from sand to fabric elements.
Some experimental techniques benefit from deliberately incompatible primer-paint combinations. These controlled failures can create interesting surface effects.
Medium-Specific Considerations
Abstract painters often prefer neutral-toned primers that don’t compete with their color choices. Gray or beige grounds work better than stark white for many contemporary approaches.
Portrait painters traditionally favor warm-toned primers that complement skin tones. This approach dates back to renaissance masters who understood color theory principles.
Landscape work benefits from primers that support atmospheric effects. Some artists prefer slightly textured surfaces that help with aerial perspective techniques.
Specialized Application Methods
Spray application creates perfectly even primer coats but requires proper ventilation and masking. This technique works well for large canvases or commercial art production.
Roller application with extension handles reaches large surfaces efficiently. Coverage quality remains excellent when using proper roller sleeves and technique.
Surface Customization
Building primer thickness selectively across the canvas creates intentional surface variations. Some areas might receive extra coats while others remain at minimum coverage.
This approach supports composition planning by creating physical emphasis areas before painting begins.
FAQ on How To Prime A Canvas For Painting
Can I paint directly on canvas without primer?
Painting on unprimed canvas causes paint absorption into the material, leading to dull colors and canvas deterioration. Oil paints will eventually rot cotton fibers.
Primer creates proper paint adhesion and prevents chemical damage to your canvas material.
How many coats of gesso do I need?
Most canvases require two to three coats of gesso for adequate coverage. Thin the first coat slightly to help penetration.
Sand lightly between coats and check for canvas texture showing through the primer layer.
What’s the difference between gesso and primer?
Gesso is a specific type of primer containing chalk, pigment, and binder. Modern acrylic gesso serves as both sizing and primer.
Traditional gesso used rabbit skin glue, while contemporary versions use acrylic binders for easier application.
How long should primer dry between coats?
Acrylic gesso typically dries within 2-4 hours between coats. Oil-based primers need 24-48 hours minimum.
Test tackiness in a corner area before applying additional coats to prevent adhesion problems.
Can I use house paint as canvas primer?
House paint lacks proper adhesion properties and flexibility needed for canvas preparation. It may crack or peel over time.
Invest in quality artist primers designed specifically for canvas applications and archival durability.
Should I sand between primer coats?
Light sanding with fine-grit paper removes brush marks and creates uniform surface texture. Sand gently to avoid damaging the canvas weave.
Clean thoroughly with a tack cloth after sanding to remove dust particles.
What brush works best for priming canvas?
Wide flat brushes (2-3 inches) provide even coverage with consistent brush strokes. Foam rollers create the smoothest finish without visible marks.
Cheap brushes work fine for priming since brush quality matters less than for actual painting.
Can I prime canvas with colored gesso?
Colored primers eliminate stark white surfaces and can improve color theory relationships in your painting. Gray and warm brown work well.
Mix acrylic paint into white gesso or buy pre-tinted primer for consistent color consistency.
How do I fix uneven primer coverage?
Spot repairs work for small areas – sand lightly and apply additional primer. Large uneven areas usually require complete re-priming.
Prevention through proper technique beats correction every time in canvas preparation.
Is expensive primer worth the extra cost?
Professional-grade primers contain higher pigment ratios and better binders than student versions. They require fewer coats and provide superior archival quality.
The cost difference becomes minimal when considering coverage and longevity of your finished artwork.
Conclusion
Mastering how to prime a canvas for painting transforms your artistic foundation from amateur to professional quality. This surface preparation directly impacts paint adhesion, color vibrancy, and artwork longevity.
Quality primer application requires patience but rewards you with decades of stable artwork. Rush the process and face cracking, peeling, or color shifts later.
The primer consistency, brush technique, and drying time all contribute to your final painting surface. Canvas preparation deserves the same attention as your actual brushwork and composition planning.
Different painting styles benefit from specific primer approaches. Expressionism might embrace textured surfaces while minimalism demands perfectly smooth preparation.
Your canvas becomes the silent partner in every artistic decision you make. Invest in proper priming materials, follow correct application methods, and watch your paintings achieve new levels of professional quality that will endure for generations.