
Nothing kills creative momentum like waiting for paint to dry. Acrylic paint drying time tips can transform your studio sessions from frustrating stop-and-go experiences into smooth, productive workflows.
Most painters waste hours staring at wet canvases or rushing into layers that aren’t ready. You don’t have to.
Understanding color theory and proper timing techniques gives you control over your materials instead of letting them control you. Smart painters work with drying schedules, not against them.
This guide covers environmental controls, application methods, and professional timing strategies. You’ll learn to speed up drying when needed and extend working time when blending acrylic paint requires it.
Master these techniques and spend more time painting, less time waiting.
Environmental Control Methods

Paint dries through water evaporation and polymer bonding. Getting these conditions right makes all the difference between waiting forever and moving forward with your work.
Temperature Management Techniques
Warm air speeds up drying dramatically. Most acrylics perform best between 65-75°F.
Space heaters work great for cold studios. Position them at least three feet from your canvas to avoid warping or cracking.
Excessive heat ruins everything. Never use direct flame or heating elements above 85°F on fresh paint.
Winter painting requires patience. Cold temperatures can triple normal drying times.
Quick Temperature Fixes
- Hair dryers on low heat, held 12 inches away
- Heating pads under (not on) your work surface
- Warm rooms before painting sessions start
Humidity Control Solutions
High humidity fights against water evaporation. Your paint stays wet longer in muggy conditions.
Ideal moisture levels sit around 45-55% relative humidity. Anything above 70% creates problems.
Dehumidifiers transform sticky summer studios. Run them continuously during humid seasons for consistent results.
Rainy days mean extended drying periods. Plan your painting schedule around weather patterns when possible.
Dealing with Moisture
- Use fans to circulate air, not just blow directly on paintings
- Avoid basements during wet seasons
- Consider portable dehumidifiers for problem areas
Airflow and Ventilation Strategies
Moving air carries away moisture faster than still air. Simple physics working in your favor.
Cross-ventilation beats single-direction airflow every time. Open windows or doors on opposite sides of your space.
Ceiling fans help more than you’d think. They keep air moving without creating dust storms.
Dust contamination happens when airflow is too strong. Gentle circulation works better than hurricane-force winds.
Position fans to pull air away from wet paintings rather than blowing directly onto them.
Paint Consistency and Application Tricks
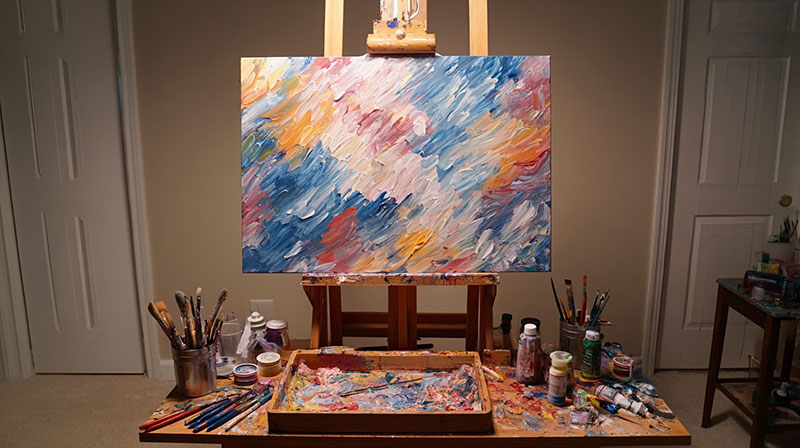
Thick paint takes longer to dry than thin paint. Obvious but often ignored by eager painters.
The way you apply acrylic painting directly affects drying speed and final appearance.
Thinning Agents and Their Effects
Water is the cheapest thinner, but it weakens paint strength. Use sparingly for best results.
Painting mediums maintain paint quality while adjusting consistency. They cost more but deliver better outcomes.
Retarding medium extends working time by slowing evaporation. Perfect for detailed work or wet-on-wet blending.
Flow aids reduce surface tension, helping paint spread smoother and dry more evenly.
Mixing Ratios That Actually Work
- Water: No more than 30% of paint volume
- Acrylic medium: Up to 50% without losing opacity
- Retarder: 5-15% for noticeable extension
- Flow aid: Just a few drops per dollop
Layer Thickness Control
Thin coats dry faster and look more professional. Build up color intensity gradually instead of slapping on thick layers.
Heavy impasto techniques need patience. Those thick marks can take hours to cure completely.
Brush application creates thinner, more even coverage than palette knives for most work.
Spray bottles help maintain consistent moisture during extended painting sessions.
Application Methods by Drying Speed
Fastest drying:
- Thin glazes with medium
- Dry brush techniques
- Light washes over dry surfaces
Slowest drying:
- Thick impasto applications
- Wet-into-wet blending
- Multiple wet layers
Paint Brand and Quality Considerations
Student-grade acrylics dry slower than professional versions. Cheaper paints contain more filler and less pigment.
Heavy body acrylics maintain their texture but take longer to cure. Fluid acrylics dry faster due to their thinner consistency.
Open acrylics stay workable for hours instead of minutes. They’re designed for extended blending time.
Brand consistency matters more than you realize. Stick with one manufacturer per project when possible.
Golden, Liquitex, and Winsor & Newton each have different drying characteristics. Learn your preferred brand’s timing.
Workspace Setup and Tools

Your painting environment controls more variables than any single technique. Set it up right from the start.
Studio organization affects workflow speed and paint management. Chaos leads to wasted time and dried-out colors.
Surface Preparation Methods
Canvas dries faster than paper because air circulates on both sides. Paper tends to curl and hold moisture longer.
Gesso creates a slightly absorbent surface that helps with even drying. Skip the gesso for longer working times.
Glass palettes release paint easily but don’t breathe. Disposable palettes absorb some moisture, affecting drying rates.
Non-absorbent surfaces like plastic or metal keep paint wet longer. Use them for extended color mixing sessions.
Surface Speed Comparison
- Fastest: Stretched canvas on easel
- Medium: Canvas board or paper on table
- Slowest: Glass palette or non-porous surfaces
Palette Management Systems
Stay-wet palettes extend working time by hours. They use damp paper to maintain moisture without diluting paint.
Traditional palettes work fine for quick sessions. Clean them thoroughly between uses to avoid color contamination.
Disposable paper palettes offer convenience but limit working time. Good for studies and small works.
Wet palette construction takes five minutes and saves hours of frustration. Layer damp paper towels under parchment or special palette paper.
Palette Paper vs. Traditional Options
Paper palettes absorb moisture, affecting paint consistency. Glass stays neutral but doesn’t prevent drying.
Mixing large batches works better on traditional palettes. Paper tears under heavy mixing pressure.
Brush and Tool Care During Sessions
Brushes dry out faster than paint in low humidity. Keep them damp between color changes.
Spray bottles become your best friend during long painting sessions. Light misting prevents skin formation.
Tool positioning affects workflow efficiency. Keep frequently used brushes within easy reach.
Clean brushes immediately after use, even during active painting. Dried acrylic ruins good brushes quickly.
Maintaining Tools During Work
- Rest brushes in water containers between uses
- Wipe palette knives clean after each mix
- Cover unused paint with damp cloth
- Position spray bottle for easy access
Brush rest systems keep bristles off surfaces and maintain proper moisture levels throughout your session.
Timing Strategies for Different Painting Approaches
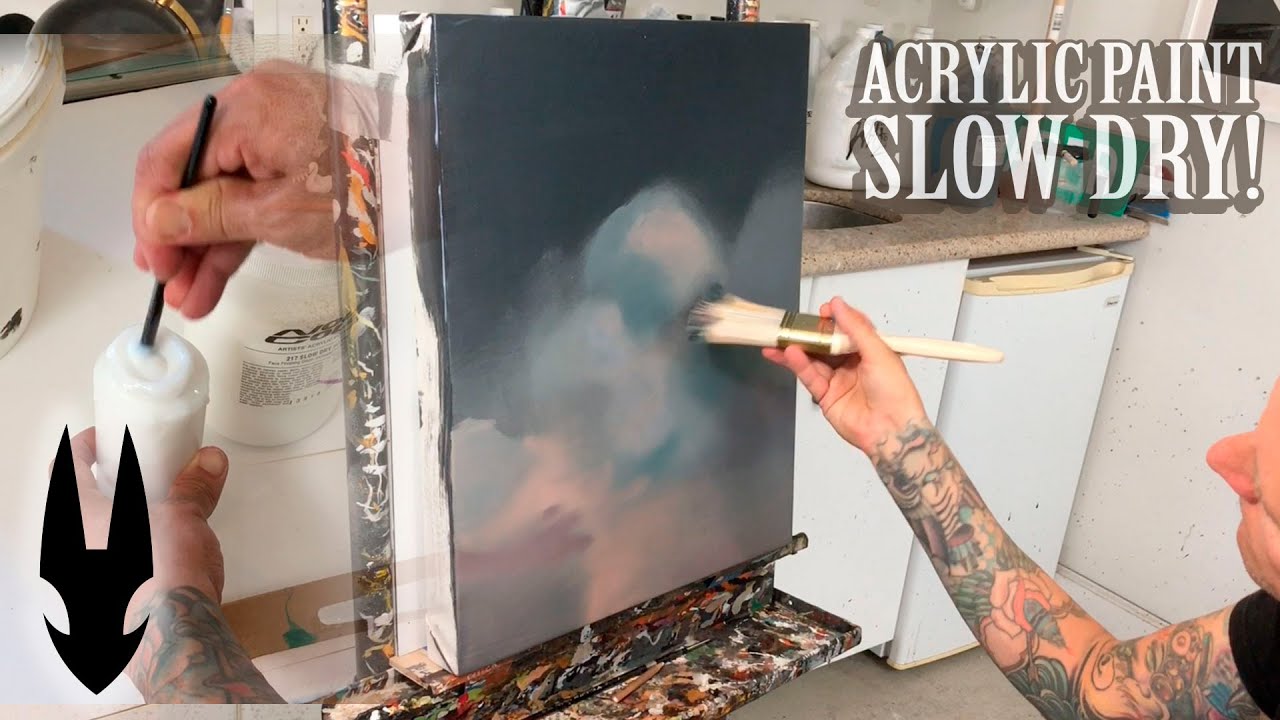
Different techniques demand different timing approaches. Wet-on-wet work needs speed while layering paint properly requires patience.
Understanding your chosen method saves frustration and wasted paint.
Wet-on-Wet Technique Timing
Working windows last 10-15 minutes with standard acrylics in normal conditions. That’s your sweet spot for seamless blending.
Mist your palette lightly before starting. This buys you extra minutes without thinning the paint too much.
Maximizing Blend Time
Start with your largest areas first. Background elements need the most blending time.
Keep a spray bottle nearby for emergency moisture. Light misting revives slightly tacky paint.
Color transitions work best when both colors remain equally wet. Don’t let one side dry while working the other.
Work in sections rather than trying to cover entire canvases at once.
Layering and Glazing Schedules
Base layers need complete drying before adding transparent glazes. Touch-dry isn’t enough for quality results.
Test dryness by lightly touching an inconspicuous area. Completely dry paint feels cool and smooth.
Transparent layers require bone-dry surfaces to avoid lifting previous work. Wait at least 30 minutes between coats.
Safe Waiting Periods
- Thin washes: 15-20 minutes
- Medium coverage: 30-45 minutes
- Heavy applications: 1-2 hours
- Impasto work: 2-4 hours minimum
Build up color intensity gradually with multiple thin coats. This approach dries faster than single thick applications.
Detail Work and Fine Lines
Steady hand timing depends on paint consistency and brush size. Thicker paint stays put longer but fights against fine detail.
Small brushes dry out quickly in low humidity. Keep backup brushes ready for continuous line work.
Base areas must be completely set before adding details. Wet backgrounds smear under precise brush pressure.
Touch-up work requires patience between corrections. Rushing creates muddy, overworked areas.
Quick-Drying Acceleration Methods
Sometimes you need paint dry yesterday. These methods speed things up without sacrificing quality.
Heat, airflow, and additives all play roles in acceleration techniques.
Heat Application Techniques
Hair dryers work on low heat settings only. High heat creates surface skin while leaving wet paint underneath.
Hold the dryer 12-15 inches from your painting. Move it constantly to avoid hot spots.
Heat guns are overkill for most work. Save them for thick impasto pieces or large canvases.
Warm surface preparation helps initial drying. Place canvases in sunny windows before painting starts.
Safe Heat Application
- Always use low temperature settings
- Keep heat sources moving across the surface
- Test on practice pieces first
- Watch for paint bubbling or cracking
Oven drying works for small studies on canvas board. Set temperature to 150°F maximum and prop the door open.
Additive Solutions
Fast-drying mediums cut normal drying time in half. Mix them with paint on your palette, not directly from tubes.
Acrylic gel mediums speed drying while maintaining paint body. They cost more but deliver professional results.
Texture paste additives dry faster than plain paint because of their absorbent properties.
Proven Mixing Ratios
- Fast-dry medium: 1 part medium to 2 parts paint
- Gel medium: Equal parts for maintained consistency
- Texture paste: 1 part paste to 3 parts paint
Avoid overdoing additives. Too much medium changes paint behavior and color intensity.
Strategic Paint Application
Thin layer building beats thick single coats every time. Each layer dries faster and creates better color depth.
Section-by-section completion lets you work continuously. Start one area while another dries.
Priority painting focuses on elements that need the most layers first. Work background to foreground systematically.
Time-saving color mixing means preparing larger batches of frequently used colors.
Problem-Solving Common Drying Issues
Every painter faces drying problems eventually. Knowing how to fix them saves paintings and sanity.
Most issues stem from environmental factors or application mistakes.
Tacky Paint Surface Solutions
Sticky surfaces happen when humidity is too high or paint layers are too thick. The top dries but underneath stays wet.
Gentle heat application helps cure tacky areas. Use a hair dryer on cool setting with constant movement.
Thin paint applications prevent most tackiness issues. Build coverage gradually instead of applying thick coats.
Quick Fixes for Sticky Paint
- Increase air circulation around the painting
- Lower room humidity with dehumidifiers
- Apply gentle heat while maintaining distance
- Wait longer between layers next time
Surface treatment with thin medium coats can seal problematic areas once they’re fully dry.
Uneven Drying Patterns
Streaking occurs when brush marks hold different amounts of paint. Consistent pressure prevents this problem.
Patchy coverage shows up more as paint dries. What looks even when wet often reveals problems during drying.
Canvas texture affects drying patterns. Rough surfaces create uneven thickness naturally.
Prevention Techniques
Work in consistent lighting to spot coverage problems early. Natural north light shows true color and coverage.
Cross-hatching brush strokes helps even out application thickness.
Blending while paint remains workable smooths out most streak problems before they set.
Paint Skin Formation
Surface films form when top layers dry faster than underlying paint. This creates wrinkled, leathery textures.
Stirring paint too vigorously introduces air bubbles that contribute to skin formation.
Palette maintenance prevents most skin issues. Cover unused paint with damp cloth or plastic wrap.
Mixing Solutions
- Stir paint gently, not aggressively
- Add medium instead of water when thinning
- Work in smaller batches during hot weather
- Cover palettes between painting sessions
Storage container problems create pre-dried paint before you even start. Check paint consistency before each use.
Remove any skin formation before mixing colors. These dried bits create lumps and uneven application.
Advanced Timing Techniques
Professional painters work multiple pieces simultaneously. This rotation system keeps you productive while paint dries.
Studio efficiency comes from understanding timing patterns and planning accordingly.
Multi-Panel Project Management
Working on three to four pieces at once maximizes studio time. Start one while another dries.
Staggered timing means beginning new sections every 30-45 minutes. By the time you finish the fourth piece, the first is ready for next layers.
Assembly line thinking works perfectly for series work or commissions.
Rotation Schedule Example
- 9:00 AM: Start Panel A background
- 9:30 AM: Begin Panel B while A dries
- 10:00 AM: Start Panel C, check Panel A
- 10:30 AM: Begin Panel D, work details on A
Drying racks hold multiple works safely. Position them for good air circulation around each piece.
Space planning determines how many simultaneous projects you can handle. Account for easel space and drying areas.
Color Mixing Time Optimization
Pre-mixing color batches saves time and maintains consistency across sessions. Mix enough for entire sections, not just immediate needs.
Large palette areas prevent accidental color contamination. Give each mix plenty of breathing room.
Strategic Color Preparation
Primary colors need the most space since they mix into everything else. Position them at palette edges for easy access.
Secondary colors work well pre-mixed in small batches. They stay stable longer than complex tertiary mixes.
Custom skin tone mixtures dry faster when prepared in advance. Mix large amounts for portrait series.
Palette Organization Systems
- Warm colors on one side, cool colors on the other
- Most-used colors closest to your dominant hand
- Medium and water containers positioned for easy reach
- Clean mixing areas marked and maintained
Color wheel planning reduces mixing time during active painting. Know your intended color harmony before starting.
Professional Studio Practices
Production painting requires systematic approaches to timing and workflow. Treat your studio like a business operation.
Batch processing works for similar subjects or techniques. Paint all skies together, then all foregrounds.
Client deadline management starts with realistic time estimates. Factor in full curing time, not just touch-dry periods.
Quality Control Timing
Check previous layers before adding new ones. Partially dry paint causes lifting and muddying.
Documentation of successful timing helps repeat good results. Note environmental conditions and drying times for future reference.
Photography during different drying stages shows value changes and helps plan future sessions.
Professional Workflow Tips
- Schedule detail work for consistent humidity days
- Plan large backgrounds during optimal drying conditions
- Keep backup pieces ready for weather delays
- Maintain detailed timing logs for complex projects
Canvas preparation affects every subsequent timing decision. Prime and dry surfaces completely before starting painted layers.
Series work benefits from standardized approaches. Develop consistent methods for repeated subjects or composition types.
Time Management for Large Works
Break complex paintings into logical sections. Foreground elements typically need more layers and longer working times.
Background areas can dry while you focus on detailed sections. Plan your attack strategy before touching brush to canvas.
Balance your daily studio time between new starts and finishing existing work. Half new, half completion works well for most painters.
FAQ on Acrylic Paint Drying Time Tips
How long does acrylic paint take to dry?
Standard acrylics dry to touch in 15-30 minutes under normal conditions. Complete curing takes 24-48 hours depending on thickness and humidity.
Thin applications dry faster than heavy texture work.
Can I speed up acrylic paint drying?
Use hair dryers on low heat, increase room temperature, or add fast-drying mediums. Proper ventilation and lower humidity also accelerate the process.
Avoid excessive heat which creates surface skin over wet paint underneath.
Why is my acrylic paint still tacky after hours?
High humidity or thick application causes tackiness. Temperature below 60°F also slows curing significantly.
Increase air circulation and reduce moisture levels for better results.
What’s the difference between touch dry and fully cured?
Touch dry means surface feels solid but paint remains soft underneath. Full cure creates permanent, scratch-resistant film ready for additional layers.
Always wait for complete drying before glazing or detailed work.
How do I keep acrylic paint wet longer while working?
Use retarding medium, spray bottles for light misting, or stay-wet palettes. Open acrylics extend working time naturally.
Work in cooler, more humid conditions when possible for extended blending time.
Does canvas type affect drying time?
Canvas breathes better than paper, allowing faster drying. Gesso primer affects absorption rates and overall drying speed.
Non-absorbent surfaces like glass keep paint workable longer but slow final curing.
Can I layer wet acrylic paint over wet paint?
Yes, but colors will blend and mix. Wet-on-wet techniques work best within 10-15 minute windows before surface starts setting.
Plan color harmony carefully to avoid muddy results.
What room conditions work best for drying?
Maintain 65-75°F with 45-55% humidity. Good air circulation without direct drafts on paintings works best.
Avoid basements or areas with temperature fluctuations during drying periods.
Why does my paint crack while drying?
Thick applications, rapid temperature changes, or poor surface preparation cause cracking. Flexible mediums help prevent this issue.
Build up coverage gradually rather than applying single heavy coats.
How do I fix paint that dried too fast?
Surface dried too quickly usually means inadequate mixing or environmental issues. Gentle heat and humidity can sometimes reactivate workability.
Prevention through proper timing and conditions works better than corrections.
Conclusion
Mastering acrylic paint drying time tips transforms your studio workflow from chaotic waiting periods into efficient, productive sessions. Smart timing beats impatient rushing every time.
Environmental control makes the biggest difference in consistent results. Temperature, humidity, and airflow work together to speed or slow your painting process.
Application techniques matter as much as studio conditions. Thin layers, proper mediums, and strategic timing create professional-quality work.
Understanding complementary colors and contrast helps plan your layering schedule. Some color combinations need specific drying times for best results.
Professional painters use rotation systems and batch processing to maximize studio time. Multiple pieces dry while you work on others.
These timing strategies work for any painting styles from abstract to photorealism. Master the fundamentals first, then adapt techniques to your preferred approach.
Stop waiting for paint to dry. Start working smarter.