
Fur is one of those subjects that separates painters who know their medium from those still guessing at it.
Learning how to paint fur with acrylic is less about raw talent and more about understanding a specific sequence: surface prep, tonal blocking, stroke direction, layering, and highlights. Miss one step and the whole passage falls flat.
Acrylic handles fur better than most media. Fast drying time supports clean layering. Heavy body consistency holds directional strokes. Glazing medium adds transparent depth without covering the texture underneath.
This guide covers everything from brush selection and base layer construction to color mixing for black, white, brown, and grey coats, plus how to fix common mistakes before they ruin a painting.
What Is Fur Painting with Acrylic

Fur painting is directional, layered mark-making that simulates hair texture, depth, and growth anatomy on a two-dimensional surface. It is not a single technique but a sequence of decisions: surface prep, tonal blocking, stroke direction, layering order, and final highlight placement.
Acrylic paint handles this sequence better than most media. It dries fast enough to layer without muddying, holds thick impasto strokes for coarse fur, and thins to a transparent glaze for fine, soft undercoats. That range is hard to replicate with oils or watercolor alone.
The artist-grade acrylic paint market was valued at USD 0.47 billion in 2024, projected to grow to USD 0.73 billion by 2033 at a 4.6% CAGR (Business Research Insights, 2024). Demand from professional portrait and animal painters is a direct driver of heavy body and fluid acrylic product development.
Most animal fur has 2 distinct layers: a soft downy undercoat and a coarser topcoat called guard hair. Painting only the top layer is the most common mistake beginners make. It leaves the piece flat and two-dimensional.
The key difference between painting fur and painting smooth surfaces comes down to edge control. Smooth surfaces reward blending. Fur rewards broken, directional strokes with deliberate hard and soft edges at different depths.
| Fur Type | Primary Technique | Key Medium Property |
|---|---|---|
| Short fur (cat, bear) | Stippling and short flick strokes | Heavy body acrylic with no added water |
| Long fur (dog, wolf) | Liner brush sweeps and layered clumps | Fluid acrylic or slightly thinned heavy body paint |
| Coarse fur (bear, bison) | Dry brushing with impasto outer texture | Heavy body paint used directly from the tube |
| Fine fur (rabbit, kitten) | Soft glazing over smooth base washes | Glazing medium mixed with fluid acrylic |
Understanding what acrylic paint is at a material level matters here. Acrylic is pigment suspended in a polymer emulsion. Once dry, it becomes water-resistant and flexible, meaning you can layer over it without lifting previous fur strokes.
What Brushes Work Best for Painting Fur with Acrylic

Brush choice directly determines the type of fur mark available to you. The right brush for a bear’s coarse outer guard hair is wrong for fine facial fur around a cat’s eye. Using a single brush throughout is the second most common mistake in fur painting.
6 brush types handle the full range of fur rendering: fan, flat, round, filbert, chisel, and detail/liner. Most fur paintings use at least 3 of these across different stages (Learn My Craft, 2025).
Fan brush: broad fur mass strokes and dry brush texture passes. Best for background fur zones and coarse outer coats.
Liner/rigger brush: individual hair strands, whiskers, fine highlight passes. Load thinned paint and pull from root to tip in a single motion.
Filbert brush: mid-length fur and soft edge work. The oval tip blends while still leaving directional marks.
Flat brush: blocks in shadow masses before detail work begins. Also useful for glazing passes over dried fur layers.
Worn brushes often outperform new ones for fur work. Frayed, splayed bristles produce more natural broken marks than perfectly aligned new bristles (Jackson’s Art Blog, 2025).
How Brush Size Affects Fur Scale
Size determines whether your strokes read as individual hairs or fur masses. Get this wrong and the scale feels off even if the technique is correct.
- Size 10–14 flat or fan: background fur zones, large shadow blocks
- Size 6–8 filbert or round: mid-zone fur, layered midtone passes
- Size 2–4 round or liner: face fur, transitions around eyes and muzzle
- Size 0–1 liner: whiskers, final highlight strands, individual guard hairs
Scale consistency matters across the whole piece. Painting fine liner strokes on a large background fur zone looks wrong. Match brush size to the fur zone, not just to the subject size.
Synthetic vs. Natural Bristles for Fur Work
Synthetic brushes are the standard choice for acrylic fur painting. They hold up under repeated dry brush passes, clean easily, and their stiffness helps create the broken stroke effect that fur texture requires.
Natural hair brushes hold more water, which can be useful for glazing passes over dried fur layers. But they soften too easily for the scrubbing action dry brushing requires. Most working acrylic portrait painters use synthetic for dry brush and liner work, natural for soft glaze passes only.
What Acrylic Paints and Mediums Are Needed for Fur Texture

Paint viscosity and medium selection determine how your fur strokes behave on the canvas. Choosing the wrong consistency for the stage you’re in is a reliable way to ruin an otherwise solid technique.
| Paint / Medium | Use in Fur Painting | When to Use |
|---|---|---|
| Heavy body acrylic | Impasto texture and dry-brush strokes | Coarse outer fur and early texture-building layers |
| Fluid acrylic | Thin washes and fine liner-detail strokes | Underpainting and delicate hair passes |
| Glazing medium | Transparent layers over dry paint | Deepening shadows and shifting color temperature |
| Retarder medium | Extends acrylic drying time for blending | Soft-edged fur transitions and short fur blending |
Heavy body acrylics hold the largest share of the artist-grade acrylic market due to their ability to retain brushstrokes and create textured, sculptural finishes (Business Research Insights, 2024). That same quality makes them the default for dry brush fur work.
Fluid acrylics are too thin for dry brushing. They bleed into surface texture rather than catching only the raised peaks, which wrecks the broken stroke effect entirely.
The right acrylic mediums do more work than most painters give them credit for. A glazing medium mixed at roughly 3 parts medium to 1 part paint produces a transparent layer that shifts color temperature over dried fur without covering the stroke detail underneath.
Matte vs. gloss finish also affects perceived fur depth. Matte finish reduces surface glare and lets the layered stroke work read cleanly. Gloss finish picks up light and can make fur look wet or plastic. Most animal portrait painters default to matte or satin.
How to Prepare the Surface Before Painting Fur
Surface preparation is where most beginners lose control before they even pick up a brush. The wrong surface kills dry brush strokes. The right surface amplifies every technique you apply on top of it.
Textured canvas is the most common surface for fur painting. The weave catches dry brush strokes naturally and creates a built-in directional quality that smooth boards lack. Cold press watercolor paper works well for practice sessions since it has a defined tooth and acrylic adheres to it cleanly (russell-collection.com, 2025).
Surface options ranked by dry brush responsiveness:
- Textured canvas (linen or cotton): highest tooth, best dry brush catch
- Gessoboard or cradled panel: smoother, better for fine detail fur
- Illustration board with gesso: good mid-range tooth, affordable
- Cold press watercolor paper: good for practice, less durable
Multiple thin coats of gesso, sanded between layers, actually reduce surface texture. That is the wrong direction for fur work. Gesso should be applied in 1–2 coats max, brushed with visible strokes to preserve surface tooth.
Why a Toned Ground Matters for Fur
A toned ground is a mid-value base color applied before any fur work begins. It eliminates the problem of white canvas showing through thin fur strokes and unifying the painting before any marks are made.
Best toned ground colors for fur subjects: raw umber thin wash for brown/golden animals, grey-blue wash for white or black fur, yellow ochre wash for warm-toned coats.
The toned ground color directly affects all subsequent glazed layers. A warm umber ground under a white fur passage will push the shadow zones toward warm brown rather than cool grey. This is a decision, not an accident.
Mapping Fur Direction Before Painting
Sketch the fur direction map before applying any paint. This is a light pencil drawing that shows the growth direction across all fur zones of the subject.
Fur does not grow in one direction across the whole animal. It radiates outward from specific growth points, reverses direction at spine lines, and fans outward around facial features. Painting without this map produces a flat, incorrect result regardless of technique quality.
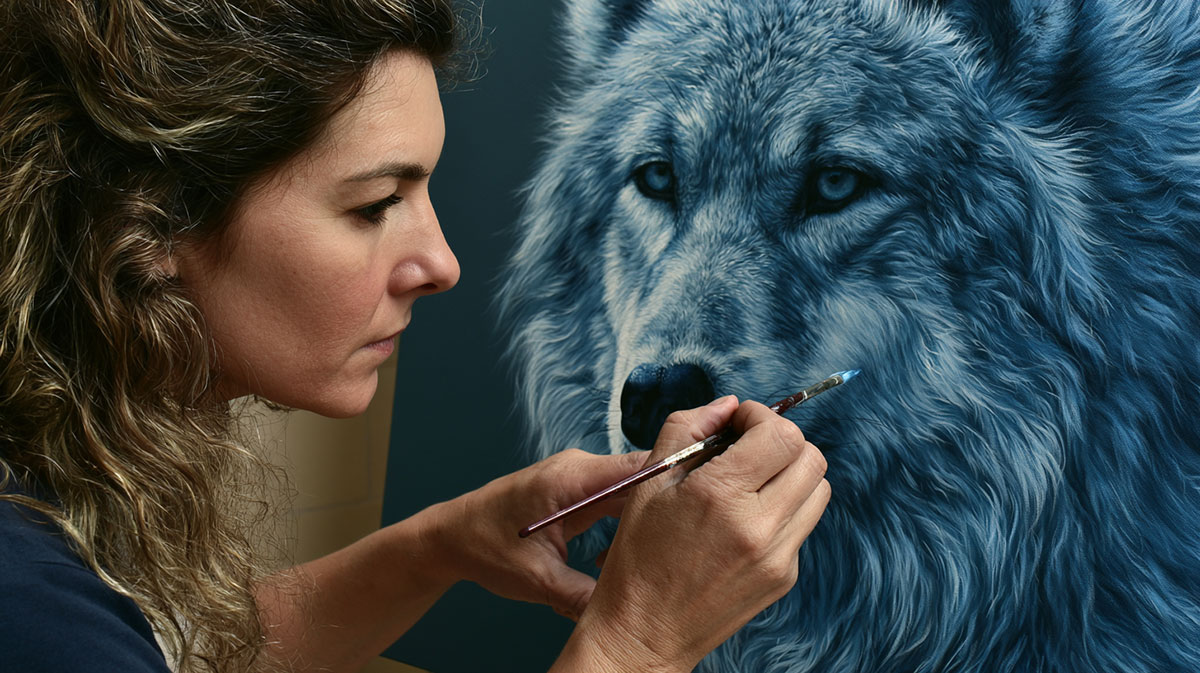
Transfer the direction map to the toned canvas using thinned burnt umber. Keep the lines faint. They will be covered by paint layers but serve as a guide throughout the painting process. Transferring the drawing accurately is especially useful for complex subjects like wolves or long-haired dogs.
How to Build a Base Layer for Fur with Acrylic
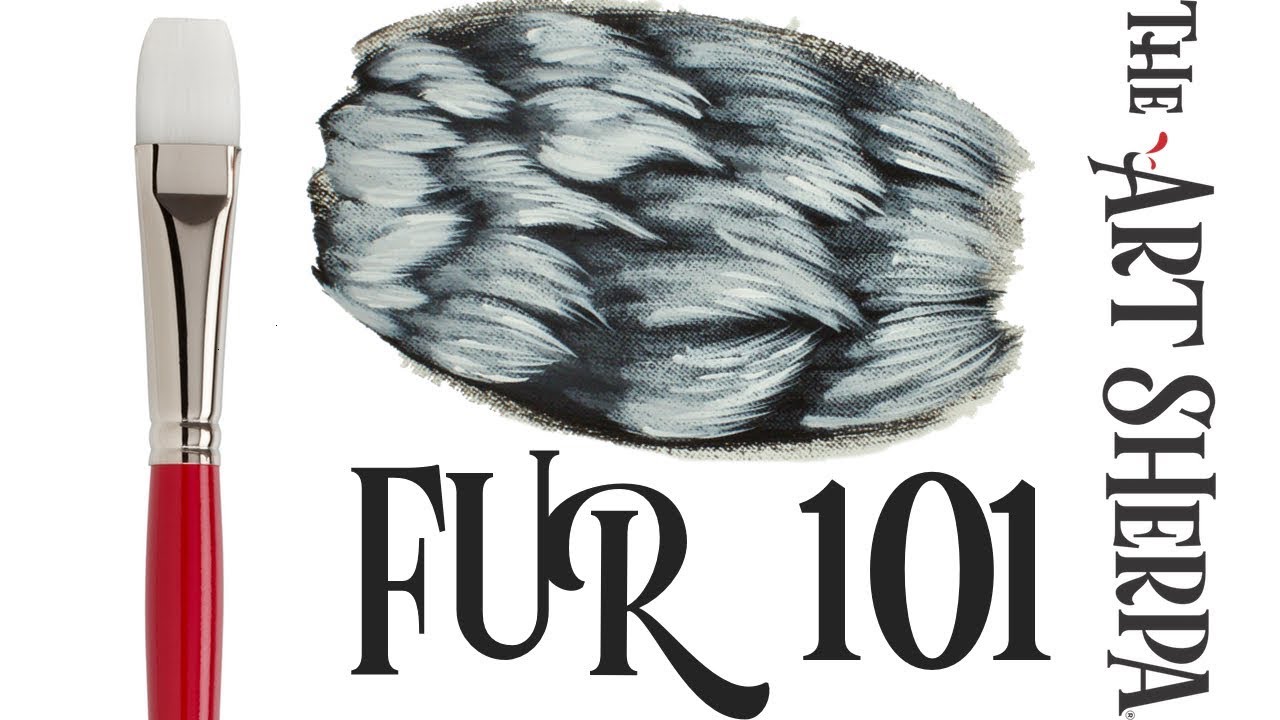
The base layer establishes 3 tonal zones: shadow, midtone, and highlight. Every subsequent fur pass refines these zones. Skipping this stage and going straight to detail strokes is the main reason fur paintings look overworked and muddy.
Start with shadow shapes. Block them in as flat color masses using a filbert or flat brush. Do not add any stroke detail yet. The goal at this stage is correct tonal value placement, nothing else.
Base layer color sequence:
- Shadow masses first, using darkest mixed tone (no pure black)
- Midtone over shadow edges to create soft transitions
- Highlight zones blocked in with lighter midtone only, no white yet
Pure black in shadow zones is a consistent mistake. Black fur is not black. It uses dark blue-grey in shadow areas and warm grey in highlight zones. A mix of ultramarine blue and burnt umber produces a rich dark that reads as black without killing color temperature.
The base layer color affects all glazed layers applied on top. A cold blue-grey base under a golden fur coat will keep shadows cooler and highlights warmer, which is exactly what realistic fur color temperature requires. This relationship between base and glaze is why underpainting matters in animal portrait work.
Identifying the 3 Tonal Zones in Fur
Every fur subject has 3 tonal zones that follow the form of the animal’s body and the direction of the light source.
Shadow zone: darkest values, deepest inside the fur mass, away from the light source. Cool temperature. Use transparent glazes here, not opaque paint.
Midtone zone: the largest zone. This is where most fur strokes live. Warm to neutral temperature. Applied in multiple passes with directional strokes following the growth map.
Highlight zone: where light catches the top of guard hairs directly. Warm to near-white temperature. Applied last, with a liner brush or dry fan pass using near-opaque paint.
The light source in the reference photo determines where each zone falls. A top-left light source pushes highlights to the upper left of every fur mass and shadows to the lower right. Consistent light source direction is what makes fur read as three-dimensional form.
How to Paint Fur Direction and Stroke Technique
Stroke direction is the most important technical decision in fur painting. Correct direction produces anatomy. Incorrect direction produces texture without form.
Fur follows anatomical growth patterns specific to the animal. It does not travel in one direction uniformly across the body. On a dog or cat, fur radiates outward from a central spine line, fans around the muzzle, and reverses direction at limb joints. Painting all strokes in the same direction is one of the 5 most common errors in fur work.
Short flicking strokes from root to tip, varying pressure mid-stroke to taper the end of each hair, produce the most convincing fur marks. Drag from the base of the hair toward the tip. Release pressure at the end of the stroke. The resulting taper matches the natural thinning of a hair shaft.
How to Paint Short Fur vs. Long Fur
Short fur and long fur use different stroke vocabularies. Mixing them incorrectly on the same subject flattens the texture.
Short fur (cat, bear, short-haired dog):
- Tight stippling for initial texture pass
- Small flick strokes 3–6mm long
- High stroke density, overlapping layers
- Dry brush for highlight pass
Long fur (golden retriever, wolf, horse mane):
- Sweeping liner strokes following growth direction
- Hair clumping logic: groups of 4–8 hairs moving together
- Overlap strokes to build depth between clump layers
- Longer dry brush passes for highlight
The stippling technique works well for short, dense fur zones. A stiff round brush creates small packed marks that read as tight undercoat texture when viewed from a normal viewing distance.
How to Paint Fur Around Facial Features
Fur direction around the face follows radial patterns. Strokes radiate outward from the nose and eyes like compass lines.
Around the eye socket, fur fans outward and slightly downward following the orbital bone. Strokes here should be shorter and denser than the body fur. Getting this wrong makes the face look pasted onto the body rather than continuous with it.
Muzzle zone: short, tight strokes pointing downward and outward. Hard edges between the muzzle and surrounding fur zones. The nose leather itself has no fur and should read as a smooth, slightly reflective surface against the textured fur surrounding it.
The area directly around the eye is where the liner brush earns its place. Fine strokes pointing away from the eye socket in all directions, varying from 2mm to 8mm in length, produce the subtle framing that makes animal eyes look embedded in fur rather than floating on the surface.
How to Layer Color for Realistic Fur Depth
Color depth in fur is the product of multiple transparent layers interacting, not a single opaque coat. A realistic fur passage typically takes 3 to 5 glaze passes after the base layer, each one refining tonal value and color temperature.
Glazing is the technique that handles this. A transparent layer of paint mixed with glazing medium is applied over a fully dried fur layer. It shifts color without covering the stroke detail underneath. The underlying layers interact with the glaze color, producing richness that a single opaque application cannot replicate.
Build darker tones into shadow zones first. Apply the glaze, let it dry fully (minimum 20 minutes for thin fluid layers), then assess. Add a second shadow glaze if the depth is not sufficient before moving to midtones. Moving to highlights before shadows are deep enough is a reliable way to produce flat fur.
Color Temperature in Fur Shadows and Highlights
Color temperature shifts between shadow and highlight zones are what separate convincing fur from flat texture.
Shadows run cool. A mix of ultramarine blue and raw umber dark creates a cool shadow tone for most fur colors. Apply this as a transparent glaze into shadow zones rather than as opaque paint.
Highlights run warm. Mix titanium white with a warm local color (yellow ochre for brown fur, cadmium orange for golden fur, raw umber for grey fur) to keep highlights from looking chalky. A highlight that is simply lighter than the midtone without a temperature shift will flatten rather than lift the fur.
Realistic Acrylic Portrait School (2024) notes this directly: cool tones in shadowed areas balance the warmth of highlights, and the interplay between them creates the depth that makes animal fur read as three-dimensional form.
How Many Layers Build Realistic Fur
Layer 1: toned ground, sets the base temperature across the whole piece.
Layer 2: shadow mass blocking, flat color with no stroke detail yet.
Layer 3: midtone fur strokes, first directional pass with the fan or filbert brush.
Layer 4: shadow glaze, transparent cool tone pushed into shadow zones to deepen value.
Layer 5: midtone refinement pass, short directional strokes over the dried glaze.
Layer 6+: highlight application with liner brush, fine strand work, whiskers if applicable.
The layering process in acrylic is iterative, not linear. Moving back and forth between shadow and midtone passes is normal and produces better results than completing each zone once and moving on.
How to Paint Fur Highlights and the Top Light Pass
The highlight pass is the last major stage before whisker detail. Get it wrong and the whole fur passage flattens. Get it right and individual guard hairs separate from the fur mass, and the surface reads as lit.
Pure titanium white straight from the tube is the wrong starting point for most fur highlights. A highlight mixed from titanium white plus a small amount of the local fur color stays optically connected to the rest of the coat. Pure white on brown fur reads as chalk, not light (Bex Art Educator, 2025).
Dry brush is the correct application method for the broad highlight pass. Load a fan or flat brush with a minimal amount of near-opaque highlight mix, wipe most of it off on a paper towel, and drag lightly across the fur mass. The bristles deposit color only on raised texture peaks, leaving the shadow valleys untouched.
Reserve pure titanium white for 3 specific zones: the nose leather edge, the ear rim catching direct light, and whiskers. Applying it anywhere else flattens rather than lifts the surface.
How to Paint Individual Strand Highlights
Individual strand highlights come after the dry brush pass, not before. The dry brush establishes the overall highlight mass. The liner brush adds the specific hair-level detail on top of it.
Load the liner brush with thinned highlight mix. Pull from root to tip in a single stroke, releasing pressure at the end to taper. Do not go back over the stroke while wet. A second pass while wet smears the edge and loses the taper.
Studio Wildlife (2023) notes that highlight placement on dog portraits requires careful observation of the reference photo. Blue-grey reflections from a sky overhead appear on the upper surface of dark fur. Those reflected color shifts make highlights read as environmental rather than painted on.
Avoiding Overworked Highlights
Overworked highlights are the most common finish-stage mistake in fur painting. The signs are flat texture, chalky tone, and individual strokes that no longer read as separate hairs.
The fix: stop. Let the passage dry fully (minimum 30 minutes for thin layers). Apply a thin transparent glaze of the midtone color over the overworked zone. This pushes the muddy highlights back into the fur mass. Once dry, reapply a single dry brush pass and 3 to 5 individual liner strokes. No more.
Overblending is the leading cause of lost texture in acrylic fur work. Going back over areas too many times removes the directional quality of the strokes and makes the surface look uniform (Art Shed, 2026).
What Colors to Mix for Common Fur Types
No fur color is achieved with a single tube paint. Every realistic fur coat requires a mixed shadow tone, a mixed midtone, and a mixed highlight. The relationships between those 3 values determine whether the fur reads as a specific animal or as generic brown texture.
Titanium White is the most common mixing base for highlights. Zinc White is more transparent and works better for subtle glaze highlights where opacity would cover the stroke detail underneath (Cowling and Wilcox, 2025).
| Fur Type | Shadow Mix | Midtone Mix | Highlight Mix |
|---|---|---|---|
| Black fur | Ultramarine Blue + Burnt Umber | Payne’s Grey + Titanium White | Cool blue-biased grey |
| White fur | Raw Umber + Ultramarine Blue | Titanium White + Buff Titanium | Near-pure Titanium White |
| Brown / tabby fur | Burnt Umber + Black | Raw Sienna + Yellow Ochre | Yellow Ochre + Titanium White |
| Golden / red fur | Burnt Sienna + Alizarin Crimson | Raw Sienna + Cadmium Orange | Cadmium Yellow + Titanium White |
Never use pure black in any fur shadow zone. Pure black kills color temperature and makes fur look painted rather than natural. A mix of ultramarine blue and burnt umber produces a rich dark that reads as black while staying optically alive (Studio Wildlife, 2023).
How to Mix Grey Fur Tones
Grey fur is not simply black plus white. That mix produces dead, chalky tones that flatten immediately.
Warm grey: titanium white + raw umber + touch of yellow ochre. Use in midtone zones and warm-lit areas.
Cool grey: titanium white + paynes grey + touch of ultramarine blue. Use in shadow zones and areas reflecting sky or cool ambient light.
Studio Wildlife (2023) notes it is common to introduce subtle lilac and blue tints into white and grey fur when the reference photo was taken in open shade. The reflected environmental color is what makes grey fur read as believable rather than flat.
How to Mix Black Fur Without Losing Color Temperature
Black fur has 3 distinct visible zones when lit correctly: warm brown midtones, cool blue-grey highlights, and deep cool shadows.
For the midtone pass, mix burnt umber with a small amount of yellow ochre. For highlights, bias the grey toward ultramarine blue, not toward neutral. For deep shadows, push prussian blue into the shadow mix to add depth without losing the black quality (Studio Wildlife, 2021).
The reflected color in black fur changes based on the environment. Green grass reflects into lower zones. Blue sky reflects onto upper surfaces. Identify those reflected color zones in the reference photo before mixing the highlight colors.
How to Paint Fur Texture on Different Animal Subjects
The core technique stays the same across subjects. What changes is stroke length, density, clumping logic, and how much surface texture variation exists within a single animal’s coat.
Acrylic resin holds a 36.26% share of the broader paints and coatings market in 2024, partly because of its superior color retention across multiple layered passes (William Tucker Art, 2025). That color stability is especially useful in multi-session animal portrait work where layers build across days.
How to Paint Cat Fur in Acrylic
Cat fur is short, directional, and dense. The individual hairs are fine enough that the liner brush is not the primary tool. Most of the cat fur texture comes from the stippling and short-flick passes in the midtone stage.
- Stroke length: 3–5mm per flick stroke in body fur zones
- Higher stroke density than dog or bear fur
- Radial stroke direction around eyes, tighter than most subjects
- Tabby markings painted as stripe-shaped shadow masses before fur strokes
The cat painting process rewards patience in the early blocking stage. Getting the stripe or marking placement right before any texture work begins saves significant correction time later.
How to Paint Dog Fur in Acrylic
Dog fur varies more across breeds than any other common fur subject. A Labrador’s short dense coat uses different strokes than a Golden Retriever’s long wavy coat or a Poodle’s tight curls.
Short-haired breeds (Labrador, Boxer): tight stippling, small flat brush passes, dry brush highlight. Similar to cat but with larger stroke zones.
Long-haired breeds (Golden Retriever, Border Collie): sweeping liner strokes following hair clump direction, glazed shadow depth between clumps, dry brush highlight across clump peaks.
Studio Wildlife (2023) uses burnt umber as the base color for most brown dog breeds, adjusting toward carbon black for darker tones and titanium white plus yellow ochre for lighter zones. Pre-mixing a 5-value tonal string before starting saves correction time mid-painting.
How to Paint Whiskers on Fur Subjects
Whiskers are the last element applied. Painting them too early means subsequent fur layers cover or interrupt them.
Load a liner brush with thinned titanium white. A consistency close to ink works best: fluid enough to flow in a single pull, thick enough to stay opaque on the first pass.
Pull from the muzzle outward. Taper by releasing pressure at the end of the stroke. Real whiskers are thicker at the base and taper toward the tip. A uniform-width whisker looks painted on. Add 2 to 3 slightly curved whiskers per side, varying length and angle. Do not make them parallel.
What Mistakes to Avoid When Painting Fur with Acrylic

Overblending is the leading technical error in acrylic fur work. Going back repeatedly over wet strokes removes directional texture and produces a flat, uniform surface that reads as blurred rather than furry (Art Shed, 2026).
Relying on black for shadows is the second most consistent problem. It flattens color temperature and disconnects shadow zones from the rest of the tonal structure. Build shadows from mixed darks, not tube black (Art Shed, 2026).
5 technical errors that flatten fur passages:
- Painting all strokes in one uniform direction across the whole subject
- Overblending fur edges until stroke identity disappears
- Using tube black undiluted in shadow zones
- Applying highlights before shadow layers are fully dry
- Making all hair strands the same length, thickness, and spacing
Jumping into fine detail before the underlying structure is solid is a separate problem. Individual hair strokes applied over a poorly blocked base do not rescue a weak foundation (Penny Apple Studio, 2024).
Why Fur Direction Errors Are Hard to Fix
Incorrect stroke direction is the hardest fur mistake to correct because it is embedded in the midtone layer, not the surface. Overpainting it requires rebuilding from that layer outward.
The most practical correction is to let the passage dry, apply a thin glaze in the correct shadow tone, then repaint the midtone and highlight passes with corrected stroke direction. This works if caught at the midtone stage. At the final highlight stage, the options narrow.
Prevention is the only reliable approach. Sketch the fur direction map before painting and refer to it at every stage. Deviating from it mid-painting is what causes most directional errors.
The Problem with Early Highlighting
Applying highlights before shadow glazes are fully dry produces muddy, washed-out results. The highlight color mixes into the wet glaze below, losing the clean value separation that makes fur look dimensional.
Acrylic dries faster than most painters expect in thin fluid layers (20 to 30 minutes). Thicker heavy body layers need 45 to 60 minutes before a glaze or highlight pass is safe. The impatience-driven impulse to move forward too quickly is the direct cause of most highlight errors (Dabble in Color, 2025).
How to Fix and Rework Acrylic Fur Passages
Acrylic is more forgiving than oil for reworking. The fast dry time that makes blending tricky is the same property that lets you paint over and correct in the same session.
The most straightforward correction method: identify the problem zone, let it dry fully, paint over it with an opaque color that matches the surrounding area, rebuild the texture strokes on top. Use artist-grade rather than student-grade paint for coverage corrections. Student-grade acrylics have lower pigment load and often cannot fully cover what’s beneath (Painting Gal, 2023).
How to Recover an Overworked Fur Zone
Signs of overworking: dull muddy colors, stroke detail lost, surface looks uniform rather than textured.
Step 1: stop entirely and let the zone dry for at least 30 minutes.
Step 2: apply a thin transparent glaze of the midtone shadow color over the whole overworked area. This unifies the muddy surface under a coherent color layer.
Step 3: once the glaze dries, re-establish directional fur strokes with a dry brush midtone pass. Keep it light.
Step 4: add 4 to 6 liner highlight strokes in the correct growth direction. Stop there.
When to Paint Out a Zone Completely
Glazing and reworking works for passages that are muddy but structurally correct. When the stroke direction is fundamentally wrong across a whole zone, or when the tonal values are far from the reference, painting out is faster.
Apply an opaque layer of the base midtone color over the problem zone. Use heavy body paint straight from the tube for maximum coverage. Let it dry until fully matte, then rebuild from the base layer forward using the correct stroke direction map.
Artists who use standard painting correction methods approach this stage the same way across mediums: assess the zone objectively, decide whether to adjust or rebuild, and commit to one path rather than switching between both mid-correction.
Gessoing over a completely failed canvas is always an option. Wait at least a week after painting before applying gesso to allow moisture to escape, which improves adhesion of the new ground layer (Painting Gal, 2023).
FAQ on How To Paint Fur With Acrylic
What brushes work best for painting fur with acrylic?
A fan brush handles broad fur texture passes. A liner brush pulls individual hair strands. A filbert blends mid-zone fur edges. Most animal portrait painters use all three across different stages rather than relying on one brush throughout.
Do I need to use a medium for acrylic fur painting?
A glazing medium mixed with paint at roughly 3:1 creates transparent layers that deepen shadow zones without covering stroke detail. Retarder medium slows drying time for short fur blending. Neither is required, but both reduce common layering mistakes.
What is the dry brush technique for fur texture?
Dry brushing uses a stiff brush loaded with a minimal amount of heavy body acrylic, wiped mostly dry on paper towel, then dragged lightly across the canvas. Bristles deposit color only on raised texture peaks, creating broken marks that simulate fur.
How many layers does realistic fur need?
Realistic fur typically takes 3 to 5 passes after the base layer: shadow blocking, midtone fur strokes, shadow glaze, midtone refinement, then highlights. Each layer must dry fully before the next. Skipping drying time muddies color temperature and flattens stroke detail.
How do I paint black fur without it looking flat?
Never use pure black. Mix ultramarine blue with burnt umber for deep shadows. Add cool grey highlights biased toward blue. Identify reflected environmental colors in the reference photo and introduce them into midtone and highlight zones for a natural result.
What colors do I mix for white fur?
White fur is never pure white. Mix raw umber with ultramarine blue for shadow zones. Use titanium white plus buff titanium for midtones. Reserve near-pure titanium white for the final highlight pass on ear rims, nose edges, and whiskers only.
How do I paint fur direction correctly?
Sketch a fur direction map before applying any paint. Fur radiates from specific growth points, reverses at spine lines, and fans around facial features. Painting all strokes in one direction ignores anatomy and produces texture without form, regardless of technique quality.
How do I fix overworked or muddy fur?
Stop and let the area dry fully. Apply a thin transparent glaze of the midtone shadow color over the muddy zone. Once dry, re-establish directional strokes with a light dry brush pass, then add 4 to 6 liner highlight strokes. Stop there.
What surface is best for painting fur with acrylics?
Textured canvas gives the best dry brush response because the weave catches broken strokes naturally. Gessoboard suits fine detail fur work. Apply 1 to 2 coats of gesso only. Over-gessoing reduces surface tooth and kills the broken stroke effect entirely.
How do I paint whiskers in acrylic?
Apply whiskers last. Load a liner brush with thinned titanium white to an ink-like consistency. Pull from the muzzle outward in one stroke, releasing pressure at the tip to create a natural taper. Vary the length and angle. Never paint them parallel.
Conclusion
This conclusion is for an article presenting how to paint fur with acrylic as a structured, learnable process rather than a mysterious skill.
The fundamentals are consistent: a toned ground, correct fur stroke direction, layered color depth, and a controlled highlight pass.
Color mixing matters as much as technique. Whether you are working with short tabby fur, long golden coat, or dense black guard hair, the same principle applies: build from mixed darks, push color temperature between shadow and highlight zones, and avoid pure black entirely.
Mistakes are fixable. Transparent glazes recover muddy passages. Dry brush passes restore lost texture.
Practice the layering sequence on scrap canvas before committing to a full portrait. The process becomes faster each time.