
Hair is the part of a portrait that most beginners dread and most viewers notice first.
Learning how to paint realistic hair with acrylic is less about painting every strand and more about understanding value structure, directional brushwork, and layering in the right sequence.
Acrylic’s fast drying time makes it one of the most practical mediums for this kind of detail work. Each layer locks in quickly, so shadow glazing, mid-tone blocking, and strand detail can all build on each other without mudding the previous pass.
This guide covers everything from brush selection and color mixing for different hair types to highlight placement, edge control, and the most common mistakes that make painted hair look flat.
What Makes Hair Look Realistic in Acrylic Painting

Realistic hair in acrylic painting comes down to one thing: value variation, not strand count. Most beginners reach for a liner brush too early, chasing individual hairs before they’ve built any underlying structure.
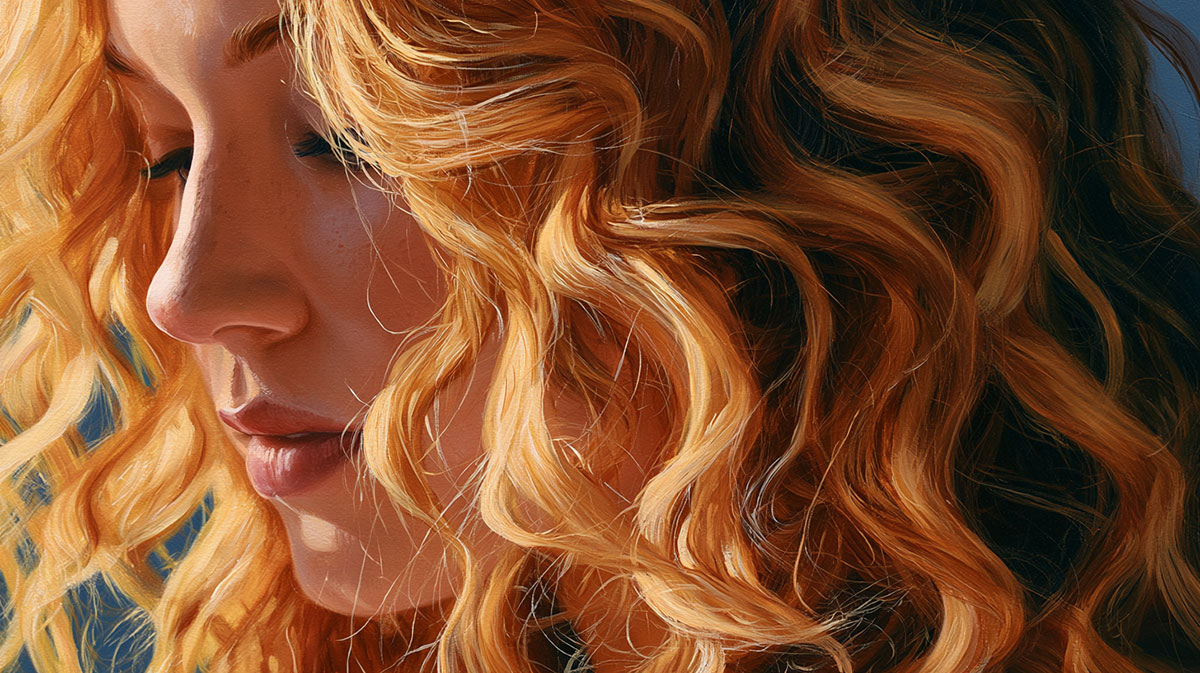
Hair that reads as flat has uniform color throughout. Real hair doesn’t. It shifts from warm shadows at the roots to cooler mid-tones through the body, then picks up warm reflected light at the crown.
There are 5 visual properties that separate convincing hair from decorative brushwork:
- Value contrast between shadow zones, mid-tones, and highlights
- Directional flow that follows the hair’s actual growth pattern
- Transparent shadow layers underneath opaque light passages
- Edge variation, some sections sharp, others soft and lost
- Hair mass groupings treated as shapes, not collections of lines
The global artist-grade acrylic paints market reached USD 0.47 billion in 2024, growing at a 4.6% CAGR through 2033 (Business Research Insights). Acrylic’s fast drying time and layering flexibility make it one of the most used mediums for portrait painting techniques that require controlled detail work.
Kehinde Wiley, known for his large-scale portrait work, consistently demonstrates how hair mass groupings read first from a distance before any strand detail becomes visible. That sequencing, mass before line, is the foundation of every convincing hair painting.
| Visual Property | What It Controls | Most Common Mistake |
|---|---|---|
| Value contrast | Depth and three-dimensionality | Too narrow a value range |
| Color temperature | Light vs. shadow believability | Same temperature throughout |
| Directional stroke | Movement and flow | Random stroke direction |
| Edge control | Hair-to-background transition | All hard edges, no variation |
Understanding what value means in painting is the single most useful concept before picking up any brush for hair work. Get the value structure right and the hair will read as real even with minimal strand detail.
Why Hair Painted Strand-by-Strand Looks Wrong
The core problem: painting individual hairs without underlying mass first produces something that looks like a wire drawing, not hair.
Hair exists in groups. Those groups catch light as unified shapes. Painting every strand as a separate line treats hair like a collection of objects rather than a surface with texture and form.
Fix it by building 3 distinct value layers first, dark base, mid-tone blend, light passages, before any liner brush work begins. Strand detail added on top of a solid value foundation reads as real. Strand detail added onto a flat base reads as decoration.
How Color Temperature Affects Hair Realism
Warm light sources produce cool shadows in hair. Cool light sources produce warm shadows. Most beginners ignore this entirely and mix all hair tones in the same color temperature, which flattens everything out.
In practice: if the light hitting the hair is warm (afternoon sun, tungsten light), the shadow zones in the hair need a cooler bias. Payne’s grey and ultramarine blue both push shadows cooler without going muddy.
This temperature shift is what gives hair its internal luminosity. Without it, even perfectly placed highlights look stuck on rather than integrated.
What Brushes Work Best for Painting Realistic Hair
The artist brush market was valued at USD 4.2 billion in 2024, with synthetic hair holding the largest share at 40% of all brush types used (Verified Market Reports). For acrylic hair painting specifically, 3 brush shapes do the majority of the work.
| Brush Type | Primary Use in Hair | Best Size Range |
|---|---|---|
| Fan brush | Broad hair mass strokes, soft highlights | Size 4–6 |
| Liner / rigger | Individual strand detail, flyaways | Size 0, 00, 000 |
| Filbert | Mid-section blending, transitions | Size 4–8 |
Most artists working on hair in acrylic use these 3 brush types in sequence. Fan brush first, filbert to blend and transition, liner brush last for strand detail and edge work.
For a deeper look at how each shape functions, different types of paintbrushes covers the full range of shapes and their applications across painting styles.
Fan Brush Techniques for Hair Masses

Load the fan brush lightly. Too much paint produces clumped, heavy strokes. The goal is a dry, feathered application that suggests multiple strands moving together.
Pull the fan brush in the direction of hair growth. Rotate the angle slightly at the ends of each stroke to follow curves. This single technique, directional fan brush strokes with light paint load, builds more convincing hair texture than any other method at this stage.
Firm-bristled fan brushes produce more visible individual stroke marks. Soft synthetic fans produce smoother, more blended results. Match the brush stiffness to the hair type being painted.
Liner Brush Control for Fine Strands
The liner brush (also called a rigger brush) only works well when loaded with thinned paint. Too thick and the stroke is uneven; too watery and it bleeds.
The right consistency: paint diluted to about the thickness of ink. The brush should deposit a continuous line without skipping or pooling.
Apply liner strokes with tip-only contact, not the full length of the brush. Start each stroke at the root end and pull toward the tip, following the hair’s natural growth direction. Vary pressure mid-stroke to produce natural width variation. A strand that stays the same width from root to tip looks mechanical.
Understanding what a liner brush is and how it differs from a round brush helps significantly before starting detail work.
What Acrylic Colors Are Used to Paint Realistic Hair

Every hair color mix needs 3 distinct targets: a shadow color, a mid-tone base, and a highlight color. Mixing only one color and adding white or black to adjust it is the fastest route to chalky, flat hair.
Color temperature must shift across those 3 targets. The shadow color carries a cool bias. The mid-tone sits neutrally. The highlight pulls warm, never pure titanium white.
Learning how to mix acrylic paint properly before starting hair work saves a lot of frustration mid-painting. Getting the mixes ready in advance, all 3 value targets per hair color, keeps the painting process moving without stopping to remix.
Mixing Hair Colors for Dark Hair
Dark hair is not black. Painting it with ivory black or carbon black alone produces a flat, dead result with no depth.
Better dark hair base: raw umber dark mixed with ultramarine blue. This combination reads as deep, rich black but retains enough transparency for glazing. For the shadow zones, push the mix cooler with more ultramarine. For mid-tones, shift toward raw umber. For highlights, use a warm dark such as burnt sienna or transparent red oxide, not white.
Payne’s grey works well as an alternative base. It reads cooler and slightly more blue than ivory black, which gives dark hair a more natural appearance in standard daylight conditions.
Mixing Hair Colors for Light and Blonde Hair
Blonde hair is one of the trickier hair colors in acrylic. The value range is narrower than dark hair, so any mistake in highlight placement or color temperature becomes immediately obvious.
Base mix for blonde: yellow ochre, raw sienna, and titanium white in varying proportions. The shadow areas push toward raw umber or even a touch of dioxazine purple to cool them down. The highlight areas use yellow ochre mixed with titanium white, never pure white alone.
Pure titanium white highlights on blonde hair look chalky and disconnected. The warm tint in yellow ochre keeps the highlight integrated with the rest of the hair color.
Mixing Hair Colors for Red and Auburn Hair
Red hair has the widest color temperature variation of any hair type. The shadows shift toward deep burgundy or cool maroon. The mid-tones sit in the orange-red range. The highlights push toward bright copper or even a warm peach.
Core mixes:
- Shadow: alizarin crimson plus burnt umber
- Mid-tone: cadmium red medium or transparent red oxide
- Highlight: cadmium orange mixed with yellow ochre and a small amount of titanium white
The shift from cool shadow to warm highlight in red hair is more dramatic than in any other color, which is exactly what makes it look alive. Flattening that temperature shift produces hair that reads as brown rather than red.
How to Block In Hair Masses Before Adding Detail
Blocking in the hair mass first is the step most beginners skip, which is exactly why their hair ends up overworked. Detail added without an underlying structure has nowhere to land.
The block-in establishes the light source direction, the value structure, and the major shape divisions of the hair before any strand work begins. Everything painted on top of it is refinement, not construction.
The online art courses market reached USD 2.34 billion in 2024, growing at 11.2% CAGR through 2033 (Business Research Insights). Most structured acrylic painting courses place the hair block-in as a dedicated session before any detail work, which reflects how foundational this step actually is.
Establishing the Light Source and Value Map
Before applying any paint, identify 3 zones across the hair mass: shadow zone, mid-tone zone, and light zone.
Mix a diluted mid-tone and apply it across the entire hair area first. This establishes a base that subsequent layers sit on without contaminating the canvas color. While this layer is still workable, deepen the shadow zones with a transparent dark glaze. Let dry completely before proceeding.
The light source direction must be decided at this stage and kept consistent through every subsequent layer. Changing the light direction mid-painting after the block-in is in place produces contradictions in the highlight and shadow placement that are very difficult to correct.
Understanding how light source works in composition before the block-in makes this step significantly more controlled.
Soft Edge vs. Hard Edge Zones in the Block-In
Not all areas of the hair block-in use the same edge quality. Soft edges belong where the hair meets other hair or soft background areas. Hard edges belong where hair meets contrasting backgrounds or where sharp light hits a curved surface.
Use a clean damp filbert to soften edges while the paint is still workable. Hard edges can be created on dry paint by cutting back in with the background color. Planning which edges are soft and which are hard during the block-in stage prevents overworking later.
How to Paint the Hair’s Shadow and Depth Layers
Shadow layers in hair do one job: create the illusion that some hair sits behind other hair. Without convincing shadows, the hair reads as a flat surface rather than a three-dimensional mass.
The key technique is glazing in acrylic painting: applying thin, transparent dark layers over dry paint to deepen value without losing the texture underneath.
Building Depth Through Transparent Glazing
A glaze for hair shadows uses paint diluted with an acrylic glazing medium, not water alone. Water reduces viscosity but also reduces adhesion and can cause lifting of previous layers. Glazing medium maintains the paint film integrity while keeping the layer transparent.
Glaze color for shadows: burnt umber, raw umber, or a mix of burnt umber with ultramarine blue for cooler hair types. Apply with a soft flat or filbert brush using light, even strokes. Let each glaze layer dry fully before adding another.
3 to 4 glaze passes over the shadow zones produce the kind of depth that makes hair look like it recedes into itself. 1 glaze pass looks like a tint. Multiple passes build genuine value depth.
Where Shadow Falls in Hair
Shadow placement follows the hair’s physical structure, not random instinct. 4 consistent shadow locations appear in nearly every hair type:
- At the roots, where the scalp transitions into hair growth
- Under layered sections, where one group of hair sits over another
- Behind the ears and at the neckline where hair meets skin
- In concave curves within the hair’s overall shape
Getting these 4 locations right produces a structurally accurate shadow map that makes subsequent highlight and detail work much more effective.
The concept connects directly to chiaroscuro in painting, the system of managing light and dark to produce three-dimensional form. Hair shadow work is chiaroscuro applied at a small scale, but the same principles govern both.
How to Paint Individual Hair Strands with Acrylics

Strand work is the last layer, not the first. Applied on top of a solid value structure, individual strands add texture and realism. Applied over a flat base, they look like decorative lines.
The sequence matters: dark strands first, mid-tone strands second, light strands last. Each pass builds on the one before it.
Stroke Direction and Growth Pattern
Every stroke must follow the hair’s natural growth direction. This sounds obvious, but it’s the most commonly violated rule in hair painting. Strokes that cross the growth direction or run parallel to each other without following the hair’s curve produce a rigid, uniform texture.
Map the growth direction before starting strand work. On curly hair, the growth direction curves. On straight hair, it flows from root to tip in a mostly linear path. On wavy hair, the direction shifts in a series of arcs. Identify this direction first and commit to it.
The liner brush follows the direction of hair growth through the full length of each stroke. Start each stroke at the root, apply pressure at the beginning, and ease off as the stroke reaches the tip. This produces a tapered end that reads as a natural hair tip.
Layering Strands in Sequence
Dark strands go first. Mix the shadow color slightly darker than the shadow zones already established in the block-in. Apply these strands into the darker areas of the hair mass. They establish the deepest, most recessed individual hairs.
Mid-tone strands come second. These sit through the body of the hair, slightly lighter than the dark strands. They bridge the shadow layer and the upcoming highlights.
Light strands go last. These pick up the highlight color, the warmest and lightest value in the hair. Apply them sparingly, only where the light source would realistically catch individual hairs. Over-applying light strands kills the contrast and makes the hair look bleached.
The total strand count should feel like enough detail without being exhaustive. I’ve seen paintings where every visible hair was rendered individually and the result looked more like a technical drawing than a portrait. 20 well-placed strands read better than 200 mechanical ones.
This layering approach is a specific application of layering in acrylic painting, where each pass builds on the last to create depth that a single application can’t achieve.
How to Paint Hair Highlights That Look Natural
Hair highlights done wrong look like white lines sitting on top of the painting. Done right, they look like light hitting a curved, reflective surface. The difference is color temperature, placement, and the 2-stage application process.
Pure titanium white is almost never the right highlight color for hair. It reads as chalky and disconnected from the rest of the hair’s color family. The highlight color should contain a warm tint that connects it to the overall hair color temperature.
Highlight Placement and the Crown Rule
Hair highlights follow the curve of the head and the direction of the light source. On most portraits, the highest-value highlight sits at the crown of the head, where the hair curves over the skull’s uppermost point and catches the most direct light.
Secondary highlights appear along other curved surfaces where light grazes the hair’s outer edge. These are typically narrower and slightly lower in value than the crown highlight.
Placement errors to watch for:
- Highlights placed flat across the hair with no connection to the head’s curved form
- Multiple highlights of equal value with no clear primary source
- Highlight positioned where the light source couldn’t realistically reach
The logic here connects directly to understanding the value scale in art. The highlight is the top of that scale. Everything else in the hair should be lower in value, with clear gradation from the darkest shadow to the brightest light.
The Two-Stage Highlight Process
Stage 1 is a broad, soft highlight area applied with a dry fan brush over the lightest zone of the hair. This creates a diffused glow, the soft ambient lift of light across the hair’s surface. The color is the highlight mix but kept slightly lower in value at this stage.
Stage 2 is the sharp accent. After Stage 1 is dry, use a liner brush loaded with the full-value highlight color to add 5 to 10 precise, narrow strokes directly onto the brightest point of the hair. These strokes follow the growth direction and taper at both ends.
This 2-stage process produces a highlight that has both glow and crispness. A single hard highlight line without the soft underlayer behind it looks stuck on. The soft glow first, accent strokes second, is what integrates the highlight into the painting surface.
The soft-to-hard progression also applies to the broader concept of contrast in painting. The sharpest contrast in the painting should be at the lightest highlight against the adjacent mid-tone, and managing where that peak contrast sits controls where the viewer’s eye goes first.
How to Paint Hair Edges and Flyaways
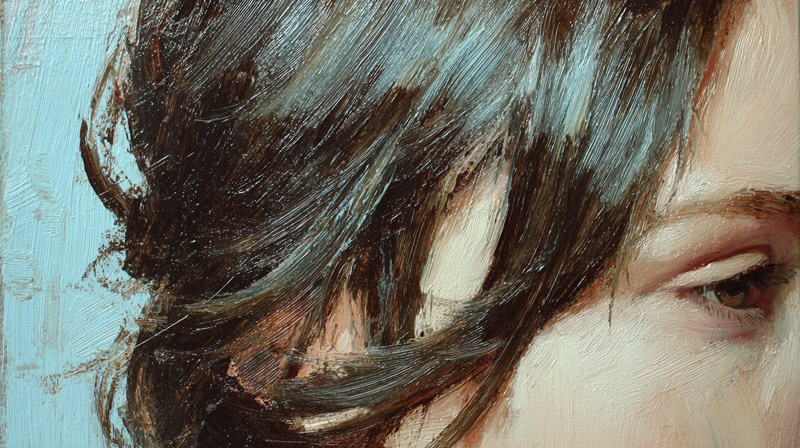
The edges of hair separate average portraits from convincing ones. Hard edges compete for attention. Soft edges recede. Getting that balance right at the hairline is where most artists either win or lose the realism battle.
Flyaways are not an afterthought. They’re what make hair look alive rather than sculpted. A perfectly rendered hair mass with zero flyaways reads like a helmet, not real hair.
According to CyPaint, paint diluted to a 1:1 ratio of paint to water is the right consistency for flyaway work in acrylics, thin enough for control, thick enough to avoid bleeding.
Hard vs. Soft Edges and Where Each Belongs
Hard edges belong where the hair meets a strongly contrasting background, where a sharp highlight hits the crown, or along the hairline where it meets skin.
Soft edges belong where hair transitions into shadow, where hair masses overlap each other, and at the outer silhouette when the background is close in value.
Use a clean damp filbert to soften an edge while the paint is still workable. On dry paint, soften by lightly dry-brushing the background color into the hair edge with a fan brush. Both approaches work. The filbert method is faster; the dry-brush method gives more control.
Understanding negative shape in art helps significantly here. The background shapes between flyaway strands define those strands just as much as the strands themselves do.
Painting Flyaways with a Liner Brush
Flyaways work on contrast. A light flyaway against a dark background reads clearly. A dark flyaway against a dark background disappears. Plan stroke color before placing any flyaway line.
3 rules for flyaway stroke work:
- Curved strokes only, no straight lines (real hair doesn’t move in straight lines)
- Vary stroke length, some short wisps, some longer stray hairs
- Place flyaways at the outer edge of the hair silhouette, not through the hair mass body
Inkmarvel research from 2024 notes that too many flyaways creates chaos, too few makes the hair look rigid. The target is enough stray strands to suggest movement without losing the hair’s overall shape. Roughly 8 to 12 flyaway strokes for a standard portrait-sized hair area is a useful starting point.
Negative Painting to Carve Out Individual Strands
Negative painting for hair means painting the background color into the hair mass to carve out individual lighter strands, rather than painting the strands themselves.
This works particularly well for light hair against a dark background. Instead of loading a liner brush with white and drawing light strands on top, paint the dark background color in thin lines between existing light areas. The result reads as individual hair strands because the light passages are now defined on both sides.
When to use it: when the hair mass is already close to the right color and value but needs more strand definition without adding more paint layers on top.
The technique connects to the broader concept of pictorial space in painting: what you leave unpainted defines form as much as what you paint.
How to Paint Different Hair Textures with Acrylics
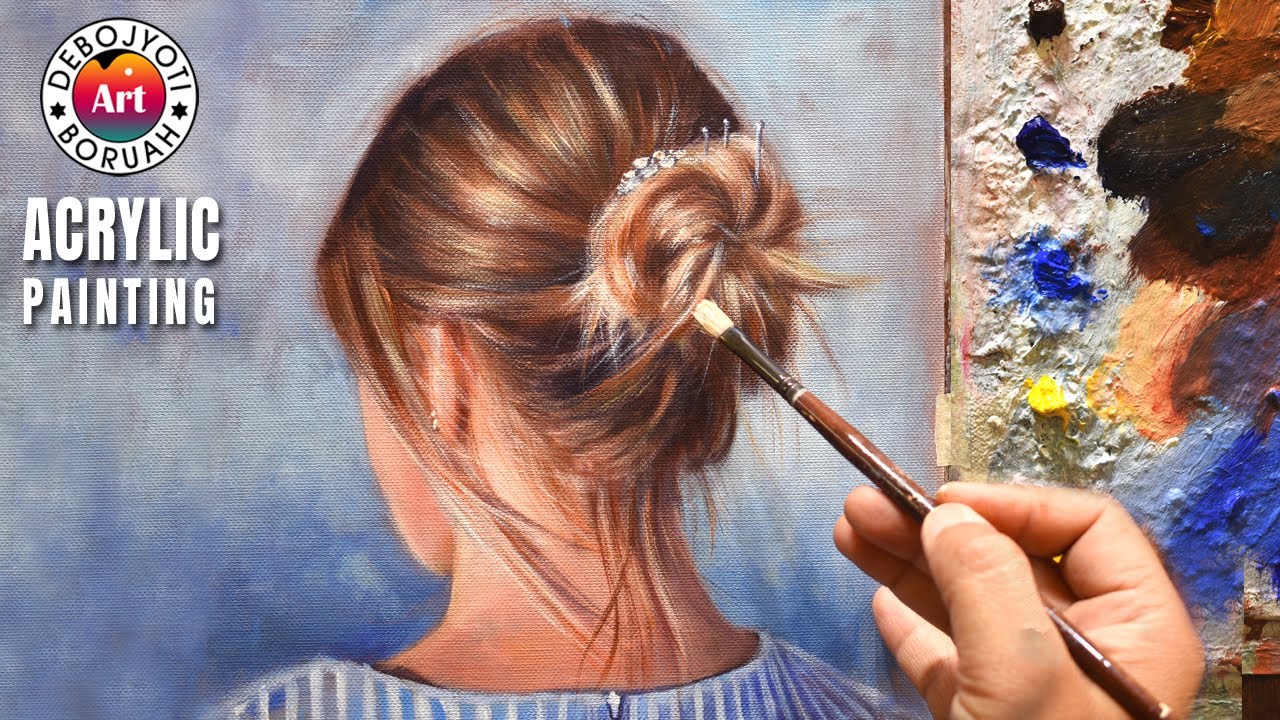
Hair texture changes everything: stroke direction, brush type, edge quality, and highlight shape all shift depending on whether the hair is straight, wavy, curly, or coily. One technique does not work across all 4 hair types.
| Hair Type | Stroke Pattern | Highlight Shape | Edge Quality |
|---|---|---|---|
| Straight | Parallel, linear strokes | Long, sharp highlight band | Hard at crown |
| Wavy | Curved alternating arcs | Wider, broken highlight bands | Soft transitions |
| Curly | Coiled clusters, spiral flow | Broken, scattered highlight spots | Soft, diffused edges |
| Coily | Tight circular groupings | Diffused, low-contrast spots | Very soft, complex |
Cupixel’s structured acrylic curriculum covers all 4 hair texture types using just 3 paint shades, which confirms that color variety matters far less than stroke pattern and value structure when painting different textures.
Straight and Wavy Hair Techniques
Straight hair uses the most disciplined stroke work of any hair type. Every liner brush stroke runs parallel to the adjacent ones. The highlight band is a single, unbroken long passage that follows the hair’s topmost curve.
Wavy hair is trickier because the stroke direction reverses at each wave crest. Where the hair curves forward, strokes angle down. Where the hair curves back, strokes angle up. Getting this directional reversal right is what makes wavy hair look like it has movement rather than a uniform pattern.
For wavy hair: block in the overall S-curve shape of each wave group first, then add shadow glazes into the underside of each wave, then add liner strokes following each wave’s specific arc direction.
Curly and Coily Hair Techniques
Curly hair scatters light rather than reflecting it in a single directional band. No single long highlight streak. Instead, small, broken highlight spots appear across multiple curl surfaces.
Build curly hair by painting coiled stroke clusters. Start with a dark base. Add mid-tone strokes that curve in a loose spiral pattern. Add highlight spots to the outer curve of each coil, where the light would catch the bend. The liner brush tip traces each curl’s outer curve in a C-shape or S-shape motion.
Coily hair has the most complex light scattering of any hair type and the tightest stroke clusters. The shadow zones are deeper and the highlight contrast is lower than in straight hair. Use more glaze passes in the shadow areas to get sufficient depth, and keep highlights diffused with a dry fan brush rather than sharp liner strokes.
Kehinde Wiley’s portrait work demonstrates coily and natural hair rendered with exceptional depth and texture in acrylic, using layered color masses rather than individual strands as the primary structural tool.
This texture work connects to the broader study of texture in art: how surface quality is communicated through mark-making rather than literal reproduction of every detail.
What Common Mistakes Cause Unrealistic-Looking Hair

Most hair painting mistakes fall into the same 5 categories. The good news: every one of them is a process error, not a skill ceiling. Fix the sequence and the result improves immediately.
Penny Apple Studio’s 2024 analysis of acrylic painting mistakes identifies starting with fine detail before establishing broad shapes and values as the most common beginner error, which applies directly to hair work. The same source notes that over-blending successive wet layers produces muddy, textureless results.
Painting Strands Before Establishing Values
This is the single most common hair painting error. The liner brush comes out before the value structure is in place, and the result is a collection of decorative lines sitting on a flat base.
Strand detail only reads as realistic when the underlying value map, shadow zones, mid-tones, light passages, is already established. The strands reinforce the structure. They can’t create it.
The fix: complete 3 full value passes before the liner brush appears. If the hair already reads as three-dimensional in value alone, the strand work will lock in. If it doesn’t read yet, more strands won’t help.
Using Too Much White in Highlights
Pure titanium white highlights on any hair color look chalky. The highlight disconnects from the rest of the hair color family and reads as a painted line rather than reflected light.
Correct highlight mixes by hair color:
- Dark hair: burnt sienna or transparent red oxide as the highlight, not white
- Brown hair: yellow ochre plus titanium white, 3 parts ochre to 1 part white
- Blonde hair: yellow ochre plus titanium white, kept warm
- Red hair: cadmium orange mixed with yellow ochre
The role of color in painting is especially relevant here: highlights are not simply lighter versions of the base color. They carry color temperature information that shifts them away from straight diluted base color toward the light source’s own temperature.
Uniform Stroke Width Throughout
Hair drawn with consistent stroke width looks mechanical. Each liner brush stroke that maintains the same width from start to finish reads as a drawn line, not a painted hair.
Real hair tapers. It’s thicker at the root and finer at the tip. Vary pressure mid-stroke: start each strand with moderate pressure at the root, ease off gradually toward the tip. This single adjustment produces significantly more natural-looking strands than any other single technique change.
Katie Jobling’s 2025 analysis of acrylic painting mistakes identifies over-reliance on small brushes as a core issue, noting that starting with large brushes for structure and saving small brushes for final detail produces far better results than reaching for fine brushes too early.
Over-Blending Shadow and Light Zones
Hair that has been blended until the shadow and light zones merge loses all contrast. The value range collapses. The result is flat, single-tone hair with no dimensional structure.
Blending in hair work should be limited to the transition zone between shadow and mid-tone. Shadow zones stay dark. Light zones stay light. The transition between them is where blending happens, and that transition should be narrow, not a gradual fade across the whole hair mass.
Over-blending also removes the directional stroke texture that makes hair look like hair rather than a painted shape. Some stroke visibility in the final layer is desirable, not a mistake to fix.
The dry brushing technique in acrylic painting is the most controlled method for building texture and value contrast without over-blending: the semi-dry brush deposits paint only on the raised surface texture of the canvas and previous paint layers, which preserves both contrast and directional stroke information.
FAQ on How To Paint Realistic Hair With Acrylic
What brushes do I need to paint realistic hair with acrylic?
3 brushes cover most hair work: a fan brush for broad hair masses, a filbert for blending transitions, and a liner brush (size 0 or 00) for individual strand detail and flyaways. Synthetic bristles work best with acrylic paint.
Should I paint hair strand by strand?
No. Build the value structure first, shadow zones, mid-tones, light passages, before any strand work. Strands added on top of a solid value foundation read as real hair. Strands added to a flat base look like decorative lines.
What colors do I mix for dark hair?
Avoid pure black. Mix raw umber dark with ultramarine blue for a deep, transparent base. Push shadows cooler with more ultramarine. Use burnt sienna or transparent red oxide for highlights, not titanium white.
How do I paint hair highlights that don’t look chalky?
Never use pure titanium white for highlights. Mix yellow ochre with titanium white for warm hair, or cadmium orange for red hair. The highlight color must stay in the same color family as the rest of the hair.
What is the glazing technique and why does it help with hair?
Glazing uses thin, transparent acrylic layers over dry paint to deepen shadows without losing texture underneath. Apply 3 to 4 glaze passes in shadow zones using burnt umber or ultramarine blue mixed with acrylic glazing medium.
How do I paint flyaway hairs with acrylic?
Load a liner brush with paint thinned to ink consistency. Use tip-only contact and pull curved strokes following the hair’s growth direction. Vary stroke length and placement along the outer hair silhouette. 8 to 12 flyaway strokes is usually enough.
How do I paint curly hair differently from straight hair?
Straight hair uses parallel directional strokes and a single long highlight band. Curly hair uses coiled stroke clusters and scattered broken highlight spots across multiple curl surfaces. Shadows are deeper and highlight contrast is lower in curly hair.
Why does my painted hair look flat?
Flat hair usually means too narrow a value range or uniform color temperature throughout. Add cooler, darker shadow glazes into recessed areas. Make sure warm lights and cool shadows are distinct. Avoid over-blending the transition zones between shadow and mid-tone.
How do I paint the edges of hair where it meets the background?
Use hard edges where hair meets a strongly contrasting background and soft edges where hair transitions into shadow or meets a close-value background. Soften edges with a clean damp filbert on wet paint, or dry-brush the background color into the hair edge.
How do I avoid overworking painted hair?
Stop adding detail once the hair reads as three-dimensional from a normal viewing distance. Overworking collapses value contrast and removes directional stroke texture. Some visible brushwork in the final layer is correct, not a mistake that needs fixing.
Conclusion
This conclusion is for an article presenting how to paint realistic hair with acrylic, and the core message is straightforward: the process matters more than talent.
Get the value structure right before any strand detail. Build shadow depth through transparent glazing. Match your brush choice to the hair texture you’re painting.
Color temperature shifts between warm lights and cool shadows are what give hair its internal luminosity. Without that shift, even precise liner brush work falls flat.
Whether you’re working on straight hair, wavy hair, or tight coily curls, the same principles apply: hair mass groupings first, directional brushwork second, strand detail last.
Nail that sequence and the rest follows.