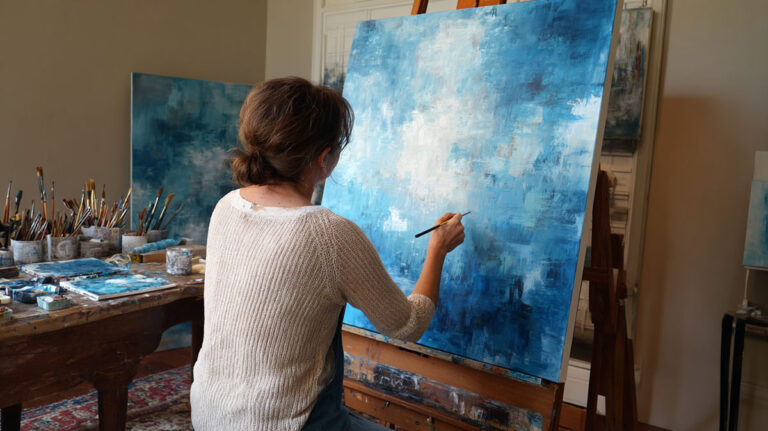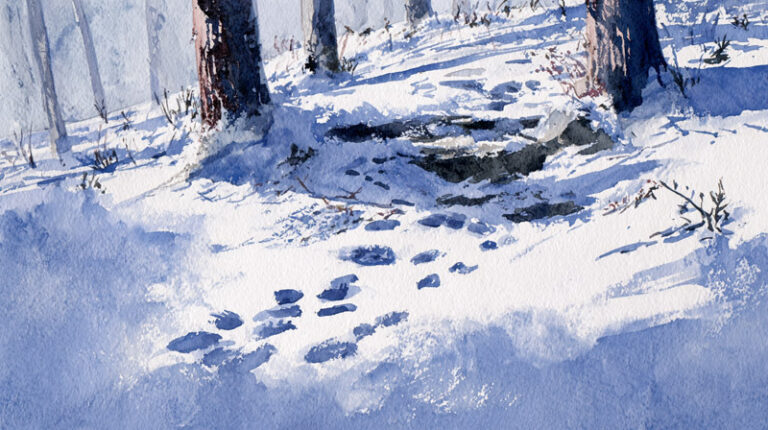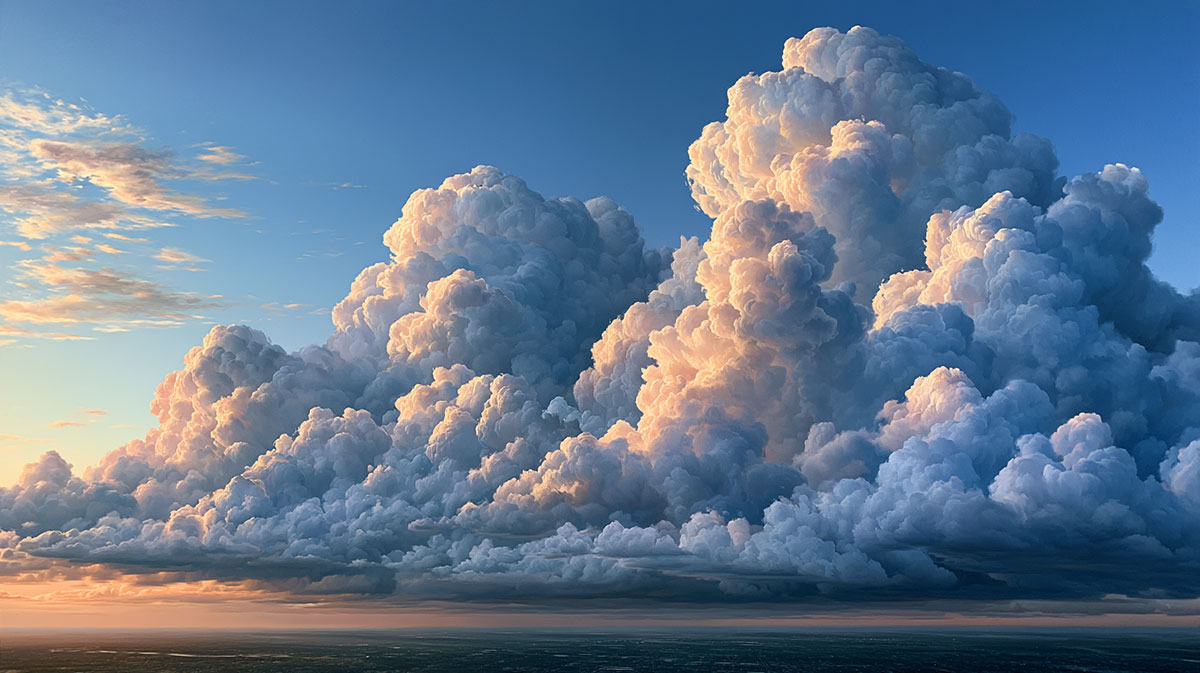

Clouds are one of the most painted subjects in landscape art, and one of the most consistently mishandled.
Learning how to paint clouds techniques across oil, acrylic, and watercolor comes down to 3 things: soft edges, accurate color mixing, and a clear value structure from lit top to shadowed underside.
Get those right and the cloud reads as three-dimensional regardless of your medium or style.
This guide covers cloud types, pigment selection, wet-on-wet blending, brushwork patterns, light and shadow logic, and the most common mistakes that flatten cloud form. By the end, you will have a complete technical framework for painting realistic cloud formations in any medium.
What Are Cloud Painting Techniques?
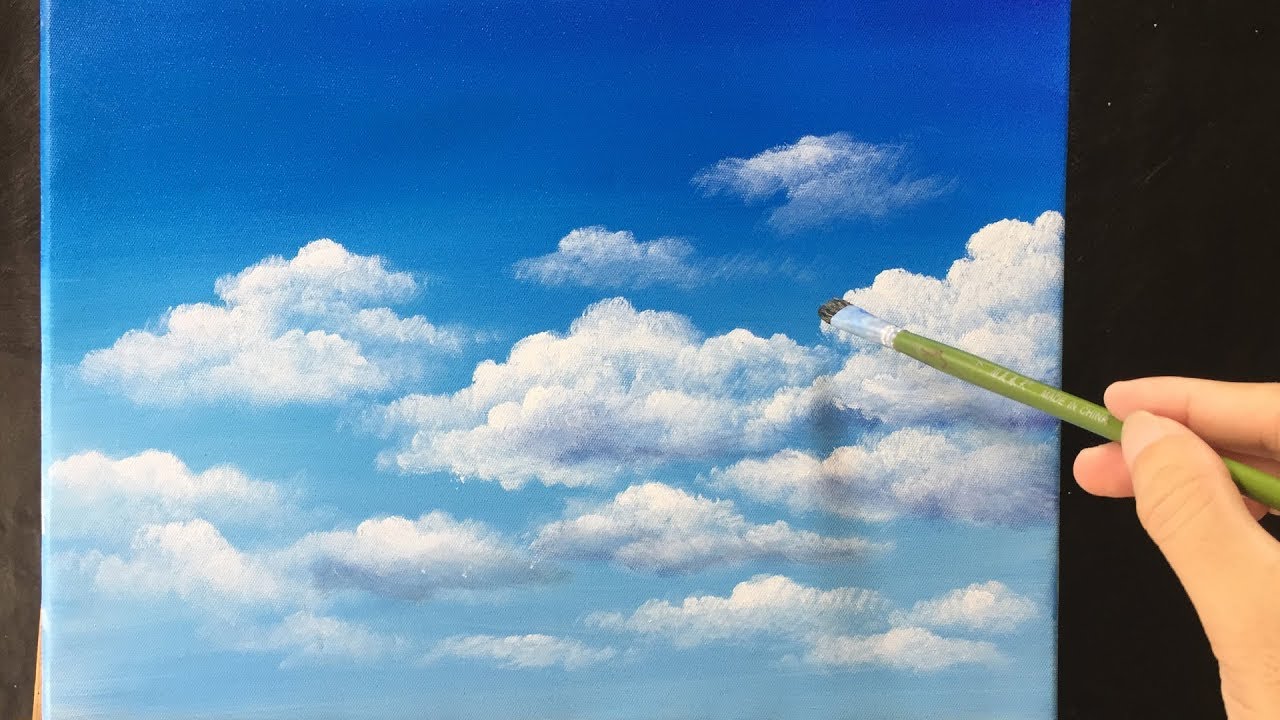
Cloud painting techniques are specific methods for building soft edges, layering paint, and controlling value gradation to simulate cloud form and light behavior on canvas or paper.
These methods differ by medium. Oil allows extended wet-on-wet blending. Acrylic demands faster decisions and often benefits from a retarder medium. Watercolor relies on water control and paper saturation above everything else.
3 principles apply across all mediums: soft edge transitions, a clear light source, and a value structure that runs from bright highlight down to a shadowed underside. Get those right and the cloud reads as three-dimensional regardless of style.
Cloud painting sits inside the broader practice of landscape painting, and most of the same rules apply. Atmospheric perspective, color temperature shifts, and edge quality all carry over directly from landscape work into sky studies.
According to Art Business Today survey data, landscape paintings are among the top-selling subject categories for working artists, with skies and atmospheric elements cited as key factors in a painting’s emotional impact.
What Are the Main Types of Clouds to Paint?

The 4 primary cloud types artists paint are cumulus, stratus, cirrus, and cumulonimbus. Each has a distinct visual structure that determines which technique works and which color palette applies.
| Cloud Type | Visual Structure | Technique Fit |
|---|---|---|
| Cumulus | Rounded, stacked, high contrast | Fan brush, circular strokes, wet-on-wet core |
| Stratus | Flat horizontal bands, low contrast | Wide flat brush, soft graduated washes |
| Cirrus | Thin, wispy, minimal mass | Dry brush, light pulling strokes |
| Cumulonimbus | Towering, dark base, lit top | Strong value contrast, layered shadow builds |
Cloud type selection also drives your palette. Cumulus clouds need a wider value range, from near-white highlights to blue-grey undersides. Cirrus clouds sit at the top of the value scale almost entirely, with minimal shadow. Cumulonimbus formations use the full range, with Payne’s Grey or deep blue-violet in the base and near-white or warm yellow at the lit crown.
This classification connects directly to atmospheric perspective: clouds near the horizon flatten in color contrast and compress in apparent size. A cumulus cloud at the zenith uses a broad, high-contrast value range. The same cloud type near the horizon shifts to muted blues and narrower values.
J.M.W. Turner worked extensively across all 4 types, often combining cumulonimbus drama in the foreground with flat stratus bands along the horizon to create spatial depth in a single sky. That technique is worth studying before starting any dramatic sky composition.
How Do You Mix Cloud Colors Accurately?

Clouds are not white. The lit areas of a cloud mix toward Titanium White with a small amount of Yellow Ochre or Raw Sienna for warmth. The shadow areas shift to blue-grey, using Payne’s Grey, Cerulean Blue, or a purple-violet mix.
What Pigments Work Best for Cloud Painting?
Core pigments for cloud work:
- Titanium White: opaque, high-tinting strength, used for highlights in oil and acrylic
- Ultramarine Blue: warm blue, granulates in watercolor, builds depth in shadow mixes
- Cerulean Blue: cooler, lighter value, ideal for upper sky gradation and cloud shadow edges
- Payne’s Grey: neutral dark for storm cloud bases and deep shadow undersides
- Burnt Sienna + Raw Sienna: warm the lit areas and create golden-hour cloud color shifts
Golden-hour cloud color shifts fast. The lit crown of a cumulus cloud at sunset reads orange-pink, mixed from Titanium White, Cadmium Orange, and a touch of Rose Madder. The shadow underside picks up reflected warm ground light, so it reads warmer than a midday equivalent.
How Does Color Temperature Affect Cloud Painting?
Color temperature is the single biggest factor most beginners ignore. Lit areas trend warm. Shadow areas trend cool. That rule holds across oil, acrylic, and watercolor.
Atmospheric perspective adds a second layer. Distant clouds shift toward cooler, less saturated tones. The color saturation in sky areas near the horizon drops noticeably compared to overhead sections. Working this shift into the painting adds immediate depth.
Understanding warm vs. cool color relationships is worth spending real time on before mixing cloud palettes. The contrast between warm highlight and cool shadow is what gives a painted cloud its sense of mass and three-dimensional cloud form.
What Is the Wet-on-Wet Technique for Painting Clouds?

Wet-on-wet means applying paint into still-wet paint so the two layers blend without a hard edge between them. It is the single most useful technique for painting soft, realistic cloud edges in any medium.
How Does Wet-on-Wet Work in Oil Painting?
Oil paint’s slow drying time makes it the most forgiving medium for wet-on-wet cloud painting. A base layer applied at the start of a session stays workable for hours, which gives time to build cloud form gradually without rushing.
John Constable, who produced over 100 cloud studies en plein air in Hampstead between 1821 and 1822, used this approach almost exclusively. He worked rapidly on paper affixed to a board, completing studies in under an hour and annotating each with time, wind direction, and weather conditions (Yale Center for British Art).
Process:
- Lay a toned or blue-grey base layer across the sky area
- While wet, push cloud mass shapes using circular scrubbing strokes
- Soften edges with a clean dry brush or fan brush
- Add shadow tones to the underside while the base is still workable
How Does Wet-on-Wet Work in Watercolor?
In watercolor, wet-on-wet requires timing. The paper needs to be damp but not glossy-wet. A glossy surface causes paint to run without control. A surface that is just past the sheen stage gives soft diffused edges while still allowing some directional control.
The paper should be shiny wet but not puddle wet, according to watercolor instructors who teach cloud studies specifically. At the right saturation level, a loaded brush dropping blue pigment onto damp paper creates the naturally diffused cloud edge that brushwork alone cannot replicate.
Cotton watercolor paper, such as Arches 300gsm, retains moisture longer than wood-pulp alternatives, which gives a wider working window. This matters because most of the cloud painting happens in the wet-on-wet stage, and a paper that dries too quickly forces rushed, unnatural decisions.
The wet-on-wet technique in watercolor is covered in full detail if you want to go deeper into water control ratios and paper preparation before starting cloud studies.
How Do You Paint Clouds With a Fan Brush?

A fan brush creates irregular, natural cloud edges faster than any other single tool. The spread bristles produce broken, organic texture that mimics the fluffy outer edge of a cumulus cloud without requiring precise control.
What Is the Correct Fan Brush Technique for Clouds?
Load the fan brush lightly. Too much paint causes the bristles to clump and produces a solid stroke instead of a textured one.
Brush loading method matters: dry-load the brush, meaning drag it lightly across the paint surface to pick up minimal pigment, then use dabbing or flicking strokes at the cloud’s outer edge. The pressure applied controls the result directly: light pressure produces a soft, diffuse edge, heavier pressure gives a more defined edge.
Fan brush technique works across oil and acrylic. In oil, it integrates into wet base layers naturally. In acrylic, use it while the base is still wet or with a misting of water to keep edges soft. Bob Ross built his entire cloud-painting approach around this tool, using it to pull cloud mass shapes upward with quick vertical strokes and then soften the base with horizontal passes.
See the full breakdown of what a fan brush is used for across different painting contexts before committing it to cloud work specifically.
How Does Fan Brush Compare to Round Brush for Cloud Edges?
| Brush | Edge Quality | Best For | Control Level |
|---|---|---|---|
| Fan brush | Broken, organic, natural | Cumulus outer edges, texture | Low to medium |
| Round brush | Smooth, painterly | Soft blending, cirrus wisps | High |
| Flat brush | Defined, horizontal bands | Stratus layers, sky gradients | Medium |
| Filbert brush | Rounded, soft marks | Cloud mass building, transitions | Medium to high |
How Do You Paint Clouds in Watercolor?

Watercolor cloud painting runs on 3 core methods: wet-on-wet wash, lifting, and glazing. Most finished cloud paintings use all 3 in sequence.
Wet-on-Wet Wash for Soft Cloud Edges
Wet the sky area of the paper first. Apply a warm base tone, Raw Sienna or a pale Rose Madder wash, across the cloud positions. While that layer is wet, add Cerulean Blue or Ultramarine Blue around the cloud shapes, letting the colors bleed naturally at the edges.
The white of the paper is the cloud’s highlight. You are not painting clouds. You are painting the sky around them. That shift in thinking changes how beginners approach the negative space and usually produces better results immediately.
Granulating pigments add texture without effort. Ultramarine Blue granulates visibly on Arches paper, producing a natural mottled texture that reads like water vapor. Burnt Sienna behaves similarly and works well in cloud shadow mixes for the same reason.
Lifting for Cloud Highlights
Lifting removes wet pigment from the paper surface, revealing white paper underneath. Use a clean damp brush, a folded tissue, or a dry sponge.
Timing is everything. Lift too early and the color floods back in. Lift too late and the pigment has stained. The right moment is when the paper loses its surface sheen but still feels cool to the touch.
The lifting technique in watercolor produces cloud highlights that preserve paper white without masking fluid, which often leaves a hard mechanical edge unsuitable for soft cumulus forms.
Glazing for Cloud Shadow Depth
Once the wet layers are fully dry, glazing adds depth to shadow areas without disturbing the layers underneath.
Mix a thin transparent wash of Ultramarine Blue with a touch of Payne’s Grey. Apply it in a single pass over the cloud underside. No scrubbing, no back-and-forth. One confident stroke preserves the transparency of the glaze and builds shadow depth without muddying the base layers.
How Do You Paint Clouds in Acrylic?
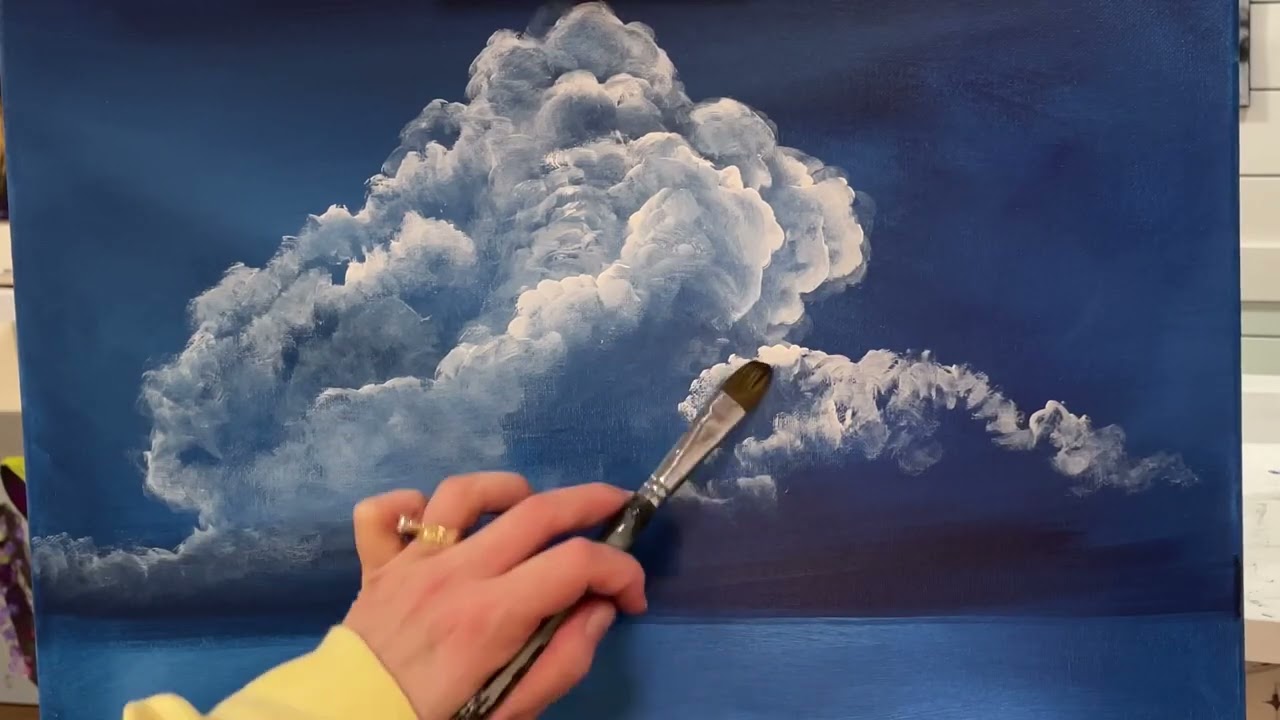
Acrylic dries fast. That is the defining constraint of acrylic cloud painting, and every technique decision flows from it. The standard approach is layering from dark to light: paint the sky first, add mid-tone cloud mass second, and finish with bright highlight passes.
How Do You Keep Acrylic Paint Wet Long Enough to Blend Clouds?
3 options extend the blending window in acrylic:
- Retarder medium: mixed directly into paint, slows drying by 30-50%, allows wet-on-wet blending similar to oil
- Misting bottle: a fine water mist over the wet paint surface keeps it workable for additional minutes without diluting the pigment significantly
- Stay-wet palette: keeps mixed paint workable for hours between sessions
Liquitex and Golden Artist Colors both make reliable acrylic mediums formulated for this. The retarder option is the most practical for cloud work because it integrates into the paint itself rather than requiring constant misting during the session.
What Is Dry Brush Technique for Acrylic Clouds?
Dry brush in acrylic means using minimal paint on a stiff bristle brush, dragged across a textured canvas surface. The raised canvas grain catches the paint and the recessed areas stay clear, producing a broken, airy stroke that reads as cloud texture.
This works especially well for wispy cirrus forms and the upper edges of cumulus clouds where mass transitions to open sky. Load the brush, then wipe most of the paint off on a paper towel before touching the canvas. The stroke should feel almost like nothing is transferring. That restraint is what produces the effect.
The dry brush technique in acrylic goes well beyond cloud work. It is worth understanding the full range of what it can do before applying it specifically to sky painting.
How Do You Blend Clouds in Acrylic Without Hard Edges?
Hard edges form when acrylic dries at the paint boundary. The fix is working faster, keeping the adjacent areas damp, or using a soft blending brush while the paint is still wet to feather the edge into the surrounding color.
Stippling with a sea sponge builds soft cumulus texture without the edge problem. The sponge loads unevenly and deposits irregular marks that blend naturally without defined boundaries. This is the technique Bob Ross used for soft cloud masses, alternating between sponge and fan brush to build cumulus volume quickly.
For larger cloud paintings in acrylic where blending time is a serious constraint, blending in acrylic techniques and medium selection make a measurable difference in final edge quality.
How Do You Paint Clouds in Oil?

Oil is the most forgiving medium for cloud painting. Extended drying time lets you blend, adjust, and rework cloud edges for hours without the surface locking up.
Painters like J.M.W. Turner and John Singer Sargent used this directly, working wet into wet across large sky sections and adjusting form as they went. Sargent kept value shifts simple: strong highlights, clear shadows, minimal mid-tone fuss.
What Is the Alla Prima Method for Oil Cloud Painting?
Alla prima means completing the painting in one session, all layers still wet. It works especially well for cloud studies because the sky stays workable throughout.
The process starts with a toned ground, usually a thin wash of Burnt Sienna, which dries in 20 minutes using Gamblin Gamsol as the solvent. After that, sky and cloud masses go in together, wet into wet.
- Hog hair bristle brushes push paint and build cloud texture
- Soft blending brushes feather edges without disturbing the base
- A palette knife pulls cloud mass shapes into the sky layer
Artists like Claude Monet applied this approach across their landscape series, capturing sky and cloud together in single sessions rather than building them up over multiple drying stages.
How Does Oil Glazing Add Cloud Depth?
After a session dries, thin transparent glazes over shadow areas build depth without losing the underlying cloud form.
Shadow glaze mix: Ultramarine Blue plus Raw Umber plus linseed oil, thinned to near-transparency. Apply in a single pass over the dried underside of each cloud mass. Do not scrub. One confident stroke over a dry layer.
The oil painting glazing technique is particularly useful for cumulonimbus formations where the base needs layered dark values that still read as translucent rather than flat.
What Oil Painting Brushes Work Best for Clouds?
Bristle types for cloud work:
- Hog hair flat: mass building and edge definition
- Soft blending brush: feathering cloud edges into the sky
- Filbert: rounded marks for cumulus surface texture
A full breakdown of types of oil painting brushes with notes on how each responds in wet paint is worth reviewing before setting up for a cloud session in oil.
What Brushwork Patterns Create Realistic Cloud Shapes?

Cloud form comes from 4 stroke types used in combination: circular scrubbing, feathering, dabbing, and pulling. Most beginners use only one, which is why their clouds look mechanical.
| Stroke Type | What It Does | Where to Use It |
|---|---|---|
| Circular scrubbing | Builds rounded cloud mass | Core of cumulus formations |
| Feathering | Softens cloud-to-sky boundary | Outer edges of all cloud types |
| Dabbing | Adds irregular surface texture | Upper surface of cumulus clouds |
| Pulling | Creates wispy, directional trails | Cirrus forms, rain streaks |
How Does Stroke Direction Affect Cloud Form?
Stroke direction should follow the cloud’s three-dimensional structure, not the orientation of the canvas.
A cumulus cloud is essentially a sphere. Strokes on its lit top face should curve upward and outward, following the sphere surface. Strokes on the underside shadow should sweep horizontally. Painting all strokes in the same direction flattens the cloud into a sticker rather than a mass.
Master Oil Painting instructors note that the cloud form and shadow structure mirrors rock and land forms: same rules of light and shade, just softer edges. Treating clouds as irregular spheres in space, rather than as fluffy shapes, produces more convincing cloud depth.
What Is the Correct Brush Pressure for Cloud Edges?
Light pressure. Always.
Heavy brush pressure deposits too much paint at the edge and creates a hard boundary that reads as a cut-out rather than a cloud. The outer edge of a cumulus cloud should feel like it dissolves into the sky rather than sitting against it.
At the edge, reduce paint load and pressure simultaneously. Let the last inch of the stroke carry only the residual paint on the brush. That residual amount is usually exactly right.
How Do You Paint Cloud Light and Shadow?

A cloud has 3 value zones: highlight at the lit top, mid-tone on the transitional faces, and shadow on the underside. The shadow underside is never just grey. It reflects ambient light from the ground or sky below it.
What Is the Value Structure of a Painted Cloud?
The standard value rule: cloud shadow values are lighter than the darkest ground values in the same painting.
Light enters a cloud, bounces around the water droplets inside, and illuminates the shadow from within. That internal bounce is what separates flat-looking painted clouds from realistic ones. A cloud shadow that is too dark looks like a solid object, not a mass of vapor.
Master Oil Painting notes that even in high-contrast storm scenes, cloud shadow values stay above the darkest ground shadows. Wilson Hurley’s storm paintings demonstrate this clearly: the cloud base, dark as it reads, stays lighter than the shadows in the foreground trees.
How Does Back-Lighting Change Cloud Painting?
Contre-jour (back-lit) clouds reverse the standard value pattern. The cloud rim glows bright, and the cloud interior reads as a dark mass.
This effect is used frequently in J.M.W. Turner’s work and in Albert Bierstadt’s dramatic sky compositions. The lit rim comes from sunlight diffracting around the cloud’s water vapor edge. Mix it from near-Titanium White and apply it as a thin bright ring against a darker interior.
Understanding value in painting as a concept before tackling cloud light and shadow saves a lot of frustration. The rules are the same as for any solid object; clouds just apply them more subtly.
How Does Reflected Light Affect Cloud Shadow Color?
Cloud shadows reflect what is beneath them. A cloud over a green field picks up a faint warm-green tint in its underside. A cloud over open ocean reads cooler and more blue-grey in shadow.
This is a small shift, not a dramatic one. But it’s what makes a painted cloud feel placed within a specific environment rather than pasted into a generic sky.
How Do You Paint a Cloudy Sky Background?
The sky gradient comes first. A correctly painted sky creates the foundation that makes or breaks how the clouds read above it.
Sky color saturation drops toward the horizon. The overhead sky reads as a richer, deeper blue. The sky near the horizon shifts to a lighter, warmer, less saturated tone. That shift is atmospheric perspective at work on the sky itself, separate from any cloud painting.
What Is the Correct Order for Painting Sky and Clouds Together?
Dark before light in opaque mediums. Light before dark in watercolor.
In oil and acrylic, paint the sky gradient first, then add cloud masses on top. In watercolor, reserve cloud whites by painting the sky around them, then add shadow glazes afterward.
Either way, sky and clouds must be painted as one system, not as separate elements added at different stages. Cloud edges need to blend into adjacent sky color, which only happens if both are wet at the same time or the edge work is done carefully into dry sky layers.
How Does the Horizon Affect Sky and Cloud Values?
Near the horizon, 3 things happen to clouds:
- They appear smaller and more compressed
- Value contrast between highlight and shadow decreases
- Color shifts warmer and less saturated
Ignoring this is one of the most common compositional errors in cloud painting. Clouds that look the same size and contrast at the horizon as they do overhead destroy the illusion of depth. Atmospheric perspective applies to the sky just as much as to the land below it.
The full breakdown of aerial perspective in painting covers how this value and color compression works across different distances and lighting conditions.
What Are Common Mistakes When Painting Clouds?

Most cloud painting problems come down to 5 recurring errors. They appear across mediums and skill levels.
Why Do Painted Clouds Look Flat?
Flat clouds usually mean one of 2 things: pure white used for all cloud areas, or no value separation between highlight and shadow zones.
Pure white kills depth. Titanium White mixed with a touch of Yellow Ochre reads as a lit cloud surface. Straight Titanium White reads as a sticker. Tim Gagnon Studio notes this is the single most common beginner error in acrylic cloud painting, as the white paint feels intuitively correct but removes all tonal gradation from the cloud mass.
Why Do Cloud Edges Look Pasted On?
Hard, uniform edges on every cloud make them look like shapes cut from paper and glued to the canvas surface.
Real clouds have 3 edge types occurring simultaneously: hard edges where the cloud mass is densest, soft edges where it thins toward the sky, and lost edges where cloud and sky blend completely. Vary edge quality across every single cloud.
Draw Paint Academy’s analysis of common painting errors confirms that using inappropriate edges, specifically hard where they should be soft, is one of the most consistent problems across beginner landscape and sky work.
What Does Overblending Do to a Cloud?
Overblending removes texture and produces fog rather than cloud form.
The fix: stop blending at least 30 seconds before you think you should. Walk back from the canvas and look. If it reads as a cloud from 3 feet away, it is done. What looks too rough up close almost always reads correctly at viewing distance.
How Does Inconsistent Light Direction Break a Cloudy Sky?
One light source. Every cloud in the painting follows it. No exceptions.
A cloud with its highlight on the upper left and a neighboring cloud with its highlight on the upper right creates visual chaos. The viewer cannot read the sky as a unified atmospheric space. Establish light direction in the first 5 minutes and mark it on the canvas edge with a pencil if needed.
How Do You Practice Cloud Painting Efficiently?
Constable produced over 100 cloud studies en plein air between 1821 and 1822, completing each in under an hour (Yale Center for British Art). Volume of focused practice, not length of individual sessions, is what builds cloud painting skill.
What Is the Best Reference Source for Cloud Studies?
Real sky, first. Photo reference, second.
Painting outdoors trains the eye to read color temperature, atmospheric depth, and edge quality in ways photos cannot replicate. Photos flatten values and shift colors. A 20-minute outdoor sketch of a single cloud formation teaches more than an hour working from a screen.
For indoor sessions, Unsplash and Paint My Photo both offer free high-resolution cloud reference. When using photo reference, convert the image to greyscale first to read value structure before adding color. This is a method recommended by outdoor painter Kim Casebeer specifically for cloud and sky study work.
How Should a Practice Schedule for Cloud Painting Look?
Focused sessions beat marathon sessions. One technique per session, 20-30 minutes, repeated across a week.
- Session 1: wet-on-wet soft edges only, one medium
- Session 2: value structure, greyscale only
- Session 3: color temperature in cloud shadows
- Session 4: edge variation across a single cumulus cloud
Keep a separate sketchbook for pencil cloud value studies. Drawing cloud forms in pencil first, as Constable did and as plein air instructor Liz Haywood-Sullivan recommends, builds the hand-eye coordination that transfers directly into faster, more confident brushwork.
Which Master Painters Are Worth Studying for Cloud Technique?
3 painters cover the major technical approaches between them:
Constable: scientific cloud observation, direct plein air method, oil on paper for rapid studies.
Turner: atmospheric color, back-lit cloud drama, soft wet-on-wet blending pushed further than any contemporary. His cloud work sits at the intersection of Impressionist principles and observed meteorological accuracy.
Albert Bierstadt: high-contrast cumulonimbus drama, strong value range, clouds used as compositional elements that anchor the landscape beneath them.
Studying these 3 gives coverage of soft naturalistic clouds, atmospheric color clouds, and dramatic structural clouds. Most cloud painting challenges fall within one of those three categories. Once you know which type you are working toward, studying the right master shortens the learning curve considerably.
FAQ on How To Paint Clouds Techniques
What is the best technique for painting soft cloud edges?
The wet-on-wet technique produces the softest edges. Apply paint into a still-wet base layer and let the two blend naturally. In watercolor, the paper must be damp but not glossy. In oil, the slow drying time gives a wide blending window.
Why do my painted clouds look flat?
Flat clouds almost always result from using pure Titanium White across all areas. Real clouds need 3 value zones: a warm lit highlight, a mid-tone transition, and a cool grey-blue shadow on the underside. Vary those values and depth appears immediately.
What colors do you mix for realistic cloud shadows?
Cloud shadows use Payne’s Grey, Ultramarine Blue, or a purple-violet mix rather than straight grey. Add a touch of the sky color to keep shadows connected to the surrounding atmosphere. Shadow areas trend cooler than lit areas in most lighting conditions.
What brush works best for painting cumulus clouds?
A fan brush builds organic, irregular edges fast. A filbert brush rounds out the cloud mass. Hog hair bristle brushes push paint and build texture in oil. Most artists combine 2 to 3 brush types across a single cloud rather than committing to one.
How do you paint clouds in watercolor without hard edges?
Work on damp paper using the wet-on-wet method. Paint the sky around cloud shapes while the paper still holds moisture. Use the lifting technique to pull out highlights with a clean damp brush. Hard edges form when paint hits dry paper, so timing controls everything.
How do you paint clouds in acrylic without them drying too fast?
Use a retarder medium mixed directly into the paint to slow drying by 30 to 50 percent. A fine misting bottle keeps the canvas surface workable. Work in small sections rather than laying in the entire sky at once. Stay-wet palettes also help maintain consistent paint consistency.
What is the correct light and shadow structure for a painted cloud?
Clouds are lit from above. The brightest highlight sits within the upper mass, not at the edge. The underside reads as the darkest value, but always lighter than ground shadows in the same painting. Back-lit clouds reverse this: bright rim, darker core.
How does atmospheric perspective affect cloud painting?
Clouds near the horizon appear smaller, flatter, and less saturated in color. Value contrast between highlight and shadow decreases with distance. Clouds at the zenith use a full value range. Ignoring this compression is one of the most common errors in sky painting.
What are the most common mistakes when painting clouds?
5 errors come up repeatedly: using pure white for all cloud areas, uniform hard edges, overblending into fog, inconsistent light source direction, and identical cloud sizes across the composition. Fixing any one of these produces immediate visible improvement in cloud form and depth.
How do you practice cloud painting efficiently?
Do focused 20-minute studies targeting one technique per session: wet-on-wet edges one day, value structure in greyscale the next. Work from real sky when possible. Use free photo reference from Unsplash or Paint My Photo for indoor sessions. Volume of short studies beats length every time.
Conclusion
This conclusion is for an article presenting the full range of cloud painting techniques across oil, acrylic, and watercolor.
The core principles stay consistent regardless of medium: accurate color mixing for cloud shadows, controlled edge quality, and a value structure that runs from bright highlight down to a cooler, lighter underside.
Brushwork patterns matter. So does atmospheric perspective, especially near the horizon where cloud contrast compresses and color saturation drops.
Study Constable’s cloud studies for observation discipline. Study Turner for atmospheric color. Practice in focused 20-minute sessions, one technique at a time.
Realistic cloud form is not about talent. It is about understanding how light behaves inside a mass of water vapor, and applying that logic consistently across every sky you paint.