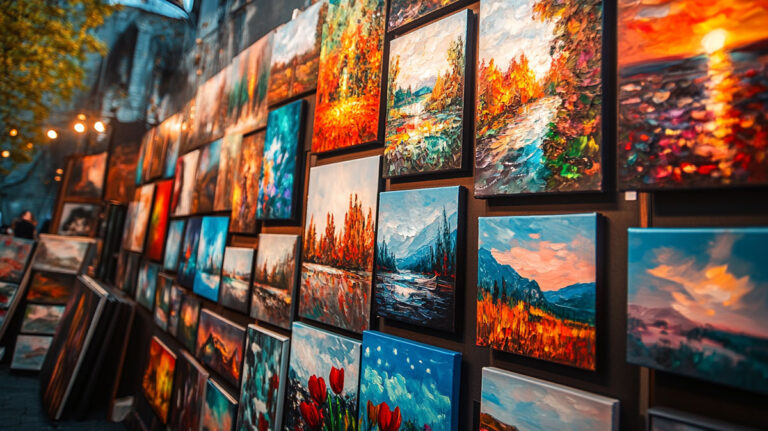
Paint flows across canvas in unpredictable rivers of color, creating art that surprises even experienced artists. Learning how to do acrylic pouring art opens doors to fluid painting techniques that require no traditional drawing skills.
This modern approach to abstract expression combines simple materials with dramatic results.
Fluid art techniques produce stunning cellular patterns and organic flows impossible to achieve with brush work alone.
You’ll master essential pouring methods from dirty cup basics to advanced cell creation.
We’ll cover workspace setup, paint mixing ratios, and troubleshooting common problems that frustrate beginners.
Professional finishing techniques and display strategies complete your artistic journey. By the end, you’ll confidently create gallery-worthy pieces using materials from any craft store.
Required Materials and Tools
Paint Selection
Quality acrylic paints make all the difference in your pour results. Arteza, Craft Smart, and Apple Barrel offer budget-friendly options that still produce decent cells and flow.
Premium brands like Liquitex and DecoArt Premium deliver more consistent results. Their pigment density stays even throughout the pour process.
Best Paint Brands for Beginners
Start with these reliable options from major retailers:
- Arteza Acrylic Paints – excellent value and decent flow
- Apple Barrel from Walmart – super affordable starter choice
- Craft Smart from Michaels – good consistency for practice
- DecoArt Premium – step up in quality without breaking budget
Dick Blick Art Materials and Jerry’s Artarama stock professional-grade options. Amazon Art Supplies offers convenient bulk purchasing for frequent pourers.
Color Combinations That Work
Understanding basic color theory helps create stunning results. Complementary colors like blue and orange create dramatic contrast.
Analogous color schemes using neighboring hues produce harmonious blends. Think sunset palettes with reds, oranges, and yellows.
Primary colors mixed with white create fresh, clean pours. Add black sparingly to avoid muddy results.
Pouring Medium Options
Commercial Pouring Mediums
Floetrol remains the go-to choice for most artists. Mix 2:1 or 3:1 ratio with your acrylic paint for proper flow.
Liquitex Pouring Medium costs more but provides superior results. Golden GAC 800 works well for archival pieces that need longevity.
DIY Medium Recipes
Mix your own with these household items:
- 50% Floetrol + 30% water + 20% white glue
- 60% Floetrol + 40% distilled water
- Equal parts Floetrol and water for thin paints
Test small batches first. Paint consistency should flow like warm honey off your stirring stick.
Silicone Oil for Cell Creation
Add 1-3 drops per ounce of paint mixture. Silicone oil creates those coveted cellular patterns everyone loves.
Treadmill oil works perfectly and costs less than art-specific products. Hair serum without dimethicone won’t create cells effectively.
Canvas and Surface Options
Canvas Types and Sizes
Pre-stretched canvas saves setup time and works great for beginners. Start with 8×10 or 11×14 inch sizes to minimize paint waste.
Canvas panels offer stability without the bounce of stretched fabric. They’re perfect for testing new techniques.
Alternative Surfaces
Wood panels provide completely rigid support. Sand lightly and apply gesso for better paint adhesion.
Ceramic tiles create interesting mini pours for practice. Yupo paper produces unique effects but requires different techniques.
Essential Equipment
Mixing Supplies
Plastic cups work better than paper ones. The paint slides off easier during cleanup.
Wooden stirring sticks prevent scratching. Plastic spoons work too but can create unwanted texture.
Protective Gear
Nitrile gloves keep paint off your hands. Disposable aprons protect clothing from inevitable splatters.
Heat Tools
Butane torches create dramatic cell formation. Kitchen torches from Curry’s Art Store work perfectly for this purpose.
Hair dryers spread paint too aggressively. Heat guns offer better control but require practice to avoid overheating.
Workspace Setup and Safety

Creating Your Pouring Space
Ventilation Requirements
Good airflow prevents fume buildup from acrylic painting mediums. Open windows and run fans when possible.
Basements and closed rooms need extra ventilation. The silicone additives can cause headaches in poorly ventilated spaces.
Surface Protection
Plastic sheeting covers floors and furniture completely. Tape edges down to prevent paint from seeping underneath.
Disposable tablecloths work for smaller setups. Layer newspapers under your work area for extra protection.
Optimal Lighting
Natural light shows colors most accurately. Position your workspace near a large window when possible.
LED lights reduce heat buildup. Avoid fluorescent bulbs that can distort color perception during mixing.
Safety Precautions
Personal Protection
Wear old clothes or disposable coveralls. Paint splatters travel farther than you’d expect during tilting.
Safety glasses protect eyes from torch flames and paint spatters. Even small amounts can cause irritation.
Chemical Handling
Read all product labels before mixing. Some painting mediums contain compounds that require special handling.
Never mix different brand mediums without testing compatibility first. Chemical reactions can ruin entire batches.
Fire Safety with Torches
Keep torches moving constantly across the surface. Lingering in one spot can scorch paint or canvas.
Have a fire extinguisher nearby when using open flames. Water makes paint fires worse, not better.
Organization and Workflow
Material Arrangement
Set up supplies in order of use. Paints, mediums, mixing cups, then stirring tools create logical workflow.
Keep extra cups and towels within arm’s reach. Spills happen fast and need immediate attention.
Cleanup Station
Pre-positioned cleanup supplies save your artwork when accidents happen. Paper towels, water containers, and scrapers should be ready.
Designate specific areas for wet brushes and dirty tools. Keep them separate from clean supplies.
Drying Area Setup
Level surfaces prevent paint from pooling unevenly. Use a carpenter’s level to check your drying rack.
Cover drying paintings to prevent dust accumulation. Clean plastic wrap works without touching wet surfaces.
Paint Mixing and Consistency

Achieving Proper Paint Flow
Testing Paint Consistency
The honey test works perfectly every time. Lift your stirring stick and watch the paint drip back into the cup.
Proper consistency flows in a continuous stream without breaking. Too thick causes choppy, interrupted drips.
Consistency Standards
Warm honey consistency flows smoothly but maintains body. Cold honey is too thick and won’t spread properly.
Thin paint like milk creates weak colors and poor coverage. Add medium gradually until you reach optimal flow.
Adjusting Problem Paints
Thick paints need more medium, not water. Water breaks down the acrylic binder and causes adhesion problems.
Thin paints require more paint, not less medium. Maintain your ratios while building up proper consistency.
Color Mixing Ratios
Paint to Medium Proportions
Start with 2:1 paint to medium ratio for most brands. Arteza and DecoArt Premium work well at this consistency.
Craft Smart paints often need 1:1 ratios due to their thicker formula. Apple Barrel requires even more medium sometimes.
Silicone Oil Amounts
Less is definitely more with silicone additives. 1-2 drops per ounce creates plenty of cells without making paint too slippery.
Different colors need different amounts. Titanium white usually needs more oil than darker pigments to create cells.
Temperature Considerations
Room temperature affects paint flow dramatically. Cold paint moves like molasses and creates poor results.
Warm paint flows too fast and can create runaway pours. Aim for comfortable room temperature around 70-75°F.
Preparing Multiple Colors

Individual Cup Preparation
Mix each color separately to maintain control over individual consistency. This prevents contamination between colors.
Label cups if mixing large batches. Paint colors look different wet versus dry, especially metallics.
Layering Colors Effectively
Dense colors sink below lighter ones naturally. Use this principle to create interesting layered effects.
Understanding value helps predict how colors will interact. Lighter values tend to stay on top longer.
Avoiding Air Bubbles
Stir slowly and consistently to prevent incorporating air. Bubbles create unwanted texture and weak spots in dried paint.
Let mixed paint rest for 5-10 minutes before pouring. This allows bubbles to rise and pop naturally.
Gentle tapping on cup sides helps release trapped air. Don’t shake or stir vigorously after resting period.
Step-by-Step Pouring Process
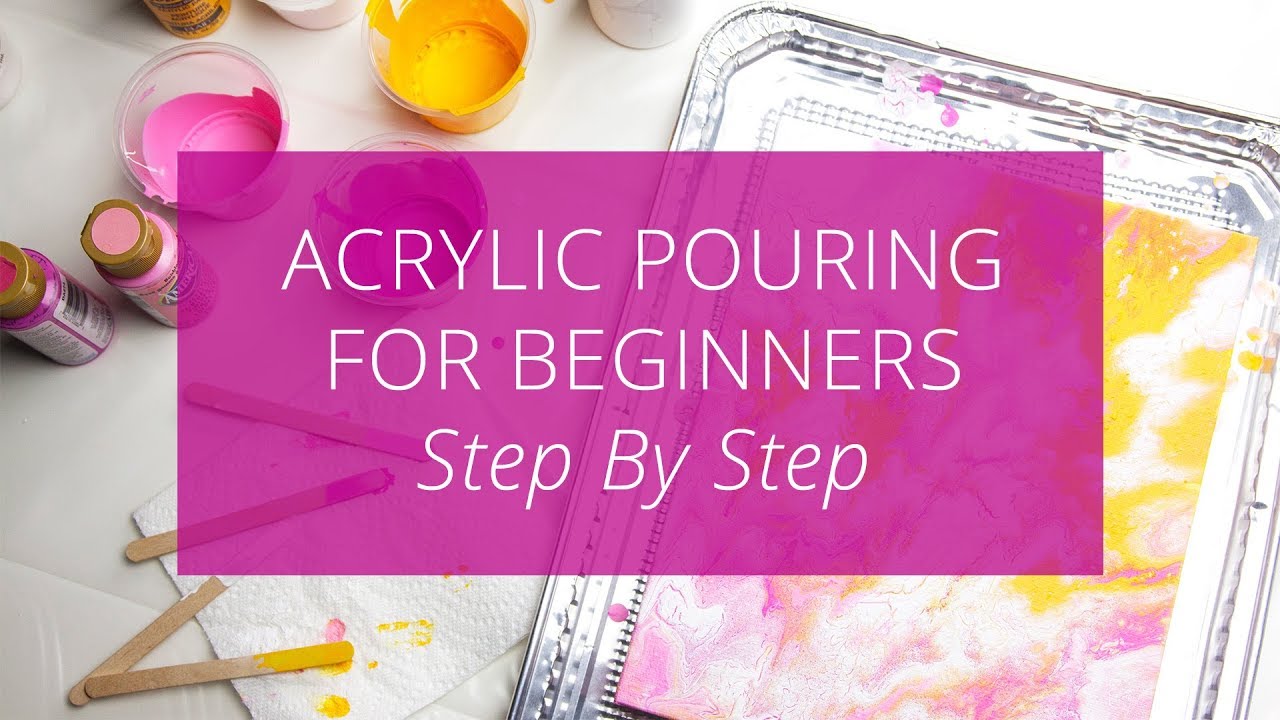
Basic Dirty Pour Technique
Layering Colors in Main Cup
Start with your lightest color at the bottom of your mixing cup. Dark colors typically work better as middle layers.
Pour each color slowly to maintain distinct layers. Don’t stir between additions – the magic happens during the actual pour.
Positioning Canvas Correctly
Center your canvas under the cup before starting. Mark the center point with a small pencil dot if needed.
Canvas height affects paint spread dramatically. Start 2-3 inches above the surface for controlled flow.
Pouring Speed and Height Control
Pour steadily in one continuous motion. Stopping and starting creates unwanted texture breaks.
Higher pours create more dramatic splashing effects. Lower pours maintain better color separation.
Initial Spread Techniques
Let gravity do most of the work initially. Resist the urge to tilt immediately after pouring.
Watch for natural paint movement before intervening. Sometimes the best results happen without manipulation.
Flip Cup Method Execution
Assembling the Flip Cup
Layer colors in reverse order since they’ll flip during the reveal. Bottom color becomes the top after flipping.
Press canvas firmly against cup rim to prevent leaks. Use steady pressure without crushing the cup edges.
Proper Flipping Technique
Flip quickly in one smooth motion. Hesitation during the flip causes uneven paint distribution.
Hold canvas flat against cup throughout the entire flip process. Any gaps let paint escape prematurely.
Lifting Timing and Speed
Wait 10-15 seconds after flipping before lifting. This allows paint to settle against the canvas surface.
Lift straight up at moderate speed. Too fast creates splashing, too slow causes paint to stick in the cup.
Managing Paint Overflow
Excess paint will spill over canvas edges. Position your workspace to catch runoff paint safely.
Tilt canvas immediately after cup removal to prevent paint from pooling in one area.
Creating Movement and Effects

Tilting Canvas for Flow
Start with gentle 15-degree tilts in different directions. Paint responds slowly to tilting motions.
Rotate canvas while tilting to create circular flow patterns. This technique works especially well with abstract compositions.
Using Tools for Manipulation
Palette knives create sharp linear effects through wet paint. Learn proper palette knife techniques for best results.
Combs and texture tools add interesting patterns. Drag tools through paint while it’s still flowing freely.
Torch Techniques for Cells
Keep torches moving constantly across the surface. Static heat burns paint and canvas.
Pass flames 6-8 inches above paint surface. Too close scorches, too far has no effect.
Knowing When to Stop
Stop manipulating when you like what you see. Overworking destroys spontaneous effects that make fluid art special.
Paint continues moving for several minutes after you stop tilting. Factor in this continued movement when deciding completion.
Advanced Techniques and Effects

Cell Creation Methods
Silicone Oil Application
Add silicone oil to individual colors rather than the final mixture. This creates more controlled cell placement.
Different viscosity oils produce various cell sizes. Thinner oils create smaller, more numerous cells.
Heat-Induced Cell Formation
Torch application timing affects cell development significantly. Apply heat immediately after pouring for maximum effect.
Multiple torch passes create different cell generations. Each pass activates dormant silicone oil droplets.
Density Differences for Natural Cells
Mix paints to different consistencies intentionally. Thicker paints naturally push through thinner ones.
Temperature variations between colors also create natural cell formation. Slightly warm paint rises through cooler mixtures.
Swipe Technique Mastery
Tool Selection for Swiping
Wet paper towels work better than dry ones for smooth swipes. Slightly damp tools glide without catching.
Credit cards and squeegees create different edge effects. Experiment with various tools to find your preferences.
Pressure and Angle Control
Light pressure prevents removing too much base color. Heavy pressure cuts through to canvas in unwanted ways.
45-degree angles work well for most swipe effects. Steeper angles remove more paint, shallower angles blend colors.
Creating Specific Patterns
Linear swipes create flowing ribbon effects across the canvas. Multiple parallel swipes build pattern complexity.
Curved swipes follow the canvas contours naturally. Understanding composition helps plan effective swipe placement.
Combining Multiple Techniques

Layered Approach Methods
Start with a base pour using dirty cup technique. Add swipe elements while paint remains workable.
Torch certain areas while leaving others untouched. This creates interesting contrast between cell and no-cell zones.
Partial Technique Applications
Combine flip cup with targeted torch work for varied effects. Not every area needs the same treatment.
Use swipe technique on just one section of a dirty pour. Partial applications often produce more interesting results than full coverage.
Creating Focal Points
Concentrate effects in specific areas to draw viewer attention. Too many focal points create visual chaos.
Learn about emphasis in art to understand effective focal point placement strategies.
Troubleshooting Common Problems
Paint Flow Issues
Too Thick Consistency Fixes
Add medium gradually, one teaspoon at a time. Large additions are difficult to correct if you overshoot.
Warm slightly thick paint by placing cups in warm water briefly. Never use microwave heating – it creates hot spots.
Paint Separation Problems
Incompatible mediums cause paint to separate into layers. Stick with one medium type per project.
Old paint sometimes separates naturally. Gentle stirring usually reconnects separated mixtures.
Cracking During Drying
Thick paint layers crack as water evaporates. Keep individual pours under 1/8 inch thickness.
Fast drying causes surface tension cracks. Slow drying with fans prevents most cracking issues.
Color and Effect Problems
Muddy Color Combinations
Avoid mixing too many colors in one cup. Three to four colors maximum prevents muddiness.
Understanding color mixing basics helps prevent unwanted brown results from complementary color combinations.
Missing or Excessive Cells
No cells usually means insufficient silicone oil or improper torch technique. Add more oil and retry heat application.
Too many cells create busy, chaotic results. Reduce silicone amounts in future pours.
Uneven Paint Distribution
Tilting too quickly causes paint to rush to one side. Slow, deliberate movements maintain better control.
Canvas position affects distribution patterns. Ensure your workspace surface stays completely level throughout the process.
Canvas and Surface Issues
Paint Running Off Edges
Smaller paint volumes prevent excessive runoff while maintaining good coverage. Calculate surface area beforehand.
Tape canvas edges to catch runoff paint. Remove tape while paint is still wet for clean edges.
Adhesion Problems
Poor surface preparation causes paint to bead up or peel later. Always prime canvases properly before pouring.
Contaminated surfaces repel paint. Clean with degreasing agents before applying gesso primer coats.
Warping During Drying
Canvas stretcher bars warp under wet paint weight. Use canvas panels for heavy paint applications.
Weight canvas corners during drying. Small clamps prevent warping without damaging wet paint surfaces.
Advanced Problem Solving
Color Intensity Issues
Pigment settling causes weak color strength in some brands. Stir paint thoroughly before adding medium.
Cheap paints often require understanding color saturation principles to achieve vibrant results.
Temperature-Related Problems
Cold studio conditions slow paint flow and cell formation. Warm paint slightly before mixing for winter sessions.
Hot conditions accelerate drying and can cause skin formation on paint surfaces. Work quickly in warm weather.
Equipment Malfunctions
Torch failures mid-pour require backup heat sources. Hair dryers work as emergency alternatives despite less precise control.
Cup breakage during flips ruins pours instantly. Double-cup important mixtures as insurance against accidents.
Finishing and Preservation
Drying Process Management

Optimal Drying Conditions
Level surfaces prevent paint from pooling during the drying phase. Use a carpenter’s level to check your drying area setup.
Avoid direct sunlight which causes uneven drying and potential cracking. Indirect light works perfectly for most fluid art pieces.
Time Requirements by Thickness
Thin pours dry within 24-48 hours in normal conditions. Thick applications can take up to a week for complete curing.
Touch the surface lightly to test dryness. Tacky paint needs more time regardless of surface appearance.
Preventing Dust and Debris
Cover drying paintings with clean plastic wrap elevated above the surface. Don’t let plastic touch wet paint.
Pet hair and dust particles ruin smooth finishes. Create a dedicated drying space away from high-traffic areas.
Sealing and Protection
Varnish Selection and Application
Acrylic varnishes work best over acrylic pour paintings. Oil-based products can cause yellowing over time.
Apply thin, even coats using soft synthetic brushes. Multiple thin layers produce better results than single thick applications.
Popular Varnish Options
Choose based on your desired finish:
- Liquitex Gloss Varnish – high shine, museum quality
- Golden Polymer Varnish – satin finish, less reflective
- Mod Podge – budget option, decent protection
- Polycrylic – hardware store alternative
UV Protection Considerations
UV-resistant varnishes prevent color fading from sunlight exposure. This matters especially for pieces displayed near windows.
Regular varnishes provide minimal UV protection. Invest in archival products for pieces you plan to keep long-term.
Gloss Level Choices
High gloss finishes show off cell details and color depth dramatically. They also reveal every surface imperfection.
Satin finishes hide minor flaws while maintaining good color saturation. Matte varnishes can dull color vibrancy significantly.
Final Touches and Corrections
Edge Cleanup Techniques
Paint drips on canvas edges detract from professional appearance. Remove while paint is still slightly tacky.
Use painter’s tape around edges before pouring to create clean lines. Remove tape immediately after pouring for best results.
Minor Flaw Corrections
Small dust particles can be carefully removed with tweezers after paint begins setting. Work quickly before surface skins over.
Hair or fiber contamination requires immediate attention. Waiting too long makes removal impossible without damaging the surface.
Signing Your Artwork
Sign on the back or use discrete corner placement. Bold signatures can overpower fluid art’s organic nature.
Date all pieces for future reference. Document your color combinations and techniques for reproduction later.
Display and Storage

Framing Options
Traditional Framing Approaches
Standard picture frames work well for smaller pour paintings. Choose frames that complement rather than compete with busy compositions.
Mat boards can isolate intense colors effectively. Understanding visual hierarchy helps select appropriate mat widths.
Floating Frame Techniques
Floating frames showcase entire canvas edges beautifully. This style works particularly well when edge effects enhance the overall composition.
Shadow boxes provide depth while protecting surface texture. Deep frames accommodate any dimensional effects from thick paint applications.
Frameless Display Methods
Gallery wraps work when edge treatments complement the main image. Many pour artists prefer this clean, modern presentation.
Direct wall mounting requires strong adhesive systems. Canvas weight increases significantly with multiple paint layers.
Proper Storage Techniques
Flat Storage Requirements
Store horizontally to prevent paint sagging or sliding. Vertical storage can cause long-term deformation in thick paint areas.
Use acid-free materials between stacked pieces. Regular cardboard can cause discoloration over extended periods.
Protection from Damage
Interleaving paper prevents pieces from sticking together during storage. Glassine or wax paper works better than regular tissue.
Climate-controlled storage prevents expansion and contraction cycles. Attics and basements create unstable environments for acrylic artwork.
Climate Considerations
Humidity fluctuations cause canvas expansion that can crack dried paint layers. Maintain consistent 40-60% relative humidity when possible.
Temperature swings affect both canvas and paint differently. Stable temperatures between 65-75°F minimize stress on finished pieces.
Photography and Documentation
Capturing Your Work Effectively
Natural lighting shows true colors most accurately. Photograph near large windows during overcast conditions for even illumination.
Direct sunlight creates harsh shadows and reflective hot spots. Early morning or late afternoon light provides better color accuracy.
Lighting for Photos
LED photography lights eliminate color temperature issues from mixed lighting sources. Daylight-balanced bulbs (5600K) work best.
Avoid fluorescent lights that create green color casts. Incandescent bulbs add unwanted warm tones to digital images.
Building a Portfolio
Document each piece immediately after completion while details remain fresh in memory. Include notes about texture techniques used.
Photograph works at multiple stages: wet, partially dry, and fully cured. Paint appearance changes dramatically throughout drying phases.
Essential Documentation Details
Record these specifics for each piece:
- Paint brands and colors used
- Medium ratios and consistency notes
- Environmental conditions during creation
- Techniques combined in the piece
- Drying time and final dimensions
Social Media Sharing
Instagram and TikTok showcase fluid art effectively through video content. Time-lapse videos of the pouring process perform particularly well.
Pinterest users search for technique tutorials frequently. Share process photos alongside finished results for maximum engagement.
Facebook groups provide supportive communities for feedback and technique sharing. Reddit communities offer honest critiques and improvement suggestions.
Professional Documentation
High-resolution images matter for prints and professional presentations. Shoot at minimum 300 DPI for reproduction purposes.
Include scale references in photos when size matters. Coins or rulers help viewers understand actual piece dimensions.
Color-calibrated monitors ensure accurate digital representation. This becomes important when selling work online or creating prints.
FAQ on How To Do Acrylic Pouring Art
What materials do I need to start acrylic pouring art?
You need acrylic paints, pouring medium (Floetrol works well), mixing cups, stirring sticks, and canvas. Silicone oil creates cells, while a torch helps activate them. Gloves and aprons protect from mess during fluid art techniques.
How do I get the right paint consistency for pouring?
Honey-like consistency works best for most pouring methods. Mix paint with medium until it flows smoothly off your stirring stick without breaking. Test by lifting the stick – proper flow creates continuous drips.
Why aren’t my cells forming properly?
Silicone oil is typically missing or insufficient. Add 1-3 drops per ounce of paint mixture. Apply torch heat immediately after pouring to activate cell formation. Different paint densities also help natural cell creation.
What’s the difference between dirty pour and flip cup techniques?
Dirty pour layers colors in one cup then pours directly onto canvas. Flip cup layers colors, places canvas on top, flips together, then lifts cup. Each method produces different paint distribution patterns.
How long does acrylic pour art take to dry completely?
Thin pours dry in 24-48 hours, while thick applications need up to a week. Understanding value changes during drying affects final appearance. Avoid touching until completely cured.
Can I use regular acrylic paint without pouring medium?
Pure acrylic paint is too thick for proper flow and won’t create good cells. Painting mediums are necessary to achieve fluid consistency and prevent cracking during drying.
What causes muddy colors in my pours?
Too many colors mixed together create muddy results. Stick to 3-4 complementary colors maximum. Avoid mixing opposite colors directly – let them blend naturally during pouring.
How do I prevent paint from cracking as it dries?
Thick paint layers crack from surface tension. Keep pours under 1/8 inch thickness. Add appropriate medium ratios and ensure proper drying conditions with consistent temperature and humidity.
What’s the best surface for acrylic pouring?
Pre-stretched canvas works well for beginners, while canvas panels provide stability. Wood panels offer rigid support but need proper priming. Avoid paper surfaces which can’t handle wet paint weight.
How do I finish and protect my acrylic pour paintings?
Apply acrylic varnish after complete drying for protection. Choose gloss levels based on desired finish – high gloss shows cell details best. UV-resistant varnishes prevent color fading over time.
Conclusion
Mastering how to do acrylic pouring art transforms simple craft supplies into stunning visual expressions. These fluid painting techniques offer endless possibilities for creative experimentation.
Pour painting methods require practice but produce immediate results that surprise even experienced artists. Each dirty pour and flip cup attempt teaches valuable lessons about paint behavior.
Your artistic journey starts with basic workspace setup and proper color theory understanding. Advanced cell creation and swipe techniques develop naturally through hands-on experience.
Professional finishing elevates amateur pours into gallery-worthy pieces worth displaying. Document your process, experiment with different paint brands, and embrace unexpected outcomes.
The unpredictable nature of liquid acrylic art means every canvas holds potential magic. Start with simple supplies from Michaels or Amazon Art Supplies and let gravity become your creative partner.