Your blank canvas stares back at you, waiting for that first brushstroke to bring it to life. Whether you’re gripping your brush for the first time or you’ve been painting for years, finding fresh oil painting ideas can spark the creative breakthrough you’ve been searching for.
The beauty of working with oils lies in their forgiving nature and rich, buttery color potential. Unlike other painting mediums, oils give you time to work, blend, and refine your vision.
This guide will walk you through dozens of inspiring projects. You’ll discover everything from simple still life arrangements perfect for beginners to complex landscape techniques that challenge experienced artists.
We’ll explore different painting styles and creative approaches that will push your artistic boundaries. By the end, you’ll have a toolkit of ideas ready to transform into your next masterpiece.
Inspiring Oil Painting Ideas
Still Life with Copper Kettle

Copper kettles represent traditional still life painting subjects focused on metallic reflections and warm color harmonies. This subject challenges artists to capture reflective surfaces and complex light interactions. The warm reddish-brown hues of copper create striking contrasts against complementary colors.
Technical Attributes
- Medium Requirements: Burnt sienna, cadmium red light, raw umber, ultramarine blue, titanium white, medium and small brushes
- Skill Level: Intermediate to Advanced
- Time Investment: 4-8 hours for detailed study
- Color Palette: Warm browns, oranges, reds with blue-green shadows
Visual Characteristics
- Composition Elements: Central kettle placement with supporting objects for depth
- Lighting Approach: Single directional light source to emphasize reflections
- Texture Techniques: Smooth blending for metallic surfaces, impasto for highlights
- Style Attributes: Realistic rendering with attention to surface detail
Historical Context
- Art Movement: Traditional academic realism and Dutch Golden Age influence
- Notable Artists: William Merritt Chase, Jean-Baptiste-Siméon Chardin
- Cultural Significance: Represents domestic life and material wealth in art
- Evolution: Evolved from 17th century vanitas paintings to modern alla prima techniques
Practical Application
- Subject Selection: Antique copper vessels work best for authentic patina
- Setup Requirements: Strong directional lighting, neutral background, stable surface
- Step-by-Step Process: Block in basic shapes, establish light/shadow patterns, build metallic surface details
- Common Challenges: Achieving convincing metallic appearance without muddy colors
Semantic Relationships
- Related Techniques: Metallic object painting, chiaroscuro lighting
- Complementary Styles: Dutch master techniques, contemporary realism
- Contrast Elements: Differs from transparent glass studies or matte surfaces
- Progression Path: Advances to complex multi-object still life compositions
Dramatic Cloudscape

Dramatic cloudscapes focus on atmospheric perspective and dynamic sky formations. These paintings capture the ephemeral beauty of changing weather patterns and light effects. Cloud studies require understanding of meteorological forms and color temperature shifts.
Technical Attributes
- Medium Requirements: Titanium white, ultramarine blue, burnt sienna, alizarin crimson, large flat brushes
- Skill Level: Beginner to Intermediate
- Time Investment: 2-4 hours for cloud study
- Color Palette: Blues, grays, whites with warm undertones
Visual Characteristics
- Composition Elements: Perspective diminishing cloud sizes toward horizon
- Lighting Approach: Directional sunlight creating light and shadow cloud masses
- Texture Techniques: Soft blending, finger blending, dry brush techniques
- Style Attributes: Naturalistic with emphasis on atmospheric effects
Historical Context
- Art Movement: Romanticism and Hudson River School landscape tradition
- Notable Artists: J.M.W. Turner, John Constable, Albert Bierstadt
- Cultural Significance: Represents sublime nature and weather drama
- Evolution: Developed from classical landscape backgrounds to primary subjects
Practical Application
- Subject Selection: Stormy weather conditions, cumulus formations, sunset conditions
- Setup Requirements: Outdoor observation or high-quality photo references
- Step-by-Step Process: Establish sky gradation, block in cloud masses, refine edges and details
- Common Challenges: Maintaining soft cloud edges while preserving form
Semantic Relationships
- Related Techniques: En plein air painting, weather studies
- Complementary Styles: Landscape backgrounds, seascape skies
- Contrast Elements: Static clear sky studies or indoor subjects
- Progression Path: Leads to complete landscape compositions with sky dominance
Winter Landscape

Winter landscapes emphasize value relationships and color temperature in snowy conditions. These scenes simplify complex landscapes into high-contrast abstract shapes. Snow creates unique color reflection opportunities and textural challenges.
Technical Attributes
- Medium Requirements: Titanium white, ultramarine blue, burnt sienna, yellow ochre, palette knife
- Skill Level: Intermediate
- Time Investment: 3-6 hours for complete scene
- Color Palette: Cool blues, warm grays, subtle violets for shadows
Visual Characteristics
- Composition Elements: Simplified shapes with strong light-dark patterns
- Lighting Approach: Low winter sun creating long shadows
- Texture Techniques: Impasto for snow accumulation, dry brush for frost effects
- Style Attributes: Simplified realism with atmospheric mood
Historical Context
- Art Movement: Northern European landscape tradition, American regionalism
- Notable Artists: Pieter Bruegel the Elder, Caspar David Friedrich
- Cultural Significance: Represents seasonal cycles and natural resilience
- Evolution: From medieval manuscript backgrounds to plein air movement
Practical Application
- Subject Selection: Snow-covered buildings, bare trees, frozen water features
- Setup Requirements: Warm studio space, winter photo references, adapted medium for cold
- Step-by-Step Process: Tone canvas, establish major value masses, build snow details
- Common Challenges: Avoiding pure white paint, maintaining color in snow shadows
Semantic Relationships
- Related Techniques: Frost painting, ice formation studies
- Complementary Styles: Other seasonal landscape approaches
- Contrast Elements: Warm summer scenes or indoor subjects
- Progression Path: Develops into specialized weather effect paintings
Portrait in Limited Palette

Limited palette portraiture focuses on color harmony through restricted color choices. This approach forces reliance on value relationships and temperature shifts. Three to five colors create sophisticated flesh tone variations.
Technical Attributes
- Medium Requirements: Burnt umber, yellow ochre, cadmium red, titanium white, portrait brushes
- Skill Level: Intermediate to Advanced
- Time Investment: 6-12 hours for finished portrait
- Color Palette: Earth tones with single warm accent color
Visual Characteristics
- Composition Elements: Traditional portrait formats with focal point on eyes
- Lighting Approach: Classical portrait lighting with defined shadow patterns
- Texture Techniques: Smooth blending for skin, varied brushwork for clothing
- Style Attributes: Academic realism with simplified color approach
Historical Context
- Art Movement: Classical academic training, Old Master techniques
- Notable Artists: Diego Velázquez, Rembrandt van Rijn
- Cultural Significance: Demonstrates technical mastery through limitation
- Evolution: Training method that predates full color portrait painting
Practical Application
- Subject Selection: Willing models or self-portraits with consistent lighting
- Setup Requirements: Controlled lighting, comfortable posing arrangement
- Step-by-Step Process: Draw accurate proportions, establish value structure, develop skin tones
- Common Challenges: Achieving flesh tone variety within color restrictions
Semantic Relationships
- Related Techniques: Grisaille underpainting, monochromatic studies
- Complementary Styles: Full palette portraiture, figure studies
- Contrast Elements: High-key color portraits or abstract treatments
- Progression Path: Foundation for complex full-color portrait work
Nocturne City Scene

Nocturne paintings capture artificial lighting effects and urban atmosphere at night. These scenes emphasize warm light sources against cool shadow areas. Electric lighting creates unique color temperature contrasts unavailable in daylight.
Technical Attributes
- Medium Requirements: Ultramarine blue, burnt sienna, cadmium orange, alizarin crimson, small detail brushes
- Skill Level: Advanced
- Time Investment: 5-8 hours for detailed night scene
- Color Palette: Cool blues and warm yellows with high contrast
Visual Characteristics
- Composition Elements: Strong light source placement creating dramatic shadows
- Lighting Approach: Multiple artificial light sources with color temperature variations
- Texture Techniques: Smooth gradations for distance, crisp edges for light effects
- Style Attributes: Contemporary realism with emphasis on light phenomena
Historical Context
- Art Movement: American Tonalism, Impressionism night studies
- Notable Artists: James McNeill Whistler, Edward Hopper
- Cultural Significance: Documents modern urban experience and electric age
- Evolution: Emerged with gas lighting, developed through electric illumination era
Practical Application
- Subject Selection: Urban streets, illuminated buildings, neon signage
- Setup Requirements: Night photography references, studio lighting for studies
- Step-by-Step Process: Establish dark values first, place light sources, build atmospheric effects
- Common Challenges: Maintaining luminosity in dark passages, avoiding muddy mixtures
Semantic Relationships
- Related Techniques: Tenebrism, artificial lighting studies
- Complementary Styles: Daylight urban scenes, interior lighting
- Contrast Elements: Natural daylight paintings or rural subjects
- Progression Path: Leads to complex contemporary urban realism
Lemon with Silver Cup

Reflective metal and citrus fruit create classic still life challenges combining organic and manufactured forms. Silver surfaces require understanding of cool reflected light and environmental reflections. The warm-cool color contrast provides natural complementary colors.
Technical Attributes
- Medium Requirements: Cadmium yellow, ultramarine blue, burnt umber, titanium white, fine round brushes
- Skill Level: Intermediate
- Time Investment: 3-5 hours for detailed study
- Color Palette: Yellow-orange citrus tones with blue-gray metallic colors
Visual Characteristics
- Composition Elements: Simple two-object arrangement with intersecting forms
- Lighting Approach: Single light source emphasizing surface qualities
- Texture Techniques: Smooth metallic rendering versus organic fruit texture
- Style Attributes: Traditional realism with contemporary sensibility
Historical Context
- Art Movement: Classical still life tradition, contemporary realism
- Notable Artists: Luis Meléndez, Giorgio Morandi
- Cultural Significance: Represents abundance and material refinement
- Evolution: Continues centuries-old still life tradition with modern materials
Practical Application
- Subject Selection: Fresh citrus fruit with interesting surface variations
- Setup Requirements: Controlled lighting, stable arrangement, neutral background
- Step-by-Step Process: Draw accurate ellipses, establish light patterns, refine surface details
- Common Challenges: Achieving convincing metallic reflections and fruit translucency
Semantic Relationships
- Related Techniques: Metallic surface studies, transparent object painting
- Complementary Styles: Multi-object still life arrangements
- Contrast Elements: Matte surface studies or monochromatic arrangements
- Progression Path: Foundation for complex reflective surface combinations
Coastal Cliff Face

Rocky coastal subjects emphasize geological form and atmospheric perspective in marine environments. These scenes combine land and water elements with dramatic lighting possibilities. Weather effects create constantly changing conditions.
Technical Attributes
- Medium Requirements: Raw umber, ultramarine blue, yellow ochre, titanium white, palette knife
- Skill Level: Intermediate to Advanced
- Time Investment: 4-7 hours for complete scene
- Color Palette: Earth tones with blue-green water colors
Visual Characteristics
- Composition Elements: Vertical cliff masses with horizontal water line
- Lighting Approach: Natural sunlight with reflected light from water
- Texture Techniques: Impasto for rock surfaces, smooth blending for distance
- Style Attributes: Naturalistic with emphasis on geological accuracy
Historical Context
- Art Movement: Marine painting tradition, plein air movement
- Notable Artists: J.M.W. Turner, Winslow Homer
- Cultural Significance: Represents natural power and geological time
- Evolution: From romantic sublime to contemporary environmental awareness
Practical Application
- Subject Selection: Accessible coastal locations with interesting rock formations
- Setup Requirements: Portable painting equipment, weather protection
- Step-by-Step Process: Establish horizon line, build cliff masses, add water and atmospheric effects
- Common Challenges: Capturing wave motion and maintaining rock solidity
Semantic Relationships
- Related Techniques: Seascape painting, geological studies
- Complementary Styles: Mountain landscapes, desert rock formations
- Contrast Elements: Flat prairie or woodland subjects
- Progression Path: Develops into specialized marine painting skills
Loose Floral Arrangement

Informal flower arrangements emphasize gesture drawing principles and color relationships over precise botanical accuracy. This approach captures essential flower characteristics through simplified form and energetic brushwork. Color harmony becomes primary focus.
Technical Attributes
- Medium Requirements: Alizarin crimson, cadmium yellow, ultramarine blue, viridian, soft brushes
- Skill Level: Beginner to Intermediate
- Time Investment: 2-4 hours for gestural study
- Color Palette: Bright florals with green foliage accents
Visual Characteristics
- Composition Elements: Asymmetrical arrangements with natural flow
- Lighting Approach: Soft diffused light preserving color intensity
- Texture Techniques: Loose brushwork suggesting rather than defining forms
- Style Attributes: Impressionist approach with color emphasis
Historical Context
- Art Movement: Impressionism, Post-Impressionism flower studies
- Notable Artists: Claude Monet, Pierre-Auguste Renoir
- Cultural Significance: Celebrates natural beauty and seasonal change
- Evolution: Moved from botanical illustration to expressive color studies
Practical Application
- Subject Selection: Fresh flowers in natural arrangements
- Setup Requirements: Good natural lighting, flowers at eye level
- Step-by-Step Process: Capture gesture first, establish color masses, suggest details
- Common Challenges: Working quickly before flowers change or wilt
Semantic Relationships
- Related Techniques: Botanical studies, garden painting
- Complementary Styles: Detailed botanical illustration, abstract florals
- Contrast Elements: Geometric still life or architectural subjects
- Progression Path: Leads to landscape garden scenes and larger floral compositions
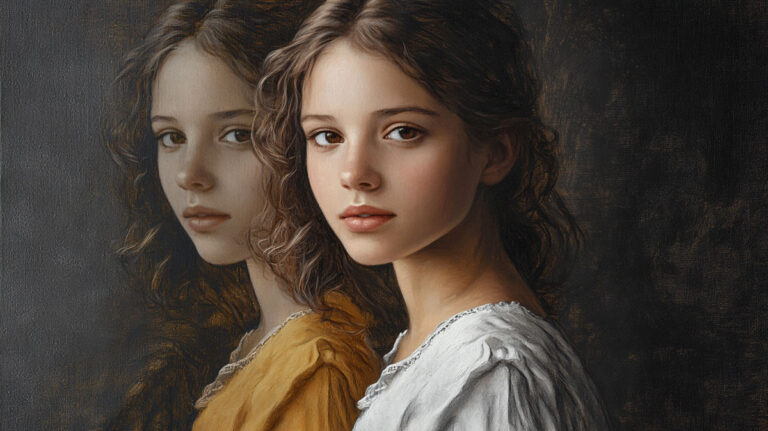
Self-Portrait with Mirror

Mirror self-portraits combine portraiture skills with complex reflection challenges. The reversed image creates unique composition opportunities and spatial relationships. Working from life provides immediate feedback and authentic lighting.
Technical Attributes
- Medium Requirements: Portrait palette with skin tone colors, various brush sizes
- Skill Level: Advanced
- Time Investment: Multiple sessions, 10-20 hours total
- Color Palette: Flesh tones with environmental reflection colors
Visual Characteristics
- Composition Elements: Figure placement within mirror frame, background integration
- Lighting Approach: Consistent lighting between artist and reflection
- Texture Techniques: Smooth blending for faces, varied handling for clothing
- Style Attributes: Contemporary realism with traditional roots
Historical Context
- Art Movement: Self-portraiture tradition from Renaissance to present
- Notable Artists: Johannes Vermeer, Lucian Freud
- Cultural Significance: Explores artistic identity and self-reflection
- Evolution: Evolved from convenience to conceptual exploration
Practical Application
- Subject Selection: Self as available model with mirror setup
- Setup Requirements: Stable mirror positioning, consistent lighting arrangement
- Step-by-Step Process: Establish proportions, develop likeness, integrate mirror elements
- Common Challenges: Maintaining consistent viewpoint and reversed image accuracy
Semantic Relationships
- Related Techniques: Traditional portraiture, figure studies
- Complementary Styles: Observed portraiture, photographic self-portraits
- Contrast Elements: Landscape or still life subjects
- Progression Path: Advanced portrait technique development
Interior with Window Light

Window-lit interiors showcase natural illumination effects and architectural space. These subjects combine interior design elements with challenging lighting conditions. Atmospheric perspective occurs even in confined spaces.
Technical Attributes
- Medium Requirements: Full palette with emphasis on warm and cool temperature shifts
- Skill Level: Intermediate to Advanced
- Time Investment: 5-8 hours for detailed interior
- Color Palette: Warm interior tones with cool window light
Visual Characteristics
- Composition Elements: Architectural framework with furniture and object placement
- Lighting Approach: Strong directional window light creating dramatic shadows
- Texture Techniques: Various surface textures from fabric to wood to metal
- Style Attributes: Contemporary realism with atmospheric sensitivity
Historical Context
- Art Movement: Dutch interior tradition, American scene painting
- Notable Artists: Johannes Vermeer, Edward Hopper
- Cultural Significance: Documents domestic life and architectural space
- Evolution: From symbolic religious interiors to contemporary domestic spaces
Practical Application
- Subject Selection: Rooms with interesting light patterns and architectural features
- Setup Requirements: Stable viewpoint, consistent time of day for lighting
- Step-by-Step Process: Establish architectural structure, place light and shadow, add details
- Common Challenges: Managing complex perspective and multiple surface textures
Semantic Relationships
- Related Techniques: Architectural rendering, still life arrangement
- Complementary Styles: Exterior architectural studies, landscape backgrounds
- Contrast Elements: Outdoor subjects or artificial lighting scenarios
- Progression Path: Develops spatial organization and complex lighting skills
Barn in Landscape

Rural architecture in landscape settings combines structural elements with natural environments. These subjects offer simplified geometric forms within organic surroundings. Traditional agricultural buildings provide authentic American scene content.
Technical Attributes
- Medium Requirements: Earth tones, ultramarine blue, titanium white, flat and round brushes
- Skill Level: Beginner to Intermediate
- Time Investment: 3-5 hours for complete scene
- Color Palette: Weathered wood tones with natural landscape colors
Visual Characteristics
- Composition Elements: Architectural focal point within landscape setting
- Lighting Approach: Natural outdoor lighting with cast shadows
- Texture Techniques: Weathered wood textures, grass and foliage handling
- Style Attributes: American realism with pastoral quality
Historical Context
- Art Movement: American regionalism, rural realism
- Notable Artists: Andrew Wyeth, Grant Wood
- Cultural Significance: Documents agricultural heritage and rural life
- Evolution: From working farm documentation to nostalgic rural imagery
Practical Application
- Subject Selection: Historic barns with interesting weathering and landscape context
- Setup Requirements: Outdoor painting equipment, seasonal timing for best lighting
- Step-by-Step Process: Establish horizon and building placement, develop architecture, integrate landscape
- Common Challenges: Maintaining building accuracy while keeping landscape natural
Semantic Relationships
- Related Techniques: Architectural painting, landscape composition
- Complementary Styles: Urban architecture, pure landscape
- Contrast Elements: Modern architecture or natural wilderness
- Progression Path: Leads to complex architectural landscape combinations
Glass Objects with Strong Light

Transparent and translucent objects require understanding of refraction and reflection principles. Strong lighting reveals glass characteristics through light transmission and surface reflections. These studies develop advanced observational skills.
Technical Attributes
- Medium Requirements: Full palette emphasizing transparent color mixing, fine brushes
- Skill Level: Advanced
- Time Investment: 4-6 hours for detailed glass study
- Color Palette: Transparent colors with reflected environment tones
Visual Characteristics
- Composition Elements: Simple arrangements emphasizing glass qualities
- Lighting Approach: Strong directional light revealing transparency and refraction
- Texture Techniques: Smooth gradations with crisp edge work
- Style Attributes: Hyperrealistic attention to optical phenomena
Historical Context
- Art Movement: Trompe-l’oeil tradition, contemporary photorealism
- Notable Artists: William Harnett, Janet Fish
- Cultural Significance: Demonstrates technical virtuosity and observational skill
- Evolution: From traditional still life elements to contemporary glass art documentation
Practical Application
- Subject Selection: Clear glass objects with interesting shapes and optical effects
- Setup Requirements: Controlled lighting, stable arrangement, neutral backgrounds
- Step-by-Step Process: Map transparency patterns, establish reflected images, refine optical effects
- Common Challenges: Capturing convincing transparency without losing glass substance
Semantic Relationships
- Related Techniques: Transparent object studies, trompe-l’œil painting
- Complementary Styles: Reflective metal studies, water transparency
- Contrast Elements: Opaque object studies or matte surface work
- Progression Path: Advances to complex transparent material combinations
Autumn River Scene

Seasonal water landscapes combine flowing water with fall foliage colors. These scenes capture transitional lighting and rich color harmonies. Reflection patterns create complex compositional opportunities.
Technical Attributes
- Medium Requirements: Autumn palette with burnt sienna, raw sienna, ultramarine blue, yellow ochre
- Skill Level: Intermediate
- Time Investment: 4-6 hours for complete scene
- Color Palette: Warm fall colors with cool water reflections
Visual Characteristics
- Composition Elements: Flowing water as movement element through landscape
- Lighting Approach: Autumn sunlight filtering through colored foliage
- Texture Techniques: Smooth water surfaces with rough foliage textures
- Style Attributes: Naturalistic with seasonal color emphasis
Historical Context
- Art Movement: Hudson River School, American Impressionism
- Notable Artists: Claude Monet, John Singer Sargent
- Cultural Significance: Celebrates seasonal change and natural cycles
- Evolution: From romantic landscape ideal to plein air observation
Practical Application
- Subject Selection: Rivers or streams with overhanging autumn trees
- Setup Requirements: Autumn timing, portable outdoor equipment
- Step-by-Step Process: Establish water flow direction, place tree masses, develop reflections
- Common Challenges: Capturing accurate water reflections and maintaining flow sense
Semantic Relationships
- Related Techniques: Water painting, seasonal landscape studies
- Complementary Styles: Other seasonal water scenes, pure foliage studies
- Contrast Elements: Winter scenes or desert landscapes
- Progression Path: Develops water painting specialization and seasonal sensitivity
Figure Study with Dramatic Lighting

Strong lighting on figure subjects creates sculptural form emphasis and emotional impact. Chiaroscuro techniques highlight three-dimensional form through light-shadow relationships. These studies develop advanced figure painting skills.
Technical Attributes
- Medium Requirements: Figure painting palette with emphasis on warm and cool flesh tones
- Skill Level: Advanced
- Time Investment: 6-10 hours for detailed figure study
- Color Palette: Flesh tone range with dramatic light-shadow contrasts
Visual Characteristics
- Composition Elements: Figure placement emphasizing light direction and shadow patterns
- Lighting Approach: Single strong light source creating dramatic chiaroscuro effects
- Texture Techniques: Smooth flesh modeling with varied edge work
- Style Attributes: Academic realism with dramatic lighting emphasis
Historical Context
- Art Movement: Baroque dramatic tradition, academic figure studies
- Notable Artists: Caravaggio, Rembrandt van Rijn
- Cultural Significance: Demonstrates mastery of human form and lighting effects
- Evolution: From religious dramatic scenes to contemporary figure studies
Practical Application
- Subject Selection: Willing models comfortable with dramatic lighting setups
- Setup Requirements: Controlled dramatic lighting, comfortable posing environment
- Step-by-Step Process: Establish pose and lighting, develop major light-shadow masses, refine anatomical details
- Common Challenges: Maintaining dramatic lighting while preserving anatomical accuracy
Semantic Relationships
- Related Techniques: Portrait lighting, sculptural form studies
- Complementary Styles: Soft lighting figure work, outdoor figure studies
- Contrast Elements: High-key lighting or landscape subjects
- Progression Path: Advanced figurative painting and dramatic lighting mastery
Summer Garden Path

Garden pathways combine architectural elements with natural plantings in warm season lighting. These subjects offer perspective opportunities through path recession and varied plant textures. Summer color intensity provides rich color relationships.
Technical Attributes
- Medium Requirements: Bright summer palette with varied greens and flower colors
- Skill Level: Intermediate
- Time Investment: 4-6 hours for detailed garden scene
- Color Palette: Intense summer colors with multiple green variations
Visual Characteristics
- Composition Elements: Path as linear perspective device through planted areas
- Lighting Approach: Bright summer sunlight with dappled shade patterns
- Texture Techniques: Varied foliage textures from grass to flowering plants
- Style Attributes: Impressionist color with naturalistic form
Historical Context
- Art Movement: Impressionist garden painting, English garden tradition
- Notable Artists: Claude Monet, Gustav Klimt
- Cultural Significance: Celebrates cultivated nature and garden design
- Evolution: From formal garden portraits to impressionist color studies
Practical Application
- Subject Selection: Mature gardens with interesting path systems and plantings
- Setup Requirements: Summer timing, portable outdoor painting equipment
- Step-by-Step Process: Establish path perspective, block in major plant masses, develop color relationships
- Common Challenges: Managing complex plant forms and intense summer colors
Semantic Relationships
- Related Techniques: Landscape painting, botanical studies
- Complementary Styles: Wild landscape, formal architectural gardens
- Contrast Elements: Winter scenes or desert landscapes
- Progression Path: Develops landscape specialization and complex color handling
Fruit Tree in Blossom

Flowering trees combine botanical accuracy with seasonal celebration. Spring blossoms provide delicate color relationships and complex branch structures. These subjects capture ephemeral seasonal moments.
Technical Attributes
- Medium Requirements: Delicate spring colors with browns for branches, fine brushes
- Skill Level: Intermediate to Advanced
- Time Investment: 3-5 hours for detailed tree study
- Color Palette: Soft spring colors with earth tone branches
Visual Characteristics
- Composition Elements: Tree structure with blossom distribution patterns
- Lighting Approach: Soft spring light emphasizing blossom delicacy
- Texture Techniques: Rough bark textures contrasted with delicate blossom handling
- Style Attributes: Naturalistic with botanical sensitivity
Historical Context
- Art Movement: Botanical art tradition, Impressionist spring studies
- Notable Artists: Vincent van Gogh, Japanese ukiyo-e masters
- Cultural Significance: Celebrates renewal and seasonal beauty
- Evolution: From scientific botanical documentation to artistic seasonal celebration
Practical Application
- Subject Selection: Fruit trees during peak blossom period
- Setup Requirements: Spring timing, outdoor equipment, quick working methods
- Step-by-Step Process: Establish tree structure, place blossom masses, develop individual flowers
- Common Challenges: Working quickly during brief blossom period, maintaining tree structure
Semantic Relationships
- Related Techniques: Botanical painting, seasonal landscape studies
- Complementary Styles: Autumn fruit trees, full foliage summer trees
- Contrast Elements: Bare winter trees or evergreen subjects
- Progression Path: Leads to specialized botanical and seasonal painting
Foggy Harbor Scene

Maritime fog creates simplified value relationships and mysterious atmospheric effects. These scenes emphasize tone over color and suggestion over detail. Fog reduces contrast and creates subtle gradations.
Technical Attributes
- Medium Requirements: Limited palette emphasizing grays and muted colors
- Skill Level: Intermediate to Advanced
- Time Investment: 3-5 hours for atmospheric study
- Color Palette: Muted grays with subtle warm and cool shifts
Visual Characteristics
- Composition Elements: Simplified forms emerging from atmospheric effects
- Lighting Approach: Diffused light with minimal contrast
- Texture Techniques: Soft blending and gradual transitions
- Style Attributes: Atmospheric Impressionism with minimal detail
Historical Context
- Art Movement: Tonalism, Impressionist atmospheric studies
- Notable Artists: James McNeill Whistler, Claude Monet
- Cultural Significance: Represents mystery and atmospheric beauty of maritime environments
- Evolution: From romantic maritime scenes to pure atmospheric studies
Practical Application
- Subject Selection: Harbor scenes during foggy conditions, boats as focal elements
- Setup Requirements: Quick working methods, simplified color palette, atmospheric references
- Step-by-Step Process: Establish simplified value masses, suggest forms through fog, minimal detail work
- Common Challenges: Maintaining form suggestion without losing atmospheric unity
Semantic Relationships
- Related Techniques: Atmospheric perspective, marine painting
- Complementary Styles: Clear weather marine scenes, coastal landscapes
- Contrast Elements: Sharp detailed subjects or bright clear lighting
- Progression Path: Develops atmospheric painting specialization and simplified value work
Glowing Sunset Over Field

Sunset landscapes emphasize warm color temperature relationships and dramatic sky effects. These scenes capture transitional lighting with intense color saturation. Backlighting creates silhouette opportunities and atmospheric perspective.
Technical Attributes
- Medium Requirements: Warm palette with cadmium yellow, orange, alizarin crimson, ultramarine blue
- Skill Level: Intermediate
- Time Investment: 2-4 hours for dramatic sunset study
- Color Palette: Intense warm colors with cool shadow contrasts
Visual Characteristics
- Composition Elements: Low horizon emphasizing sky drama, silhouetted foreground elements
- Lighting Approach: Backlighting with dramatic warm-cool contrasts
- Texture Techniques: Smooth sky gradations with textured foreground elements
- Style Attributes: Romantic naturalism with color emphasis
Historical Context
- Art Movement: Romanticism, American landscape tradition
- Notable Artists: J.M.W. Turner, Frederic Edwin Church
- Cultural Significance: Represents daily renewal and natural beauty
- Evolution: From religious symbolism to pure color studies
Practical Application
- Subject Selection: Open fields with unobstructed western views
- Setup Requirements: Evening timing, quick working methods for changing light
- Step-by-Step Process: Establish horizon line, develop sky colors, silhouette foreground
- Common Challenges: Working quickly during brief optimal lighting period
Semantic Relationships
- Related Techniques: Sky studies, atmospheric perspective work
- Complementary Styles: Sunrise scenes, midday lighting studies
- Contrast Elements: Overcast conditions or night scenes
- Progression Path: Develops color sensitivity and rapid painting skills
Old Wooden Door

Weathered architectural details provide texture studies and historical character. These subjects emphasize surface quality and aging effects. Wood grain and weathering patterns create rich textural opportunities.
Technical Attributes
- Medium Requirements: Earth tones, burnt umber, raw sienna, ultramarine blue, texture brushes
- Skill Level: Beginner to Intermediate
- Time Investment: 2-4 hours for detailed door study
- Color Palette: Weathered wood tones with metal hardware accents
Visual Characteristics
- Composition Elements: Architectural framing with detailed surface work
- Lighting Approach: Side lighting emphasizing texture and depth
- Texture Techniques: Varied brushwork for wood grain, metal, and aging effects
- Style Attributes: Realistic detail with emphasis on material qualities
Historical Context
- Art Movement: Architectural painting, American scene documentation
- Notable Artists: Andrew Wyeth, architectural illustrators
- Cultural Significance: Documents craftsmanship and historical preservation
- Evolution: From architectural documentation to artistic texture studies
Practical Application
- Subject Selection: Historic doors with interesting weathering and hardware
- Setup Requirements: Stable viewpoint, consistent lighting, detail observation
- Step-by-Step Process: Establish proportions, develop wood texture, add hardware details
- Common Challenges: Capturing authentic weathering without overworking surface
Semantic Relationships
- Related Techniques: Architectural detail work, texture studies
- Complementary Styles: Complete architectural views, interior studies
- Contrast Elements: Smooth modern surfaces or natural subjects
- Progression Path: Develops detailed observational skills and texture techniques
Bowl of Red Onions

Vegetable still life subjects provide organic form studies with translucent skin qualities. Red onions offer rich color variations and interesting surface characteristics. Simple arrangements focus attention on individual object qualities.
Technical Attributes
- Medium Requirements: Alizarin crimson, burnt sienna, yellow ochre, ultramarine blue, round brushes
- Skill Level: Beginner to Intermediate
- Time Investment: 2-3 hours for simple arrangement
- Color Palette: Red-purple onion tones with warm undertones
Visual Characteristics
- Composition Elements: Simple bowl arrangement with overlapping organic forms
- Lighting Approach: Soft directional light revealing surface translucency
- Texture Techniques: Smooth blending for onion skins, varied bowl surface
- Style Attributes: Traditional still life with contemporary sensibility
Historical Context
- Art Movement: Classical still life tradition, contemporary realism
- Notable Artists: Paul Cézanne, contemporary still life painters
- Cultural Significance: Celebrates everyday objects and domestic abundance
- Evolution: Continues tradition of humble subject matter elevation
Practical Application
- Subject Selection: Fresh onions with interesting skin variations and good form
- Setup Requirements: Simple lighting, neutral background, stable arrangement
- Step-by-Step Process: Draw accurate ellipses, establish local colors, develop form through light-shadow
- Common Challenges: Capturing onion translucency and maintaining fresh appearance
Semantic Relationships
- Related Techniques: Vegetable studies, simple still life arrangement
- Complementary Styles: Complex multi-object arrangements, fruit studies
- Contrast Elements: Manufactured objects or landscape subjects
- Progression Path: Foundation for complex still life composition work
Practical Tips and Techniques for Improvement

Consistency in Practice
Improvement comes from consistency, not just bursts of inspiration. Work on something every day. Even if it’s just a small section of a painting or practicing brush strokes on a scrap canvas.
The more time you spend with your materials, the more familiar you become with how they behave-whether it’s how thickly you’re applying your oil paint or how much linseed oil you’re mixing in.
It’s easy to fall into the trap of working only when you feel like it, but consistency builds muscle memory.
This is especially true with techniques like glazing or impasto-both of which require a lot of control to master. Repetition sharpens your skills and helps you understand your medium more intuitively.
Focus on Color Mastery
Color theory isn’t something you just read about once and then move on. You have to constantly revisit it.
One thing that helped me improve was creating my own color wheel with oils. It forces you to understand how different pigments interact, and more importantly, it shows you how far you can push certain tones without them getting muddy.
Mix your own shades instead of relying on pre-made tubes. It gives you more control over the final outcome.
When you mix directly on your palette, you start to understand the delicate balance between warm and cool tones, and how to make shadows without relying on black. This is key, especially when working with still life or portraits where subtle shifts in tone make all the difference.
Take Risks with Composition
Don’t settle for safe composition choices. If you’re not happy with how something looks, move things around. I’ve learned more by making big, bold changes mid-painting than by staying cautious. Throw some gesso over a section if it’s not working, and start again.
Challenge yourself to break away from symmetrical or traditional layouts. I’ve found that asymmetry, or even having empty space, can often give a painting more energy. Study Leonardo da Vinci if you want to see how he used balance without making things predictable.
Texture: Go Beyond the Brush

Using a palette knife isn’t just for mixing. Applying thick strokes of paint with it creates texture and movement that you can’t get with a brush alone. If your painting feels too flat, switch it up. Combine both brush strokes and impasto for contrast. The play between smooth areas and rough, textured ones can make a piece more dynamic.
When you start working with different textures, you also learn more about light and shadow. The ridges left by thick paint will catch light differently than smooth sections, adding depth without having to rely solely on shading.
Avoiding Overworking
Overworking a painting is one of the biggest mistakes you can make. I’ve done it more times than I’d like to admit. You think just one more layer, one more adjustment, and suddenly, the life is sucked out of the piece. Oil painting ideas don’t have to be perfect.
Know when to stop. If a section isn’t working, walk away from it for a bit. Overblending, in particular, is a common issue with oils. Instead of going back over areas again and again, let them sit for a day. When you come back, you’ll have fresh eyes, and sometimes you’ll find that what felt unfinished is actually fine.
FAQ on Oil Painting Ideas
What are the easiest oil painting subjects for beginners?
Start with simple still life arrangements using fruits, vegetables, or household objects. These subjects don’t move and have clear shapes and defined shadows.
Practice basic color mixing with apples or oranges before moving to complex landscapes.
How do I choose the right canvas size for my painting?
Smaller canvases (8×10 or 11×14 inches) work best for beginners. They’re less intimidating and help you focus on fundamental techniques without getting overwhelmed.
Large canvases require more paint and longer completion times.
What colors should I start with for oil painting?
Begin with a limited palette: titanium white, cadmium yellow, cadmium red, ultramarine blue, and burnt umber. This teaches proper color theory basics.
You can mix almost any hue from these five colors.
How long does oil paint take to dry?
Oil paint stays workable for hours, sometimes days depending on thickness. Thin layers dry in 24-48 hours, while thick impasto applications can take weeks.
This slow drying time allows for blending and corrections.
Can I paint outdoors with oils?
En plein air painting is perfect for oils because of their workability. Pack small canvases, a portable easel, and essential colors only.
Morning light offers the most consistent conditions for outdoor work.
What’s the difference between alla prima and layered techniques?
Alla prima means completing a painting in one session while paint is wet. Layered techniques involve multiple sessions with dry layers underneath.
Beginners often prefer alla prima for its immediacy and forgiving nature.
How do I create depth in my oil paintings?
Use atmospheric perspective by making distant objects lighter, cooler, and less detailed. Apply warm colors in foregrounds and cool colors in backgrounds.
Linear perspective with converging lines also creates depth effectively.
What brushes do I need for oil painting?
Start with flat and round brushes in sizes 2, 6, and 10. Natural bristle brushes work best for oils because they handle the paint consistency well.
Add a small detail brush and a large brush for backgrounds later.
How do I fix mistakes in oil painting?
While paint is wet, scrape off mistakes with a palette knife or wipe with a rag. For dry paint, paint over with opaque colors or sand lightly.
The flexibility of oils makes corrections easier than other mediums.
What subjects make the most interesting oil paintings?
Subjects with strong contrast and clear light sources create compelling paintings. Think dramatic landscapes, portraits with directional lighting, or textured objects like old books or weathered wood.
Choose subjects that personally inspire you for better results.
Conclusion
These oil painting ideas offer endless possibilities for your artistic journey, whether you’re drawn to classical realism or bold abstract expressions. Each project builds your technical skills while pushing creative boundaries.
Remember that mastering texture takes practice. Don’t rush the process.
Your personal style will emerge through experimentation with different subjects and techniques. Try impressionism for loose, emotional brushwork or explore cubism for geometric interpretations.
The beauty of oils lies in their forgiving nature and rich pigment quality. Mistakes become learning opportunities when you can scrape away wet paint or work over dried layers.
Start with simple still life arrangements, then progress to landscapes and portraits as your confidence grows. Focus on understanding value relationships before worrying about complex color mixing.
Your artistic voice will develop naturally through consistent practice and bold experimentation.